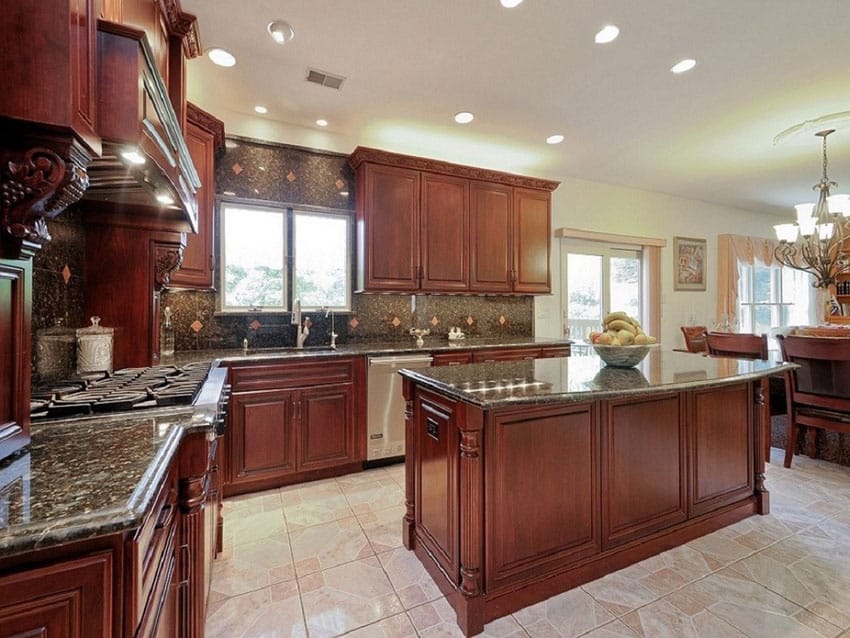
A kitchen with cherry flooring exudes warmth and elegance, thanks to its rich, reddish-brown hues and smooth, lustrous finish. Cherry wood is durable and ages beautifully, developing a deeper patina over time. This type of flooring complements a variety of kitchen styles, from classic to contemporary, adding a touch of sophistication. Easy to clean and maintain, cherry flooring is a stylish and practical choice that enhances the heart of your home.
Kitchen Cherry Floor

Kitchen Flooring Ideas With Cherry Cabinets – 25 Cherry Wood Kitchens (Cabinet Designs & Ideas

Home Improvement Archives Cherry hardwood flooring, Diy wood floors, Cherry wood floors

Kitchen Cherry Wood Floors

13 Ways to Modernize Cherry Cabinets For Less Kitchen design, Cherry cabinets kitchen, Cherry

Pin on Flooring ideas

kitchens with light cherry cabinets and wood floors – Saferbrowser Image Search Results (With

cherry floors on Pinterest Cherries, Countertops and Kitchen gallery

Cherry Wood Floor Kitchen DesignYou would, of course, accept gotten a lower amount if you had b

Pin by Kaylen Lawson Morgan on For the Home White modern kitchen, Green countertops, Kitchen

American Cherry 3″ to 7″ Flooring, Lakes Region, NH – Mill Direct Cherry wood floors, Wood

What Color Floor Tile Goes With Cherry Cabinets
Related Posts:
- Small Kitchen Floor Plan Ideas
- Laminate Flooring In Kitchen
- Black Slate Tile Kitchen Floor
- How To Lay Tile In Kitchen Floor
- Red Kitchen Floor
- Cheap Kitchen Laminate Flooring
- Decorative Kitchen Floor Mats
- Contemporary Kitchen Flooring Ideas
- Kitchen Ceramic Tile Floor
- Quarry Tile Kitchen Floor
Kitchen Cherry Floor: A Guide to Installing a Luxurious Hardwood
When it comes to achieving a luxurious look in your kitchen, few materials can compare to hardwood flooring. In particular, cherry hardwood is a popular choice for homeowners who want a classic yet sophisticated look in their kitchen. Installing a cherry hardwood floor isn’t as difficult as you may think, and it’s something that most people can handle themselves with the right tools and materials. Read on for some tips on how to install your own cherry hardwood floor.
### What You’ll Need for the Job
Before you get started, make sure you have all the necessary materials and tools for the job. Here’s a checklist of what you’ll need:
– Cherry hardwood planks
– Underlayment material
– Hardwood adhesive
– Hammer
– Nails
– Tape measure
– Pencil
– Circular saw
– Safety glasses
– Ear protection
– Knee pads
### Preparation Is Key
Before you begin installing your cherry hardwood floor, there are several preparation steps that need to be taken. First, make sure the subfloor is free from any debris or dirt. Sweep and vacuum the area thoroughly so that the hardwood planks have a smooth surface to lay on. Also, check for any uneven areas and fill with wood putty before you start laying down the planks.
### Laying Down the Planks
Once your subfloor is prepped, it’s time to start laying down the hardwood planks. Begin by cutting your underlayment material into strips that are slightly smaller than the width of the room. Place these strips down in rows perpendicular to the direction in which you’ll be laying down the planks. The underlayment material will provide cushioning and insulation between the subfloor and the hardwood planks.
Next, start laying down your cherry hardwood planks in rows parallel to each other. Make sure that each plank is properly aligned with the ones next to it and use a hammer and nails to secure them in place. If you’re having trouble aligning them, use a tape measure or pencil line to help guide you. Once all the planks are laid down, use a circular saw to cut off any excess material around the edges of the room.
### Finishing Touches
Once all your planks are laid down and cut off, it’s time to finish up by adding some hardwood adhesive along the edges of each plank. This will help create a seal between them and ensure they stay in place over time. Finally, once everything is dry, vacuum up any excess sawdust or debris and admire your work!
Installing a cherry hardwood floor isn’t as difficult as it may seem with these simple steps. With some patience and attention to detail, you can achieve a beautiful look in your kitchen that will last for years to come!