Introduction to DIY Garage Floor Coatings
Garage floors often endure heavy traffic, chemical spills, and temperature fluctuations, which can lead to wear and tear over time. Applying a garage floor coating not only enhances the appearance of the floor but also provides a durable, protective layer that extends the life of the concrete. DIY garage floor coatings have become increasingly popular due to their affordability and the sense of accomplishment they bring to homeowners. These coatings are designed to be user-friendly, allowing even those with limited experience to achieve professional-looking results.
Several types of DIY garage floor coatings are available, each with its unique properties and benefits. Epoxy coatings are among the most popular due to their durability and resistance to chemicals and stains. Polyurethane coatings offer excellent abrasion resistance and flexibility, making them ideal for high-traffic areas. Acrylic coatings are easy to apply and dry quickly, but they may not be as durable as epoxy or polyurethane options. Understanding the differences between these coatings is essential for selecting the best one for your garage.
The benefits of applying a garage floor coating extend beyond aesthetics. A properly coated garage floor is easier to clean and maintain, reducing the amount of dust and dirt that can accumulate. It also provides a safer surface by offering better traction and reducing the risk of slips and falls. Moreover, a coated floor can increase the value of your home, making it a worthwhile investment if you plan to sell in the future.
One of the main advantages of DIY garage floor coatings is the cost savings. Professional floor coating services can be expensive, often costing several thousand dollars. By opting for a DIY approach, you can achieve similar results for a fraction of the price. Additionally, the satisfaction of completing a home improvement project yourself adds to the overall value and enjoyment of the finished product.
The process of applying a garage floor coating involves several steps, including surface preparation, application of the coating, and curing. Proper preparation is crucial for ensuring the coating adheres well and provides long-lasting protection. This includes cleaning the floor thoroughly, repairing any cracks or damage, and etching the surface to promote adhesion. Following the manufacturer’s instructions carefully is essential for achieving the best results.
While DIY garage floor coatings are designed to be user-friendly, they do require some effort and attention to detail. Choosing the right product, preparing the surface properly, and applying the coating correctly are all critical factors in achieving a professional-looking finish. With the right tools, materials, and a bit of patience, you can transform your garage floor into a durable and attractive surface that enhances the overall functionality and appearance of your space.
Types of DIY Garage Floor Coatings
There are several types of DIY garage floor coatings available, each with its unique characteristics and benefits. Epoxy coatings are perhaps the most popular choice for garage floors due to their durability and resistance to chemicals and stains. Epoxy is a two-part system consisting of a resin and a hardener, which must be mixed together before application. This type of coating forms a hard, glossy surface that can withstand heavy traffic and is easy to clean.
Polyurethane coatings are another excellent option for garage floors. These coatings are known for their flexibility and resistance to abrasion, making them ideal for high-traffic areas. Unlike epoxy, polyurethane is a single-component system, which makes it easier to apply. However, it is important to choose a polyurethane product that is specifically designed for use on concrete floors to ensure proper adhesion and durability.
Acrylic coatings offer a more budget-friendly option for garage floors. These coatings are easy to apply and dry quickly, allowing for faster project completion. Acrylic coatings are available in a variety of colors and finishes, making it easy to achieve a customized look. However, they may not be as durable as epoxy or polyurethane coatings, so they may require more frequent reapplication.

Polyaspartic coatings are a newer option for garage floors that offer several advantages over traditional epoxy and polyurethane coatings. Polyaspartic coatings cure very quickly, often within a few hours, allowing for a faster return to service. They are also highly resistant to UV rays, which helps prevent yellowing and fading over time. Additionally, polyaspartic coatings are very flexible, making them resistant to cracking and peeling.
Concrete stains and sealers are another alternative for garage floors. While they do not provide the same level of protection as epoxy or polyurethane coatings, they can enhance the appearance of the concrete and provide some resistance to stains and moisture. Concrete stains penetrate the surface of the concrete, adding color and visual interest, while sealers create a protective barrier on the surface.
Choosing the right type of coating for your garage floor depends on several factors, including the level of traffic, exposure to chemicals and moisture, and your budget. Epoxy and polyurethane coatings are generally the best choices for high-traffic and heavy-use areas, while acrylic coatings and concrete stains may be more suitable for lighter-use areas. Polyaspartic coatings offer a premium option with fast curing times and excellent durability, making them worth considering for those looking for the best possible protection for their garage floor.

Benefits of DIY Garage Floor Coatings
Applying a DIY garage floor coating offers numerous benefits, making it a worthwhile investment for homeowners. One of the primary advantages is enhanced durability. Garage floor coatings provide a hard, protective layer that can withstand heavy traffic, impacts, and chemical spills. This durability extends the life of the concrete and reduces the need for costly repairs or replacements.
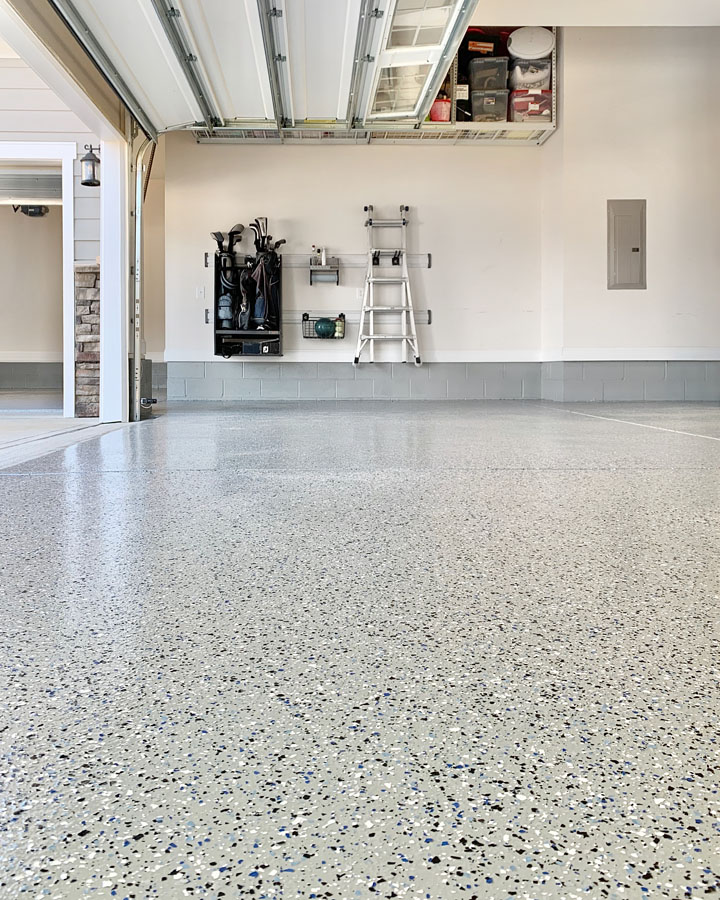
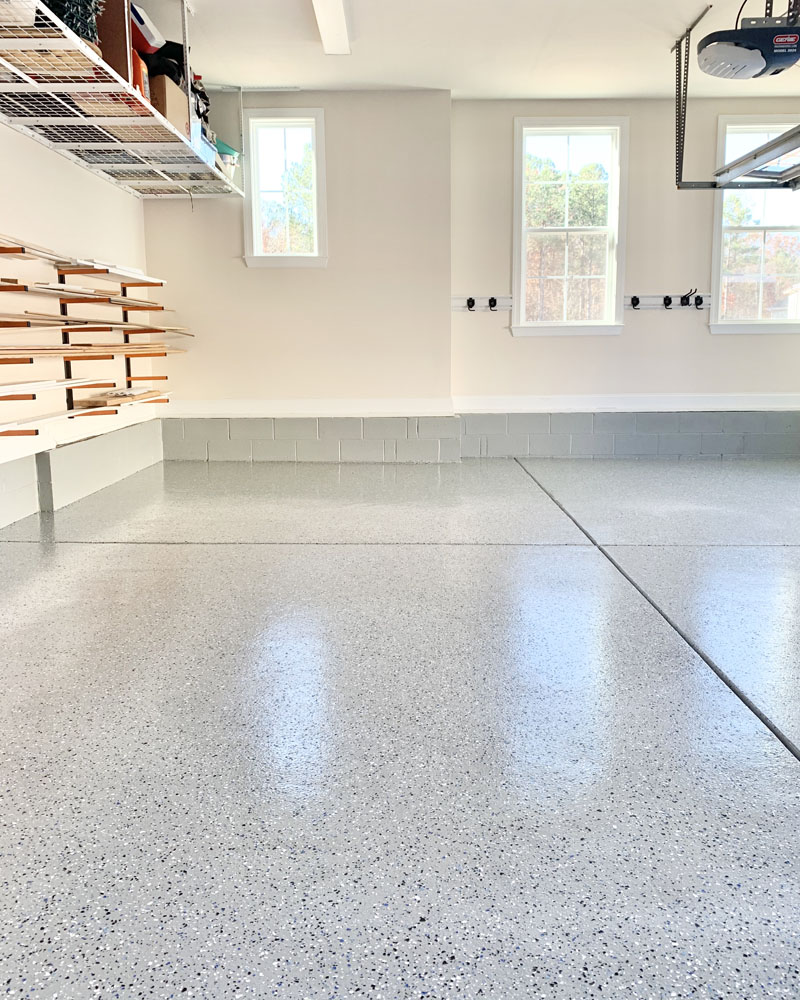
Another significant benefit is improved appearance. A garage floor coating can transform a dull, stained concrete floor into an attractive, polished surface. Epoxy and polyurethane coatings are available in a variety of colors and finishes, allowing homeowners to customize the look of their garage. Decorative options such as color flakes and metallic finishes can add visual interest and create a unique, high-end appearance.
Garage floor coatings also make cleaning and maintenance easier. The smooth, non-porous surface of a coated floor prevents dirt, dust, and grime from penetrating the concrete, making it easy to sweep or mop. Spills can be wiped up quickly without leaving stains, and regular cleaning helps maintain the floor’s appearance and functionality.
Safety is another important benefit of garage floor coatings. Many coatings can be formulated to include non-slip additives, providing better traction and reducing the risk of slips and falls. This is particularly important in areas where water or oil spills are common, such as garages and workshops. A non-slip surface enhances the safety of the space and provides peace of mind for homeowners.
A coated garage floor can also increase the value of your home. A clean, well-maintained garage is an attractive feature for potential buyers, and a professionally finished floor can make a positive impression. Investing in a DIY garage floor coating is a cost-effective way to enhance your home’s appeal and potentially increase its resale value.
Finally, DIY garage floor coatings offer a sense of accomplishment and pride. Completing a home improvement project yourself provides a rewarding experience and allows you to take pride in your work. With the right tools and materials, and by following the manufacturer’s instructions carefully, you can achieve professional-looking results that enhance the overall functionality and appearance of your garage.
Steps to Apply DIY Garage Floor Coatings
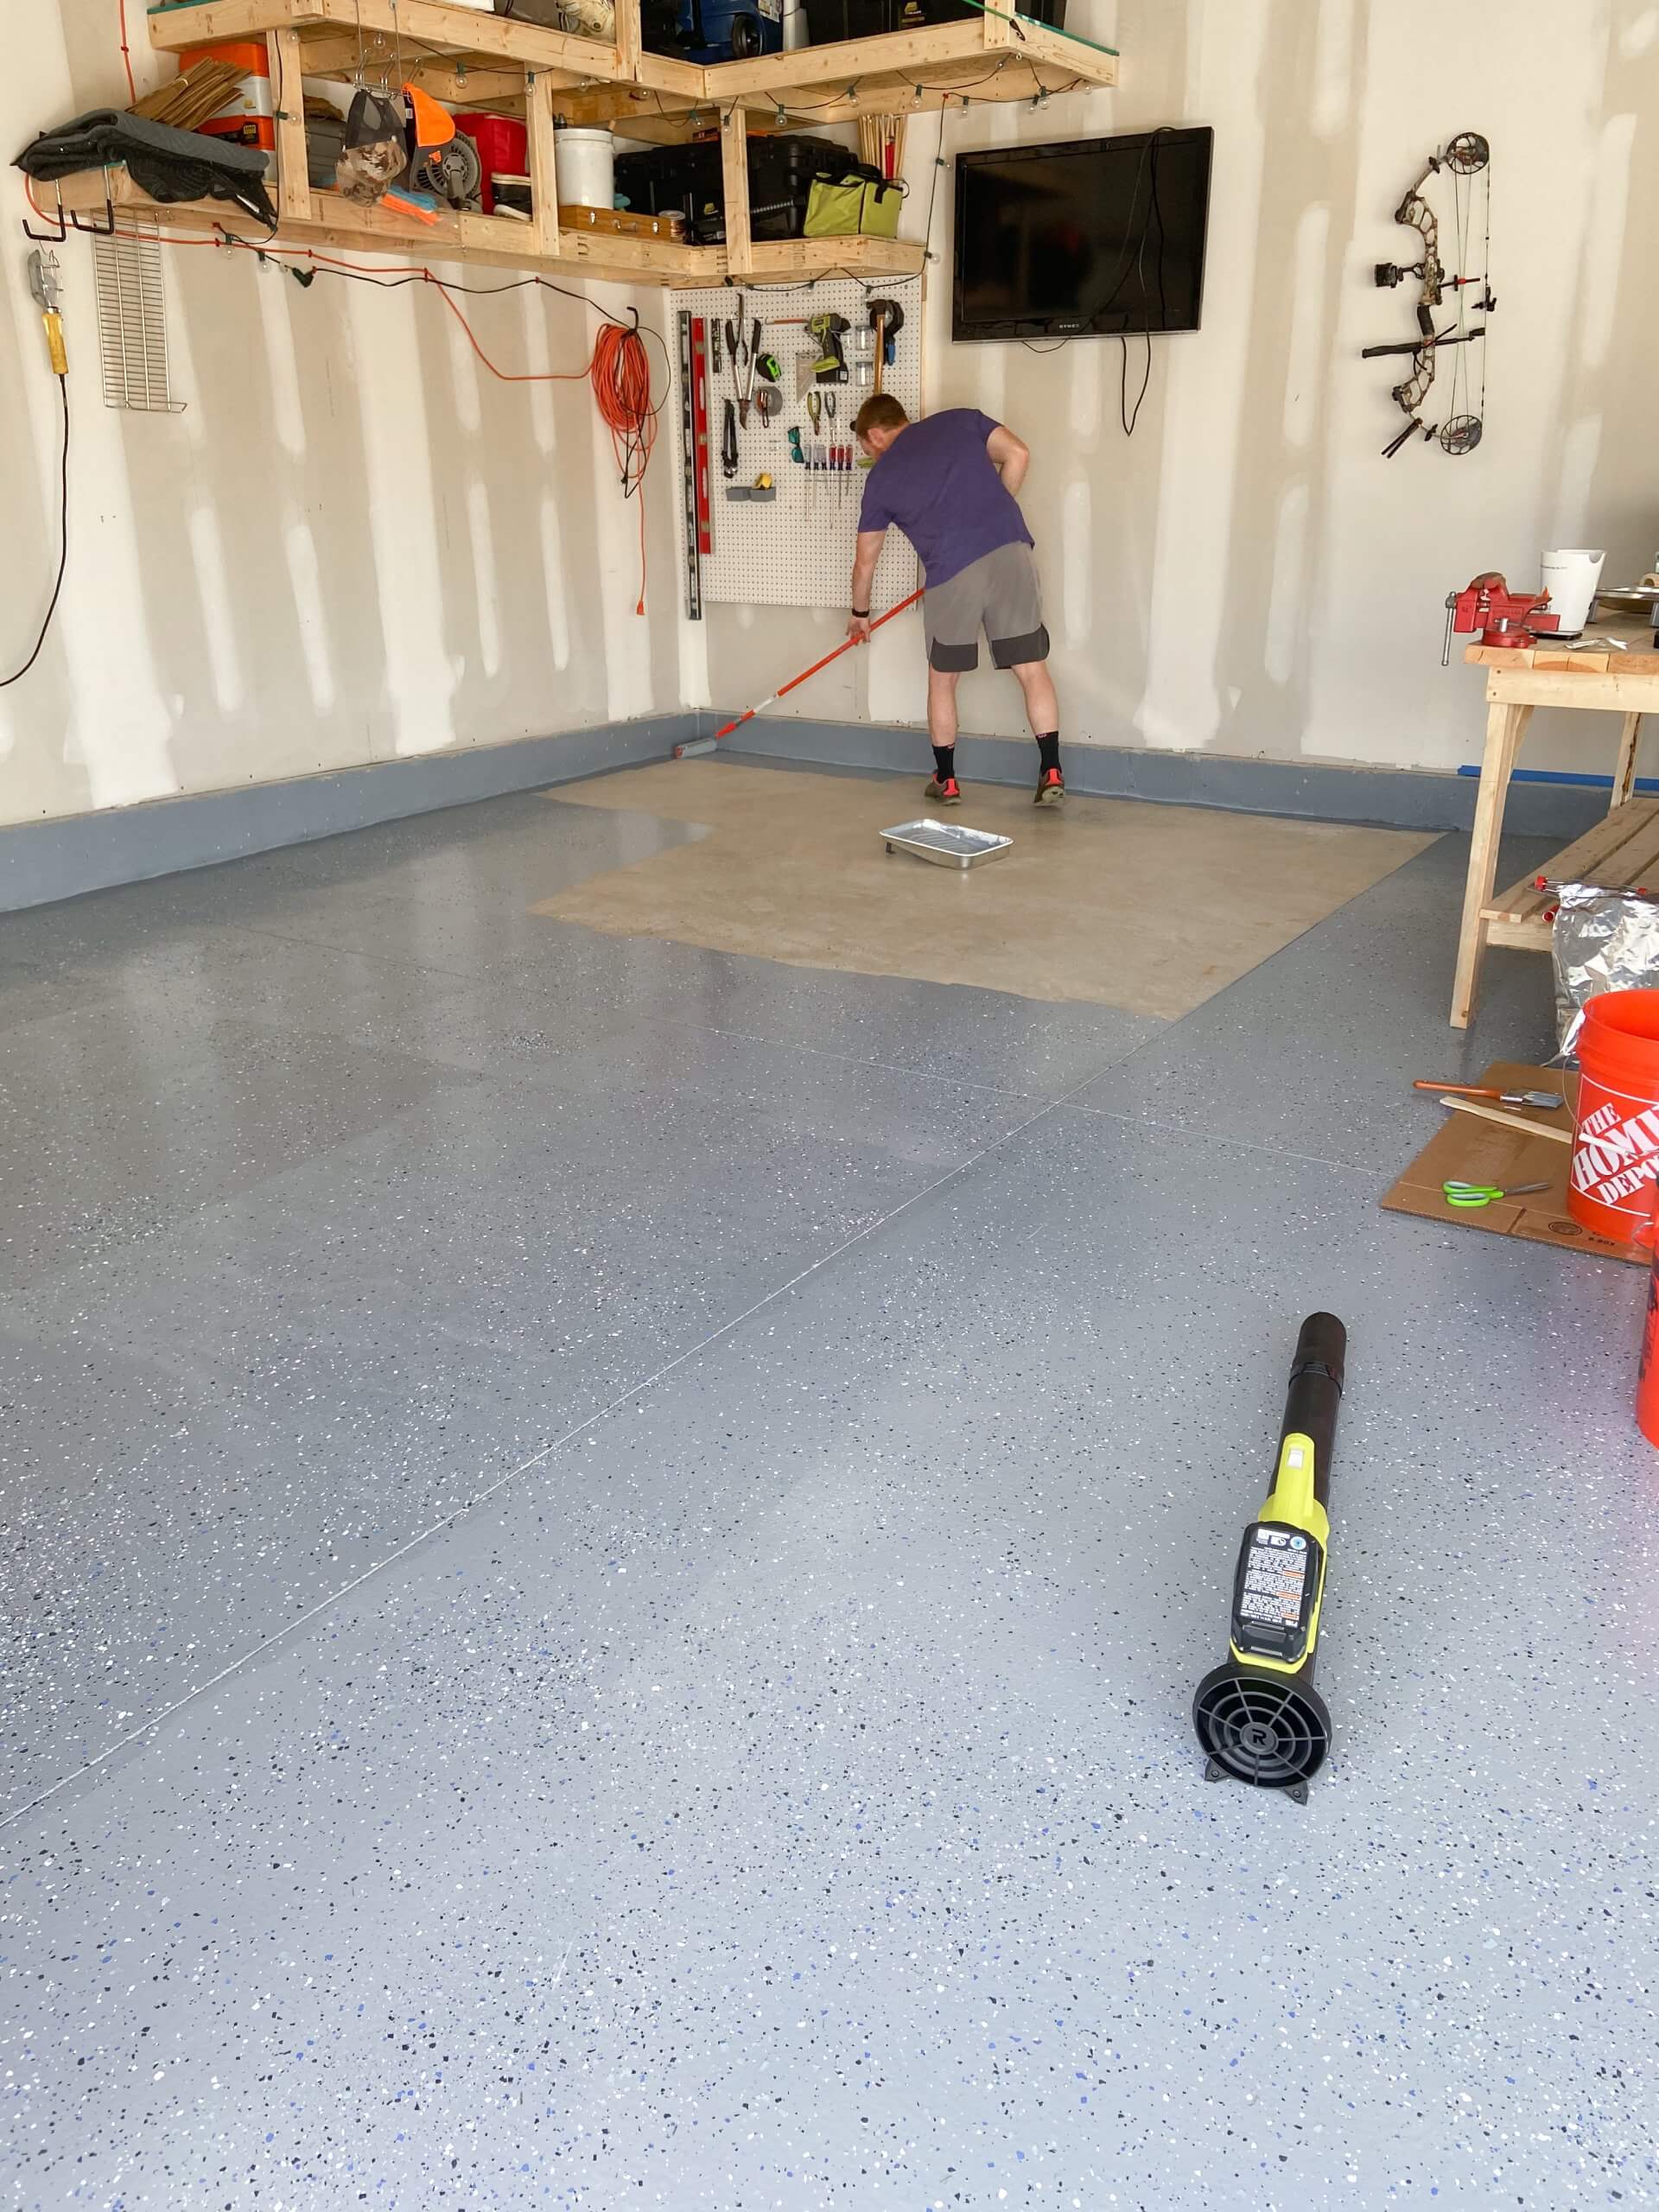
Applying a DIY garage floor coating involves several steps, each of which is crucial for achieving a durable and attractive finish. The first step is to thoroughly clean the concrete surface. Remove all dirt, dust, grease, and oil stains using a concrete cleaner or degreaser. For stubborn stains, a mechanical grinder or wire brush may be necessary to ensure a clean surface that allows for proper adhesion.
After cleaning, the next step is to repair any cracks or imperfections in the concrete. Use a concrete patching compound to fill in cracks and holes, and smooth out the surface to create an even base. Allow the patching compound to cure completely before proceeding. This step is crucial to prevent the coating from settling into imperfections and creating an uneven finish.
Once the repairs are complete, the surface must be etched or sanded to enhance adhesion. Etching involves applying an acid solution to the concrete to create a rough texture, which helps the coating bond more effectively. Alternatively, sanding with a floor sander or grinder can achieve a similar result. Rinse the surface thoroughly after etching or sanding to remove any residue, and allow it to dry completely.
Before applying the coating, it is important to mix the components according to the manufacturer’s instructions. Many coatings come in two parts: a resin and a hardener. Mixing these components in the correct ratio ensures proper curing and performance. Use a drill with a mixing paddle to combine the components thoroughly, ensuring a uniform mixture.
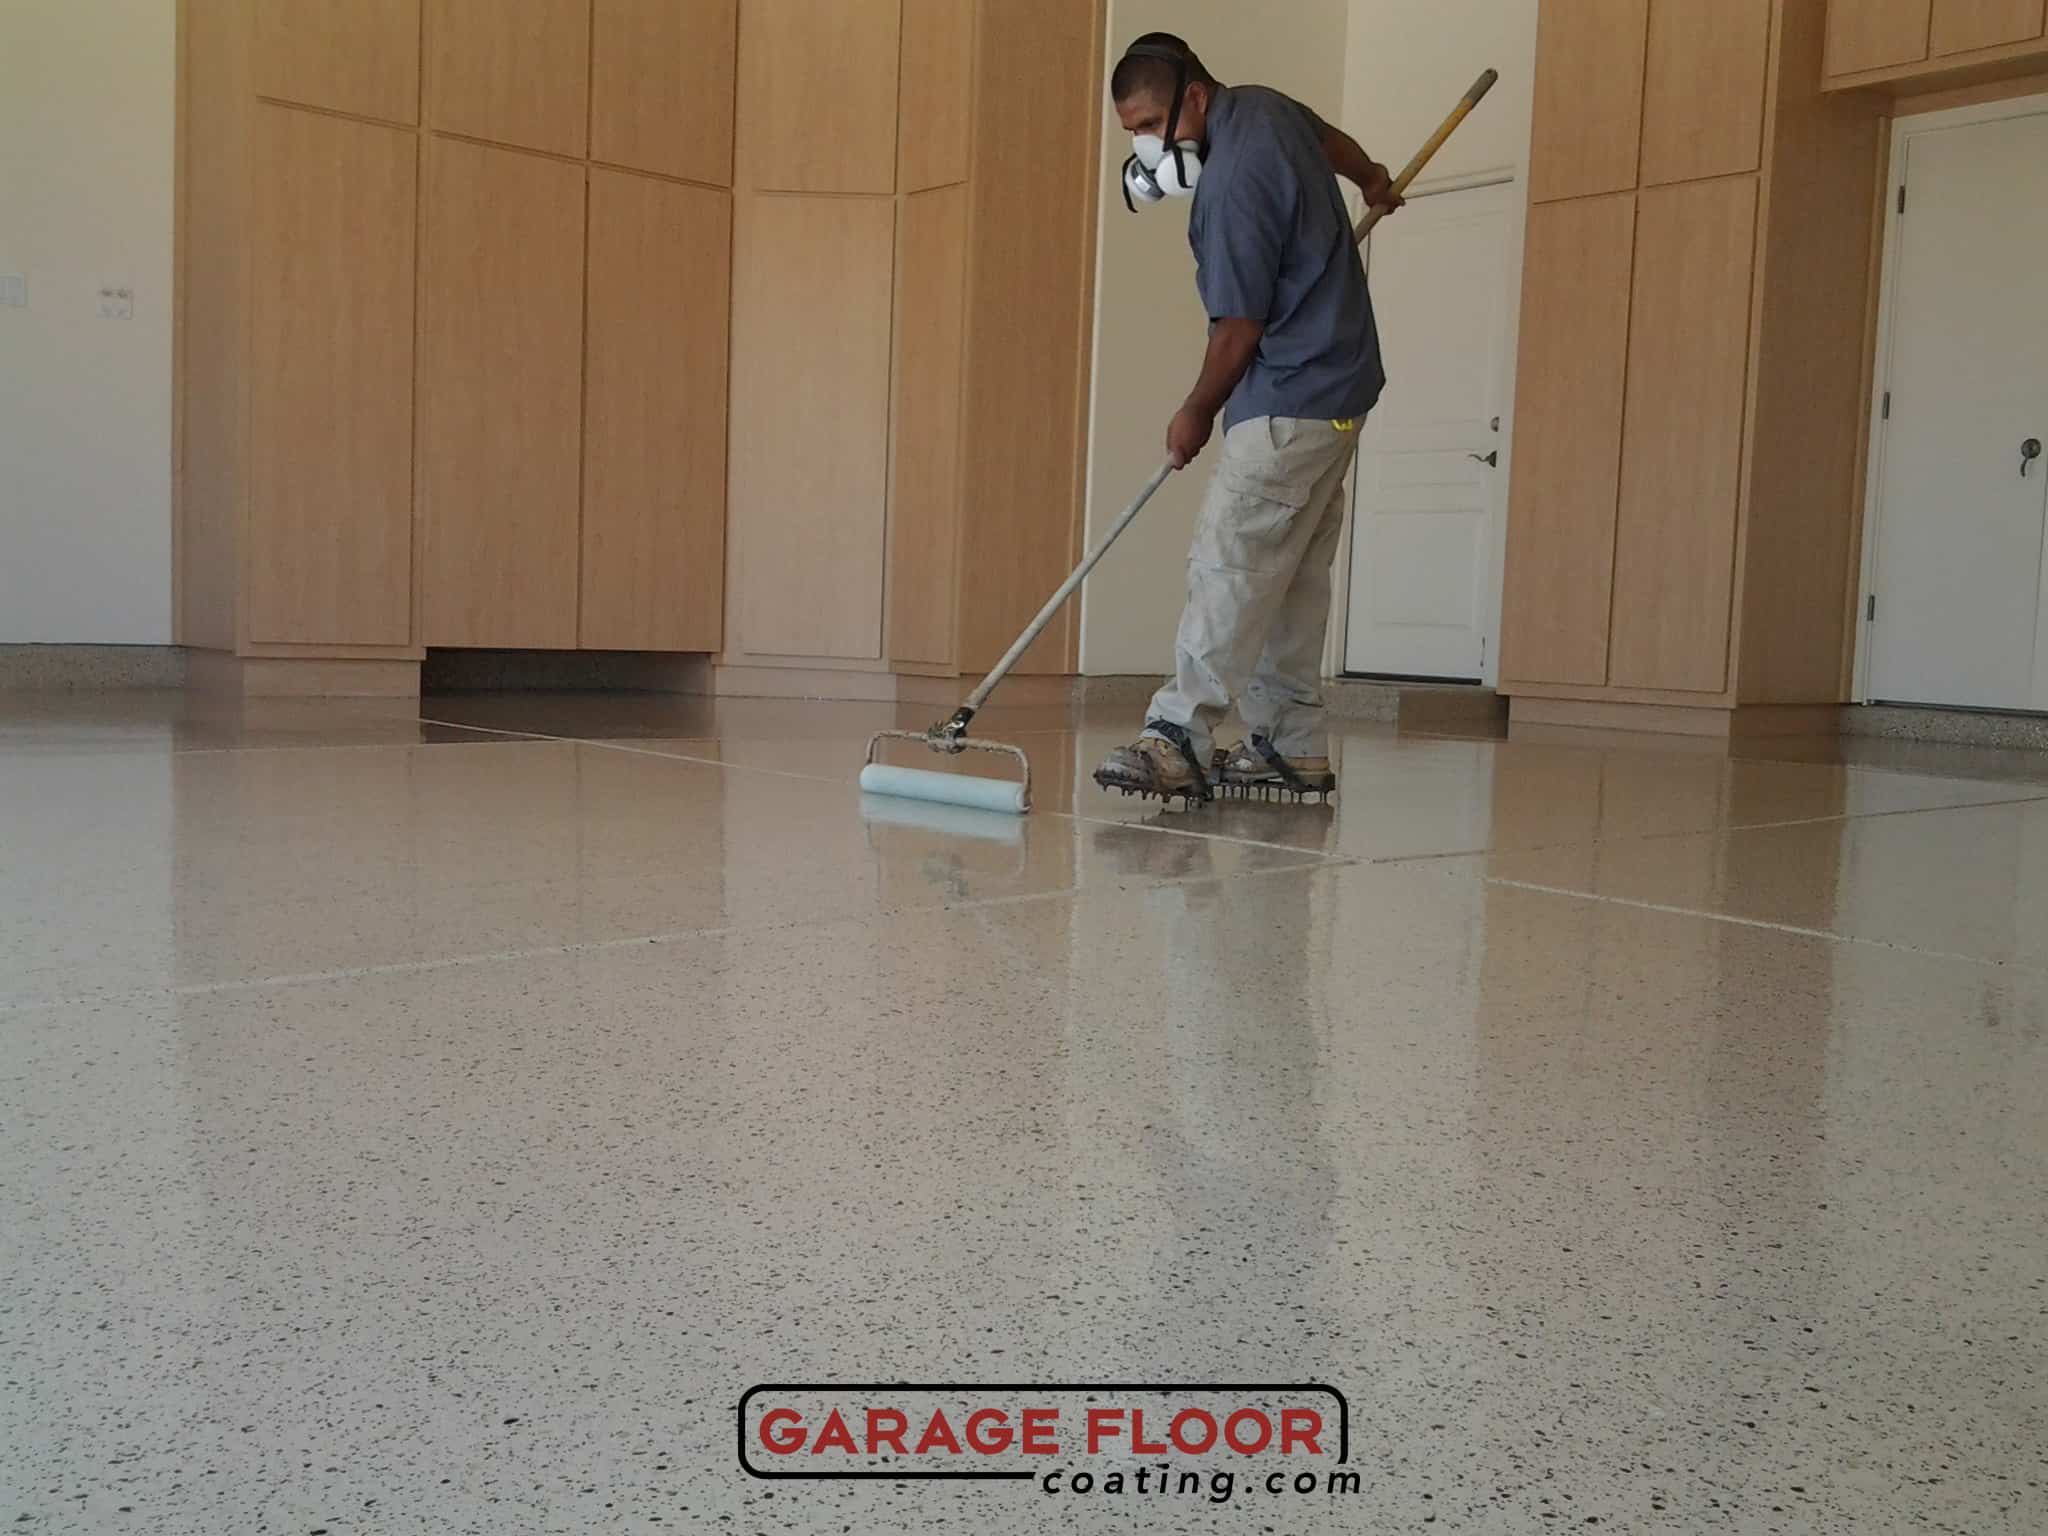
Apply the coating using a roller or brush, starting from the farthest corner of the room and working towards the exit to avoid stepping on the wet surface. For larger areas, a squeegee can be used to spread the coating evenly. Work in small sections to ensure consistent coverage and prevent the coating from drying before it is fully spread. Apply the coating in thin, even layers to avoid bubbles and ensure a smooth finish.
Allow the first coat to cure according to the manufacturer’s recommendations before applying additional coats. Multiple coats may be necessary to achieve the desired thickness and durability. Between coats, lightly sand the surface to remove any imperfections and ensure proper adhesion of subsequent layers. After the final coat, allow the coating to cure fully before using the floor. This curing period can vary depending on the product and environmental conditions.

Maintenance of Coated Garage Floors
Maintaining a coated garage floor involves regular cleaning and proper care to preserve its appearance and functionality. One of the key aspects of maintenance is keeping the floor clean and free from debris. Sweep or vacuum the floor regularly to remove dirt, dust, and grit that can cause scratches and wear on the surface. A soft-bristle broom or a vacuum with a brush attachment is ideal for this purpose.
For routine cleaning, use a mild detergent mixed with water to mop the floor. Avoid using harsh chemicals or abrasive cleaners, as they can damage the coating. A pH-neutral cleaner is recommended to maintain the integrity of the coating. Mop the floor with a damp mop, and ensure it is not overly wet, as excessive moisture can affect the coating.
Address spills and stains promptly to prevent damage to the coating. Wipe up spills immediately using a soft cloth or paper towel, and clean the area with a mild detergent if necessary. Oil and chemical spills should be cleaned up as soon as possible to prevent them from penetrating the coating and causing stains. Regularly inspect the floor for any signs of damage or wear.
Use furniture pads or coasters under heavy furniture and equipment to distribute the weight and prevent scratches or dents. Avoid dragging heavy objects across the floor, as this can cause damage to the coating. If possible, use mats or rugs in high-traffic areas to reduce wear and tear. These protective measures help maintain the floor’s appearance and extend its lifespan.
Regular inspections of the coated floor can help identify any areas that require attention. Look for signs of wear, such as fading, chipping, or peeling. Addressing these issues early can prevent further damage and extend the lifespan of the coating. For minor touch-ups, use a small amount of the original coating product to repair the affected areas. For larger repairs, consider consulting a professional.
Periodic reapplication of the coating may be necessary to maintain its protective properties and appearance. Over time, the surface may become dull or show signs of wear. Reapplying a fresh coat of coating can restore the floor’s shine and durability. Follow the manufacturer’s instructions for reapplication, and ensure the surface is clean and properly prepared before applying the new coat.

Innovative Features of Modern Garage Floor Coatings
Modern garage floor coatings have evolved to include several innovative features that enhance their performance and appeal. One such feature is the inclusion of self-leveling properties. Self-leveling coatings flow into cracks and imperfections, creating a smooth and even surface. This innovation is particularly beneficial for older or damaged concrete floors, providing a seamless finish without the need for extensive repairs.
Another innovation is the development of fast-curing formulations. Traditional coatings can take several days to fully cure, but fast-curing options significantly reduce this time. These products are ideal for projects with tight timelines, allowing the floor to be ready for use in a matter of hours. This feature is especially useful in commercial and industrial settings where downtime must be minimized.
UV-resistant coatings are designed to withstand exposure to sunlight without yellowing or fading. This innovation is crucial for areas that receive direct sunlight, such as outdoor patios or sunrooms. UV-resistant coatings maintain their appearance and protective properties over time, ensuring the floor remains attractive and durable despite prolonged exposure to sunlight.
Coatings with antimicrobial properties have also been developed to improve hygiene and safety. These coatings inhibit the growth of bacteria, mold, and mildew, making them ideal for healthcare facilities, kitchens, and other environments where cleanliness is essential. The antimicrobial feature helps maintain a healthier environment by reducing the risk of contamination and improving indoor air quality.
Decorative coatings have expanded with the introduction of metallic and glitter finishes. Metallic coatings contain metallic pigments that create a shimmering, three-dimensional effect, adding a touch of luxury to the space. Glitter coatings include tiny reflective particles that catch the light, creating a sparkling surface. These decorative options provide unique and eye-catching finishes for residential and commercial applications.
Formulations that incorporate non-slip additives enhance safety by providing better traction on the floor. These additives can be mixed into the coating during application or applied as a topcoat. Non-slip coatings are particularly important in areas prone to moisture, such as garages, bathrooms, kitchens, and pool decks. This innovation helps prevent slips and falls, making the floor safer for users.

Common Mistakes to Avoid When Applying DIY Garage Floor Coatings
Using DIY garage floor coatings can yield excellent results, but avoiding common mistakes is crucial for a successful application. One frequent mistake is inadequate surface preparation. Failing to thoroughly clean and repair the concrete can lead to poor adhesion and a subpar finish. Ensure the floor is free of dirt, grease, and cracks before applying the coating.
Another common error is not allowing sufficient curing time between coats. Rushing the application process can result in a weak bond and a less durable finish. Follow the manufacturer’s recommended curing times between coats to ensure proper adhesion and strength. Patience during the curing process is essential for achieving a high-quality result.
Applying the coating in unfavorable environmental conditions is another mistake to avoid. Temperature and humidity levels can significantly impact the curing process. Applying the coating in extreme temperatures or high humidity can lead to bubbles, uneven curing, and poor adhesion. Ensure the application environment is within the recommended range for the coating product being used.
Incorrect mixing of the coating components can also lead to problems. Many coatings come in two parts that must be mixed in a specific ratio. Failing to mix these components thoroughly or in the correct proportions can result in incomplete curing and a weak finish. Use a drill with a mixing paddle and follow the manufacturer’s instructions precisely to achieve a proper mix.
Skipping the application of a primer is another common mistake. A primer helps the coating bond better with the concrete and provides a more durable finish. Without a primer, the coating may not adhere as well, leading to peeling or chipping over time. Applying a high-quality primer designed for use with the chosen coating ensures a stronger and more resilient result.
Neglecting regular maintenance of the coated floor can reduce its lifespan and appearance. Regular cleaning, prompt spill cleanup, and periodic inspections are essential to keep the floor in good condition. Ignoring maintenance can lead to stains, scratches, and other damage that diminishes the floor’s performance and aesthetic appeal.
What are the benefits of using DIY garage floor coatings?
DIY garage floor coatings offer several benefits, including enhanced durability, improved appearance, easier cleaning and maintenance, increased safety, and cost savings. These coatings provide a hard, protective layer that can withstand heavy traffic and chemical spills, extending the life of the concrete. They also transform the look of the garage, making it more attractive and functional. Additionally, a coated floor is easier to clean and maintain, reducing dust and dirt buildup. Many coatings can be formulated to include non-slip additives, enhancing safety by providing better traction.
How do I prepare my garage floor for a DIY coating application?
Proper preparation of the garage floor is crucial for a successful DIY coating application. Start by thoroughly cleaning the surface to remove all dirt, dust, grease, and oil stains. Use a concrete cleaner or degreaser for stubborn stains. Repair any cracks or imperfections with a concrete patching compound, and ensure the surface is smooth and even. Etch or sand the concrete to create a rough texture for better adhesion, and rinse the surface thoroughly to remove any residue. Allow the floor to dry completely before applying the coating.
What types of DIY garage floor coatings are available?
Several types of DIY garage floor coatings are available, each with its unique properties and benefits. Epoxy coatings are known for their durability and resistance to chemicals and stains. Polyurethane coatings offer excellent abrasion resistance and flexibility. Acrylic coatings are easy to apply and dry quickly but may not be as durable. Polyaspartic coatings cure quickly and are highly resistant to UV rays and abrasion. Concrete stains and sealers provide some protection and enhance the appearance of the concrete but may require more frequent reapplication.
How long does a DIY garage floor coating take to cure?
The curing time for a DIY garage floor coating varies depending on the product and environmental conditions. Most epoxy and polyurethane coatings require at least 24 hours to cure before light foot traffic is allowed, with full curing taking up to seven days. Fast-curing polyaspartic coatings can cure within a few hours, allowing for a quicker return to service. It is important to follow the manufacturer’s recommended curing times and avoid rushing the process to ensure proper adhesion and durability.
Can DIY garage floor coatings be applied over existing coatings?
DIY garage floor coatings can be applied over existing coatings, but proper preparation is essential for good adhesion. The existing coating must be thoroughly cleaned and sanded to create a rough texture. Any loose or peeling areas should be removed, and the surface should be free of dirt, dust, and grease. Applying a primer designed for use with the chosen coating can help ensure a strong bond between the existing coating and the new one. Testing a small area for adhesion before proceeding with the entire floor is also recommended.
How do I maintain a DIY-coated garage floor?
Maintaining a DIY-coated garage floor involves regular cleaning and proper care. Sweep or vacuum the floor regularly to remove dirt and debris that can cause scratches. Use a mild detergent mixed with water for routine cleaning, and avoid harsh chemicals or abrasive cleaners. Address spills and stains promptly to prevent damage to the coating. Use furniture pads or coasters under heavy furniture and equipment to prevent scratches or dents. Regularly inspect the floor for signs of wear and reapply the coating as needed to maintain its protective properties and appearance.

Related Posts: