Concrete floor rubber coating is a versatile and durable solution for a variety of environments, from industrial spaces to residential garages. This coating provides a protective layer that enhances the floor’s durability, safety, and appearance. Let’s explore everything you need to know about concrete floor rubber coating, from its benefits and types to the application process and maintenance.
Understanding Concrete Floor Rubber Coating
What is Concrete Floor Rubber Coating?
Concrete floor rubber coating is a type of protective layer applied to concrete surfaces. It is made from rubber-based materials that offer flexibility, durability, and resistance to various environmental factors. This coating can be applied as a liquid that cures into a solid, rubber-like surface. It is commonly used in commercial, industrial, and residential settings to protect concrete floors from damage and improve their performance.
Benefits of Rubber Coating
Rubber coating offers numerous benefits, making it a popular choice for concrete floors. One of the primary advantages is its durability. Rubber coatings are highly resistant to wear and tear, making them ideal for high-traffic areas. They also provide excellent protection against chemicals, oils, and other substances that can damage concrete. Additionally, rubber coatings are waterproof, which helps to prevent moisture damage and mold growth. They also offer slip resistance, enhancing safety in environments where spills and wet conditions are common.
Applications of Rubber Coating
Rubber coatings are used in a wide range of applications due to their versatility. In industrial settings, they protect floors from heavy machinery and chemical spills. In commercial spaces, such as restaurants and retail stores, they enhance the durability and appearance of flooring. Residential applications include garages, basements, and patios, where rubber coatings provide a protective barrier against moisture and wear. Additionally, rubber coatings are used in sports facilities, playgrounds, and other recreational areas to create safe, non-slip surfaces.
Types of Rubber Coating
There are several types of rubber coatings available, each with its unique properties and applications. Liquid rubber coatings are applied as a liquid and cure to form a seamless, rubber-like surface. They are easy to apply and offer excellent flexibility and durability. Rubberized epoxy coatings combine the properties of epoxy and rubber to provide a hard, durable surface with added flexibility. Urethane rubber coatings offer high abrasion resistance and are suitable for environments with heavy traffic and impact. Each type of coating has specific advantages, making it important to choose the right one for your needs.
Environmental Considerations
Rubber coatings are environmentally friendly options for concrete floors. Many rubber coatings are made from recycled materials, such as recycled tires, reducing waste and promoting sustainability. Additionally, rubber coatings are low in volatile organic compounds (VOCs), making them safer for indoor use and contributing to better indoor air quality. Their durability also means that they need to be replaced less frequently, reducing the environmental impact over time.
Cost Considerations
The cost of rubber coating for concrete floors varies depending on several factors, including the type of coating, the size of the area, and the complexity of the application. While rubber coatings may have a higher upfront cost compared to some other flooring options, their durability and low maintenance requirements make them cost-effective in the long run. Additionally, rubber coatings can extend the lifespan of concrete floors, reducing the need for costly repairs and replacements.

Preparing the Concrete Floor for Rubber Coating
Cleaning the Surface
Proper preparation is crucial for the success of a rubber coating application. The first step is to thoroughly clean the concrete surface. Remove any dirt, dust, oil, grease, and other contaminants using a suitable cleaner. For heavily soiled areas, a degreaser may be necessary. Use a pressure washer or a scrub brush to ensure the surface is clean. Rinse the floor thoroughly with clean water and allow it to dry completely before proceeding to the next step.
Repairing Cracks and Holes
Inspect the concrete floor for any cracks, holes, or other damage. It is essential to repair these issues before applying the rubber coating to ensure a smooth and even surface. Use a concrete patching compound to fill in cracks and holes. Follow the manufacturer’s instructions for mixing and applying the compound. Allow the repaired areas to cure completely before moving on to the next step. Properly repairing the surface will help the rubber coating adhere better and last longer.
Etching the Concrete
Etching the concrete helps to create a rough surface that the rubber coating can adhere to. This step is especially important for smooth or polished concrete floors. Use a concrete etching solution, following the manufacturer’s instructions for application and safety precautions. Apply the etching solution evenly across the floor, allowing it to react with the surface. After the recommended time, rinse the floor thoroughly with clean water to remove any residue. Allow the floor to dry completely before applying the primer.
Priming the Surface
Applying a primer is essential for ensuring good adhesion between the concrete and the rubber coating. Choose a primer that is compatible with both the concrete surface and the rubber coating you plan to use. Apply the primer using a roller or a brush, following the manufacturer’s instructions for coverage and drying times. Ensure that the primer is applied evenly and allow it to dry completely before proceeding to the application of the rubber coating.
Masking and Protecting Surrounding Areas
Before applying the rubber coating, protect any areas that you do not want to coat. Use painter’s tape to mask off the edges of the floor, baseboards, and any fixtures. Cover walls, doors, and other surfaces with plastic sheeting or drop cloths. Ensuring that these areas are well-protected will help you achieve a clean and professional-looking finish. Taking the time to mask and protect the surrounding areas will also save you time and effort in cleaning up after the project is complete.
Ensuring Proper Ventilation
Proper ventilation is crucial when working with rubber coatings, as they can emit fumes during application and curing. Ensure that the area is well-ventilated by opening windows and doors and using fans if necessary. If you are working in an enclosed space, consider using a respirator mask to protect yourself from inhaling fumes. Following safety precautions will help you avoid health issues and ensure a safer working environment.

Applying the Rubber Coating
Choosing the Right Application Method
The application method for rubber coating can vary depending on the type of product you are using. Common methods include rolling, brushing, and spraying. Rolling is the most common method and is suitable for most rubber coatings. Brushing may be necessary for edges and hard-to-reach areas. Spraying is an option for larger areas or when a smoother finish is desired. Choose the method that best suits your project and the type of coating you are using.
Mixing the Rubber Coating
Before applying the rubber coating, ensure that it is properly mixed according to the manufacturer’s instructions. Some rubber coatings come in two parts that need to be mixed before application. Use a mixing paddle and a drill to mix the components thoroughly. Mixing the coating properly is essential for achieving a consistent and durable finish. Follow the manufacturer’s guidelines for mixing ratios and mixing times.
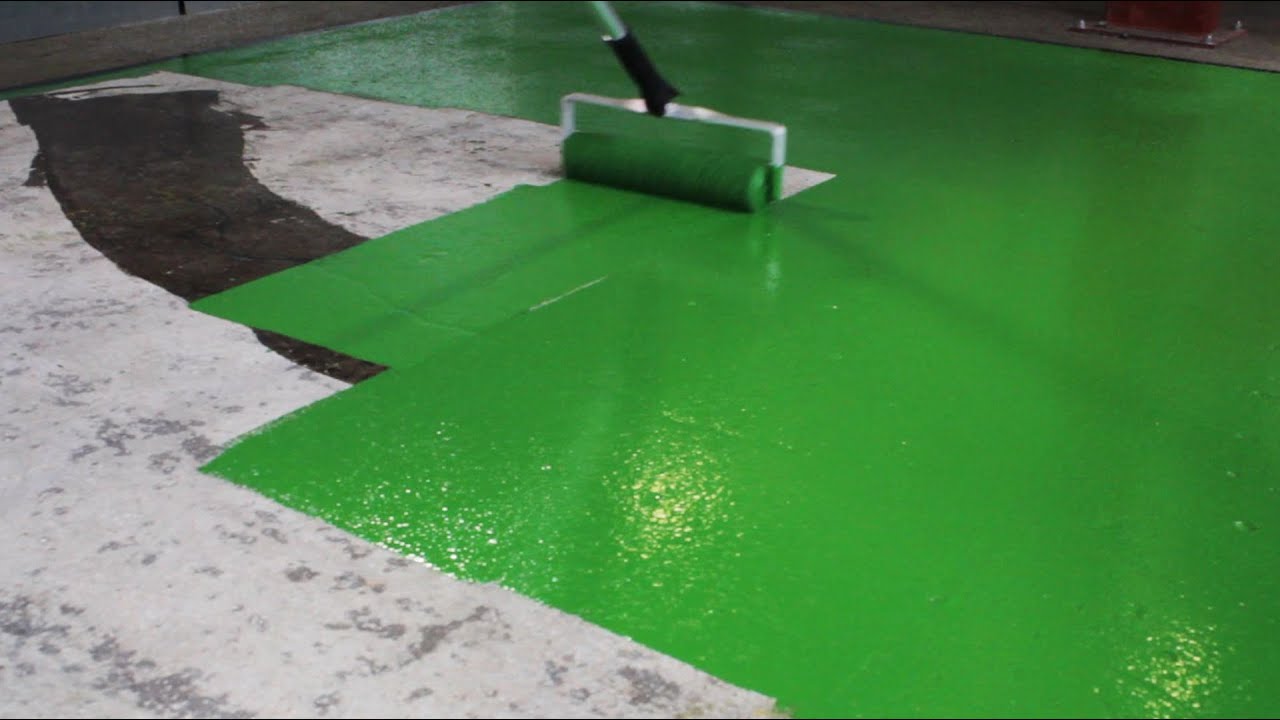
Applying the First Coat
Begin by applying the first coat of rubber coating to the concrete floor. Use a roller or brush to apply the coating evenly, working in small sections to ensure full coverage. Apply the coating in thin, even layers to avoid drips and runs. Start at one end of the room and work your way towards the exit to avoid stepping on the wet coating. Allow the first coat to dry completely before applying additional coats. Follow the manufacturer’s instructions for drying times between coats.

Applying Additional Coats
Depending on the desired thickness and durability, you may need to apply multiple coats of rubber coating. Follow the manufacturer’s recommendations for the number of coats and drying times between each coat. Each additional coat will enhance the durability and appearance of the floor. Apply each coat in the same manner as the first, ensuring even coverage and allowing each coat to dry completely before applying the next.
Final Touches and Inspections
After the final coat has dried, inspect the floor for any missed spots or uneven areas. Use a small brush or roller to touch up any imperfections. Remove any painter’s tape carefully while the coating is still slightly tacky to avoid peeling the coating. Allow the rubber coating to cure fully according to the manufacturer’s instructions before using the floor. Proper curing is essential for achieving a durable and long-lasting finish.
Cleaning Up
Once the application is complete, clean up any tools and equipment used during the process. Follow the manufacturer’s instructions for cleaning the tools, which may involve using a specific solvent or cleaner. Properly dispose of any leftover coating material and packaging according to local regulations. Cleaning up promptly will help you maintain your tools and ensure they are ready for future projects.
Benefits of Concrete Floor Rubber Coating
Enhanced Durability
One of the primary benefits of rubber coating is its enhanced durability. Rubber coatings are highly resistant to wear and tear, making them ideal for high-traffic areas. They can withstand heavy machinery, foot traffic, and impact without showing signs of damage. This durability helps to extend the lifespan of the concrete floor and reduces the need for frequent repairs or replacements.
Moisture and Chemical Resistance
Rubber coatings provide excellent protection against moisture and chemicals. They create a waterproof barrier that prevents water from penetrating the concrete, reducing the risk of damage and mold growth. Rubber coatings are also resistant to a wide range of chemicals, including oils, solvents, and acids, making them suitable for industrial and commercial environments where spills and chemical exposure are common.
Slip Resistance
Safety is a critical consideration in any flooring application, and rubber coatings excel in providing slip resistance. The rubberized surface creates a non-slip finish that reduces the risk of slips and falls, even when the floor is wet. This makes rubber coatings an excellent choice for environments where safety is a priority, such as kitchens, bathrooms, and industrial settings.
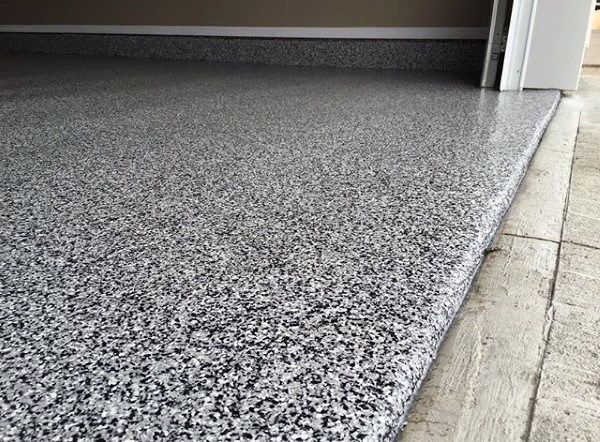
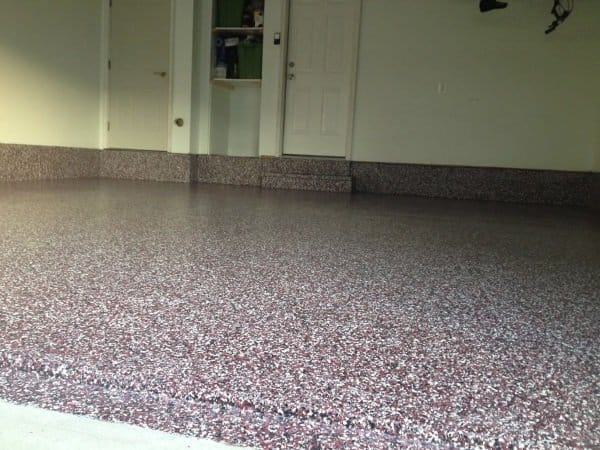
Aesthetic Appeal
In addition to their functional benefits, rubber coatings can also enhance the aesthetic appeal of concrete floors. They are available in a variety of colors and finishes, allowing you to customize the appearance of your floor to match your decor or branding. A well-applied rubber coating can transform the look of a concrete floor, making it more attractive and inviting.
Easy Maintenance
Rubber-coated floors are easy to maintain, requiring minimal effort to keep them looking their best. Regular cleaning with a broom or mop and a mild detergent is usually sufficient to remove dirt and stains. The smooth, non-porous surface of rubber coatings also makes them resistant to staining and easier to clean than untreated concrete. This ease of maintenance helps to reduce the time and cost associated with floor upkeep.
Cost-Effective Solution
While the initial cost of applying a rubber coating may be higher than some other flooring options, the long-term benefits make it a cost-effective solution. The durability and low maintenance requirements of rubber coatings reduce the need for frequent repairs and replacements, saving money over time. Additionally, the protective properties of rubber coatings can help to extend the lifespan of the concrete floor, further enhancing their cost-effectiveness.

Common Mistakes to Avoid
Inadequate Surface Preparation
One of the most common mistakes when applying rubber coating is inadequate surface preparation. Skipping or rushing the preparation process can result in poor adhesion and a less durable finish. Properly cleaning, repairing, and priming the concrete surface is essential for ensuring the success of the coating application. Take the time to prepare the surface thoroughly to achieve the best results.
Using the Wrong Type of Coating
Choosing the wrong type of rubber coating can lead to disappointing results. Not all rubber coatings are suitable for every environment or application. Consider the specific needs of your project, such as the level of traffic, exposure to chemicals, and desired finish. Select a rubber coating that is designed to meet these requirements for optimal performance and durability.
Applying Too Thick or Too Thin Coats
Applying the rubber coating too thick or too thin can compromise its effectiveness. Thick coats may not cure properly and can lead to drips, runs, and an uneven finish. Thin coats may not provide sufficient protection and durability. Follow the manufacturer’s instructions for the recommended thickness of each coat and apply the coating evenly to achieve the best results.
Ignoring Environmental Conditions
Environmental factors such as temperature and humidity can affect the application and curing process of rubber coatings. Applying the coating in extreme temperatures or high humidity can result in poor adhesion and longer drying times. Follow the manufacturer’s recommendations for ideal application conditions and ensure proper ventilation during the process to avoid these issues.
Rushing the Curing Process
Rushing the curing process can lead to a less durable and less effective coating. It is essential to allow each coat to dry completely before applying the next and to let the final coat cure fully before using the floor. Follow the manufacturer’s guidelines for drying and curing times to ensure a long-lasting and resilient finish. Patience during this final step is crucial for achieving the best results.
Neglecting Safety Precautions
Safety should always be a priority when working with rubber coatings. Neglecting safety precautions, such as proper ventilation and protective gear, can lead to health issues. Follow the manufacturer’s safety recommendations, including using respirators, gloves, and eye protection, and ensure that the work area is well-ventilated. Taking these precautions will help you avoid potential health risks and ensure a safer working environment.
How long does it take to apply and cure rubber coating on concrete floors?
The time it takes to apply and cure rubber coating on concrete floors depends on several factors, including the size of the area, the number of coats, and the specific product used. Preparation, including cleaning and repairing the surface, can take a day or more. Applying the coating typically involves multiple coats, each requiring drying time. The final curing process can take several days to a week. Overall, the entire process can take from a few days to over a week, depending on the project’s complexity and the product used.
What type of rubber coating is best for high-traffic areas?
For high-traffic areas, a rubberized epoxy coating or urethane rubber coating is often the best choice. Rubberized epoxy coatings combine the durability of epoxy with the flexibility of rubber, providing a hard-wearing surface that can withstand heavy use. Urethane rubber coatings offer high abrasion resistance and are ideal for environments with heavy machinery and foot traffic. Both types of coatings provide excellent durability and protection for high-traffic areas.
Can I apply rubber coating over existing concrete sealant?
Applying rubber coating over existing concrete sealant can be challenging, as the sealant may interfere with the adhesion of the rubber coating. It is generally recommended to remove any existing sealant before applying the rubber coating. This can be done by mechanical abrasion, such as sanding or grinding, to create a clean and rough surface for the coating to adhere to. Ensuring proper surface preparation is crucial for achieving a durable and long-lasting finish.
How do I maintain a rubber-coated concrete floor?
Maintaining a rubber-coated concrete floor is relatively easy. Regular cleaning with a broom or mop and a mild detergent is usually sufficient to keep the floor looking its best. Avoid using harsh chemicals or abrasive cleaners, as they can damage the coating. For stubborn stains, use a soft brush and a mild cleaner specifically designed for rubber surfaces. Additionally, placing mats or rugs in high-traffic areas can help protect the floor and reduce wear.
Is rubber coating suitable for outdoor concrete floors?
Yes, rubber coating is suitable for outdoor concrete floors. It provides excellent protection against moisture, UV rays, and temperature fluctuations, making it ideal for outdoor applications. Rubber coatings are often used for patios, walkways, and pool decks to create a durable, non-slip surface that can withstand the elements. When applying rubber coating outdoors, ensure that the weather conditions are suitable for application and curing, as recommended by the manufacturer.
What are the environmental benefits of rubber coating for concrete floors?
Rubber coating offers several environmental benefits. Many rubber coatings are made from recycled materials, such as recycled tires, reducing waste and promoting sustainability. Additionally, rubber coatings are low in volatile organic compounds (VOCs), making them safer for indoor use and contributing to better indoor air quality. Their durability and long lifespan also mean that they need to be replaced less frequently, reducing the environmental impact over time. Choosing rubber coating for concrete floors can be an environmentally responsible decision that contributes to sustainability and reduces waste.

Related Posts:
- Interior Concrete Floor Paint Ideas
- Concrete Floor Epoxy Crack Filler
- Concrete Floor Basement Ideas
- Painting Concrete Floor With Epoxy
- Outdoor Concrete Floor Paint Ideas
- Concrete Floor Painting Tips
- Outdoor Concrete Floor Finishes
- Non Slip Concrete Floor
- Concrete Floor Epoxy Coating
- Outdoor Concrete Floor Tiles