Transform Your Garage with Epoxy Floor Coating
When I first considered upgrading my garage floor, I wanted something durable, easy to maintain, and visually appealing. After researching various options, I discovered that epoxy garage floor coating ticks all those boxes. It’s not just about aesthetics; epoxy offers protection, longevity, and a professional finish that can elevate any garage space. I’m excited to share everything I’ve learned about epoxy garage floor coating, from choosing the right type to applying it yourself.
Epoxy Garage Floor Coating: What It Is and Why It Matters
Epoxy is a resin that, when mixed with a hardener, forms a rigid plastic material. This material adheres exceptionally well to concrete surfaces, creating a strong, durable finish perfect for high-traffic areas like garages. What I love about epoxy is its versatility. It can transform a drab, dusty garage floor into a sleek, polished space, making it an extension of your home rather than just a place to park your car.
The primary reason I opted for epoxy was its durability. Unlike paint, which can chip and peel, epoxy creates a thick, resilient surface that can withstand the weight of vehicles, tools, and heavy equipment. Plus, it’s resistant to chemicals like oil and gasoline, which are common in garages. This means fewer stains and easier cleanup.
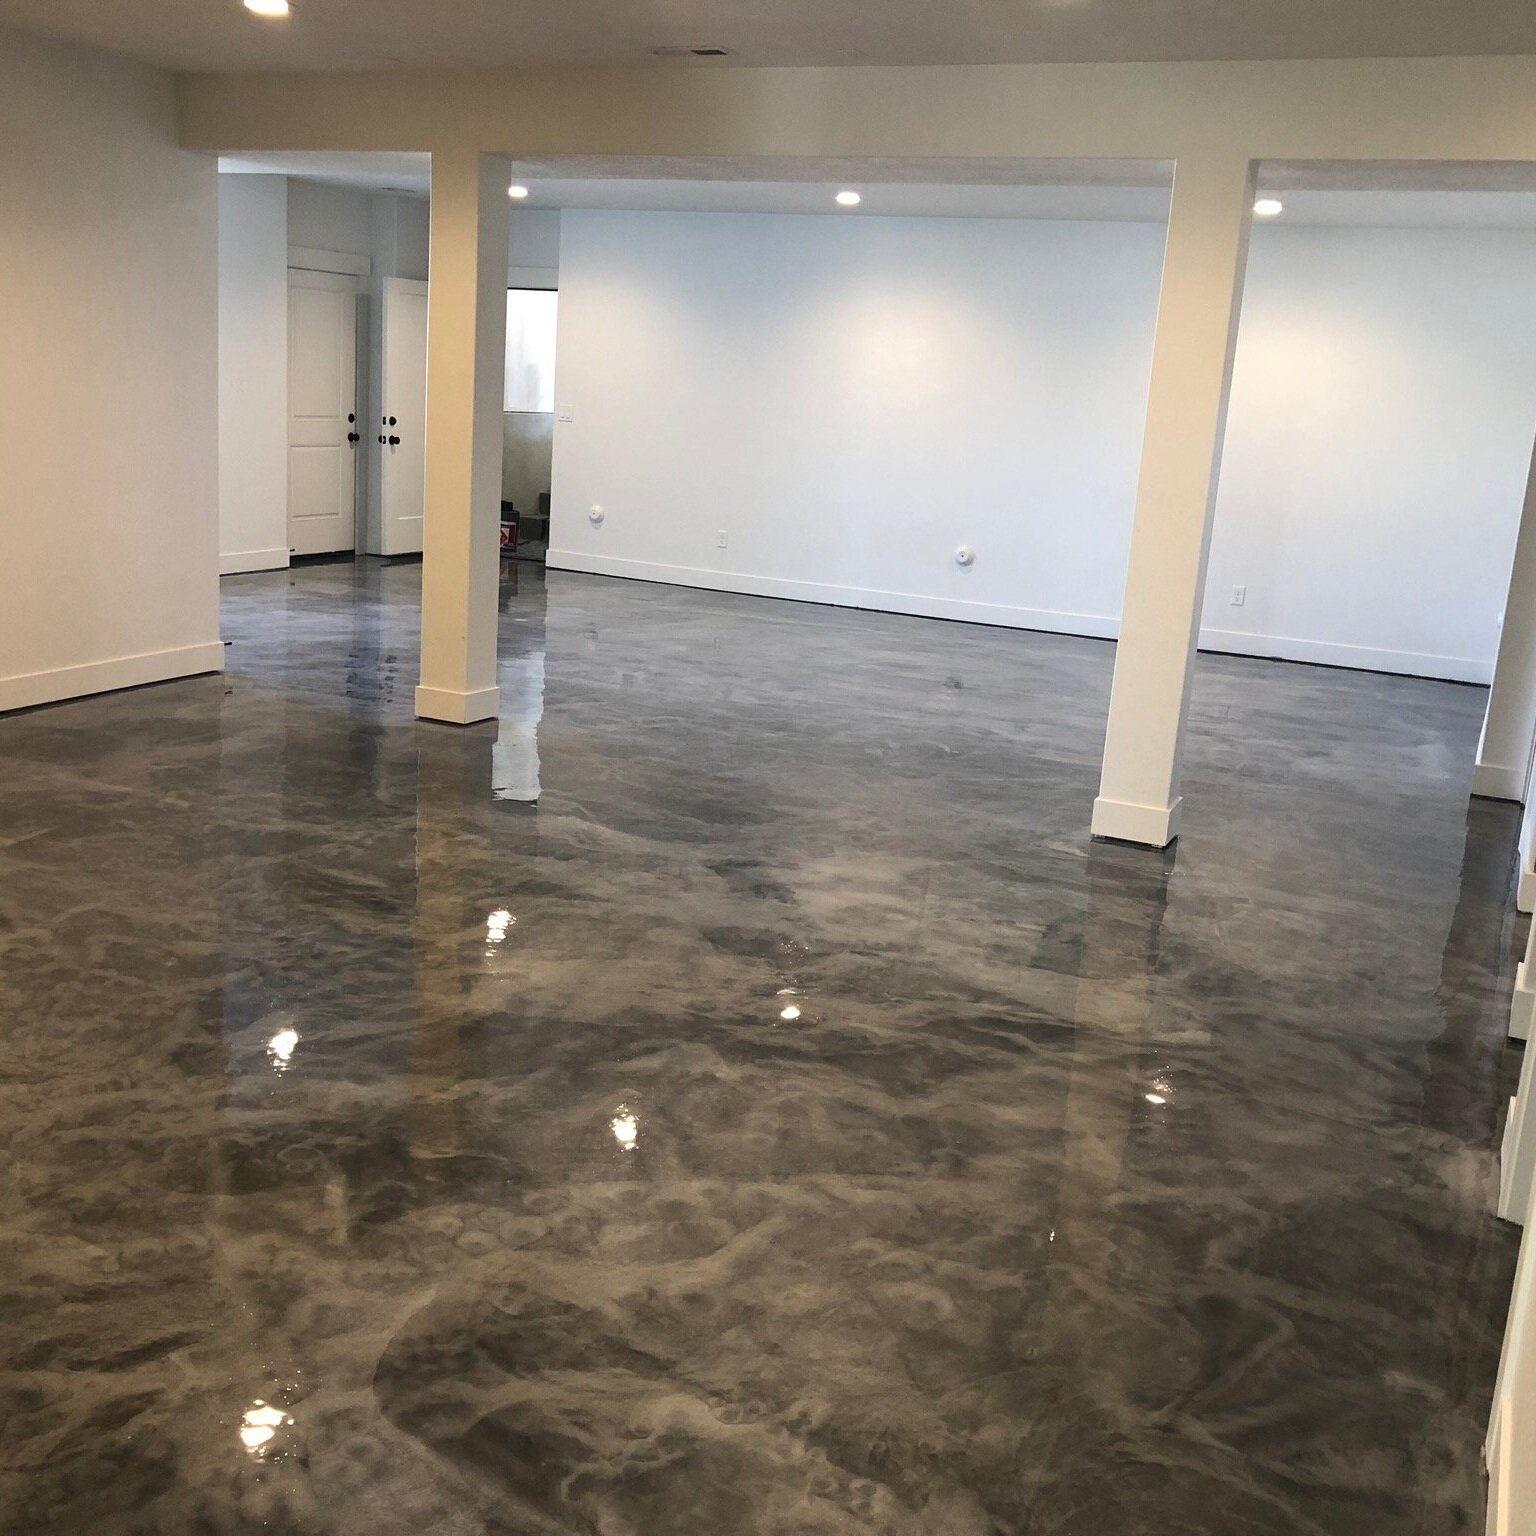
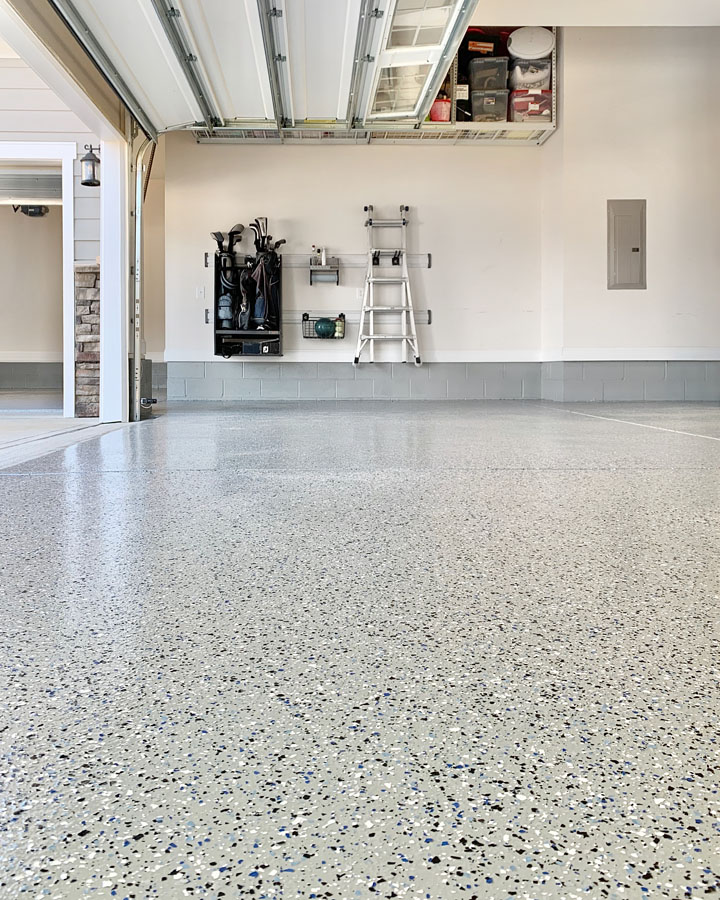
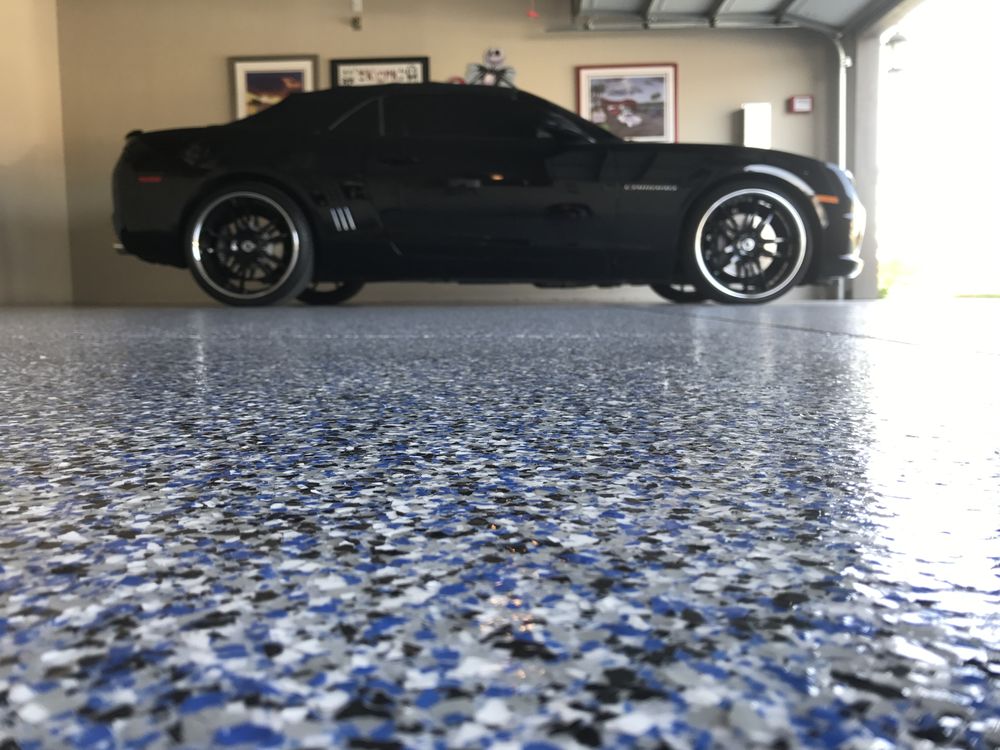
Another advantage of epoxy is its aesthetic appeal. The glossy finish reflects light, brightening up the space. You can even add decorative flakes or metallic pigments for a custom look. I was particularly impressed with the range of colors and finishes available, from simple solids to complex marbled effects. This allowed me to match the floor to the overall style of my home.
Epoxy also enhances safety in the garage. Its slip-resistant properties are a huge plus, especially when the floor gets wet. You can opt for textured finishes or add anti-slip additives to the mix for extra grip. This was a big selling point for me, knowing that my family and I would be safer moving around in the garage.
The longevity of epoxy floors is another major benefit. With proper preparation and application, an epoxy floor can last 10 to 20 years, sometimes even longer. This long lifespan makes it a cost-effective choice in the long run, especially compared to other flooring options that may require frequent touch-ups or replacements.
Finally, epoxy garage floor coating is relatively low maintenance. A simple sweep and occasional mop are usually enough to keep it looking pristine. Its resistance to dust and debris also means fewer allergens in the garage, making it a healthier environment. All these factors combined make epoxy an excellent investment for any homeowner looking to improve their garage space.

Types of Epoxy Coatings
When I started exploring epoxy coatings, I quickly realized that not all epoxies are created equal. There are different types of epoxy coatings, each with unique characteristics that make them suitable for specific applications. Understanding these options helped me choose the right one for my garage.
The most common type of epoxy is 100% Solid Epoxy. This is the purest form of epoxy, containing no solvents, which means it provides the thickest and most durable coating. It’s what professionals often use for commercial and industrial spaces. The benefit of 100% solid epoxy is its thickness and strength. It’s incredibly resilient and resistant to wear and tear, making it ideal for garages that see a lot of activity. However, it’s also the most challenging to apply and requires precise preparation and timing.
Water-based Epoxy is another popular option, especially for DIYers like myself. It’s easier to apply than 100% solid epoxy because it has a longer working time and is less likely to bubble or peel if applied correctly. Water-based epoxy provides a thinner coat, but it still offers good durability and protection. It’s also more environmentally friendly, with fewer volatile organic compounds (VOCs), which made me feel better about using it in my home.

For those looking for a balance between ease of application and durability, Solvent-based Epoxy might be the answer. It’s stronger than water-based epoxy but easier to work with than 100% solid epoxy. However, solvent-based epoxies contain higher levels of VOCs, which can be harmful if not handled properly. Proper ventilation and protective gear are crucial when applying this type of epoxy.
Metallic Epoxy is a type of decorative epoxy that can create stunning, one-of-a-kind floors. It contains metallic pigments that give the floor a three-dimensional, marble-like appearance. I was tempted by the idea of having a unique, custom look for my garage, but I decided against it because metallic epoxy is more expensive and requires more skill to apply.
Finally, there’s Gravel Epoxy, which is typically used for outdoor spaces but can be applied in garages for a rugged, textured finish. It involves mixing gravel with epoxy to create a non-slip surface that’s incredibly durable. This might be an option if you’re looking for something that can withstand the elements or if you want a more industrial look in your garage.
After weighing the pros and cons of each type, I decided on water-based epoxy. It offered the durability I needed while being manageable enough for a DIY project. The next step was to gather the necessary tools and materials and prepare the space for application.
Preparing Your Garage Floor
Preparation is everything when it comes to applying epoxy. I quickly learned that a flawless finish starts with a well-prepared surface. Skipping or rushing through this step can lead to adhesion problems, bubbling, and a shorter lifespan for your epoxy floor. Here’s how I prepped my garage for the big transformation.
The first step was to clean the floor thoroughly. I began by removing everything from the garage—vehicles, tools, storage boxes, everything. Once the space was clear, I swept the floor to get rid of loose dirt and debris. Next, I used a heavy-duty degreaser to clean any oil stains and residue. This was crucial because any grease or oil left on the floor could prevent the epoxy from adhering properly. After scrubbing, I rinsed the floor with water and let it dry completely.
Next came patching and repairing. My garage floor had a few cracks and divots, so I used an epoxy patching compound to fill them in. It’s important to use a product compatible with the epoxy coating to ensure a seamless finish. I smoothed out the patches with a trowel and allowed them to cure according to the manufacturer’s instructions. This step might seem tedious, but it’s essential for a smooth, even surface.
After patching, it was time to etch the concrete. This step is critical because it opens up the pores of the concrete, allowing the epoxy to bond more effectively. I used an acid-based concrete etcher, which I diluted according to the instructions and applied with a garden sprayer. Etching creates a slightly rough surface that the epoxy can grip onto. After applying the etcher, I scrubbed the floor with a stiff brush to ensure even coverage, then rinsed it thoroughly with water. Again, I waited for the floor to dry completely before moving on to the next step.
Before applying the epoxy, I performed a moisture test. Even a small amount of moisture in the concrete can cause the epoxy to lift or peel over time. To test for moisture, I taped a piece of plastic sheeting to the floor and left it for 24 hours. If there was condensation on the underside of the plastic, it meant there was moisture in the concrete, and I needed to address that before proceeding. Fortunately, my floor passed the test, and I was ready to move forward.
The final step in preparation was priming the floor. While not always necessary, a primer can enhance the adhesion of the epoxy and provide a more uniform finish. I chose a primer specifically designed for use with epoxy coatings. Applying the primer was similar to applying paint—I used a roller with an extension handle to cover the entire floor evenly. The primer dried quickly, and I was finally ready to apply the epoxy.
Proper preparation took time and effort, but it was well worth it. It ensured that the epoxy would adhere properly and provide a long-lasting, durable finish that could withstand the demands of a busy garage.
Applying Epoxy: Step-by-Step for a Flawless Finish
With the floor prepped and ready, it was time to apply the epoxy. I was a bit nervous about this part because I knew that once I started, there was no turning back. Timing is crucial when working with epoxy, so I made sure to have everything I needed within reach before mixing the components.
The first step was to mix the epoxy and hardener. Epoxy comes in two parts: the resin and the hardener. Once mixed, a chemical reaction occurs that causes the mixture to harden. I carefully followed the manufacturer’s instructions for mixing the two components, ensuring that the ratio was correct. It’s important to mix thoroughly but not too vigorously to avoid introducing air bubbles into the mixture. I used a paddle mixer attached to a drill for this step, which made the process quick and easy.
Once the epoxy was mixed, I began cutting in around the edges of the garage floor with a paintbrush. This involved applying the epoxy along the walls and in tight corners where a roller wouldn’t reach. Cutting in first ensures that the entire floor is coated evenly and prevents any gaps or missed spots along the edges.
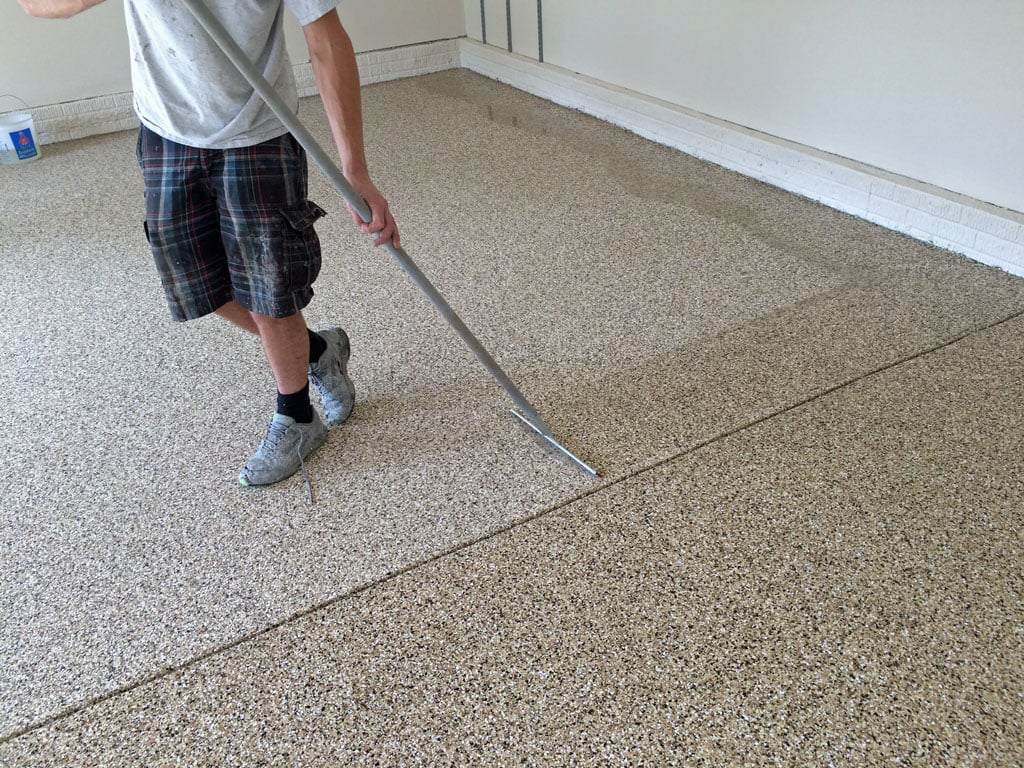
Next, I used a roller with an extension handle to apply the epoxy to the rest of the floor. I worked in small sections, starting at the back of the garage and moving towards the exit. This way, I wouldn’t paint myself into a corner. It’s important to maintain a wet edge while rolling to avoid lap marks and ensure a smooth, uniform finish. I applied the epoxy in a thin, even layer, taking care not to let it pool in any areas.
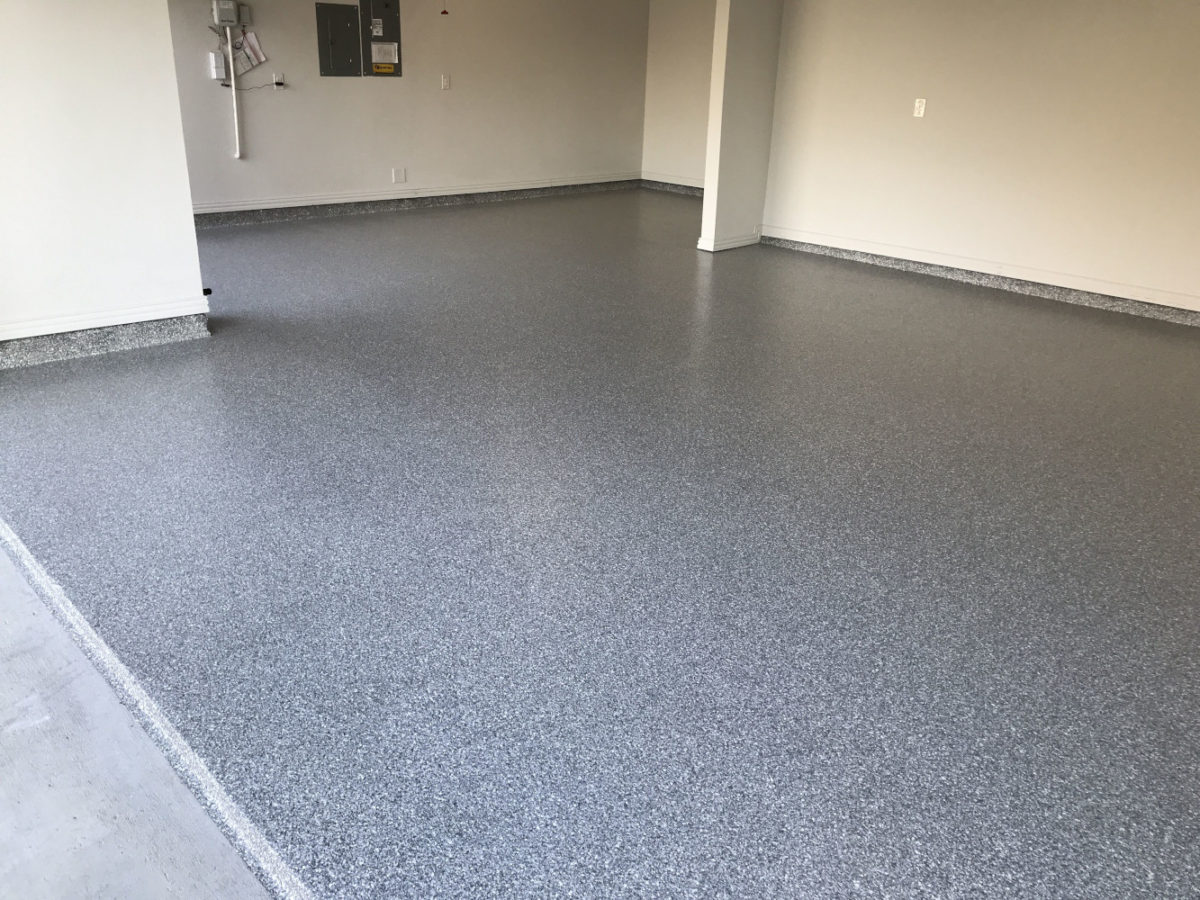
After applying the first coat, I added decorative flakes for a custom look. These flakes not only add visual interest but also help to hide imperfections and increase slip resistance. I scattered the flakes by hand, tossing them up into the air and letting them fall naturally onto the wet epoxy. It’s important to apply the flakes while the epoxy is still wet so they adhere properly.
Once the first coat was dry (which took about 24 hours), I applied a second coat of epoxy. This isn’t always necessary, but I wanted to ensure maximum durability and coverage. The process was the same as the first coat, minus the decorative flakes. The second coat provided a deeper, richer finish and helped to seal in the flakes.
Finally, I applied a clear topcoat to protect the epoxy and give the floor a glossy, polished look. The topcoat also adds another layer of durability, making the floor even more resistant to scratches, chemicals, and wear. I applied the topcoat in the same manner as the epoxy, using a roller for an even finish. After allowing the topcoat to cure for the recommended time, the floor was ready for use.
Applying epoxy can be intimidating, but with careful preparation and attention to detail, the results are well worth it. The floor looked incredible, with a professional finish that transformed the entire garage.
Maintenance Tips and Tricks
After all the hard work of applying the epoxy, I wanted to make sure I maintained the floor properly to keep it looking great for years to come. The good news is that epoxy floors are relatively low maintenance, but there are still a few things to keep in mind to ensure their longevity.
One of the biggest advantages of an epoxy floor is its resistance to stains and spills. However, it’s still important to clean up spills promptly. While the epoxy is resistant to most chemicals, leaving oil, gasoline, or other substances on the floor for extended periods can lead to discoloration or damage. I keep a supply of absorbent mats or rags in the garage so I can quickly clean up any spills as they happen.
Regular sweeping is essential to keep the floor free of dust and debris. While epoxy is resistant to dirt, grit can scratch the surface over time, dulling the finish. I use a soft-bristle broom or a dust mop to sweep the floor regularly. For a deeper clean, I occasionally use a vacuum with a soft brush attachment to get into corners and along the edges.
When it comes to washing the floor, I avoid using harsh chemicals or abrasive cleaners that could damage the epoxy. A simple solution of warm water and mild dish soap is usually all that’s needed to keep the floor looking shiny and new. I mop the floor with a soft mop, being careful not to use too much water. Excess water can seep into any small cracks or imperfections in the epoxy and cause issues down the line.
To maintain the floor’s glossy finish, I occasionally apply a wax or polish specifically designed for epoxy floors. This not only enhances the shine but also adds an extra layer of protection against scratches and wear. I’ve found that applying polish every six months or so keeps the floor looking as good as new.
If I notice any scratches or chips in the epoxy, I address them promptly. Small imperfections can usually be repaired with a touch-up kit, which contains a small amount of epoxy resin and hardener. I clean the damaged area thoroughly, mix the epoxy, and apply it with a small brush. After it cures, the repair is nearly invisible, and the floor’s integrity is restored.
Finally, I’m careful about what I place on the epoxy floor. While the epoxy is incredibly durable, dragging heavy items across the surface can cause scratches or gouges. I use felt pads or rubber mats under heavy equipment or furniture to protect the floor. By taking these simple precautions, I’m confident that my epoxy floor will continue to look amazing for years to come.
Common Mistakes to Avoid
Applying epoxy can be a rewarding DIY project, but it’s easy to make mistakes that can compromise the final result. I want to share some common pitfalls I encountered during my research and how to avoid them.
One of the biggest mistakes is skipping the preparation step. As tempting as it might be to dive right into applying the epoxy, proper preparation is crucial. Failing to clean, patch, and etch the floor properly can lead to poor adhesion, bubbling, and a shorter lifespan for the epoxy. Taking the time to prep the floor thoroughly is the best way to ensure a smooth, long-lasting finish.
Another common mistake is not mixing the epoxy components correctly. The resin and hardener must be mixed in the correct ratio and for the right amount of time. If the mixture isn’t thoroughly combined, the epoxy won’t cure properly, leading to a tacky, uneven surface. It’s also important to mix the components gently to avoid introducing air bubbles, which can create imperfections in the finish.
Rushing the application process is another pitfall to avoid. Epoxy has a limited working time, so it’s important to work efficiently but not too quickly. Applying the epoxy too thickly in one coat can cause it to pool and cure unevenly. It’s better to apply multiple thin coats, allowing each one to cure fully before applying the next. Patience is key to achieving a professional-looking finish.
Not allowing enough curing time is another common mistake. It can be tempting to move furniture or vehicles back into the garage as soon as the epoxy feels dry, but epoxy needs time to cure fully. Rushing this process can result in a weaker finish that’s more prone to damage. I made sure to wait at least 72 hours before placing anything on the floor, and even longer in colder or more humid conditions.
Neglecting safety precautions is another critical mistake. Epoxy contains chemicals that can be harmful if inhaled or if they come into contact with your skin. Proper ventilation, protective clothing, gloves, and a respirator are essential when working with epoxy. It’s also important to keep the area well-ventilated during and after application to avoid any buildup of fumes.
Finally, underestimating the amount of epoxy needed can lead to frustration and a patchy finish. It’s better to have a little extra epoxy on hand than to run out mid-project. Calculating the square footage of your garage and consulting with the epoxy manufacturer about coverage rates will help you determine how much epoxy to buy. I found it helpful to have an extra kit on hand, just in case.
Avoiding these common mistakes can make the difference between a flawless, professional-looking epoxy floor and a disappointing DIY disaster. By taking the time to plan, prepare, and apply the epoxy correctly, I achieved a result I’m proud of.

What is the best type of epoxy for garage floors?
The best type of epoxy for garage floors depends on your specific needs and skill level. 100% solid epoxy is the most durable and provides a thick, resilient finish, but it’s also the most challenging to apply. Water-based epoxy is easier to work with, especially for DIY projects, and still offers good durability. Solvent-based epoxy is a middle ground, offering strong adhesion and a longer working time. If you want a decorative look, metallic epoxy or gravel epoxy might be worth considering.
How long does an epoxy garage floor last?
A well-applied epoxy floor can last between 10 to 20 years, depending on factors like traffic, maintenance, and environmental conditions. Regular sweeping, prompt cleaning of spills, and periodic application of protective wax or polish can extend the life of the epoxy. In commercial or industrial settings, where the floor is subjected to more wear and tear, the lifespan may be shorter, but it’s still a durable option compared to other flooring types.
Can I apply epoxy garage floor coating myself, or should I hire a professional?
Applying epoxy can be a DIY project, but it requires careful preparation and attention to detail. If you’re comfortable with the steps involved—cleaning, etching, patching, mixing, and applying—the process can be rewarding and save you money. However, if you’re unsure or want the best possible finish, hiring a professional might be worth the investment. Professionals have the experience and equipment to apply epoxy efficiently and can often achieve a smoother, more durable finish.

How do I clean and maintain an epoxy garage floor?
Maintaining an epoxy garage floor is relatively simple. Regularly sweep or vacuum the floor to remove dust and debris, which can scratch the surface over time. For cleaning, use a mild detergent mixed with warm water and a soft mop or cloth. Avoid harsh chemicals or abrasive cleaners, which can damage the epoxy. If you notice any stains, address them promptly with a mild cleaner. For extra protection and shine, consider applying a wax or polish designed for epoxy floors every six months.
What should I do if my epoxy floor starts peeling or chipping?
If your epoxy floor starts peeling or chipping, it’s usually a sign that the surface wasn’t properly prepared or that the epoxy didn’t adhere correctly. Small chips can be repaired with a touch-up kit, which typically includes a small amount of epoxy resin and hardener. For larger areas of peeling, you may need to sand down the affected area, clean it thoroughly, and reapply the epoxy. It’s important to address these issues promptly to prevent them from spreading.
Can I apply epoxy over an existing coating or paint?
Applying epoxy over an existing coating or paint is possible, but it requires thorough surface preparation. The existing coating must be in good condition, free of peeling, chipping, or flaking. The surface should be lightly sanded or scuffed to ensure proper adhesion of the new epoxy layer. It’s also essential to clean the surface thoroughly to remove any grease, oil, or dirt. If the existing coating is damaged or not adhering well, it’s better to strip it down to the bare concrete before applying the epoxy.

Epoxy garage floor coating is a fantastic way to upgrade your garage, making it not only more visually appealing but also more durable and easier to maintain. Whether you’re a seasoned DIYer or new to home improvement, understanding the types of epoxy, the application process, and how to care for your floor is essential to achieving the best results. Avoid common mistakes by taking the time to prepare and apply the epoxy correctly, and your garage floor will look stunning for years to come. With the right care, your epoxy floor can withstand the daily wear and tear of garage life, giving you a space that’s both functional and beautiful.
Related Posts: