Understanding the Importance of Proper Garage Floor Preparation
Before diving headfirst into applying epoxy to my garage floor, I thought it would be a quick, simple task. However, I soon learned that the key to a successful epoxy finish lies in how well the floor is prepared. This preparation isn’t just a step to get through; it’s the foundation of the entire process. Properly prepping the floor ensures that the epoxy adheres firmly, providing a lasting and durable finish. Without it, you risk wasting time and effort on an application that will soon peel or crack. Here’s why this preparation is crucial.
- Ensuring Strong Adhesion The bond between the epoxy and the concrete floor is essential for durability. Any dirt, oil, or residue left on the surface acts as a barrier, preventing the epoxy from adhering properly. I learned that without proper preparation, the epoxy might look good initially, but it won’t last. Over time, you’ll likely see peeling or bubbles, all because the floor wasn’t adequately cleaned or prepped.
- Preventing Moisture Issues Moisture is one of the hidden enemies of epoxy applications. If there’s any dampness in the concrete, the epoxy might not cure properly. This can lead to a range of problems, from an uneven finish to large sections peeling off. By preparing the floor thoroughly, including checking for moisture and ensuring it’s completely dry, I could avoid these issues and guarantee a smooth, even application.
- Repairing Cracks and Imperfections Cracks, chips, and uneven sections in the concrete may seem minor at first glance, but they can affect the final outcome of the epoxy coating. When these issues are left unaddressed, the epoxy won’t lay flat and smooth, creating weak spots that can lead to cracks down the line. During the preparation phase, I made sure to inspect and repair any imperfections to create a solid base for the epoxy.
- Removing Old Coatings and Sealants If your garage floor has been sealed or coated before, it’s crucial to remove these before applying epoxy. These old layers can interfere with the bonding process, causing the epoxy to peel off sooner than expected. In my case, I had to strip away an old layer of paint before proceeding, and while it took extra effort, it was well worth it in the long run.
- Enhancing the Longevity of the Epoxy By ensuring a clean, smooth surface, I was essentially laying the groundwork for a longer-lasting epoxy finish. The better the preparation, the longer the coating will last without needing repairs or touch-ups. Skipping or rushing through the prep stage would have meant dealing with premature wear and tear, which could have been easily avoided.
- Achieving a Professional Finish Lastly, proper preparation is the key to that showroom-quality, professional look. The more attention you give to preparing the surface, the smoother and more uniform the epoxy will look. I wanted a high-gloss finish that was both functional and aesthetically pleasing, and proper prep ensured I got exactly that.
Clearing the Garage Space: The First Step to Success
When I began the process of preparing my garage floor for epoxy, the first challenge I encountered was clearing out the entire space. It sounds simple, but when you’ve accumulated years’ worth of tools, bikes, and storage boxes, this can feel like a monumental task. Still, clearing the space is an essential first step. Without doing this properly, it’s impossible to work on the floor effectively or even see all the areas that need attention. Here’s why clearing out the garage completely is so important and how I went about tackling it.
Accessing Every Corner of the Floor The first and most obvious reason for clearing out the garage is to ensure that every inch of the floor is accessible. It’s impossible to properly prep or apply epoxy if large areas are blocked by heavy equipment or storage items. When I cleared my garage, I discovered cracks and stains that I hadn’t even known were there, all hidden beneath the clutter. Clearing the space allowed me to address these issues head-on.
Preventing Contamination During Application Even small particles of dust or debris can ruin the final finish of your epoxy floor. When I cleared out my garage, I realized that items like boxes and shelving can harbor a lot of hidden dust. Without moving everything out, that dust would have eventually made its way onto the freshly prepped surface, compromising the epoxy’s adhesion.
Creating a Safe and Efficient Workspace With everything moved out, I could work much more safely and efficiently. Tripping over stored items or trying to navigate around obstacles would have made the entire process more stressful. By clearing the space entirely, I had room to move freely, making the job go faster and reducing the risk of accidents.
Protecting Your Belongings from Damage Epoxy application involves chemicals that can easily damage your belongings if they come into contact with them. By removing everything from the garage, I ensured that nothing valuable would be exposed to spills or fumes. This peace of mind was worth the extra effort of moving everything outside.
Making Room for Thorough Cleaning Proper floor preparation requires deep cleaning, and that’s only possible when the space is fully cleared. With everything out of the way, I could sweep, vacuum, and wash the floor thoroughly, ensuring no hidden debris would affect the epoxy application. It’s surprising how much dirt can accumulate in areas blocked by storage.
Allowing for an Uninterrupted Epoxy Application Once the floor is prepared and ready for epoxy, the application itself needs to happen in one continuous process. Having a clear, open space made this possible for me. I didn’t have to worry about moving items mid-application or accidentally spilling epoxy on something important. A clear garage makes for a smoother, more efficient epoxy process from start to finish.
Inspecting the Concrete for Cracks and Damage
After clearing out the garage and getting a good look at the bare floor, I quickly realized that inspecting the concrete for cracks and damage was a crucial step. This is something that can easily be overlooked if you’re in a rush to start applying the epoxy, but taking the time to thoroughly assess the condition of the concrete makes a big difference in how well the epoxy will perform over time. Every crack, pit, or imperfection in the concrete is an area where the epoxy might fail if left untreated. Here’s why this step is so important and how I approached it.
Identifying Structural Weaknesses Cracks in the concrete can indicate more than just surface damage. They might point to deeper structural issues that could worsen over time. In my case, I found a few hairline cracks that I initially thought weren’t a big deal, but upon closer inspection, I realized they could allow moisture to seep in, potentially lifting the epoxy down the line. Addressing these weaknesses before applying the epoxy ensured that my floor would be more stable and durable.
Preventing Future Damage One of the main reasons for inspecting and repairing cracks is to prevent them from expanding after the epoxy is applied. I’ve seen instances where small cracks if left untreated, can widen under the pressure of daily use. By taking the time to fill and repair the cracks, I was able to stop any further damage from happening. This not only protected my epoxy investment but also preserved the integrity of the concrete itself.
Ensuring a Smooth, Even Surface When you apply epoxy, any imperfections in the surface will show through the coating. Small chips or uneven areas in the concrete will result in an epoxy floor that looks bumpy or uneven. I wanted a professional-looking finish, so I made sure to smooth out any rough spots and patch any holes before moving forward. The smoother the concrete, the better the epoxy will look once applied.
Improving Epoxy Adhesion Cracks and damaged areas in the concrete can interfere with how well the epoxy bonds to the floor. I learned that unfilled cracks create weak points where the epoxy can lift or peel over time. By inspecting and repairing these areas, I was ensuring that the epoxy had a strong, uninterrupted surface to adhere to, which would keep it looking fresh for years.
Preventing Moisture Intrusion Cracks in concrete can allow moisture to seep in from below, which is a big issue when applying epoxy. Moisture trapped beneath the surface can cause the epoxy to bubble or peel, ruining the finish. During my inspection, I made sure to check for any areas where water might penetrate the concrete. After sealing these cracks, I could move forward with confidence, knowing that moisture wouldn’t be a problem.
Repairing Before It’s Too Late Addressing cracks and damage early on can save a lot of trouble down the road. Waiting until after the epoxy is applied to repair concrete is not only difficult but can also damage the coating. I took the time to inspect the entire floor carefully, using a flashlight to find even the smallest cracks. By repairing them before applying the epoxy, I avoided having to deal with expensive fixes or reapplication later.
Thorough Cleaning: Removing Dirt, Grease, and Contaminants
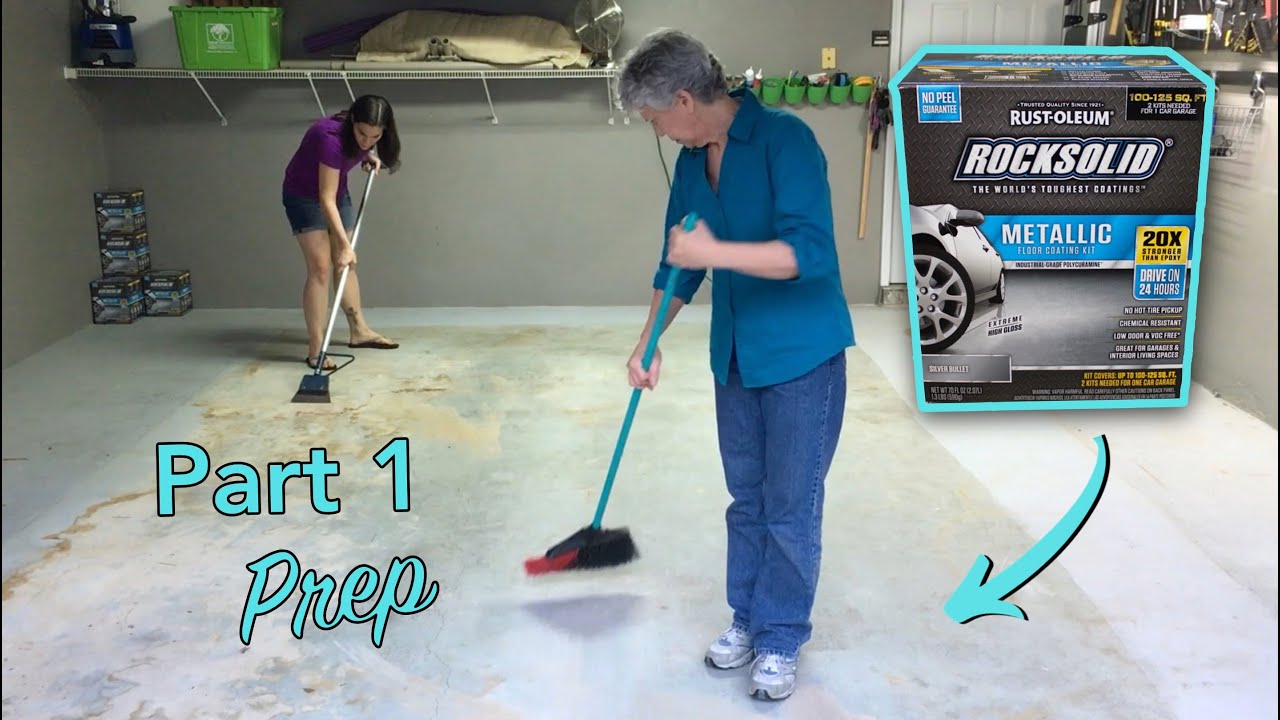
With the cracks and damage repaired, I was ready to move on to cleaning the floor. This might seem like a simple task, but thorough cleaning is one of the most critical steps in preparing for epoxy. Even the smallest amount of dirt, grease, or residue left on the floor can prevent the epoxy from bonding properly, leading to issues like peeling, bubbling, or an uneven finish. I discovered that the cleaner and more contaminant-free the surface, the better the epoxy will adhere and the longer it will last. Here’s how I approached cleaning the garage floor to perfection.
Sweeping Away Loose Debris The first step in cleaning was to sweep away all the loose dirt and debris from the floor. This included dust, leaves, and small particles that had accumulated over time. I found that even though the floor looked clean at first glance, a thorough sweep revealed just how much dust had settled into the cracks and crevices. A good sweep is crucial because these particles can get trapped under the epoxy, causing bumps or imperfections.
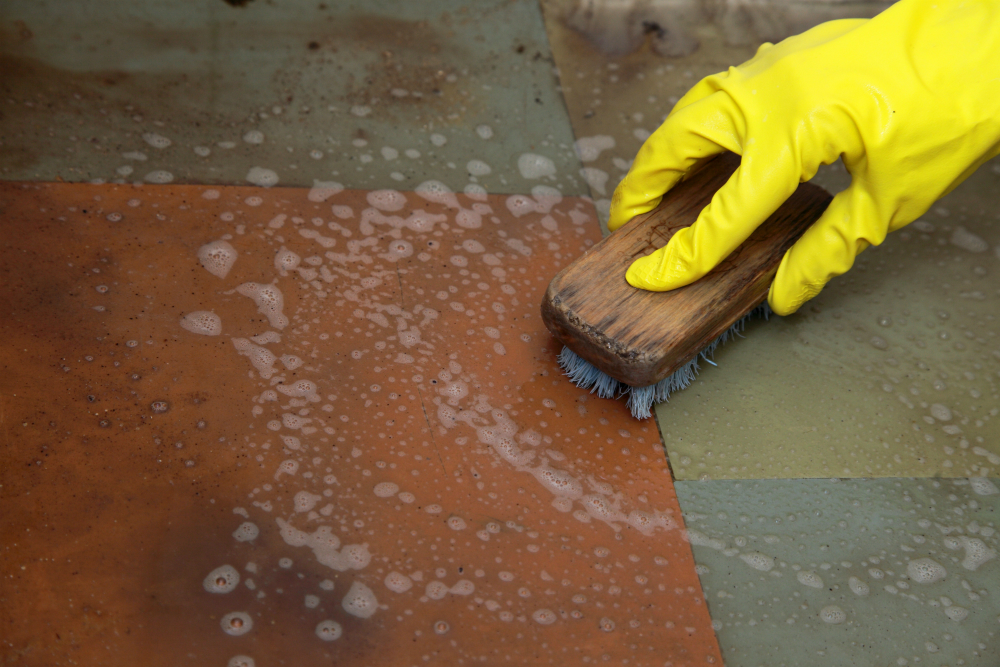
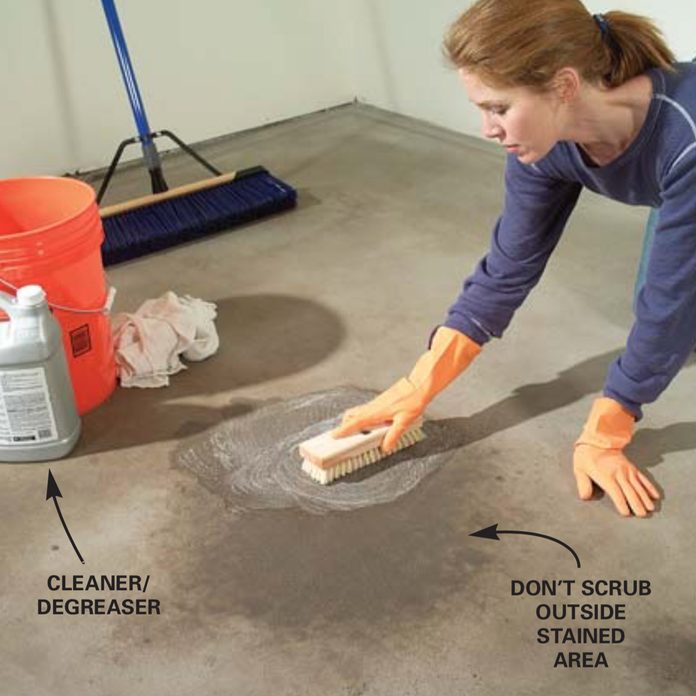
Removing Oil and Grease Stains Oil and grease are the enemies of epoxy adhesion. These stains create a slippery surface that the epoxy can’t stick to. I noticed a few spots where oil had seeped into the concrete, likely from years of car maintenance in the garage. To remove these, I used a degreaser designed specifically for concrete surfaces. It took some scrubbing, but once the stains were gone, I could already see that the surface was much more prepared for the epoxy.
Washing the Floor with a Concrete Cleaner After tackling the oil and grease, it was time to wash the entire floor. I used a concrete cleaner mixed with water, scrubbing the surface thoroughly to ensure that every inch was free of contaminants. This step is often overlooked, but washing the floor removes any remaining dirt, dust, or chemicals that might have been left behind. A clean surface is essential for proper epoxy adhesion, and I wanted to make sure the floor was as clean as possible.
Rinsing and Drying Once the floor was scrubbed clean, I made sure to rinse it thoroughly with water. Any leftover cleaning solutions could affect the epoxy, so rinsing is just as important as the initial wash. After rinsing, I used a wet vacuum to remove the water and speed up the drying process. It’s crucial to let the floor dry completely before moving on to the next step, as moisture can ruin the epoxy application.
Checking for Residual Contaminants After cleaning and drying the floor, I took one more step to ensure it was contaminant-free. Using a flashlight, I checked the floor for any remaining stains or residue that could interfere with the epoxy. This extra step gave me peace of mind, knowing that the surface was perfectly prepped and ready for the epoxy application.
Preparing for the Next Step With the floor thoroughly cleaned, I was ready to move on to the next phase of preparation. I felt confident that I had removed every trace of dirt, grease, and contaminants, ensuring a smooth and successful epoxy application. Cleaning might seem like a small task, but it makes all the difference in achieving a professional, long-lasting finish.

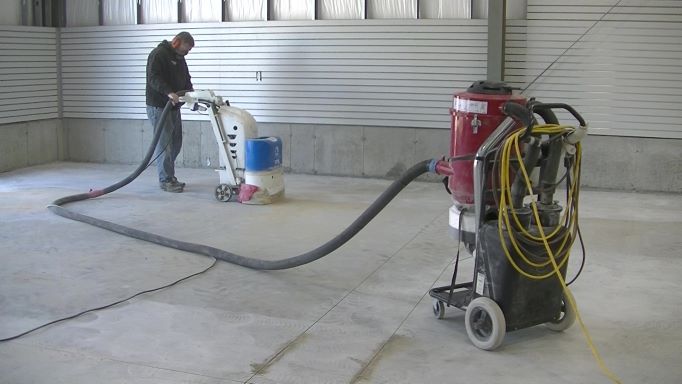
Acid Etching vs. Grinding: Choosing the Right Surface Prep Method
After thoroughly cleaning the floor, I faced one of the biggest decisions in the epoxy preparation process: whether to use acid etching or grinding to prepare the surface. Both methods are designed to roughen the concrete so the epoxy can bond more effectively, but they each have their pros and cons. I spent a lot of time weighing my options, considering the specific needs of my floor and the tools available to me. Choosing the right method was essential for ensuring the longevity and durability of the epoxy. Here’s how I made my decision and the factors I considered along the way.
Understanding Acid Etching Acid etching involves applying a mixture of water and acid, usually muriatic or phosphoric acid, to the concrete surface. This chemical reaction opens the pores of the concrete, creating a rough texture that allows the epoxy to grip the floor. I found that acid etching was a more accessible option for DIYers like myself because it doesn’t require specialized equipment. However, it does involve handling strong chemicals, which can be hazardous if not used properly.
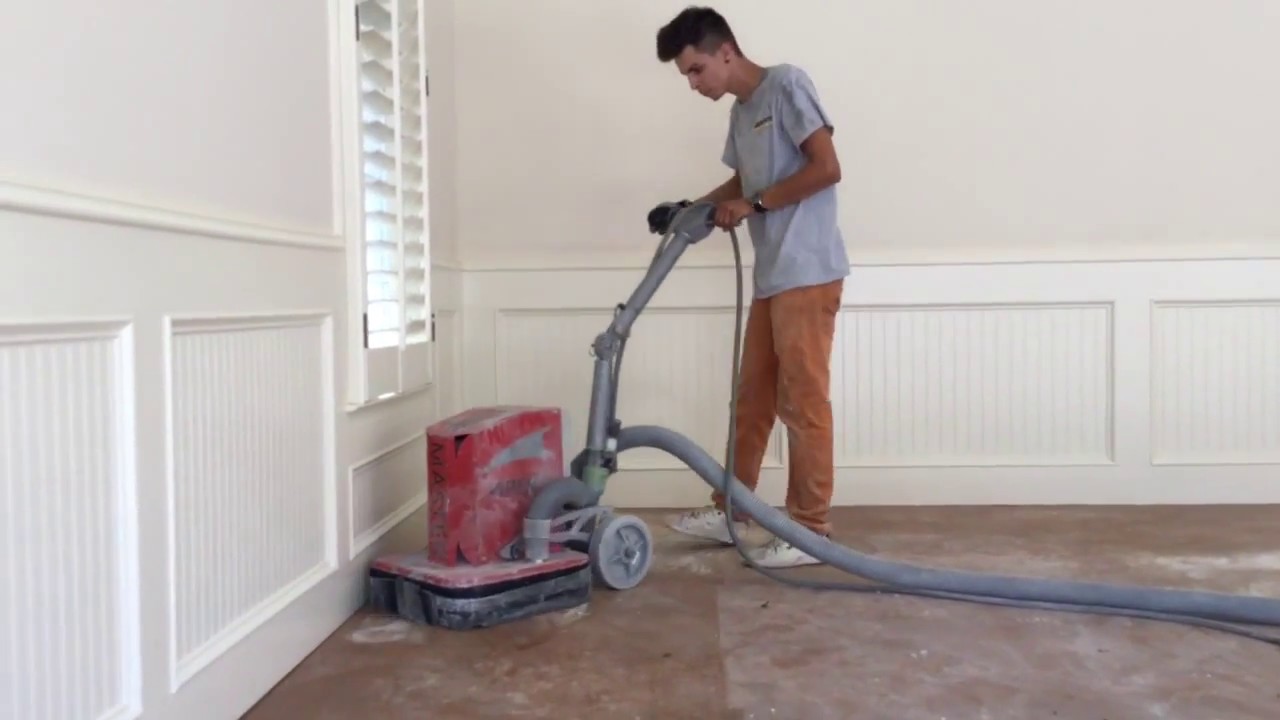
The Benefits of Grinding Grinding, on the other hand, involves using a concrete grinder to mechanically roughen the surface. This method removes a thin layer of the concrete, creating an ideal texture for epoxy adhesion. Although it requires renting a grinder and learning how to use it, grinding offers more control over the final texture of the floor. I realized that grinding also works well for removing stubborn stains or coatings, making it a more thorough preparation method than acid etching.
Safety and Environmental Considerations When choosing between acid etching and grinding, I had to consider the safety implications of both methods. Acid etching involves handling corrosive chemicals, which can be dangerous if not used carefully. I had to wear protective gear and ensure proper ventilation in the garage to avoid inhaling harmful fumes. On the other hand, grinding produces dust, which can be minimized with the right equipment, but still requires a dust mask and proper eye protection. Both methods come with risks, but I found that with proper precautions, either one can be done safely.
Suitability for My Floor Condition The condition of my garage floor was another factor in choosing the right method. Acid etching works well on smooth, clean concrete surfaces, but it may not be as effective if there are significant imperfections, stains, or old coatings. Grinding, however, provides a deeper and more consistent texture, making it ideal for floors with previous coatings or stubborn stains. Since my floor had a few patches that weren’t completely smooth, I opted for grinding, as it would give me more control over the final surface.
Cost and Equipment Considerations I also had to think about the cost and availability of the necessary tools. Acid etching requires only a few inexpensive supplies, like acid, water, and a sprayer, making it a budget-friendly option. Grinding, on the other hand, involves renting a concrete grinder, which can add to the overall cost of the project. However, I decided that the investment in renting a grinder was worth it for the long-term durability of the epoxy. Plus, grinding gave me more confidence in achieving a perfectly prepped surface.
Making the Final Decision In the end, I chose grinding as my surface prep method because it offered more control and was better suited to the condition of my garage floor. I wanted to ensure the best possible adhesion for the epoxy, and grinding gave me the confidence that the surface would be perfectly prepared. However, I can see why acid etching would be a good choice for smoother floors or for those who want to avoid the hassle of renting equipment. Both methods are effective, but it’s all about choosing the one that fits your specific situation.

Drying the Floor: Ensuring Optimal Moisture Levels
Once I completed the surface preparation with grinding, I was almost ready to move on to applying the epoxy. But there was one more crucial step that couldn’t be overlooked—ensuring that the garage floor was completely dry. Moisture can wreak havoc on an epoxy application, causing bubbling, peeling, or improper adhesion. I realized that even a small amount of moisture trapped in the concrete could ruin all my hard work. Drying the floor thoroughly was essential for achieving a smooth and long-lasting finish. Here’s how I approached this step and made sure my floor was moisture-free.
Checking for Moisture Issues Before I even began drying the floor, I needed to check if moisture was present. This is especially important for garage floors, as they’re often in contact with the ground and can absorb moisture over time. I performed a simple moisture test by taping a square of plastic sheeting to the floor and leaving it overnight. When I checked it the next day, any condensation on the underside of the plastic indicated that moisture was present. Thankfully, my floor passed the test, but if moisture had been an issue, I would have had to take additional steps to address it.
Using Fans and Ventilation After thoroughly cleaning and prepping the surface, I opened all the windows and set up several fans to help the floor dry. Proper ventilation is key to speeding up the drying process and preventing moisture from getting trapped in the concrete. I found that leaving the fans on for several hours ensured that the entire floor dried evenly. This step might seem unnecessary, but it’s important to avoid any rushing here—patience pays off when it comes to drying time.
Dealing with Humidity If you live in a humid area, drying the floor can be more challenging. High humidity levels can slow down the drying process and increase the risk of moisture being trapped in the concrete. Since I live in a relatively dry climate, this wasn’t a big issue for me, but I did monitor the weather and waited for a dry, sunny day to complete this step. If humidity had been a concern, I would have used a dehumidifier in the garage to keep moisture levels under control.
Using a Moisture Meter To be sure the floor was dry enough for epoxy application, I used a concrete moisture meter. This device measures the moisture content in the concrete and gives you a clear idea of whether it’s ready for epoxy. Ideally, the moisture level should be below 4% before applying epoxy, and luckily, my floor was well within that range. This gave me peace of mind that I wasn’t risking any adhesion issues due to trapped moisture.
The Importance of Waiting It’s tempting to move ahead with the epoxy application as soon as the floor feels dry, but I learned that it’s crucial to wait a little longer to ensure all the moisture has evaporated. Concrete is porous, so even if the surface seems dry, there could still be moisture lurking deeper down. By waiting a full 24 hours after cleaning and drying the floor, I ensured that it was completely dry and ready for epoxy. Skipping this waiting period could have compromised the entire project.
Preventing Future Moisture Problems After making sure the floor was dry, I also took steps to prevent future moisture issues. I checked the garage door seals and made sure there were no leaks that could allow water to seep in during heavy rain. By sealing any cracks or gaps around the garage, I ensured that moisture wouldn’t become a problem in the future, keeping my epoxy finish in top shape for years to come.

Final Inspection and Patchwork: Getting Ready for Epoxy Application
With the floor dry and all the preparation steps completed, it was time for one last crucial task—a final inspection. This step might feel redundant, especially after all the work that’s already gone into cleaning, repairing, and prepping the surface, but it’s essential for ensuring the epoxy application goes smoothly. I didn’t want to get halfway through applying the epoxy only to realize I missed a spot or left an imperfection behind. Here’s how I went about this final inspection and made sure my floor was in perfect condition for epoxy.
Inspecting for Any Missed Cracks or Damage I started by giving the entire floor a thorough once-over, looking for any cracks or imperfections I might have missed earlier. Even though I had already repaired the most obvious cracks, this final inspection revealed a few small hairline fractures I hadn’t noticed before. By addressing these last-minute issues with concrete filler, I ensured that no weak points would interfere with the epoxy’s adhesion.
Checking for Dust and Debris Dust and debris can easily settle on the floor between the cleaning and epoxy application stages, especially if you’ve left the floor to dry for a while. I used a microfiber mop to sweep the entire surface one last time, making sure it was completely free of dust and dirt. Even the smallest particles can ruin the smooth finish of an epoxy floor, so this step was essential for achieving a professional-looking result.
Smoothing Out Any Uneven Patches During the inspection, I found a few areas where the concrete was slightly uneven, likely from patching up cracks and imperfections. I used fine-grit sandpaper to smooth out these areas, ensuring that the epoxy would go on evenly. This extra bit of patchwork helped create a level surface, which is crucial for a flawless epoxy finish.
Taping Off Edges and Protecting Walls One of the final steps before applying the epoxy was to tape off the edges of the floor and protect the lower portions of the garage walls. This prevented any epoxy from accidentally getting on surfaces where it wasn’t supposed to be. I used painter’s tape along the base of the walls and around any fixtures in the garage, creating a clean, crisp edge for the epoxy application.
Double-Checking Moisture Levels Even though I had already dried the floor, I did one last check with the moisture meter to ensure that no moisture had seeped back into the concrete overnight. The levels were still well below the threshold, confirming that the floor was perfectly dry and ready for the epoxy. This gave me one last bit of confidence before moving forward with the application process.
Getting Ready for the Epoxy After completing the final inspection, I felt fully prepared to apply the epoxy. All the cracks were patched, the floor was clean and smooth, and I had taken every precaution to ensure a successful application. While the inspection might seem like an unnecessary extra step, I found that it gave me peace of mind, knowing that I hadn’t missed anything that could compromise the project. Now, with everything in place, I was ready to start mixing and applying the epoxy for a beautiful, durable garage floor.
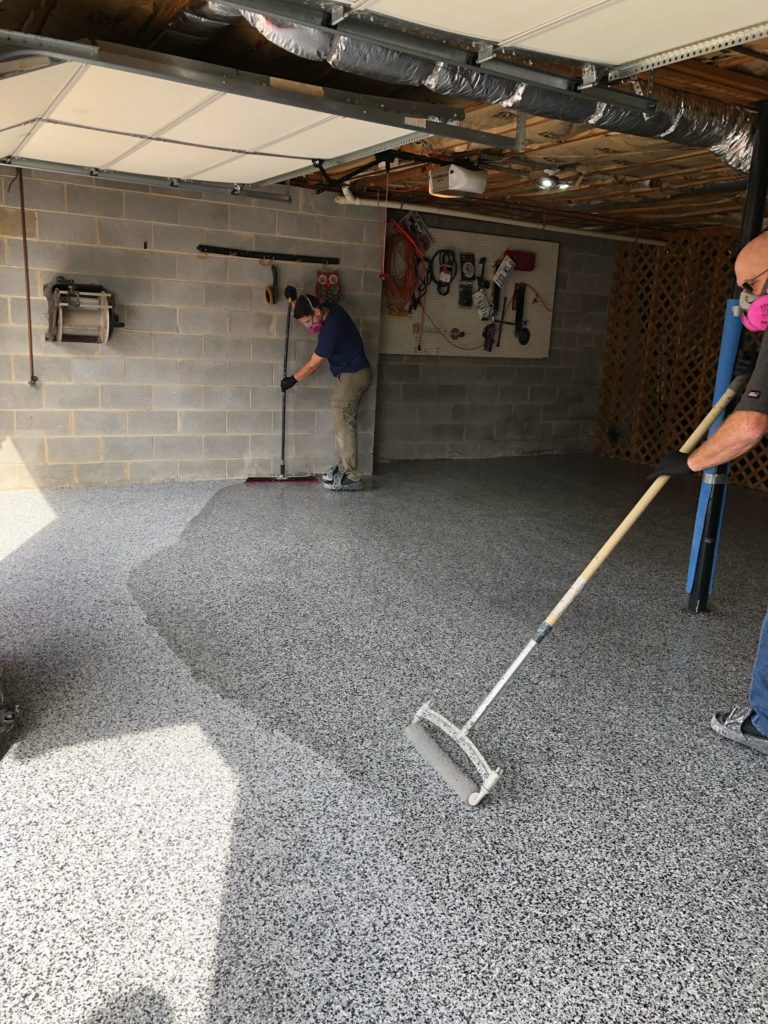
Epoxy Flooring Installation Process – Garage Floor Coating Install

How To Prepare An Epoxy Garage Floor – My 5 Best Methods
How to Epoxy Coat a Garage Floor the Easy Way

How to Paint a Garage Floor By Applying Epoxy
Related Posts: