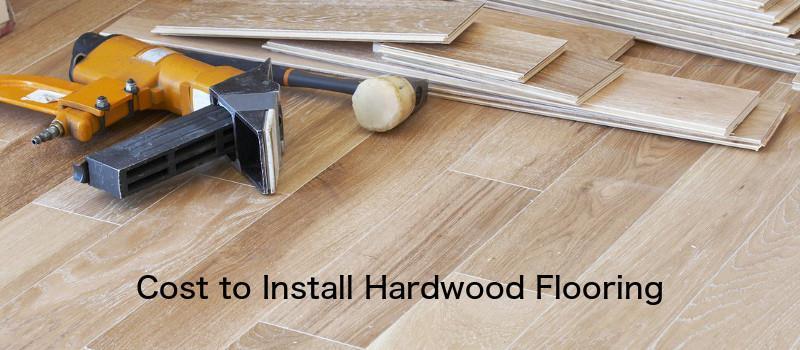
Hardwood Floor Installation DIY to Transform Your Space
Installing hardwood floors yourself can be an incredibly rewarding project. It not only enhances the beauty of your home but also adds significant value. The thought of undertaking such a project might be daunting, but with the right tools, materials, and a bit of patience, it’s entirely doable. I’ve gone through the process myself, and I’m here to walk you through each step, sharing tips and tricks along the way to ensure your project is a success.
Choosing the Right Hardwood for Your Space
Before diving into the installation, the first crucial step is selecting the right hardwood for your space. Hardwood floors come in various types, species, and finishes, each with its characteristics. Your choice will depend on factors like your home’s style, the room’s function, and your budget.
I started by considering the type of hardwood that would work best for my home. Solid hardwood is the traditional choice, known for its durability and ability to be refinished multiple times. However, it’s more sensitive to humidity and temperature changes, making it less ideal for areas like basements. Engineered hardwood, on the other hand, consists of a real wood veneer over a plywood base, providing greater stability in fluctuating environments. I chose engineered hardwood for my basement installation because of its moisture resistance.
Next, I considered the species of wood. Hardwood species vary in hardness, color, and grain pattern. Oak is a popular choice due to its durability and classic look, while maple offers a smoother, more contemporary finish. I wanted a warm, inviting feel in my living room, so I opted for hickory, which has a beautiful grain pattern and is one of the hardest domestic woods, making it ideal for high-traffic areas.
The finish of the hardwood is another important consideration. Prefinished hardwood comes with a factory-applied finish, making installation quicker and cleaner. Unfinished hardwood allows for a custom finish, but it requires sanding and finishing after installation, which can be messy and time-consuming. I went with prefinished hardwood for my DIY project to save time and minimize dust and fumes.
Color and texture also played a significant role in my decision. Darker woods create a more formal, elegant atmosphere, while lighter tones can make a room feel more open and airy. I chose a medium tone with a hand-scraped texture for a rustic yet timeless look that hides scratches and dents better than smooth finishes.
Finally, I calculated the costs and budget. Hardwood flooring can be a significant investment, so it’s essential to consider not just the price of the wood itself but also the underlayment, tools, and any potential finishing costs. I made sure to purchase a little extra material to account for mistakes and future repairs, a tip I highly recommend to avoid last-minute trips to the store.
Choosing the right hardwood is a blend of aesthetic preference, practical considerations, and budget constraints. Taking the time to make informed decisions at this stage can set the foundation for a successful installation.
Gathering Essential Tools and Materials
Once I had my hardwood selected, the next step was gathering all the tools and materials I’d need for the installation. Having everything on hand before starting the project made the process much smoother and helped avoid any unnecessary delays.
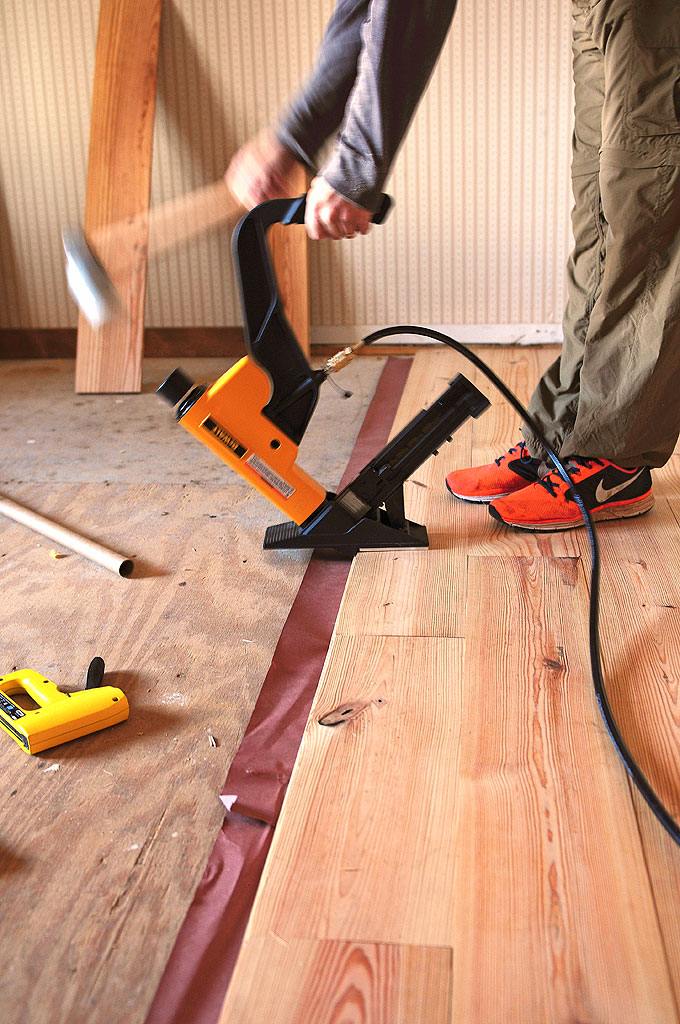
The most critical tool for hardwood installation is a flooring nailer or stapler. This tool is designed to drive nails or staples at the correct angle through the tongue of the hardwood planks, securing them to the subfloor. Since I was using engineered hardwood, I opted for a pneumatic stapler, which was easier on my hands and ensured a tight fit between boards. If you’re working with solid hardwood, a manual flooring nailer might be more appropriate.
Measuring and cutting tools are also essential. I made sure to have a tape measure, a chalk line, and a square for accurate measurements. For cutting the hardwood planks, I used a miter saw for straight cuts and a jigsaw for any notches or irregular cuts around door frames or vents. Having sharp blades is crucial for clean cuts and minimizing splintering.
Underlayment is another key material. It acts as a moisture barrier, provides sound insulation, and smooths out minor imperfections in the subfloor. Since I was installing hardwood over a concrete slab, I used a vapor barrier underlayment specifically designed for this purpose. If you’re installing over plywood, a foam underlayment might be sufficient.
Spacers and shims were indispensable for maintaining the correct gap between the hardwood and the walls. Hardwood expands and contracts with changes in humidity, so leaving a gap of about 3/8 to 3/4 inch along the perimeter is essential to prevent buckling. I used spacers to ensure a consistent gap and removed them once the installation was complete.
Adhesives and fasteners are also necessary, depending on the installation method. Since I was using the nail-down method, I didn’t need adhesive, but if you’re using a glue-down or floating method, be sure to select the appropriate adhesive or fasteners for your specific flooring type. Following the manufacturer’s recommendations is crucial to ensure a long-lasting installation.
Finally, I gathered safety equipment. Installing hardwood involves working with power tools, sharp blades, and potentially hazardous dust. I made sure to have safety glasses, ear protection, and a dust mask to protect myself during the installation. Knee pads also came in handy, as the project required a lot of kneeling on hard surfaces.
By gathering all the necessary tools and materials beforehand, I was able to work more efficiently and avoid the frustration of pausing the project to run out for supplies. This preparation step is vital to ensure a smooth and successful installation.

Preparing Your Subfloor for Installation
With the tools and materials ready, the next crucial step was preparing the subfloor. Proper subfloor preparation is key to ensuring a smooth and durable hardwood floor installation. Skipping this step can lead to issues down the road, such as squeaking, uneven floors, or even damage to the hardwood itself.
The first thing I did was inspect the subfloor for any signs of damage. Since I was installing over a concrete slab in my basement, I checked for cracks, moisture issues, and any uneven spots. For those installing over plywood, look for loose boards, squeaks, and water damage. Addressing these issues before installing the hardwood is essential for a stable and secure floor.
Next, I tested the moisture levels in the subfloor. Hardwood is sensitive to moisture, and installing it over a damp subfloor can lead to warping and other problems. I used a moisture meter to ensure the levels were within the recommended range for hardwood installation. If the subfloor is too moist, consider using a dehumidifier or waiting until conditions improve before proceeding.
Leveling the subfloor was the next step. Any uneven spots can cause the hardwood to flex or create gaps between the planks. I used a long level to check for any high or low spots across the entire floor. In areas where the concrete was uneven, I applied a self-leveling compound to create a flat, smooth surface. For plywood subfloors, sanding down high spots or shimming low spots may be necessary.

After leveling, I thoroughly cleaned the subfloor to remove any dust, debris, or loose particles. A clean surface ensures better adhesion of the underlayment and a more secure fit for the hardwood planks. I vacuumed the entire area and wiped it down with a damp cloth to remove any remaining dust.
Once the subfloor was clean and dry, I laid down the underlayment. This step is crucial for moisture control and sound insulation. I rolled out the underlayment across the entire floor, making sure to overlap the edges and secure them with tape. For my installation over a concrete slab, I used a moisture barrier underlayment to protect the hardwood from potential moisture issues.
Finally, I took the time to acclimate the hardwood planks to the room’s environment. Hardwood expands and contracts with changes in humidity, so it’s important to let the planks sit in the room where they’ll be installed for at least 48 hours before beginning the installation. This allows the wood to adjust to the room’s temperature and humidity levels, reducing the risk of gaps or buckling after installation.
Properly preparing the subfloor may seem tedious, but it’s a critical step in ensuring a successful hardwood floor installation. By taking the time to address any issues and create a clean, level, and dry surface, I set the stage for a smooth and durable floor that will last for years.
Step-by-Step Installation Process
With the subfloor prepared and the hardwood acclimated, it was finally time to start the installation. This step is where all the preparation pays off, and the transformation of the space begins. While the process requires patience and attention to detail, following a methodical approach makes it manageable.
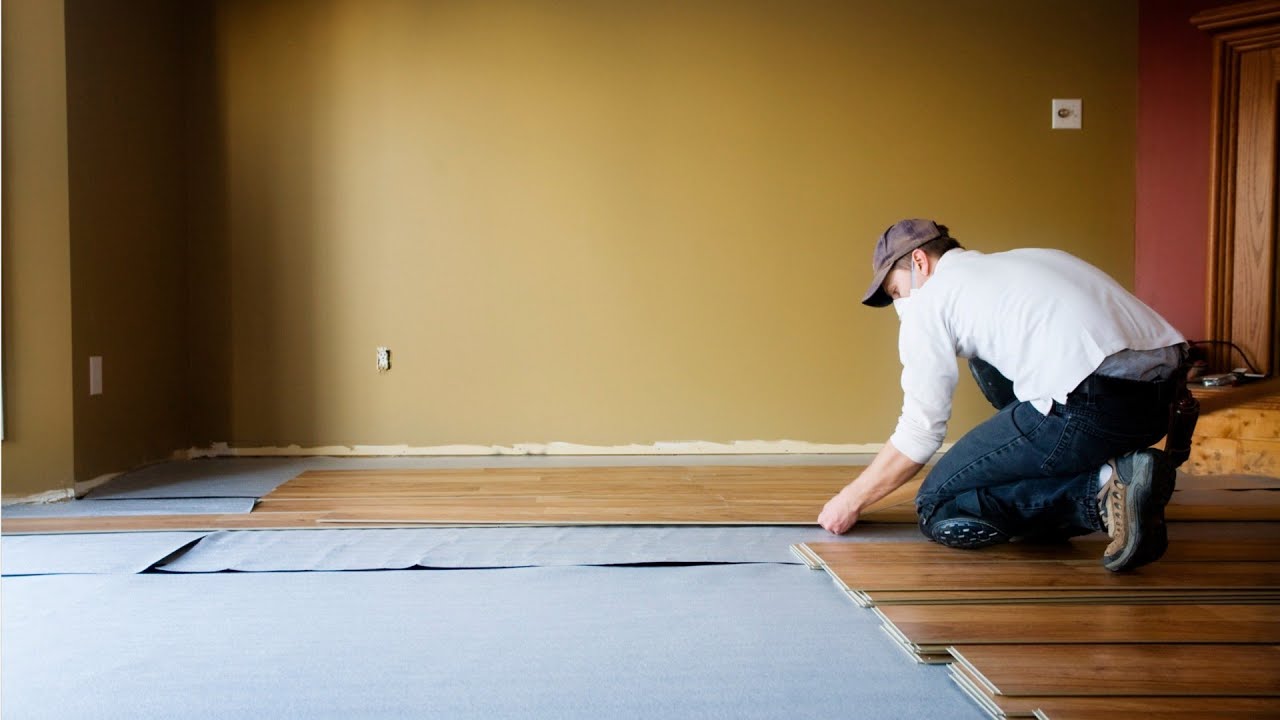
I started by planning the layout of the planks. It’s important to decide on the direction of the planks before beginning, as this will affect the overall look of the floor. Running the planks parallel to the longest wall or the main light source can make the room appear larger. I chose to run the planks parallel to the longest wall for a more seamless look.
Once I had the layout planned, I began by installing the first row of planks. This row sets the foundation for the entire floor, so it’s crucial to get it right. I started along the longest wall, using spacers to maintain the expansion gap between the planks and the wall. I took extra care to ensure the first row was perfectly straight, as any deviation would be magnified across the entire floor.
With the first row in place, I continued by installing the remaining rows. I staggered the end joints of the planks to create a more natural look and enhance the floor’s stability. To achieve this, I used planks of varying lengths, ensuring that the end joints were at least 6 inches apart in adjacent rows. This not only improves the aesthetics but also prevents weak points on the floor.

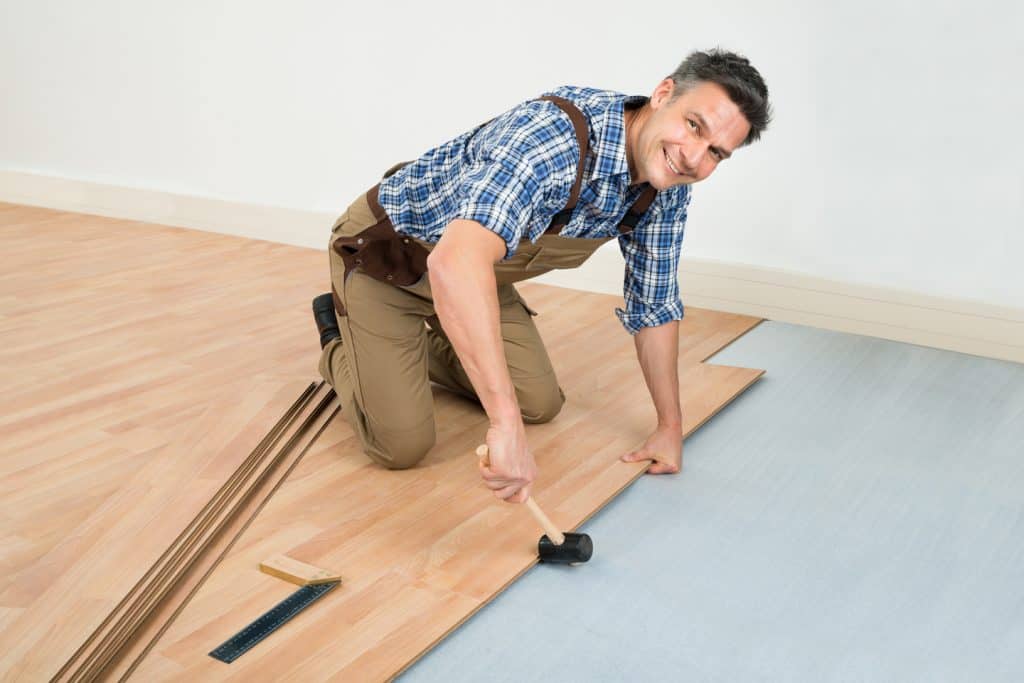
As I installed each row, I used the flooring stapler to secure the planks to the subfloor. I positioned the stapler over the tongue of each plank and struck it with a mallet to drive the staple in at the correct angle. This step required a bit of practice to get the hang of it, but once I did, the installation moved along smoothly. I made sure to check the alignment of each row as I went to prevent any gaps or misalignments.
Cutting planks to fit around obstacles like doorways, vents, and corners was another important aspect of the installation. I used a jigsaw to make precise cuts and ensured a snug fit around these areas. In some cases, I needed to undercut door frames to slide the planks underneath for a seamless look. This step required patience and careful measuring, but the result was well worth the effort.
Finally, I installed the last row of planks, which often require trimming to fit. I measured the width of the remaining space, taking into account the expansion gap, and cut the planks to size. Installing the last row was a bit tricky, as there’s usually less space to work with, but with some careful maneuvering, I was able to secure the final planks in place.
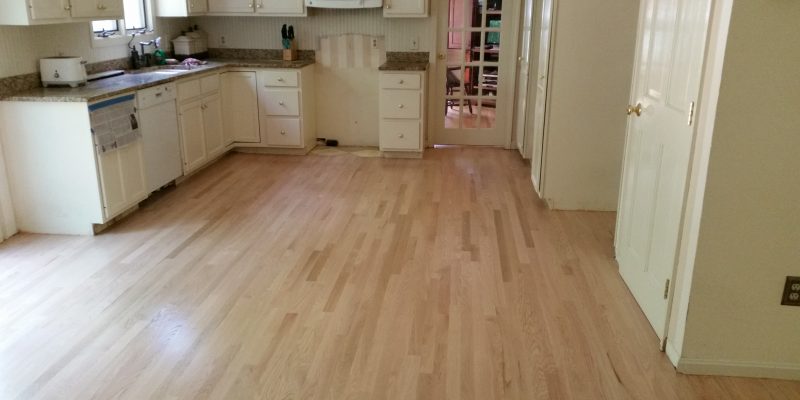
The installation process took time and required attention to detail, but seeing the floor take shape was incredibly satisfying. By following a systematic approach and taking my time, I was able to achieve a professional-looking result that transformed my space.
Finishing Touches and Cleanup
After completing the installation, the final step was to add the finishing touches and clean up the workspace. These last details are what truly complete the project, giving the floor a polished, professional appearance.
The first thing I did was remove the spacers used during installation. These were essential for maintaining the expansion gap, but once the planks were securely in place, the spacers were no longer needed. Removing them was a simple task, but it’s important to do it carefully to avoid damaging the planks.
Next, I installed the baseboards and trim to cover the expansion gaps along the walls. Baseboards not only conceal the gaps but also add a finished look to the room. I chose a baseboard style that complemented the room’s decor and used a miter saw to cut the pieces to fit. Installing the baseboards required careful measuring and cutting, but it was a straightforward process.
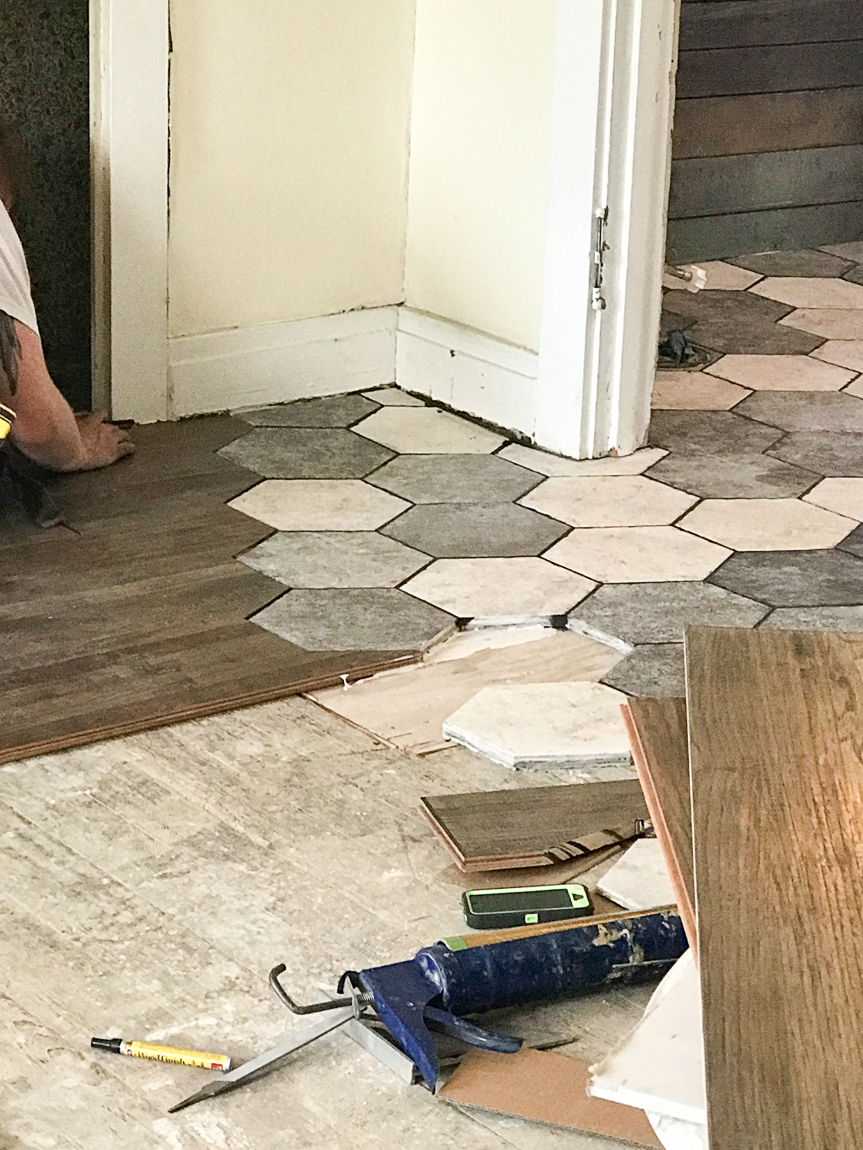
In areas where the floor met a different type of flooring, such as tile or carpet, I installed transition strips. These strips create a smooth transition between different flooring types and prevent tripping hazards. I selected transition strips that matched the hardwood for a cohesive look. Installing them was a quick process that added to the overall finished appearance.
Once the baseboards and transitions were in place, I turned my attention to touching up any imperfections. During installation, it’s common to have small gaps or visible nail holes. I used wood filler in a color that matched the hardwood to fill any gaps and holes, then sanded the areas lightly to blend them with the surrounding floor. This step made a big difference in achieving a seamless look.
With the finishing touches complete, the last step was a thorough cleanup. I vacuumed the entire floor to remove any dust and debris left from the installation. Since I had used prefinished hardwood, I didn’t need to apply a finish, but if you’re working with unfinished wood, this is the time to sand and apply your chosen finish. Cleaning up the workspace was a satisfying end to the project, leaving me with a beautiful, new floor.
The finishing touches are what take a hardwood floor installation from good to great. By paying attention to these details and taking the time to do them right, I was able to achieve a polished, professional result that I’m proud of.
Maintaining Your New Hardwood Floors
Installing hardwood floors is a significant investment, both in terms of time and money. To ensure your new floors stay beautiful and last for years, proper maintenance is essential. With a few simple steps, you can keep your hardwood floors looking as good as the day they were installed.
The first and most important aspect of maintenance is regular cleaning. Dust and dirt can act like sandpaper on hardwood floors, scratching the surface and dulling the finish. I make it a habit to sweep or vacuum my floors daily, using a soft-bristle broom or a vacuum designed for hardwood floors. This helps to remove debris before it can cause damage.
In addition to regular sweeping, mopping with care is crucial. Water is the enemy of hardwood, so I avoid using excessive amounts when cleaning. Instead, I use a damp mop with a hardwood-specific cleaner, making sure to wring out the mop thoroughly before use. For areas that need extra attention, a slightly damp cloth does the trick. It’s important to avoid steam mops or harsh chemicals, as these can damage the finish.
Protecting the floor from scratches is another key aspect of maintenance. I’ve added felt pads to the bottoms of all my furniture legs to prevent scratches when moving them. For high-traffic areas, I’ve placed rugs or mats to catch dirt and debris before it reaches the hardwood. It’s also a good idea to implement a no-shoes policy indoors to prevent dirt and grit from being tracked in.
Managing humidity levels is also essential for maintaining hardwood floors. Wood naturally expands and contracts with changes in humidity, which can cause gaps or buckling if not properly managed. I use a humidifier in the winter to prevent the air from getting too dry and a dehumidifier in the summer to keep the moisture levels in check. Ideally, indoor humidity should be kept between 30% and 50% to prevent issues.
Over time, even well-maintained floors can develop minor scratches and wear. For small scratches, I use a touch-up pen or wood marker in a matching color to hide the blemish. For deeper scratches, sanding and refinishing may be necessary. Depending on the severity of the damage, this can be done as a DIY project or by a professional. I plan to refinish my floors every 7-10 years to keep them looking their best.
Finally, I make sure to address any issues immediately. If I notice a spill, I clean it up right away to prevent staining. If I hear a squeak, I investigate the cause and fix it before it worsens. Taking care of problems as they arise ensures that my hardwood floors remain beautiful and functional for years to come.
Maintaining hardwood floors may require a bit of effort, but the result is well worth it. By following these simple steps, I’ve been able to keep my floors in top condition, enjoying their beauty and durability every day.

Common Mistakes to Avoid
When taking on a DIY hardwood floor installation, it’s easy to make mistakes that can compromise the quality of your work. From improper preparation to rushing through the installation, these errors can lead to costly repairs and frustration down the road. Here are some common mistakes to avoid:
Skipping Subfloor Preparation: One of the most common mistakes is failing to properly prepare the subfloor. This step is crucial for a smooth installation. Neglecting to level the subfloor, address moisture issues, or clean it thoroughly can lead to problems like squeaking, gaps, or even warping of the hardwood planks.
Ignoring Acclimation: Acclimating the hardwood planks to the room’s environment is essential to prevent issues like buckling or gaps. Skipping this step can lead to significant problems after installation. Always allow the planks to sit in the room for at least 48 hours to adjust to the temperature and humidity.
Using the Wrong Tools: Not having the right tools for the job can make the installation more difficult and lead to mistakes. For example, using a regular hammer instead of a flooring nailer can result in improperly secured planks. Investing in the right tools, or renting them if necessary, is key to a successful installation.
Rushing the Installation: Installing hardwood floors requires patience and precision. Rushing through the process can lead to misaligned planks, visible gaps, and uneven flooring. Take your time with each step, especially when cutting and fitting the planks around obstacles.
Improper Nailing or Stapling: Incorrectly nailing or stapling the planks can cause them to come loose over time. It’s important to follow the manufacturer’s recommendations for the correct angle and spacing of nails or staples. Over-driving or under-driving fasteners can also damage the planks or leave them insecure.
Neglecting Expansion Gaps: Wood naturally expands and contracts with changes in humidity. Failing to leave adequate expansion gaps around the perimeter of the room can cause the floor to buckle as it expands. Always use spacers to maintain a consistent gap, and ensure it’s covered by baseboards or trim after installation.

How long does it take to install hardwood floors?
The time it takes to install hardwood floors can vary depending on the size of the room, the complexity of the layout, and your level of experience. For a standard room, it can take anywhere from one to three days to complete the installation. This doesn’t include time for subfloor preparation or acclimating the wood, which can add a few more days to the project. Rushing the installation can lead to mistakes, so it’s important to plan for a few days of work.
Can I install hardwood floors over an existing floor?
Yes, you can install hardwood floors over an existing floor in some cases, but it depends on the type of flooring you’re covering and its condition. Hardwood can be installed over concrete, plywood, and even some types of tile, but the existing floor must be level, dry, and in good condition. In some cases, you may need to remove the old flooring or add an underlayment to ensure a smooth installation.
Do I need to finish the hardwood after installation?
If you’re installing prefinished hardwood, the planks already have a protective finish, so you won’t need to apply one after installation. However, if you’re working with unfinished hardwood, you’ll need to sand, stain, and finish the floor after it’s installed. This process adds time to the project but allows for customization of the color and finish.

What’s the best way to clean hardwood floors after installation?
After installing hardwood floors, it’s important to clean them properly to maintain their appearance. Start by vacuuming or sweeping to remove dust and debris. Use a damp (not wet) mop with a hardwood-specific cleaner to gently clean the surface. Avoid using excessive water or harsh chemicals, as these can damage the finish. Regular cleaning will help keep your floors looking their best.
Can I install hardwood floors myself, or should I hire a professional?
Installing hardwood floors as a DIY project is certainly possible, especially if you have experience with home improvement tasks. However, it’s important to be aware of the challenges involved, such as subfloor preparation, precise cutting, and proper nailing techniques. If you’re unsure of your skills or have a large, complex area to cover, hiring a professional might be a better option to ensure a high-quality result.
How do I prevent gaps between hardwood planks?
Gaps between hardwood planks can occur if the wood isn’t properly acclimated to the room’s environment before installation. To prevent this, make sure to allow the planks to acclimate for at least 48 hours in the room where they’ll be installed. Also, maintain consistent humidity levels in your home to prevent the wood from expanding and contracting excessively. If gaps do appear, they can often be filled with wood filler, but preventing them in the first place is the best approach.
Related Posts: