Introduction to Hardwood Floor Removal
Hardwood floors, renowned for their timeless beauty and durability, can occasionally require removal. This might be due to damage, the desire for a new aesthetic, or structural repairs. Removing hardwood flooring is not a simple task and often requires specialized tools to ensure the process is efficient and minimally damaging to the subfloor. Understanding the tools available for this task can make the difference between a smooth, effective removal and a prolonged, challenging ordeal.
Hardwood floors are typically installed using nails, staples, or glue, each method requiring different tools for removal. The process generally involves breaking the bond between the hardwood and the subfloor, which can be strenuous without the right equipment. Consequently, knowing which tools to use and how to use them can save considerable time and effort.
Common reasons for hardwood floor removal include severe water damage, widespread wear and tear, or a change in interior design preferences. In some cases, homeowners may want to salvage the old hardwood for reuse, which requires even more meticulous removal techniques to avoid damaging the planks. Proper tool selection is crucial in these scenarios.
Removing hardwood floors also presents an opportunity to inspect and repair the subfloor. Over time, subfloors can develop issues that are not visible until the hardwood is removed. Addressing these problems during the removal process ensures the new flooring will be installed on a sound foundation, contributing to its longevity and performance.
Preparation is a key aspect of hardwood floor removal. This includes removing all furniture and appliances from the area, ensuring safety gear is worn, and having a clear plan for the disposal of old flooring materials. Proper preparation minimizes disruptions and hazards during the removal process.
Hardwood floor removal is a significant undertaking that requires careful planning and the right tools. Whether the goal is to replace damaged flooring or update a room’s appearance, understanding the tools and techniques involved can help ensure the project is completed efficiently and effectively.
Essential Tools for Hardwood Floor Removal
Several tools are essential for removing hardwood floors effectively. Each tool serves a specific purpose and can significantly impact the ease and speed of the removal process. Here are some of the most important tools you’ll need:
Pry Bar: A pry bar, or crowbar, is a fundamental tool for removing nailed or stapled hardwood flooring. It is used to lift and separate the planks from the subfloor. The flat, angled end of the pry bar is ideal for getting under the planks and levering them up without causing excessive damage.
Hammer: A hammer is used in conjunction with the pry bar to drive it under the floorboards. It’s also useful for removing nails that may remain in the subfloor after the planks have been lifted. A claw hammer, in particular, can be handy for pulling out stubborn nails.
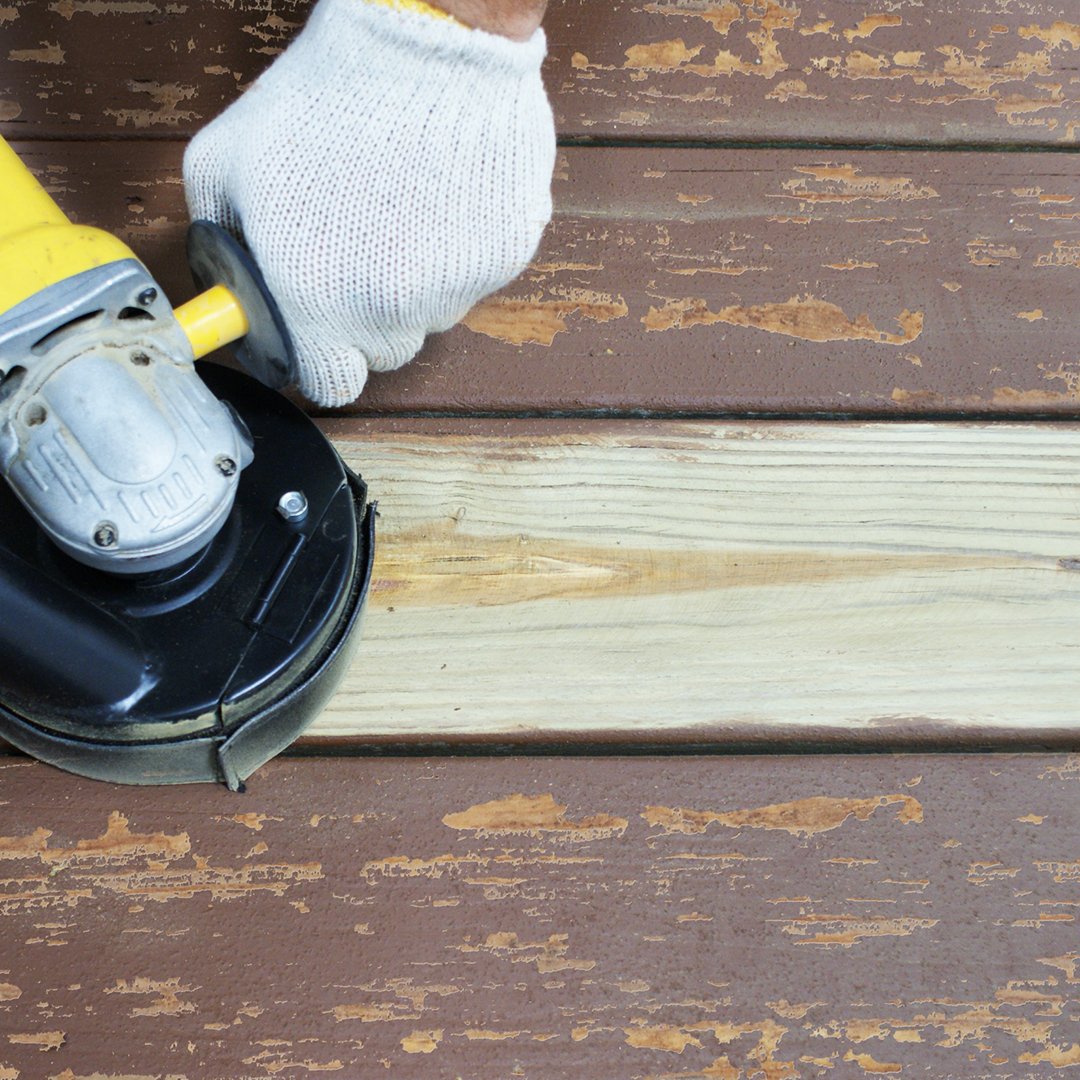
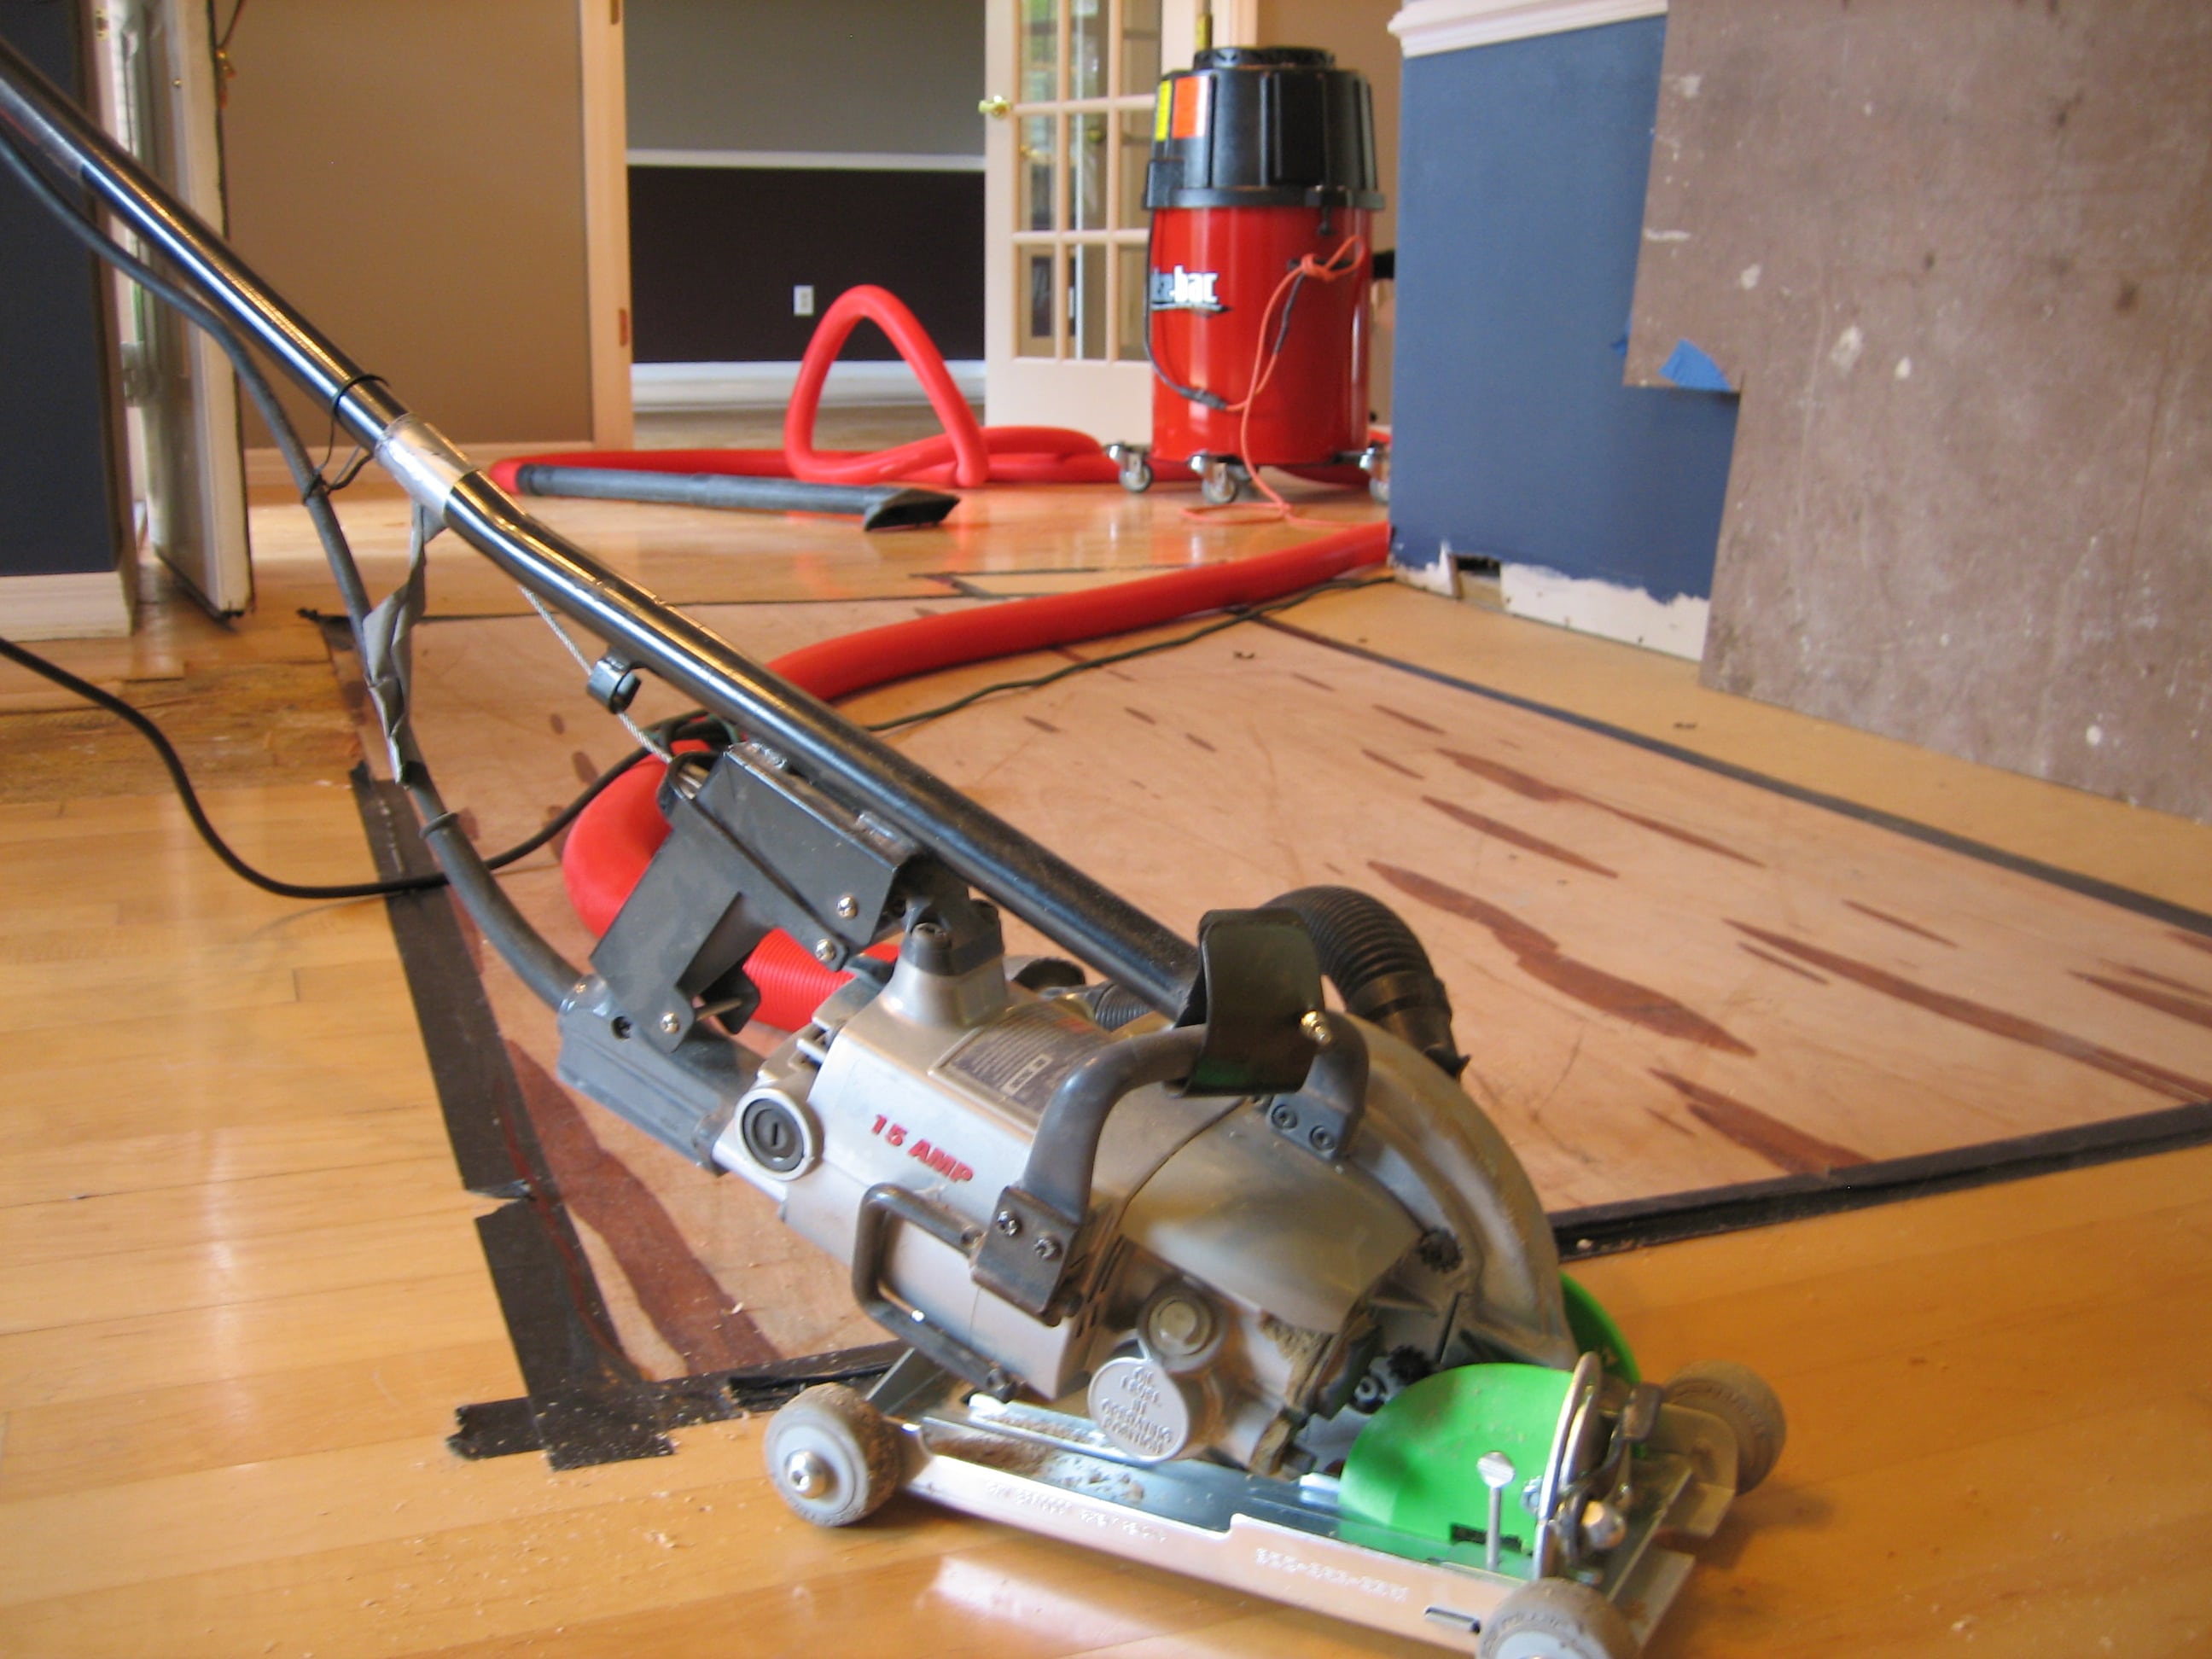
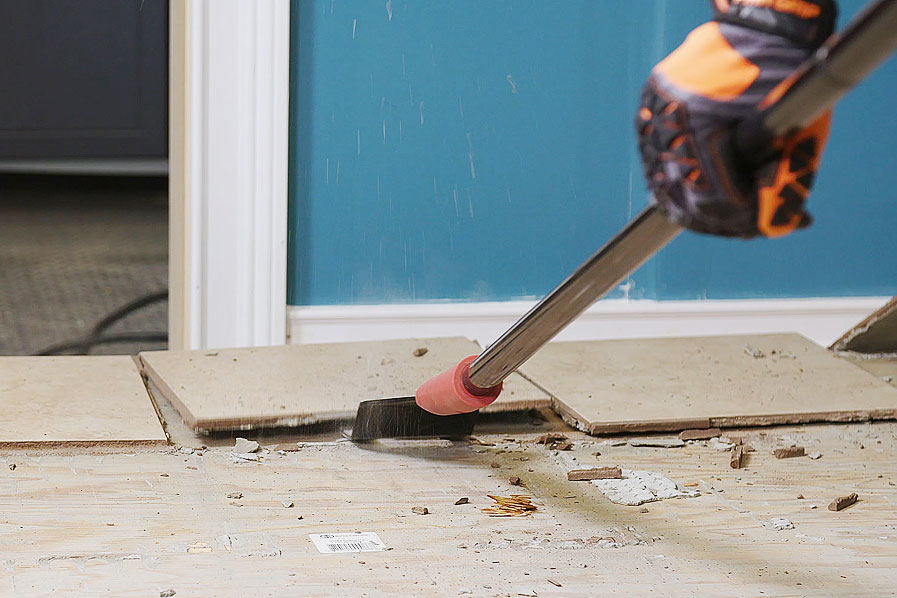
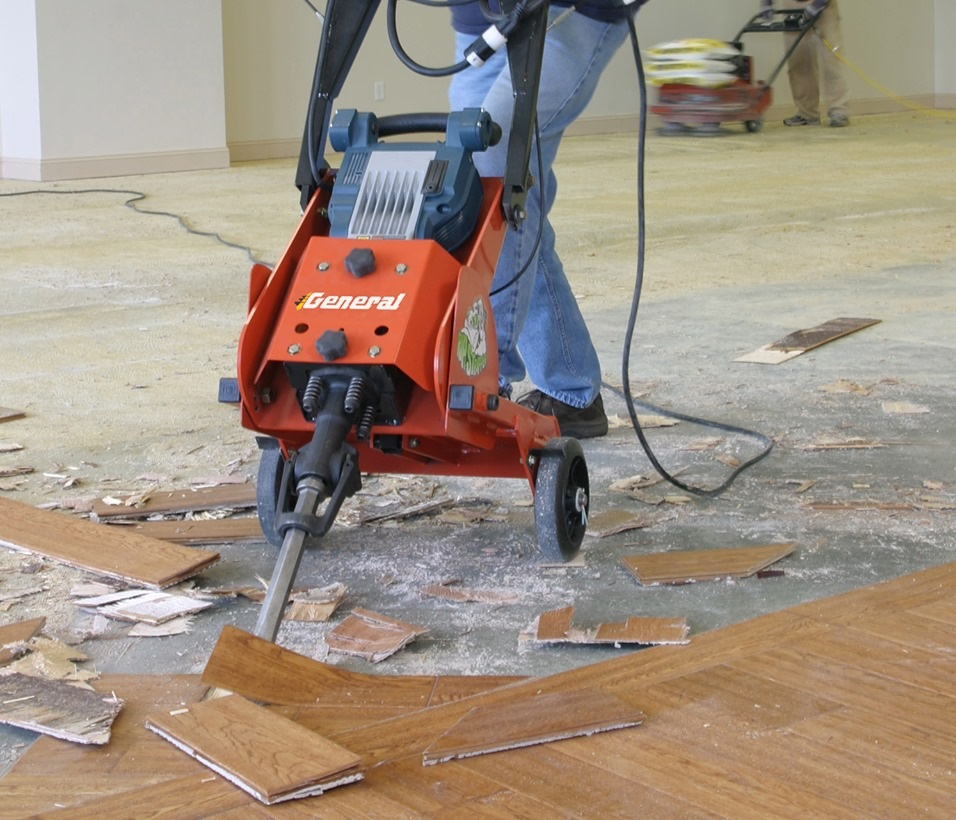
Flooring Scraper: For glued hardwood floors, a flooring scraper is essential. This tool helps to break the adhesive bond between the hardwood planks and the subfloor. There are manual scrapers, which require physical effort, and powered scrapers, which can make the job quicker and easier.
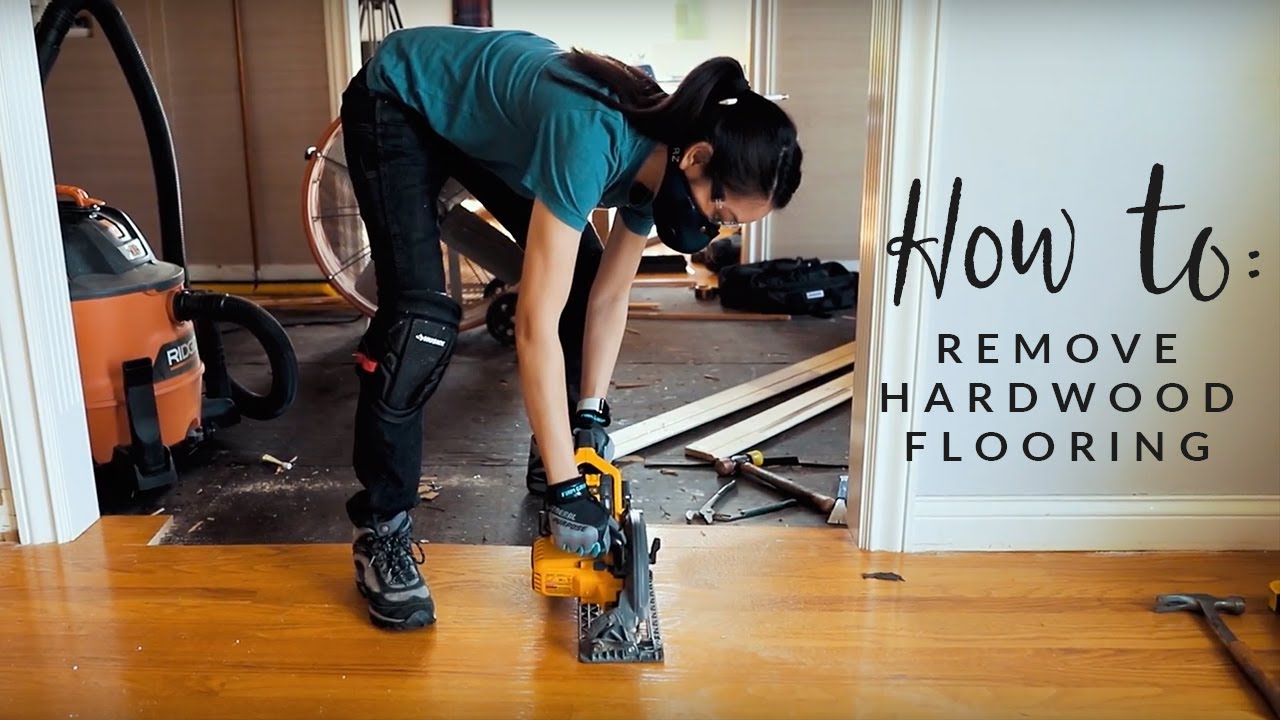
Circular Saw: A circular saw can be used to cut the hardwood planks into smaller sections, making them easier to remove. This is especially useful for large areas of flooring. Setting the saw blade to the depth of the hardwood ensures you do not cut into the subfloor.
Heat Gun: A heat gun can be useful for loosening adhesive on glued-down hardwood floors. By applying heat to the planks, the adhesive softens, making it easier to lift the planks without damaging them. This tool is particularly helpful for preserving the condition of the hardwood if you plan to reuse it.
Nail Puller: After the planks are removed, there will often be nails left in the subfloor. A nail puller, or cat’s paw, is designed to grip and extract these nails efficiently. This tool helps ensure the subfloor is clean and ready for new flooring installation.

Steps in Hardwood Floor Removal
The process of removing hardwood floors involves several steps, each requiring attention to detail and the use of appropriate tools. Here’s a detailed look at the typical steps involved:
-
Preparation: Begin by clearing the room of all furniture and appliances. Ensure you have all necessary tools on hand and wear appropriate safety gear, including gloves, safety glasses, and a dust mask. If the flooring is glued down, consider using a heat gun to soften the adhesive before starting.
-
Cutting the Flooring: For large areas, use a circular saw to cut the hardwood planks into smaller sections. This makes them easier to lift and handle. Set the saw blade to the depth of the hardwood to avoid cutting into the subfloor. Cut across the planks in manageable lengths, typically around 12 to 24 inches.
-
Removing the Planks: Start at one end of the room and use a pry bar and hammer to lift the first plank. Insert the pry bar under the plank and apply downward pressure to lift it. For nailed or stapled floors, work slowly to avoid splintering the wood. For glued floors, use a flooring scraper to break the adhesive bond as you lift the planks.

-
Dealing with Nails and Staples: After the planks are removed, you’ll need to address the nails or staples left in the subfloor. Use a hammer or nail puller to extract them. Be thorough in this step to ensure the subfloor is clean and ready for the new flooring. Nails and staples can damage new flooring if left in place.
-
Cleaning the Subfloor: Once all the planks, nails, and staples are removed, thoroughly clean the subfloor. Sweep or vacuum to remove any debris, and check for any damage that may need repair. A clean, level subfloor is essential for the successful installation of new flooring.
-
Disposal of Old Flooring: Finally, dispose of the old hardwood flooring materials. Check with local waste management services for disposal guidelines, as some areas have specific rules for construction debris. Consider recycling the old hardwood if it’s in good condition or repurposing it for other projects.
Tips for Efficient Hardwood Floor Removal
Efficiency in hardwood floor removal is key to minimizing the time and effort involved. Here are some tips to help streamline the process and achieve the best results:
Plan Ahead: Before starting, plan the removal process. Identify where you will start and finish, and organize your tools and materials. This helps prevent unnecessary delays and ensures you have everything you need at hand.
Use the Right Tools: Having the correct tools for the job is crucial. Invest in quality tools like a sturdy pry bar, a reliable circular saw, and a good flooring scraper. Using appropriate tools not only speeds up the process but also reduces the risk of damaging the subfloor.
Work in Sections: Break the project into manageable sections. Working in smaller areas allows you to focus on one part of the floor at a time, making the process more organized and less overwhelming. It also makes it easier to handle debris and clean up as you go.
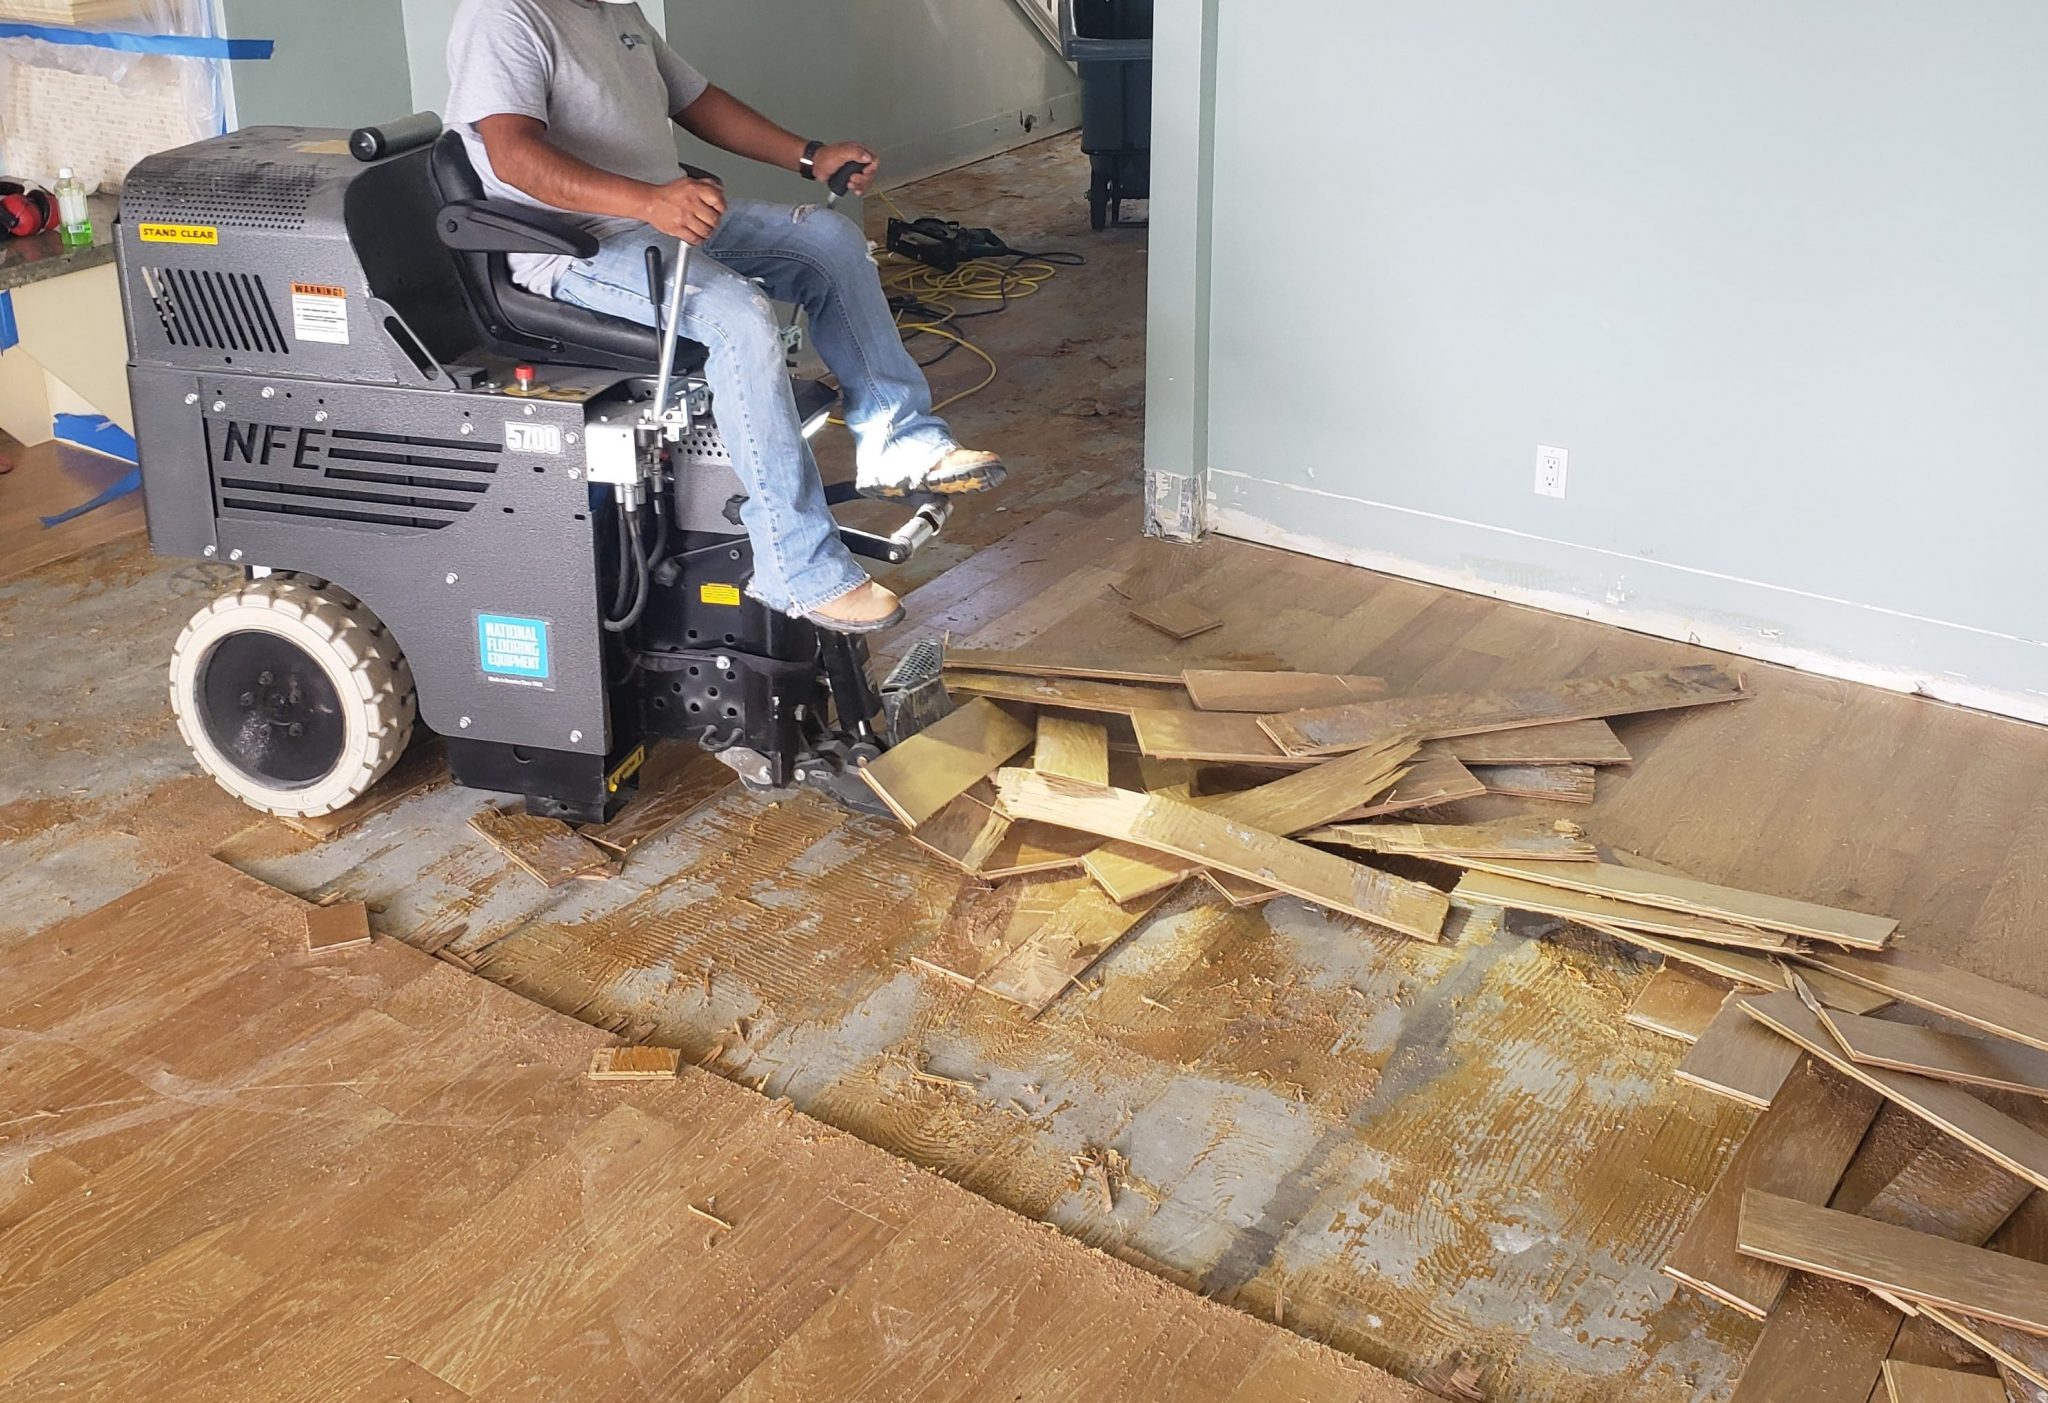
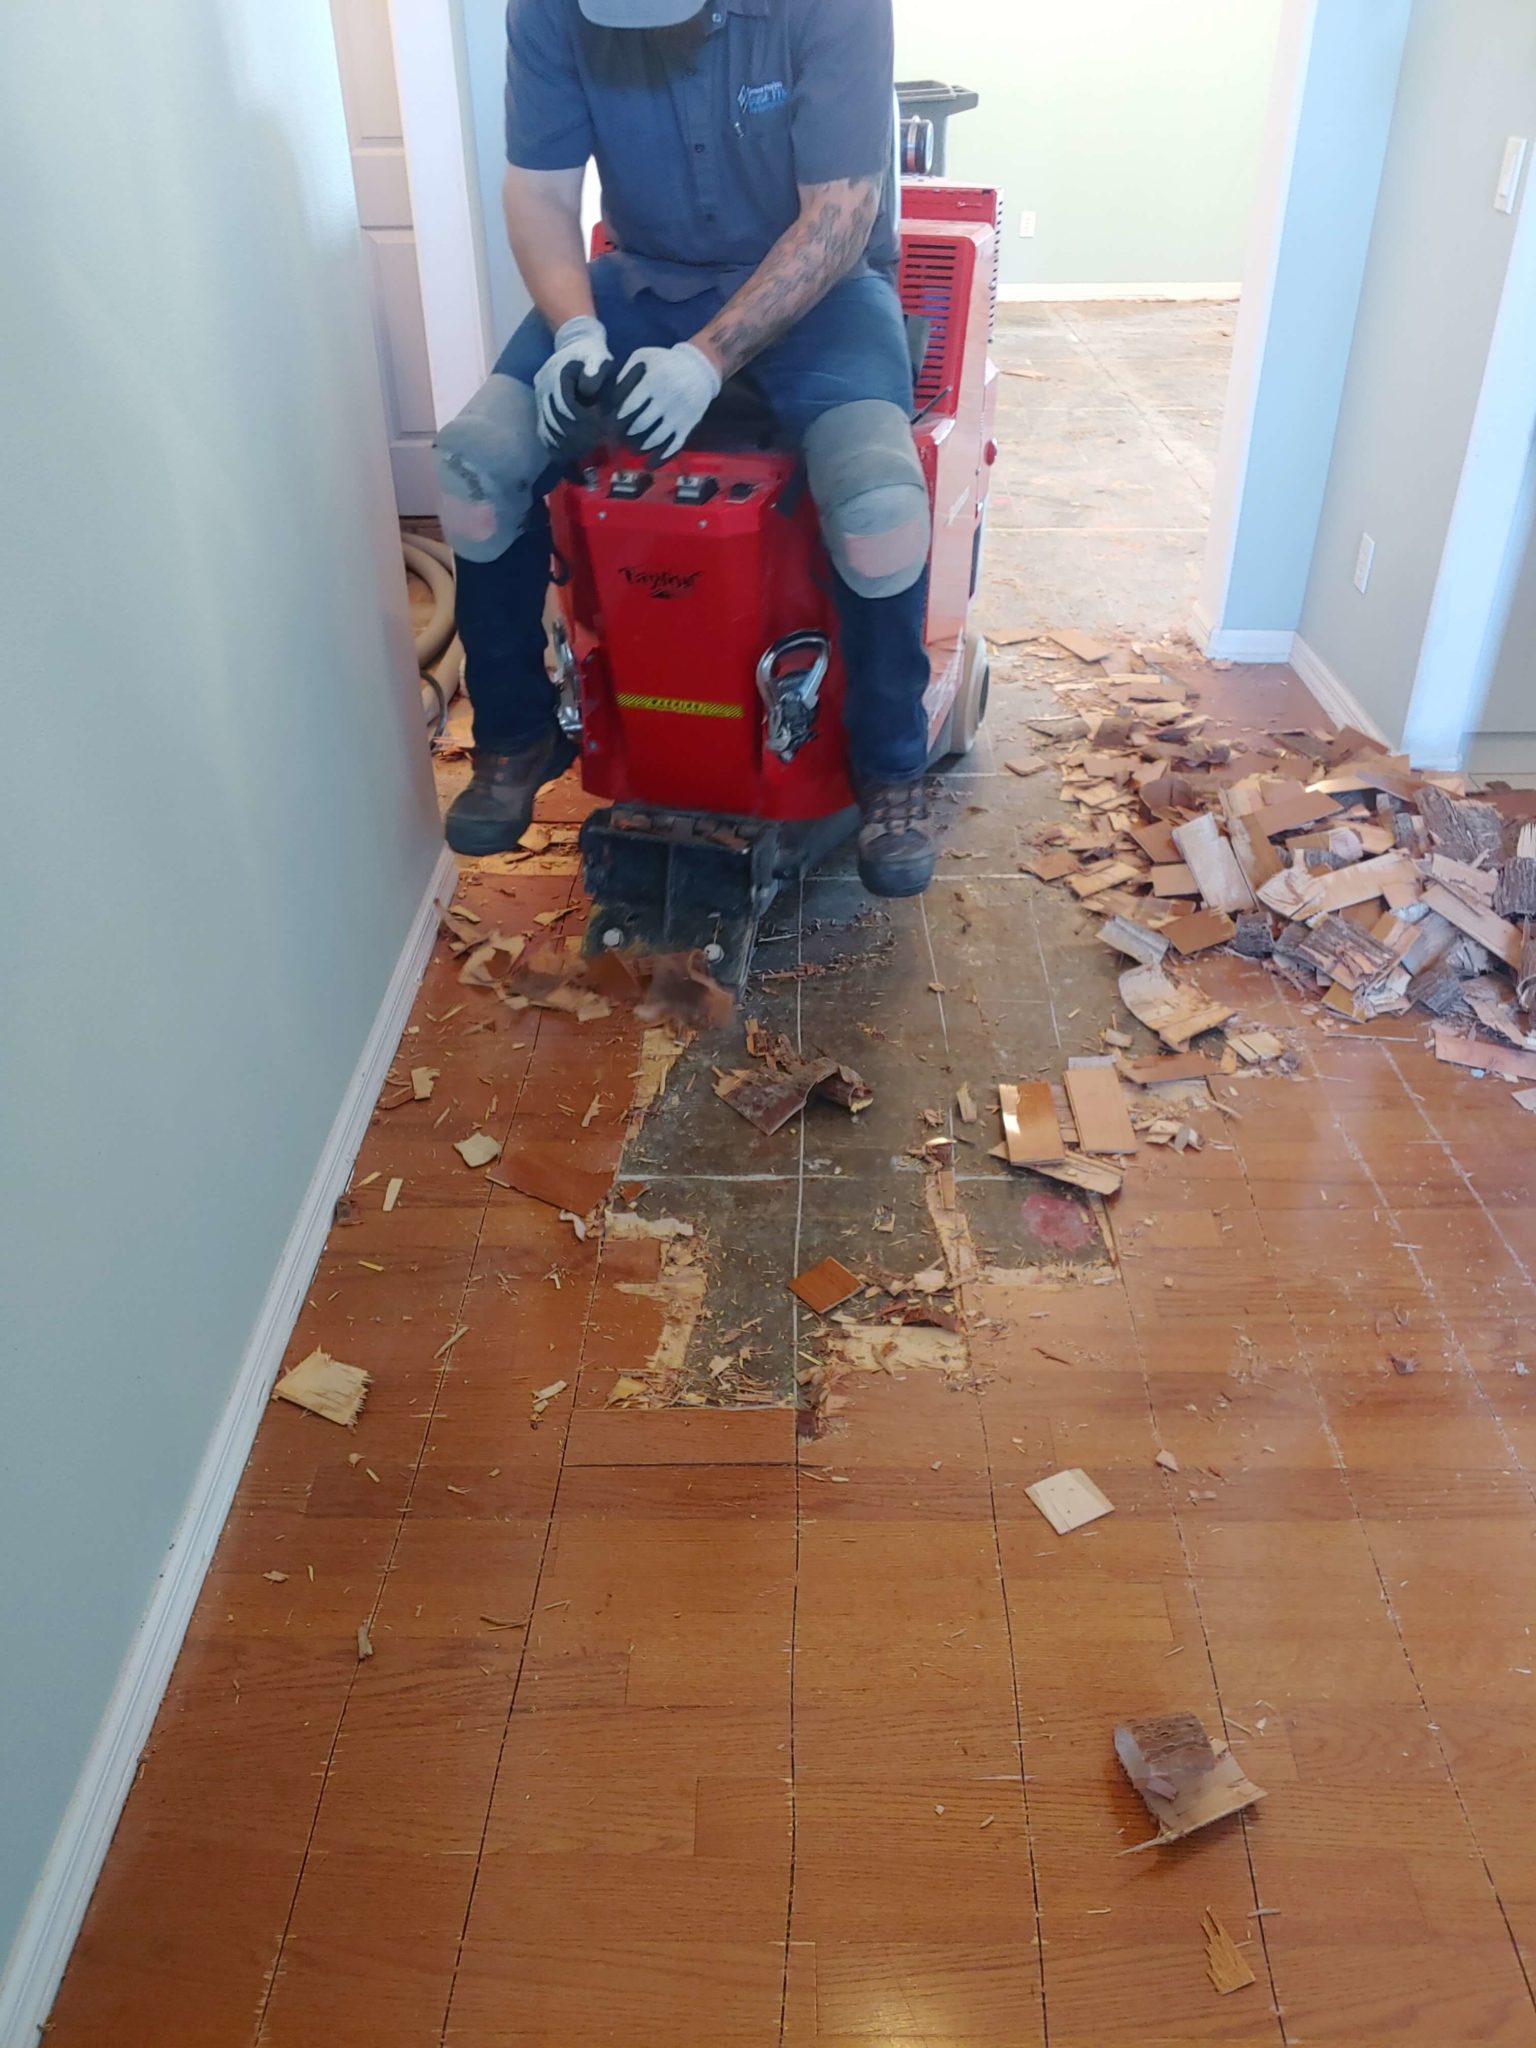
Leverage Technology: Consider using powered tools for added efficiency. Power scrapers and saws can significantly reduce the physical effort required and speed up the removal process. Be sure to follow safety guidelines when using these tools to prevent accidents.
Maintain Safety: Safety should always be a priority. Wear protective gear, including gloves, safety glasses, and a dust mask. Keep the work area well-ventilated, especially when using tools that generate dust or fumes. Ensure the floor is free from hazards like protruding nails.
Stay Organized: Keep your work area organized to avoid tripping hazards and make the removal process smoother. Collect and dispose of debris regularly to keep the area clean. Use containers to hold nails, staples, and other small debris to prevent scattering.
Efficient hardwood floor removal involves planning, using the right tools, working in sections, leveraging technology, maintaining safety, and staying organized. These tips help streamline the process, making it quicker and more manageable.

Common Challenges in Hardwood Floor Removal
Removing hardwood floors can present several challenges, each requiring specific strategies to overcome. Here are some common issues and how to address them:
Stubborn Adhesive: Removing glued-down hardwood can be particularly challenging due to the strong adhesive bond. Using a heat gun to soften the glue can make the planks easier to lift. A flooring scraper is also essential for breaking the adhesive bond as you remove each plank.
Nail and Staple Removal: Nails and staples can be difficult to remove, especially if they are old and rusted. Using a claw hammer or nail puller can help extract these fasteners. For staples, needle-nose pliers can be effective in pulling them out without breaking them.
Damaged Subfloor: Sometimes, removing hardwood floors reveals a damaged subfloor. Addressing this requires careful inspection and repair. Replace any sections of the subfloor that are rotten or severely damaged. For minor damage, use a wood filler or patching compound.
Heavy Traffic Areas: Floors in high-traffic areas may be more worn and harder to remove. These areas often require more effort and time to lift the planks. Use additional leverage with a pry bar and consider cutting the planks into smaller sections to make removal easier.
Hidden Fasteners: Occasionally, fasteners are hidden or difficult to locate, making it hard to remove the planks. Use a metal detector to identify the location of nails or staples before attempting to lift the planks. This helps prevent unnecessary damage to the wood and subfloor.
Dust and Debris: Hardwood floor removal generates a lot of dust and debris, which can be a health hazard and make the work area messy. Using a vacuum with a HEPA filter can help manage dust. Regularly sweep and clean the area to maintain a safe and tidy workspace.
Common challenges in hardwood floor removal include dealing with stubborn adhesive, removing nails and staples, addressing subfloor damage, handling high-traffic areas, locating hidden fasteners, and managing dust and debris. Strategies and tools tailored to these challenges can help overcome them effectively.
Professional vs. DIY Hardwood Floor Removal
Deciding between hiring a professional and doing it yourself (DIY) for hardwood floor removal depends on several factors, including budget, time, and expertise. Each option has its advantages and drawbacks.
Professional Removal:
Expertise and Efficiency: Professionals have the experience and tools to remove hardwood floors quickly and efficiently. They can handle unexpected challenges, such as hidden damage or difficult adhesives, with ease.
Quality Assurance: Hiring a professional ensures a high-quality job. They are knowledgeable about the best practices and techniques, reducing the risk of damage to the subfloor and surrounding areas.
Time-Saving: Professionals can complete the job faster than most DIY efforts. This is particularly beneficial for large areas or when time is of the essence.
Safety: Professionals are trained to handle tools and materials safely. They are also insured, which means any accidental damage or injuries are covered, giving you peace of mind.
Cost: While professional services can be expensive, they can save money in the long run by preventing potential mistakes and ensuring the subfloor is properly prepared for new flooring.
Convenience: Hiring a professional means you don’t have to worry about renting or buying tools, learning how to use them, or disposing of old flooring materials.

DIY Removal:
Cost Savings: DIY removal can be more cost-effective, especially if you already have some of the necessary tools. You can save on labor costs and allocate your budget to new flooring materials.
Learning Experience: Tackling the project yourself can be a valuable learning experience. It allows you to gain new skills and understand more about your home’s construction.
Flexibility: DIY projects offer more flexibility in terms of timing. You can work at your own pace and schedule the work around your availability.
Control: Doing it yourself gives you complete control over the process, from choosing the tools and methods to ensuring every detail meets your standards.
Satisfaction: There is a sense of accomplishment that comes with completing a home improvement project yourself. The effort and time invested can be very rewarding.
Physical Demand: Keep in mind that DIY removal is physically demanding and time-consuming. It requires strength, stamina, and patience, particularly for larger areas or stubborn flooring.
Common Mistakes to Avoid
Skipping Surface Preparation
One of the most common mistakes in hardwood floor removal is skipping or inadequately preparing the surface. Proper preparation is crucial for ensuring the removal process goes smoothly and the subfloor remains intact.
Thorough Cleaning: Before starting the removal process, thoroughly clean the floor to remove dust, dirt, and debris. This helps to identify any underlying issues with the hardwood and ensures tools work effectively without obstructions.
Inspect for Damage: Inspect the floor for damage such as loose planks, deep scratches, or water damage. Identifying these issues early can help in planning the removal process and avoiding further damage.
Protect Adjacent Areas: Use protective coverings to safeguard adjacent floors, walls, and furniture from damage and dust. This helps in maintaining the overall cleanliness and condition of your home during the removal process.
Safety Gear: Always wear appropriate safety gear, including gloves, safety glasses, and a dust mask. This protects you from splinters, dust, and other hazards associated with hardwood floor removal.
Proper Tool Selection: Ensure you have the right tools for the job. Using inappropriate tools can lead to inefficient removal and potential damage to the subfloor.
Plan for Disposal: Have a plan for the disposal of old flooring materials. Skipping this step can result in clutter and delays once the removal process begins.
Using Inappropriate Tools
Using the wrong tools for hardwood floor removal is another common mistake that can complicate the process and cause damage.
Pry Bars: Ensure you use a pry bar that is strong and long enough to provide adequate leverage. A short or flimsy pry bar can make it difficult to lift planks effectively.
Hammers: Use a hammer that matches the size and weight of the task. A heavy-duty hammer can provide the force needed to remove nails and staples, but it should be manageable to avoid fatigue.
Floor Scrapers: For glued floors, a quality floor scraper is essential. Manual scrapers are effective but require more effort, while powered scrapers can speed up the process significantly.
Circular Saws: Ensure the blade of the circular saw is sharp and set to the correct depth. A dull blade or incorrect depth setting can damage the subfloor.
Nail Pullers: Use a nail puller or cat’s paw designed for hardwood removal. This tool is more efficient at removing nails without breaking them, compared to a regular hammer.
Heat Guns: For adhesive removal, a heat gun can be very effective. Ensure it is powerful enough to soften the glue without causing damage to the wood.

Rushing the Process
Rushing through the hardwood floor removal process is a common mistake that can lead to errors and damage.
Proper Timing: Allocate sufficient time for the project. Rushing can lead to mistakes such as damaging the subfloor or missing nails and staples that need removal.
Step-by-Step Approach: Follow a step-by-step approach, focusing on one section at a time. This helps in maintaining organization and efficiency.
Patience with Adhesives: For glued floors, take your time with the adhesive. Rushing can result in incomplete removal and damage to the subfloor.
Nail and Staple Removal: Ensure all nails and staples are removed before moving on. Leaving them behind can cause issues during the installation of new flooring.
Regular Breaks: Take regular breaks to avoid fatigue. Working while tired can lead to mistakes and accidents.
Cleanup: Regularly clean up the work area to prevent hazards and keep the process organized. A clean work environment helps maintain focus and efficiency.

Ignoring Safety Precautions
Ignoring safety precautions during hardwood floor removal is a serious mistake that can result in injuries.
Protective Gear: Always wear gloves, safety glasses, and a dust mask. These protect against splinters, dust, and other hazards.
Tool Safety: Use tools as intended and follow the manufacturer’s instructions. Misusing tools can lead to accidents and damage.
Ventilation: Ensure proper ventilation, especially when using a heat gun or removing adhesives. Fumes can be harmful if inhaled in an enclosed space.
Clear Workspace: Keep the work area clear of obstacles and debris. This helps prevent trips and falls.
Electrical Safety: Be cautious with electrical tools, ensuring cords are not frayed and outlets are not overloaded.
Professional Help: For complex tasks or if you are unsure about safety procedures, consider hiring a professional. They have the expertise to handle the removal safely.

Overlooking Subfloor Condition
Overlooking the condition of the subfloor during hardwood floor removal is a common mistake that can affect the installation of new flooring.
Inspecting for Damage: Check the subfloor for any signs of damage, such as rot, cracks, or uneven areas. Addressing these issues before installing new flooring is crucial.
Cleaning Debris: Ensure all debris, nails, and staples are removed from the subfloor. This provides a clean, smooth surface for the new flooring.
Repairing Damage: Repair any damage to the subfloor using appropriate materials. Replace sections if necessary to ensure stability and longevity.
Leveling the Subfloor: Ensure the subfloor is level. An uneven subfloor can lead to issues with the new flooring, such as gaps or uneven wear.
Moisture Control: Check for moisture issues and address them before proceeding. Moisture can lead to mold growth and damage the new flooring.
Underlayment: Consider installing an underlayment if needed. This can provide additional support, moisture protection, and sound insulation for the new flooring.
Poor Disposal Practices
Poor disposal practices for old hardwood flooring materials can lead to environmental and logistical issues.
Local Regulations: Check local regulations for disposing of construction materials. Improper disposal can result in fines and environmental harm.
Recycling: Consider recycling old hardwood if it’s in good condition. Many recycling centers accept construction materials and can repurpose the wood.
Donation: If the hardwood is still usable, consider donating it to organizations that can use it for projects or resale.
Proper Segregation: Separate materials such as wood, nails, and adhesives for appropriate disposal. This makes the process more efficient and environmentally friendly.
Dumpster Rental: For large projects, consider renting a dumpster to handle the debris. This provides a convenient way to manage waste and ensures proper disposal.
Reuse: Think creatively about reusing the old hardwood for other projects around your home. This can reduce waste and provide new uses for the material.

Related Posts: