A Complete Guide to Hardwood Floor Repair
Hardwood floors are a timeless choice for homeowners, adding warmth and elegance to any space. However, over time, these beautiful floors can suffer from wear and tear, resulting in the need for repairs. Whether you’re dealing with scratches, gouges, water damage, or simply the effects of aging, understanding how to repair your hardwood floors is crucial for maintaining their beauty and longevity. Today, I’ll walk you through everything you need to know about hardwood floor repair, from identifying common issues to performing the necessary repairs, avoiding mistakes, and answering some frequently asked questions.
Understanding Common Hardwood Floor Problems
Hardwood floors, while durable and long-lasting, are not immune to damage. Over time, they can develop a range of issues, each requiring specific attention and repair methods. Before diving into the repair process, it’s essential to understand the common problems that can affect hardwood floors.
One of the most frequent issues homeowners encounter is surface scratches. These can occur from everyday wear and tear, such as moving furniture, high foot traffic, or even the presence of pets. While minor scratches might seem insignificant, if left untreated, they can lead to more severe damage over time.
Another common problem is gouges and dents. Unlike surface scratches, gouges penetrate deeper into the wood, often requiring more intensive repair methods. Gouges can occur from dropping heavy objects or dragging sharp items across the floor. Addressing these promptly is essential to prevent further deterioration.
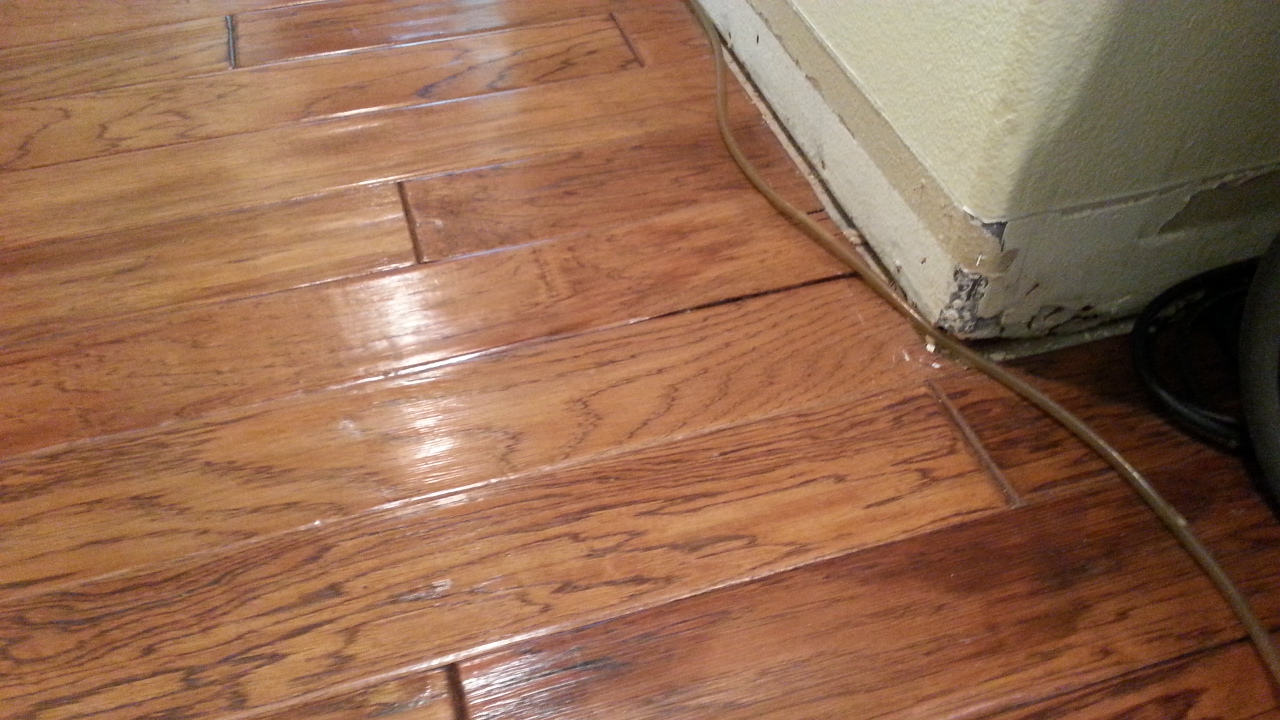
Water damage is another significant concern for hardwood floors. Whether it’s from spills, leaks, or high humidity, water can cause the wood to swell, warp, and even rot if not addressed immediately. Recognizing the signs of water damage, such as discoloration or buckling, is crucial for effective repair.
Over time, hardwood floors may also develop gaps between the boards. These gaps can occur due to changes in humidity and temperature, causing the wood to expand and contract. While some gapping is normal, excessive gaps can be unsightly and may require repair to prevent further issues.
Finally, fading and discoloration are common problems for hardwood floors, especially in areas exposed to direct sunlight. The UV rays can cause the wood to lose its color and become uneven in appearance. Understanding these common issues is the first step in maintaining and repairing your hardwood floors effectively.
Assessing the Damage: When to Repair vs. Replace
Once you’ve identified the problems with your hardwood floors, the next step is to assess the extent of the damage and determine whether repair or replacement is the best course of action. This decision depends on several factors, including the severity of the damage, the age of the floor, and your budget.
For minor surface scratches and small gouges, repairs are usually straightforward and cost-effective. You can often address these issues with sanding and refinishing, or by using wood filler and touch-up kits available at most hardware stores. These repairs are relatively simple and can restore the appearance of your floor without the need for professional help.
However, when it comes to more severe damage, such as deep gouges, large areas of water damage, or extensive discoloration, the decision becomes more complex. In some cases, extensive sanding and refinishing may be enough to restore the floor’s appearance. This process involves sanding down the top layer of the wood to remove imperfections, followed by staining and sealing to protect the surface.
If the damage is too severe, particularly in cases of widespread water damage or warping, replacement may be the only viable option. This is especially true if the structural integrity of the floor has been compromised. In such cases, it’s important to weigh the cost of repair against the cost of replacement. Sometimes, replacing the damaged sections or even the entire floor may be more cost-effective in the long run.
Another factor to consider is the age of your hardwood floors. Older floors that have already undergone multiple repairs and refinishing may no longer have enough wood thickness left for additional sanding. In such cases, replacement might be the best option to ensure the longevity and safety of your floors.
Finally, your budget will play a significant role in your decision. While repairs are generally less expensive than replacement, the costs can add up depending on the extent of the damage. It’s essential to get quotes for both repair and replacement to make an informed decision.

Step-by-Step Guide to Hardwood Floor Repair
Now that you’ve assessed the damage and decided to proceed with repairs, it’s time to dive into the step-by-step process of repairing your hardwood floors. This guide will cover the most common types of repairs, from surface scratches to more extensive damage.
Step 1: Preparing the Area
Before you begin any repair work, it’s important to prepare the area. Start by removing all furniture and rugs from the room. This will give you clear access to the damaged area and prevent any further damage during the repair process. Clean the floor thoroughly to remove any dust, dirt, or debris that could interfere with the repair.
Step 2: Sanding the Damaged Area
For surface scratches and shallow gouges, sanding is often the first step in the repair process. Use fine-grit sandpaper to gently sand the damaged area, being careful not to remove too much of the wood. Sand in the direction of the wood grain to achieve a smooth finish. Once the area is sanded, wipe it clean with a damp cloth to remove any dust.
Step 3: Applying Wood Filler
For deeper gouges or cracks, you’ll need to apply wood filler to the damaged area. Choose a filler that matches the color of your hardwood floor for a seamless repair. Use a putty knife to apply the filler, pressing it firmly into the gouge or crack. Allow the filler to dry completely, then sand it smooth to match the surrounding floor.

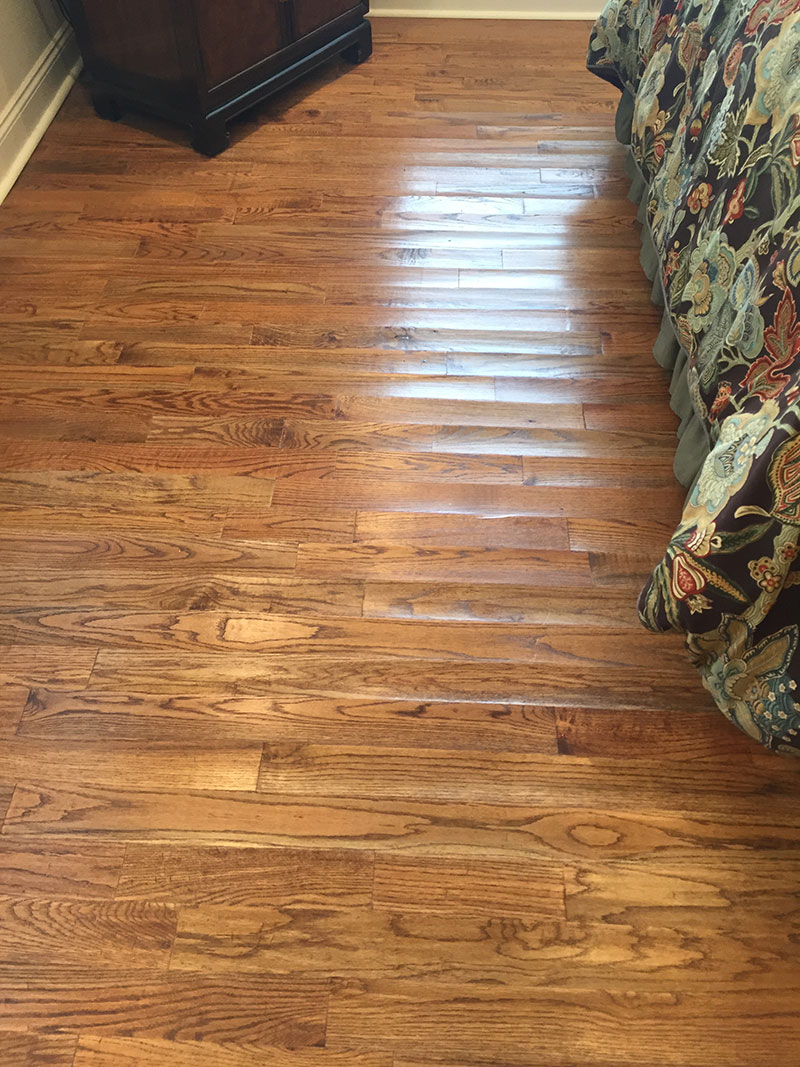
Step 4: Staining and Sealing
Once the damaged area is repaired, it’s time to restore the finish. Apply a wood stain that matches the color of your floor using a clean cloth or brush. Be sure to blend the stain with the surrounding area for a natural look. After the stain has dried, apply a protective sealant to the repaired area to protect it from future damage.
Step 5: Buffing and Polishing
After the sealant has dried, buff the repaired area with a soft cloth or buffer to achieve a smooth, polished finish. This will help blend the repaired area with the rest of the floor, making the repair less noticeable.
Step 6: Final Touches
Inspect the repaired area to ensure it matches the rest of the floor. If necessary, apply additional stain or polish to achieve a perfect match. Once you’re satisfied with the repair, replace the furniture and rugs, being careful to use felt pads to prevent future scratches.
Tackling Water Damage and Warping
Water damage is one of the most challenging issues to address in hardwood floor repair. Whether it’s from a spill, a leak, or high humidity, water can cause significant damage to hardwood floors, including warping, buckling, and even rot. Addressing water damage promptly and effectively is crucial to preserving your floors.
Step 1: Identify the Source of the Water
The first step in tackling water damage is to identify and eliminate the source of the water. This might involve repairing a leaky pipe, fixing a roof leak, or addressing high humidity levels in your home. It’s essential to stop the water at its source to prevent further damage to your floors.
Step 2: Drying Out the Floor
Once you’ve addressed the source of the water, the next step is to dry out the affected area. Use fans, dehumidifiers, and open windows to promote air circulation and speed up the drying process. It’s important to dry the floor thoroughly to prevent mold and mildew growth, which can cause additional damage.
Step 3: Assessing the Extent of the Damage
After the floor is dry, assess the extent of the water damage. Look for signs of warping, buckling, or discoloration. In some cases, the damage may be limited to the surface, while in others, the wood may have absorbed a significant amount of water, causing it to swell and warp.

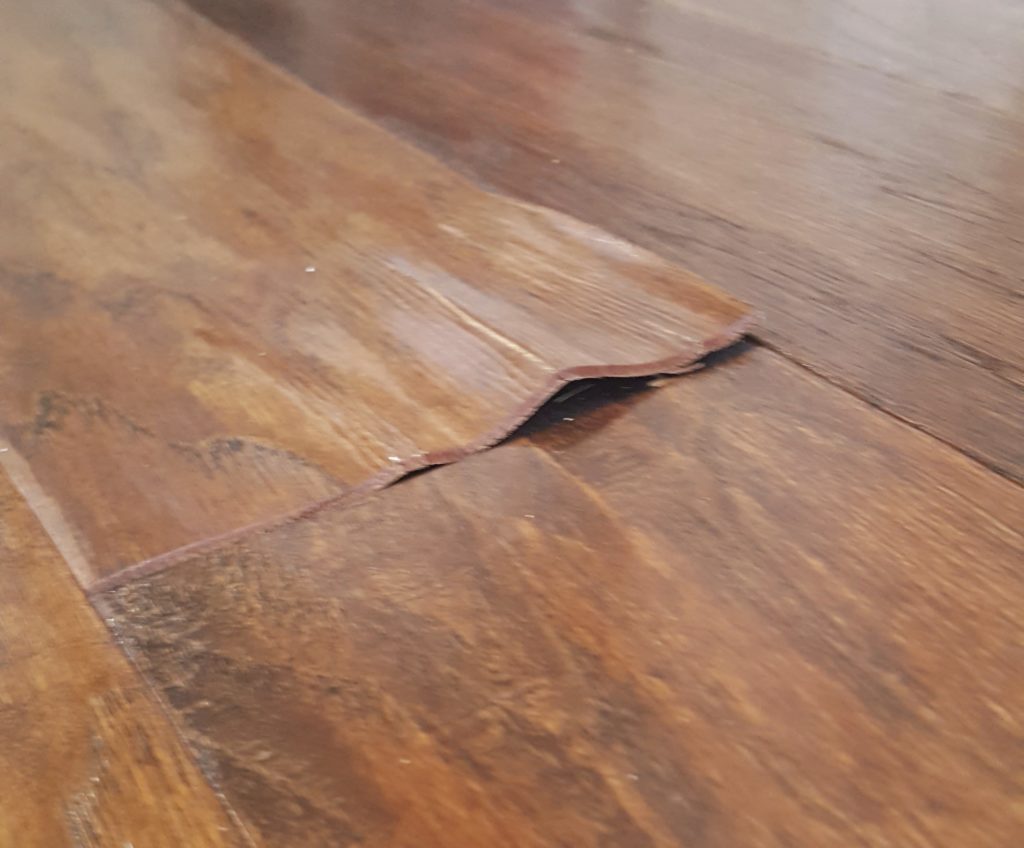
Step 4: Repairing Warped or Buckled Boards
If the water damage has caused the boards to warp or buckle, you may need to remove and replace the affected boards. This involves carefully removing the damaged boards and installing new ones. Be sure to choose replacement boards that match the color and grain of your existing floor for a seamless repair.
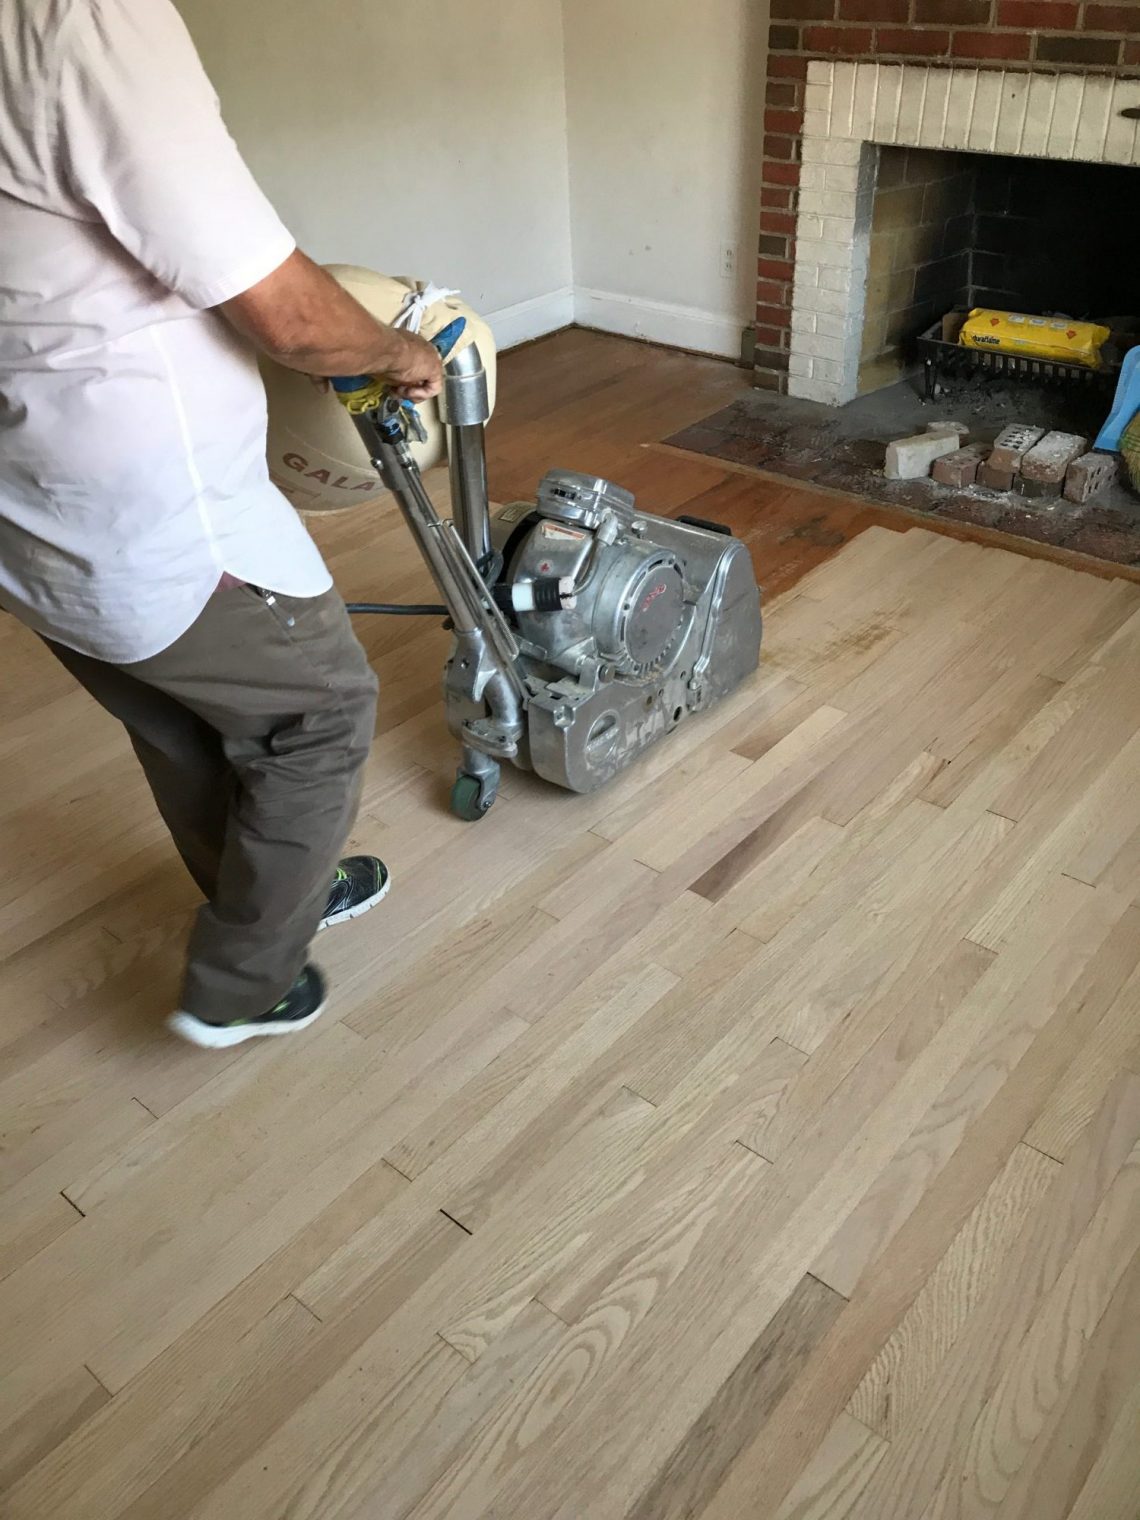
Step 5: Sanding and Refinishing
Once the damaged boards have been replaced, sand the area to create a smooth, even surface. Depending on the extent of the damage, you may need to sand the entire floor to ensure a consistent finish. After sanding, apply a stain and sealant to protect the floor from future water damage.
Step 6: Preventing Future Water Damage
Finally, take steps to prevent future water damage to your hardwood floors. This might include using area rugs in high-risk areas, installing a vapor barrier, or using a dehumidifier to control humidity levels in your home. Regular maintenance and prompt attention to spills and leaks are key to preserving the beauty and longevity of your hardwood floors.

Common Mistakes to Avoid in Hardwood Floor Repair
Repairing hardwood floors can be a rewarding and cost-effective way to maintain the beauty of your home, but it’s important to avoid common mistakes that can lead to further damage or unsatisfactory results. Here are some pitfalls to watch out for when repairing your hardwood floors.
Mistake 1: Skipping the Sanding Process
One of the most common mistakes in hardwood floor repair is skipping the sanding process. Sanding is essential for removing surface scratches, smoothing out repairs, and ensuring that the stain and sealant adhere properly. Skipping this step can result in a rough, uneven finish that detracts from the overall appearance of your floor.
Mistake 2: Using the Wrong Tools or Materials
Using the wrong tools or materials can also lead to poor results. For example, using coarse sandpaper on delicate wood can cause further damage, while using a filler that doesn’t match your floor’s color can result in an unsightly repair. It’s important to choose the right tools and materials for the job to achieve a professional-looking finish.
Mistake 3: Applying Stain or Sealant Too Thickly
When applying stain or sealant, less is often more. Applying these products too thickly can result in a sticky, uneven finish that takes longer to dry and is more prone to damage. Instead, apply thin, even coats, allowing each coat to dry completely before applying the next.

Mistake 4: Ignoring the Importance of Matching Colors
Another common mistake is failing to match the color of the repair to the existing floor. Even a small difference in color can make the repair stand out, detracting from the overall appearance of your floor. Take the time to test stains and fillers on a small, inconspicuous area before applying them to the damaged area.
Mistake 5: Rushing the Repair Process
Repairing hardwood floors requires patience and attention to detail. Rushing the process can lead to mistakes, such as uneven sanding, poorly applied stain, or missed spots. Take your time with each step to ensure a high-quality repair that will stand the test of time.
Mistake 6: Neglecting Regular Maintenance
Finally, neglecting regular maintenance can undo all the hard work you’ve put into repairing your hardwood floors. Regular cleaning, promptly addressing spills, and using protective pads under furniture can help prevent future damage and keep your floors looking their best.

Can I repair hardwood floors myself, or should I hire a professional?
Repairing hardwood floors is a task that many homeowners can tackle themselves, especially for minor issues like surface scratches and small gouges. However, for more extensive damage, such as deep gouges, water damage, or warping, hiring a professional may be the best option. Professionals have the tools, experience, and expertise to handle complex repairs and ensure a high-quality finish. If you’re unsure of your ability to repair the floor yourself, it’s always a good idea to consult with a professional before starting the project.
How much does it cost to repair hardwood floors?
The cost of hardwood floor repair can vary widely depending on the extent of the damage, the type of wood, and whether you hire a professional or do it yourself. Minor repairs, such as filling small scratches or gouges, can be relatively inexpensive, especially if you do the work yourself. However, more extensive repairs, such as replacing damaged boards or refinishing the entire floor, can be more costly. On average, homeowners can expect to pay between $200 and $1,000 for hardwood floor repairs, with larger projects costing more.
How can I prevent future damage to my hardwood floors?
Preventing future damage to your hardwood floors involves regular maintenance and protective measures. First, clean your floors regularly to remove dirt and debris that can cause scratches. Use area rugs in high-traffic areas and place felt pads under furniture to prevent dents and scratches. Avoid dragging heavy objects across the floor, and promptly clean up any spills to prevent water damage. Controlling humidity levels in your home is also important, as fluctuating humidity can cause the wood to expand and contract, leading to gaps and warping.
How do I know if my hardwood floors need to be replaced rather than repaired?
Deciding whether to repair or replace your hardwood floors depends on the extent of the damage, the age of the floors, and your budget. If the damage is limited to small areas, such as minor scratches or a few gouges, repairs are usually sufficient. However, if the damage is widespread, such as significant water damage, warping, or extensive wear, replacement may be the best option. Additionally, if your floors are old and have already undergone multiple repairs and refinishing, replacement might be necessary to maintain the structural integrity and appearance of your floors.
How long does it take to repair hardwood floors?
The time it takes to repair hardwood floors depends on the extent of the damage and the repair method used. Minor repairs, such as filling scratches or small gouges, can often be completed in a few hours. However, more extensive repairs, such as sanding and refinishing or replacing damaged boards, can take several days to complete. This includes time for the stain and sealant to dry between coats. It’s important to factor in drying time and allow the floors to cure completely before placing furniture or rugs back on the floor.
What are the signs that my hardwood floors need to be repaired?
Signs that your hardwood floors need to be repaired include visible scratches, gouges, or dents; gaps between the boards; warping or buckling; and discoloration or fading. You may also notice creaking or squeaking sounds when walking on the floor, which can indicate loose boards or structural issues. Additionally, if your floors have been exposed to water, it’s important to inspect them for signs of water damage, such as swelling, staining, or mold. Addressing these issues promptly can prevent further damage and extend the life of your hardwood floors.
Related Posts: