Understanding Hardwood Floor Water Damage
Hardwood floors are prized for their beauty, durability, and timeless appeal. However, their Achilles’ heel is water. Water damage can compromise not only the appearance of hardwood floors but also their structural integrity. Understanding how water affects hardwood floors is the first step in preventing and addressing damage.
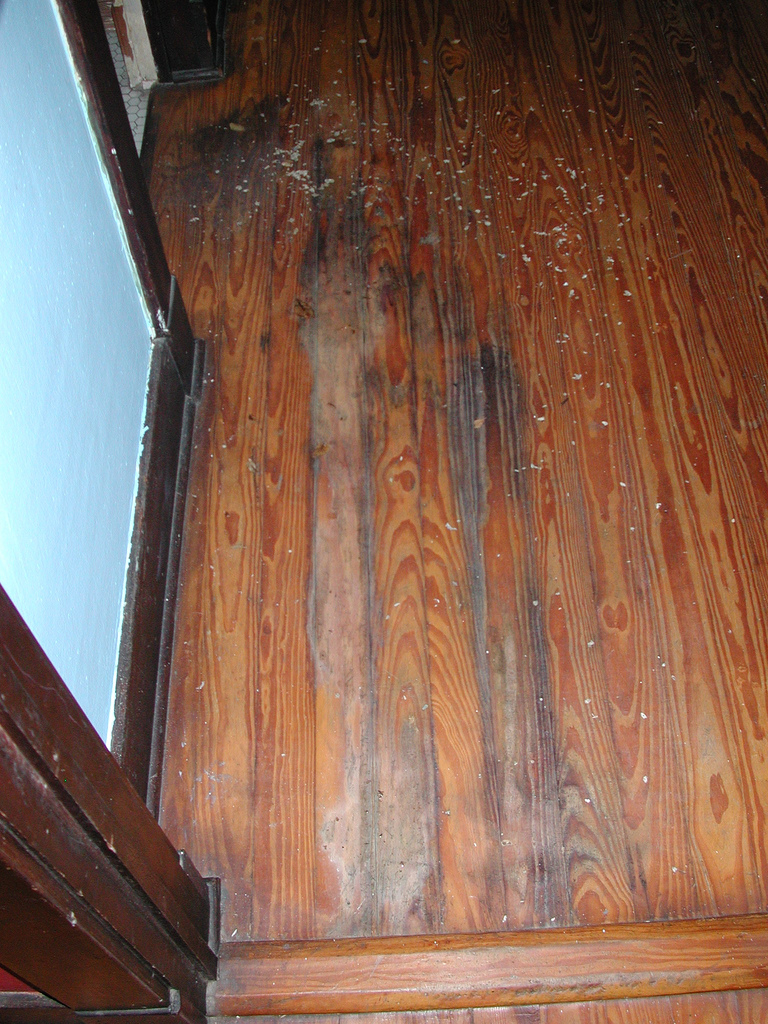
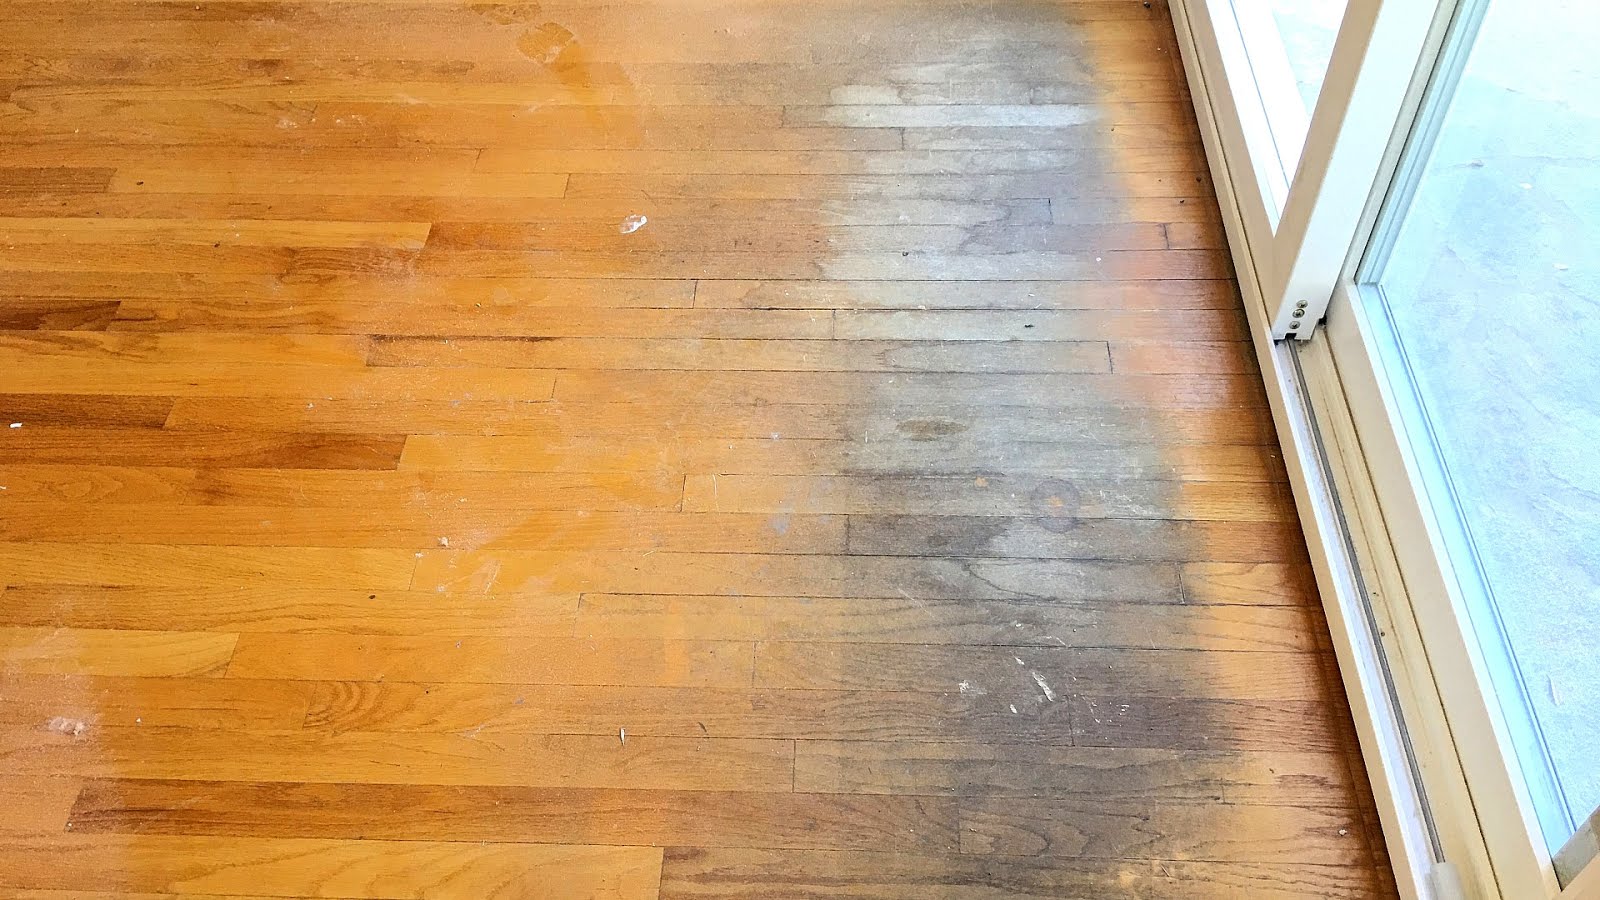
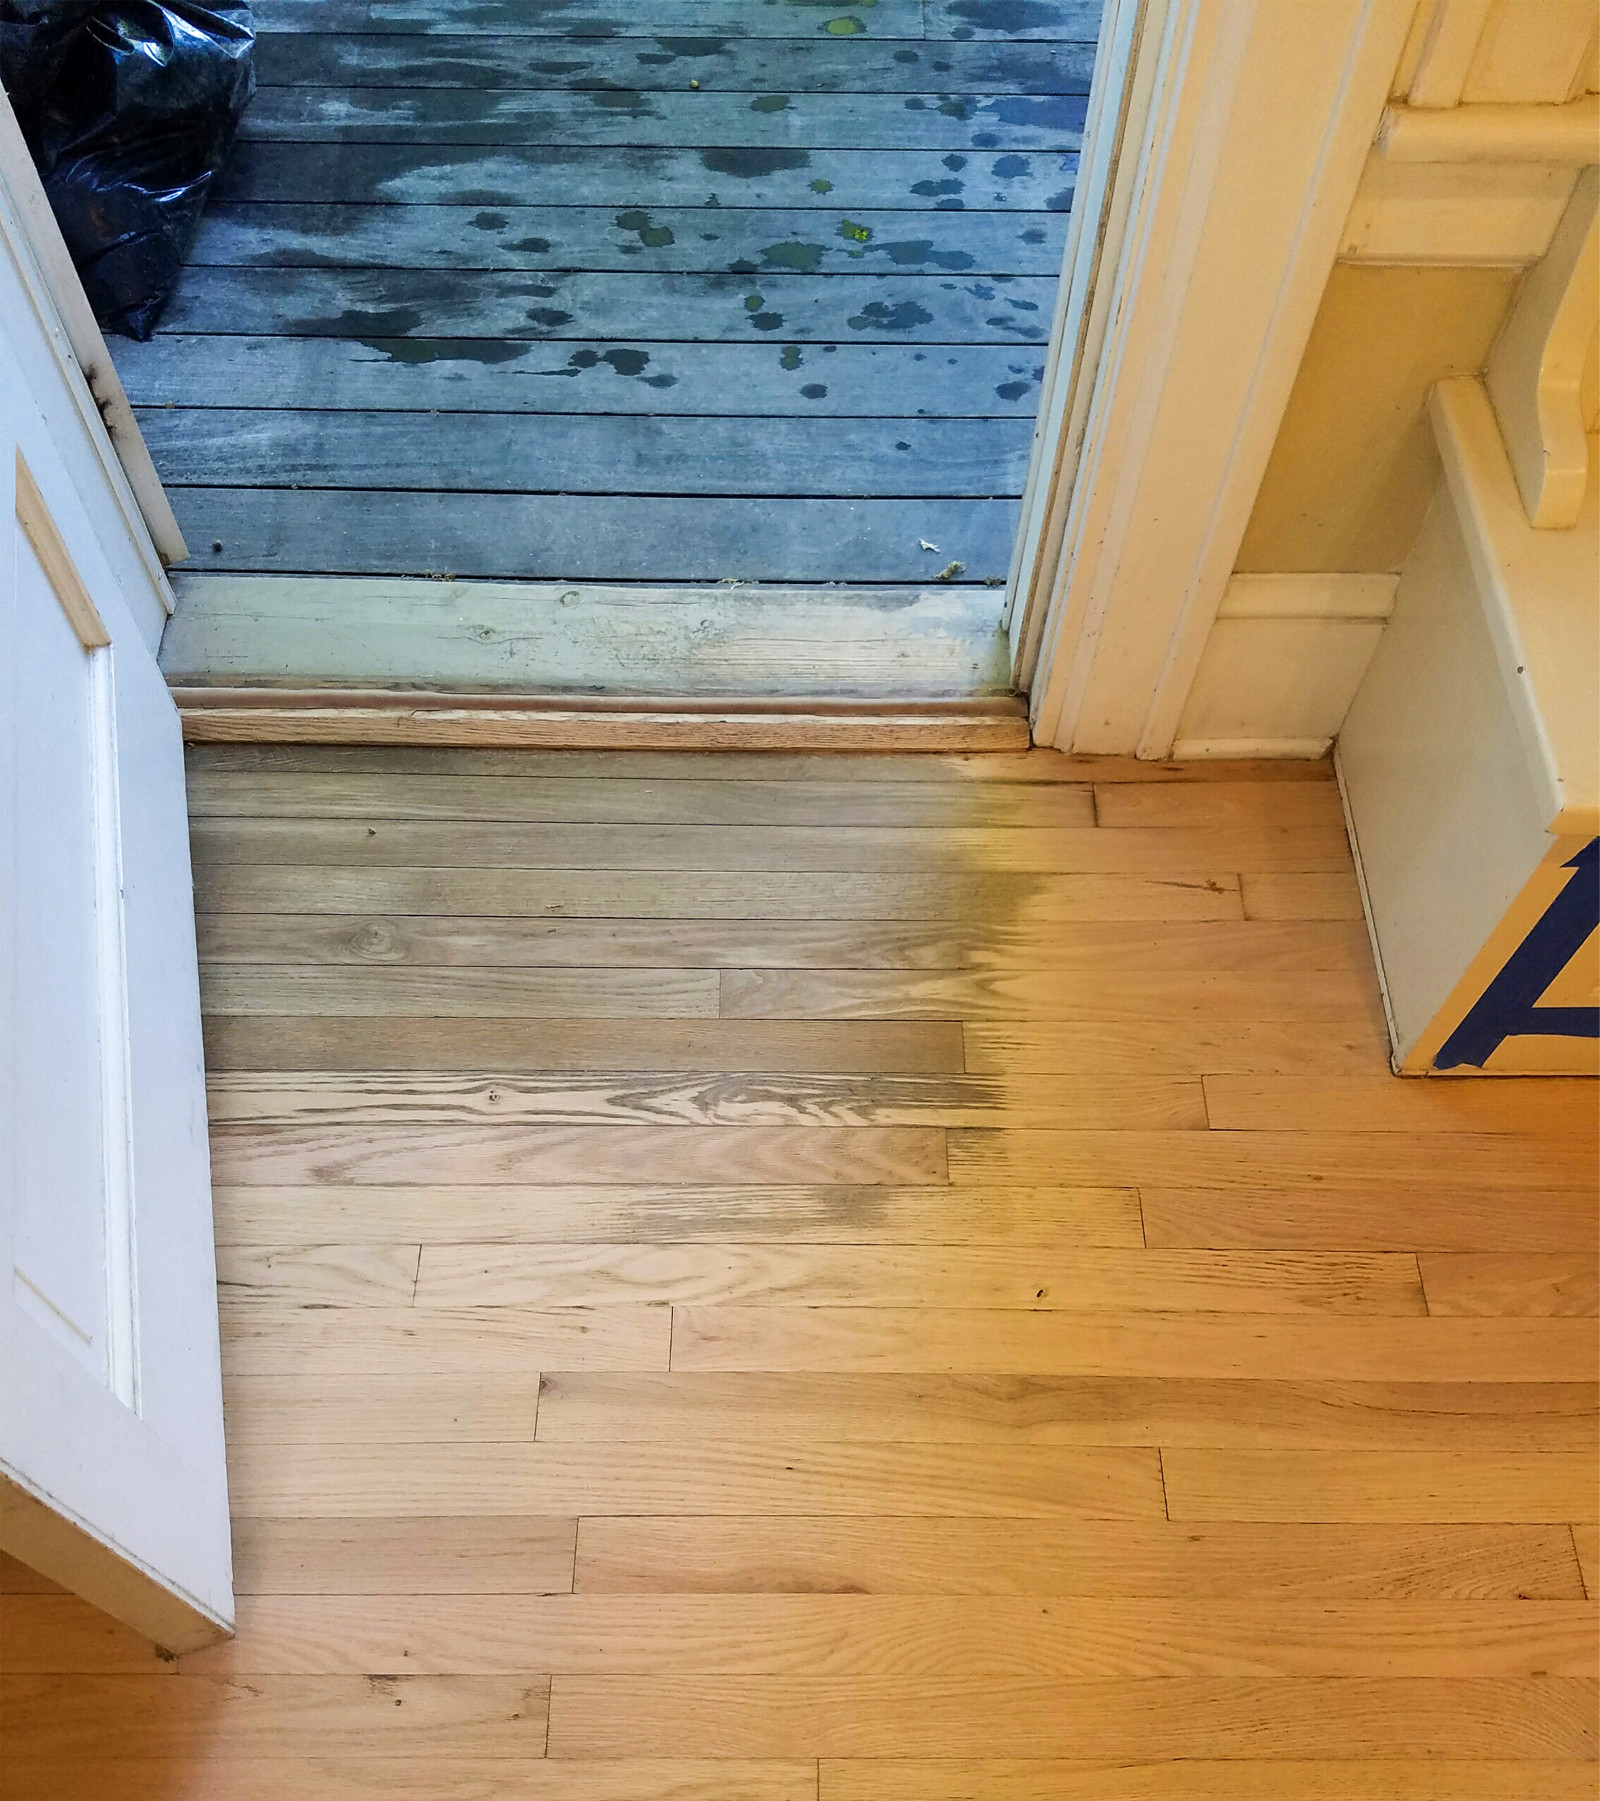
When water comes into contact with hardwood, it can seep into the wood’s fibers, causing the wood to swell and warp. This warping is often seen in the form of cupping (edges rise) or crowning (center rises). Prolonged exposure to moisture can lead to buckling, where the wood completely detaches from the subfloor. Additionally, water can penetrate through the seams of hardwood planks, leading to mold and mildew growth beneath the surface.
The sources of water damage are varied. Common causes include spills, leaks from appliances or plumbing, high humidity, and flooding. Even something as simple as a pet’s water bowl can lead to damage if spills are not promptly cleaned up. Seasonal changes can also impact hardwood floors, with increased humidity in summer causing expansion and dry winters leading to contraction.
Immediate action is crucial when dealing with water damage. The longer water sits on hardwood floors, the more severe the damage can become. Promptly addressing spills, leaks, or flooding can prevent minor issues from escalating into major repairs. Understanding the early signs of water damage, such as discoloration, warping, and a musty odor, can help in taking quick action to mitigate damage.
Assessing the Extent of Water Damage
Before diving into repairs, it’s essential to accurately assess the extent of the water damage. This assessment helps determine whether a simple drying process will suffice or if more extensive repairs, including replacement of flooring sections, are necessary.
Start by thoroughly inspecting the affected area. Look for visible signs of damage such as discoloration, warping, and gaps between planks. Use a moisture meter to measure the moisture content of the wood. Normal moisture levels for hardwood floors range between 6-12%. Readings above this range indicate excessive moisture and potential damage.
Examine the subfloor as well. If the subfloor is wet or shows signs of mold and mildew, it will need to be dried and possibly replaced. Removing a few planks of hardwood can provide access to the subfloor for a more thorough inspection. Check for any signs of mold growth, which often appears as black, green, or white patches and has a distinct musty odor.
Consider the age and type of hardwood floor. Older floors may be more susceptible to damage due to previous wear and tear. Different types of wood react differently to water; for instance, oak tends to withstand water better than softer woods like pine. Engineered hardwood floors, which have a thin layer of real wood on top of plywood, may delaminate or warp differently than solid hardwood.
Consulting a professional may be necessary for a comprehensive assessment, especially if the damage covers a large area or involves significant subfloor damage. Professionals have the expertise and tools to accurately determine the extent of damage and recommend appropriate repair or replacement options.
Drying Out Hardwood Floors
Drying out hardwood floors promptly and effectively is crucial to prevent further damage and restore the floor’s integrity. The drying process involves several steps and may require the use of specialized equipment.
Start by removing any standing water using a wet/dry vacuum. For smaller areas, towels or mops can be used to soak up water. Ensure the area is well-ventilated by opening windows and doors to facilitate air circulation. Fans and dehumidifiers are essential tools in the drying process. Place fans around the room to increase airflow and position dehumidifiers to extract moisture from the air.
Using a moisture meter, monitor the moisture levels regularly to track the drying progress. It’s important to continue drying until the moisture content returns to normal levels (6-12%). This process can take several days to a few weeks, depending on the extent of the damage and environmental conditions.
For severe water damage, professional drying services may be necessary. Professionals use industrial-grade equipment such as high-capacity dehumidifiers, air movers, and specialized drying mats. These tools can significantly speed up the drying process and ensure that moisture is removed from deep within the wood and subfloor.
Throughout the drying process, avoid using heat sources like space heaters or hairdryers, as excessive heat can cause the wood to dry too quickly and result in cracking. Patience is key; allowing the wood to dry gradually helps maintain its structural integrity and prevents additional damage.
Repairing Warped or Cupped Floors
Once the hardwood floor is thoroughly dried, the next step is addressing any warping or cupping. Warping and cupping occur when the wood absorbs moisture unevenly, leading to changes in shape and structure.
For minor cupping, where the edges of the boards are slightly raised, sanding can often restore the floor to its original condition. Begin by using a drum sander to sand down the cupped areas until they are level with the rest of the floor. Follow up with a finer-grit sandpaper to smooth the surface. After sanding, apply a new finish to protect the wood.
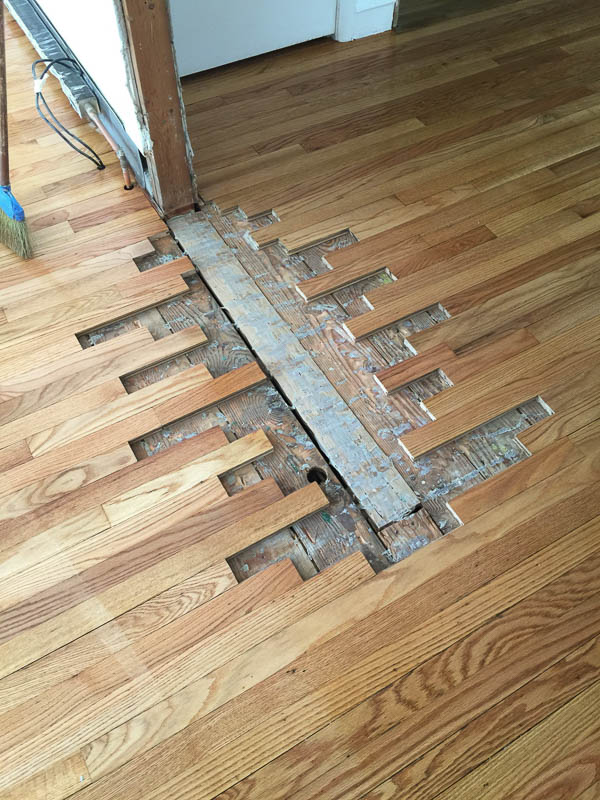
Severe warping, where the boards have significant bends or twists, may require replacing the affected sections. To replace a warped board, start by removing the damaged plank using a circular saw or chisel. Measure and cut a new piece of hardwood to fit the space. Glue and nail the new board into place, ensuring it aligns with the surrounding planks. Sand the new board to match the height of the existing floor and apply a finish.
For extensive damage, where multiple boards are warped or cupped, it might be more practical to replace the entire floor section. This approach ensures a uniform appearance and structural integrity. Removing and replacing large sections of flooring is a labor-intensive process and may benefit from professional assistance.
In addition to addressing the physical damage, it’s important to identify and fix the source of moisture to prevent future issues. This might involve repairing leaks, improving ventilation, or installing moisture barriers. Ensuring that the underlying cause of the water damage is resolved is crucial for the long-term health of your hardwood floors.
Refinishing Hardwood Floors
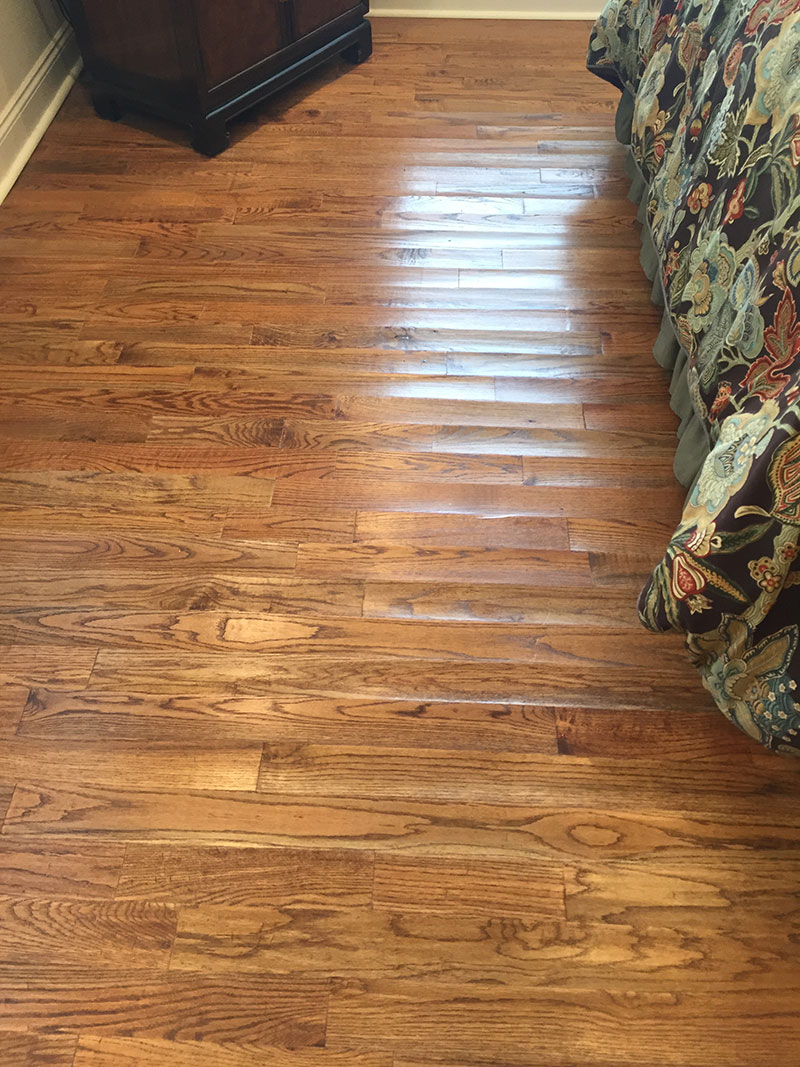
Refinishing hardwood floors is often the final step in the repair process, restoring the floor’s original beauty and providing a protective layer against future damage. Refinishing involves sanding the surface, applying stain (if desired), and sealing with a protective finish.
Begin by thoroughly cleaning the floor to remove any dirt, dust, or debris. Sand the entire floor using a drum sander to remove the old finish and any remaining imperfections. Start with a coarse-grit sandpaper and gradually progress to finer grits for a smooth finish. Be sure to sand in the direction of the wood grain to avoid scratches.
After sanding, vacuum the dust and wipe the floor with a damp cloth to remove any remaining particles. If you choose to stain the wood, apply the stain evenly using a brush or rag. Allow the stain to penetrate the wood for the recommended time before wiping off any excess. Staining is optional and primarily used to achieve a desired color.
The final step is applying a protective finish. Polyurethane is a popular choice due to its durability and water resistance. Apply the finish in thin, even coats using a brush or roller, allowing each coat to dry completely before applying the next. Typically, two to three coats are recommended for optimal protection. Once the final coat is dry, your hardwood floor should have a restored, glossy finish.
Refinishing can be a time-consuming process, but it significantly extends the life of your hardwood floors and enhances their appearance. Regular maintenance, such as sweeping and using floor protectors, will help preserve the refinished surface and prevent future damage.

Preventing Future Water Damage
Preventing future water damage is essential to maintain the beauty and longevity of hardwood floors. Implementing preventative measures can save time, money, and effort in the long run.
One of the simplest preventative steps is controlling humidity levels. Use dehumidifiers during humid months and humidifiers in the winter to maintain consistent indoor humidity levels between 30-50%. This helps prevent the wood from expanding and contracting, reducing the risk of warping and cupping.
Promptly addressing spills and leaks is crucial. Clean up spills immediately using a dry cloth or mop to prevent water from seeping into the wood. Regularly inspect plumbing fixtures, appliances, and roofs for leaks. Repair any issues promptly to avoid water damage. Consider placing waterproof mats under sinks, refrigerators, and other appliances prone to leaks.
Using area rugs and mats in high-traffic areas and near entryways can help protect the floor from moisture and dirt. Choose rugs with non-slip backings to prevent them from moving and causing scratches. Regularly shake out and clean these rugs to prevent dirt accumulation.
Consider applying a water-resistant finish to your hardwood floors. While no finish can make hardwood completely waterproof, water-resistant finishes can provide an extra layer of protection. Reapply the finish as recommended by the manufacturer to maintain its effectiveness.
Educating household members about the importance of preventing water damage can also be beneficial. Simple habits, such as removing shoes at the door, using coasters under plants, and avoiding excessive water use when cleaning, can collectively help in maintaining the health of your hardwood floors.

Common Mistakes to Avoid
Repairing hardwood floor water damage can be challenging, and several common mistakes can complicate the process or lead to suboptimal results.
Delaying Action: One of the biggest mistakes is not addressing water damage promptly. Procrastination can lead to more severe damage, including mold growth and structural issues. Immediate action is crucial to minimize damage.
Using Incorrect Drying Methods: Applying excessive heat to speed up the drying process can cause wood to dry too quickly and crack. It’s essential to use appropriate drying methods, such as fans and dehumidifiers, to allow gradual and even drying.
Ignoring Subfloor Damage: Focusing solely on the visible hardwood surface and neglecting the subfloor can lead to ongoing issues. If the subfloor remains wet or damaged, it can compromise the stability and health of the hardwood above it.
Improper Sanding Techniques: Sanding against the grain or using too coarse sandpaper can cause scratches and damage to the wood. Proper sanding techniques, progressing from coarse to fine grits and sanding with the grain, are essential for a smooth finish.
Skipping the Moisture Meter: Relying on visual inspection alone to determine dryness can be misleading. Using a moisture meter ensures that the wood has returned to safe moisture levels before proceeding with repairs and refinishing.

How can I tell if my hardwood floor is water-damaged?
Signs of water damage in hardwood floors include discoloration, warping, cupping, and a musty odor. Discoloration can manifest as dark or light spots, while warping involves board bending or lifting. Cupping occurs when the edges of the boards rise higher than the center. Additionally, if you notice any gaps between the planks or a spongy feeling underfoot, these are indicators of potential water damage. It’s important to inspect both the surface and the subfloor, as water can seep through and cause hidden damage.
Can I repair water-damaged hardwood floors myself?
Yes, you can repair water-damaged hardwood floors yourself if the damage is minor and you’re comfortable with DIY projects. For small areas of cupping or minor warping, drying the area thoroughly and sanding can often resolve the issue. However, if the damage is extensive, involves mold growth, or requires replacing multiple boards or sections, it might be best to consult a professional. Professional assessment and repair ensure that the job is done correctly and prevent further damage.
How long does it take for hardwood floors to dry out?
The drying time for hardwood floors varies depending on the extent of the damage, the environmental conditions, and the drying methods used. Generally, it can take anywhere from a few days to several weeks for hardwood floors to dry out completely. Using fans, and dehumidifiers, and ensuring good ventilation can help speed up the process. Regularly monitoring the moisture levels with a moisture meter will give you a better idea of when the floor has returned to safe levels for repair and refinishing.
What type of finish is best for protecting hardwood floors from water damage?
Polyurethane finishes are among the best for protecting hardwood floors from water damage. They come in oil-based and water-based options, both of which provide a durable and water-resistant seal. Oil-based polyurethane offers a more robust finish but takes longer to dry, while water-based polyurethane dries faster and has lower VOC emissions. Applying multiple thin coats of polyurethane ensures a strong protective layer. Regularly maintaining and reapplying the finish as needed will help maintain its effectiveness.
How can I prevent future water damage to my hardwood floors?
Preventing future water damage involves several proactive measures. Controlling indoor humidity levels is crucial; use dehumidifiers in humid months and humidifiers in winter to maintain consistent levels. Promptly clean up spills and address any leaks from plumbing or appliances. Use area rugs and mats in high-traffic areas and near entryways to protect against moisture and dirt. Applying a water-resistant finish to the floors provides an extra layer of protection. Regularly inspect your home for potential sources of water damage and educate household members on preventive practices.
Hardwood flooring water damage repair – Floor11 inc

Repair Engineered Wood Floor Water Damage – House for Rent

How To Fix Water Damage On Wood Floor – BapakPucung

Repair Water Damaged Hardwood Floors
Water Damage On Wood / Hardwood Floors After Water Damage Andrews Carpet Cleaning / Insulation

Hardwood Floor Repair Water Damage – Damage Choices
Repairing water damaged hardwood floors Mr. Floor Chicago
Related Posts: