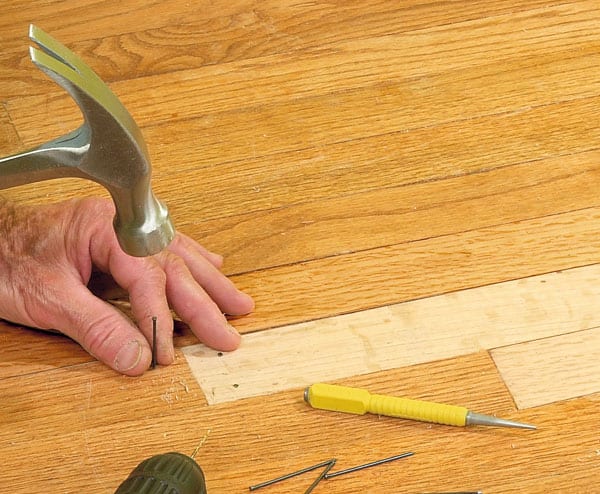
Hardwood Flooring Nails By Hand
How to Install Hardwood Floors
Last Row Flooring Hand Nailed
Example of how to nail down hand-scraped hardwood floors – YouTube
How To Install Hardwood Flooring Young House Love
Plywood Floor Nailing Schedule – Nail Ftempo
The Best What Size Nails To Use For Face Nailing Hardwood Flooring And Description Cleaning

Nailing Wood Flooring JLC Online

How to Fix Popping Hardwood Floors – Ready To DIY

Nailing Hardwood Floors By Hand – Nail Ftempo

Manse floor with nailed fixings. Distressed floors, Flooring, Oak floors

Best Nails for Hardwood Flooring In 2023 & Buying Guide
Related Posts:
- Hardwood Floor Decorating Ideas
- Hardwood Floor In A Kitchen
- Engineered Hardwood Flooring
- Rustic Oak Hardwood Flooring
- Parquet Hardwood Flooring
- Hardwood Floor Duster
- Homemade Hardwood Flooring
- Hardwood Floor Stain Colors
- Hardwood Floor Repair DIY
- Dark Hardwood Flooring Ideas
Hardwood flooring adds beauty and value to any room, but when it comes to nailing the planks in place, many homeowners assume they have to hire a professional. Surprisingly, given the right tools and knowledge, you can nail hardwood flooring yourself with confidence. This article will give you all the information you need to get started, from which tools to buy, to how to properly lay each plank.
Tools You’ll Need for Nailing Hardwood Flooring By Hand
If you’re going to be nailing your hardwood flooring by hand, there are some essential tools you’ll need before you get started. These include:
-Mallet: A mallet is a wooden or rubber-headed hammer used for hammering in nails without damaging the surface of the wood. It’s also useful for securing boards during installation.
-Nail gun: If you’re going to be nailing down a large area of hardwood flooring, using a nail gun may be a better option than hand nailing. Not only will it make the job faster, but it will also provide greater accuracy and lessens the risk of marring the wood.
-Safety glasses: You should always wear safety glasses when hammering or nailing hardwood floors. This will protect your eyes from flying wood chips, dust particles, and other debris that may be present during the installation process.
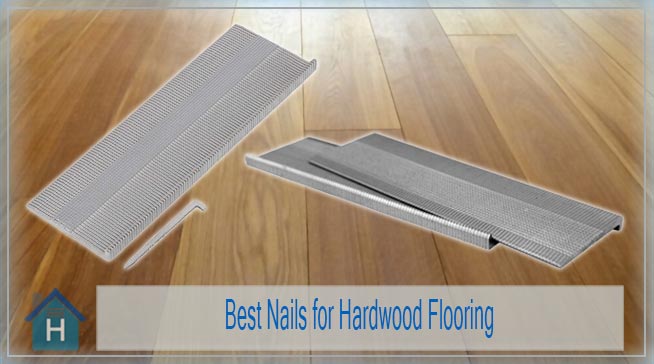
Choosing the Right Nails
Once you have all the necessary tools on hand, the next step is to choose the right nails for your project. Different types of nails can be used depending on the size and species of your hardwood flooring. Some popular types include:
-Finishing nails: Finishing nails are typically used for nailing down thin strips of hardwood flooring which are 3/8″ or less in thickness. These nails are made with small heads that don’t show after they’ve been hammered in, giving them a neat and flush finish once the job is done.
-Flooring cleats: Flooring cleats are designed for thicker planks of hardwood which measure 3/4″ or more in width. The harder material used in these nails prevents them from bending when they’re driven into dense wood planks.
-Screws: When it comes to fastening hardwood flooring, screws are also an option. Although they take longer to install than nails, screws are more secure and less likely to come loose over time. This makes them ideal for high-traffic areas like hallways and entryways where added stability is needed.
Preparing for Installation
Before you start nailing down your floorboards, there are a few things you need to do first. Make sure to double-check that your subfloor is level and clean it thoroughly with a vacuum or broom (dustbusters work best). This will help ensure that your new floor lays flat with no bumps or ridges. You should also inspect the boards for any defects such as knots or splits before installing them. If any boards have these issues, replace them before continuing on with your project.
Also, make sure that your boards are properly cut to fit the room’s dimensions before installing them. For example, if you’re going down a hallway that’s slightly narrower at one end than it is at the other, measure each board carefully before nailing it into place to ensure a snug fit throughout its entire length.
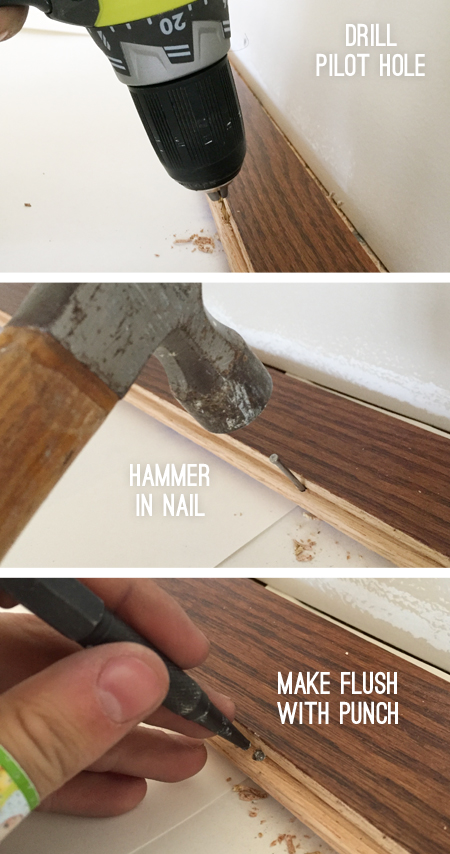
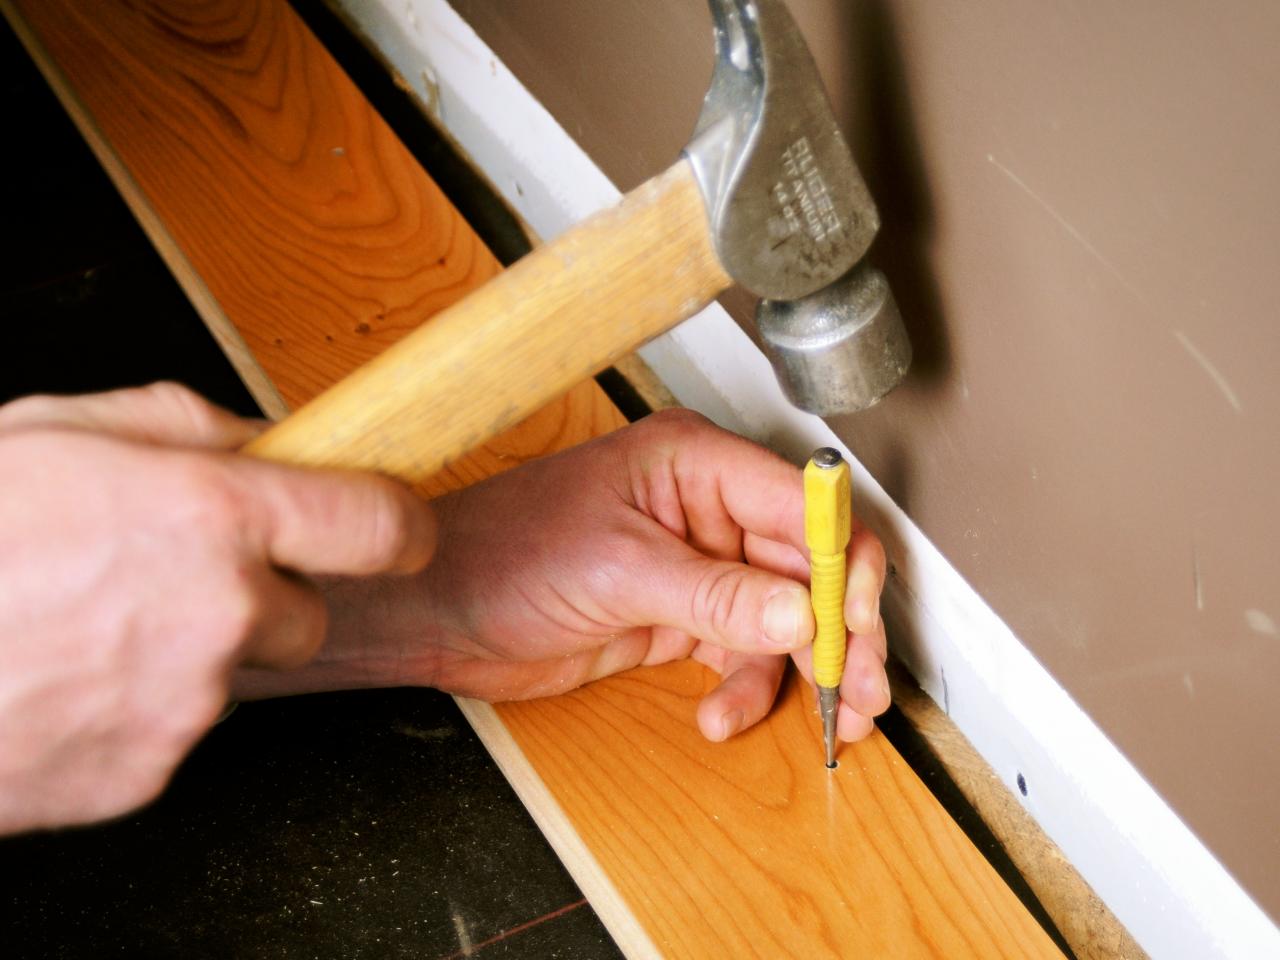
Nailing Down Your Hardwood Flooring
Now that you have all the necessary tools and supplies on hand and your subfloor is ready for installation, it’s time to start nailing down your hardwood flooring by hand! Here are some tips for getting a secure fit without marring the finish:
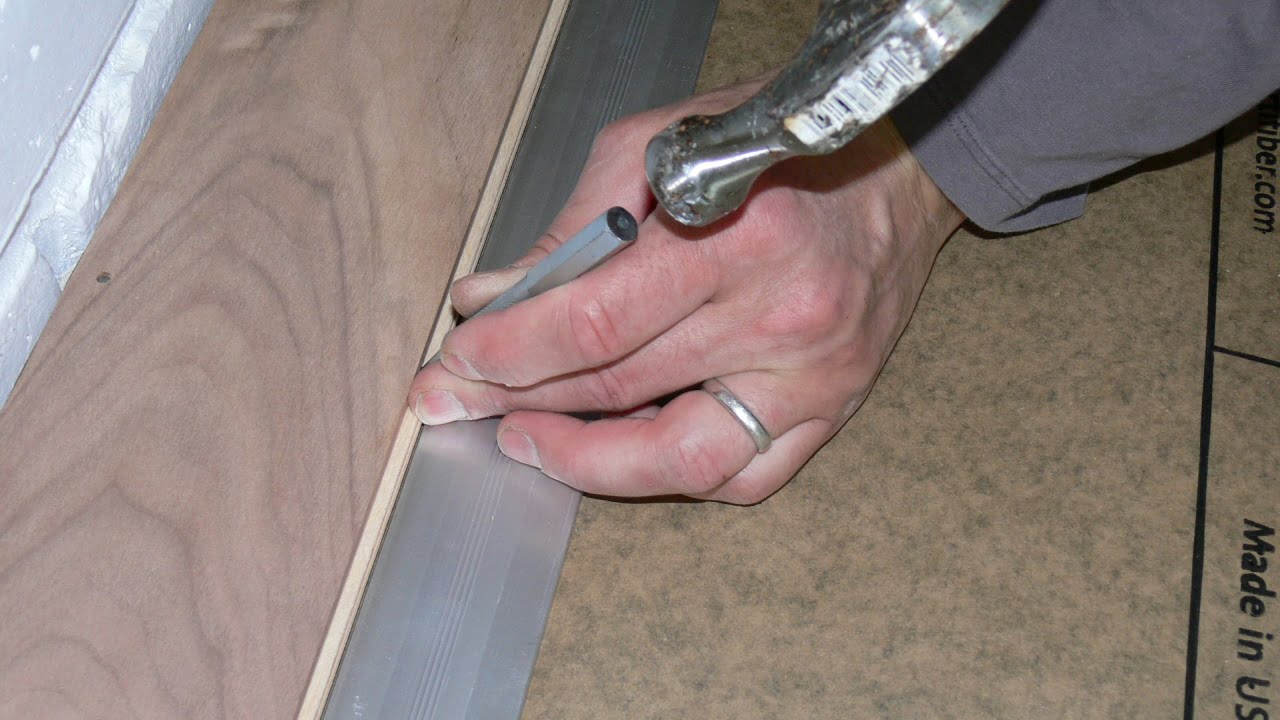
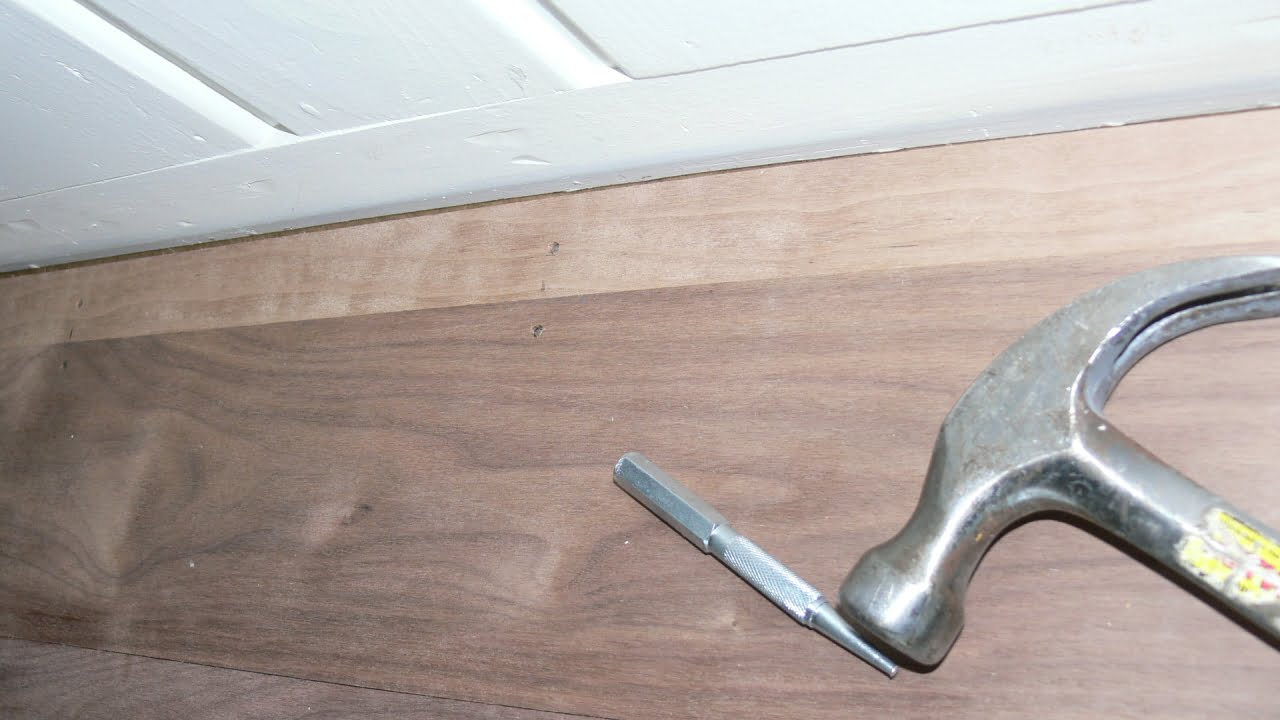
-Before hammering each nail in place, gently tap around its head with a scrap piece of wood (or even an old sock!) to ensure that it’s properly seated against each plank without splintering it or cracking its finish.
-Make sure to use enough force when hammering each nail into place; however, don’t overdo it as this could cause dents in your finished boards! Once each nail has been fully inserted into its slot, twist it slightly back and forth To help lock it firmly into place.
-Pay attention to the grain of each plank when hammering your nails in. If you’re going against the grain, the boards may shift or pull away from one another, creating an uneven floor.
-Keep in mind that hardwood floors expand and contract due to humidity changes, so don’t nail them down too tightly or they may start to buckle after a while. It’s best to leave a slight gap between each board to allow room for this natural process.
What are the benefits of nailing hardwood flooring by hand?
1. Ensuring a secure and tight fit: When nailing hardwood flooring by hand, you have complete control over the angle and force of each nail. This allows you to ensure that each fastener is driven securely into place and that the boards are properly fitted together. As a result, this can help to prevent squeaks and other issues which can arise when the floor is not properly secured.2. Increased precision: You can place your hand-driven nails with greater accuracy, reducing the risk of damaging any of the boards beneath them.
3. Greater control: Unlike power tools, nailing hardwood flooring by hand allows for greater control when it comes to the placement of each nail, so you can carefully plan out where each one will go to ensure the best results.
4. Cost savings: Hand nailing hardwood flooring can be significantly cheaper than using power tools, as you don’t need to buy or rent any additional equipment.
What tools are needed to nail hardwood flooring by hand?
1. Hammer2. Nails
3. Mallet
4. Pull Bar
5. Nail Set
6. Pencil
7. Glue Gun
8. Safety Glasses
9. Knee Pads
10. Tapping Block
11. Chalk Line
12. Tape Measure