How Do You Lay Laminate Flooring On Concrete – step by step instructions for laying laminate and vinyl wolfcraft
/Installing-Laminate-Eyeballing-Layout-56a49d075f9b58b7d0d7d693.JPG)
Laminate Flooring On Concrete Basement Floor – Flooring Ideas – how to install laminate flooring
29+ Should You Install Laminate Flooring In A Bathroom PNG – how not to install laminate flooring

How To Install Flooring On Uneven Floor – laying laminate flooring

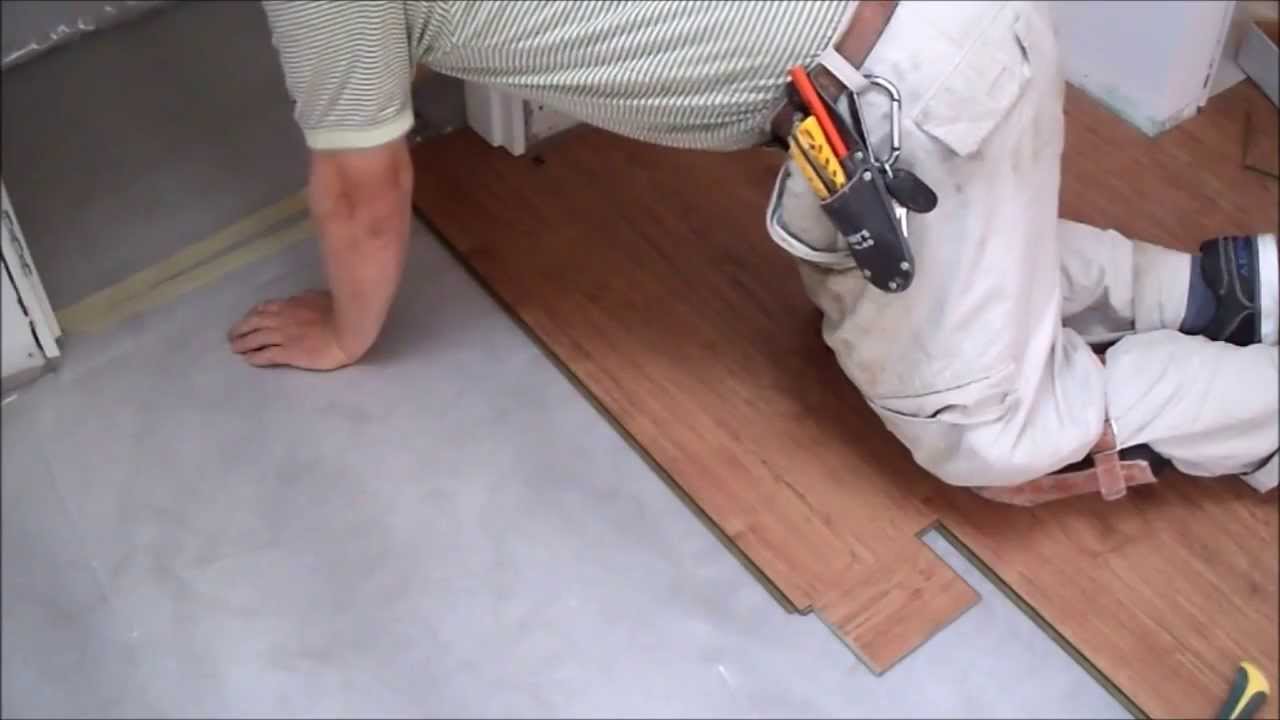
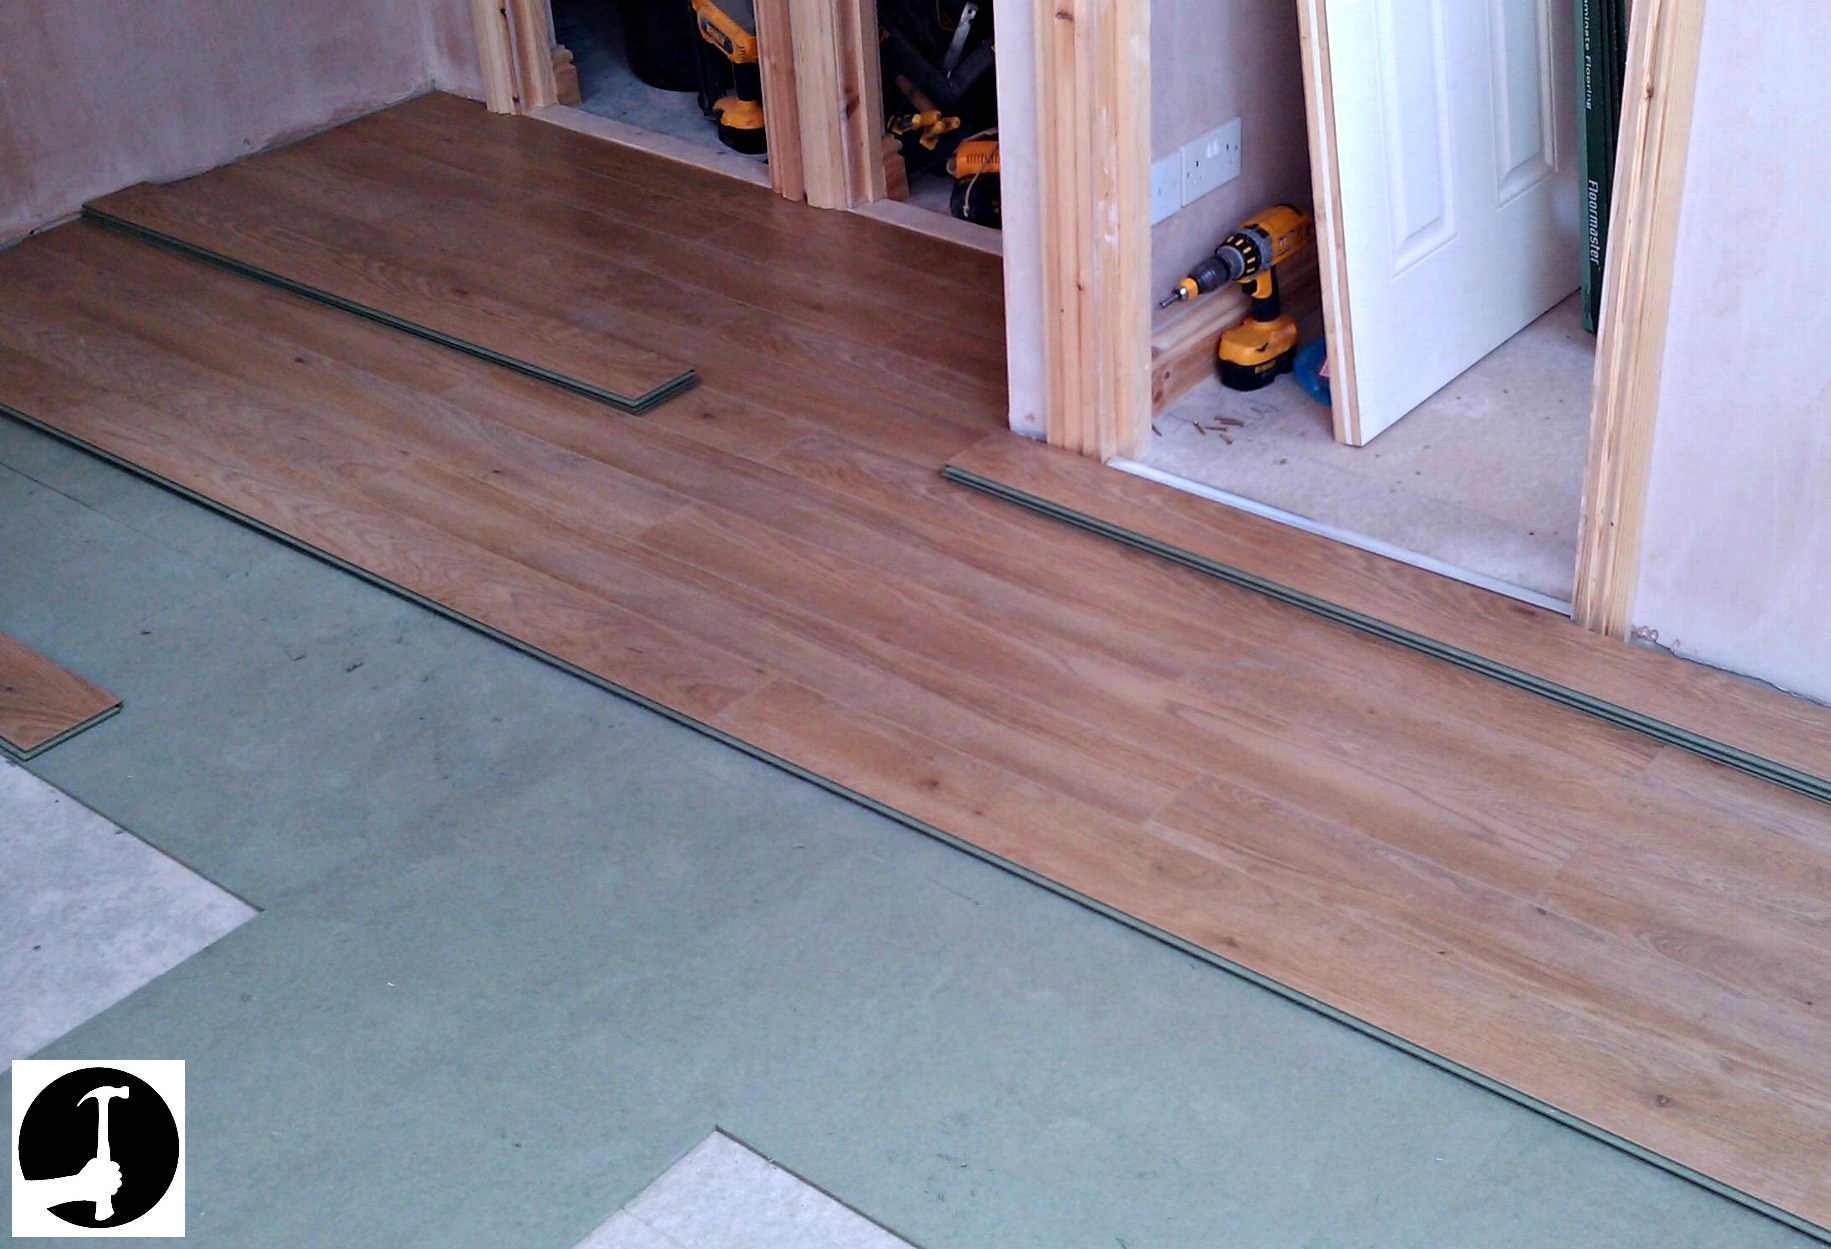
Laminate Flooring How To Lay : Step By Step Instructions For Laying Laminate And Vinyl Wolfcraft – how to lay laminate flooring

Laminate Flooring For Concrete Floors – Flooring Ideas – how to lay laminate flooring
Laminate Flooring How To Lay : Step By Step Instructions For Laying Laminate And Vinyl Wolfcraft – how to install laminate flooring
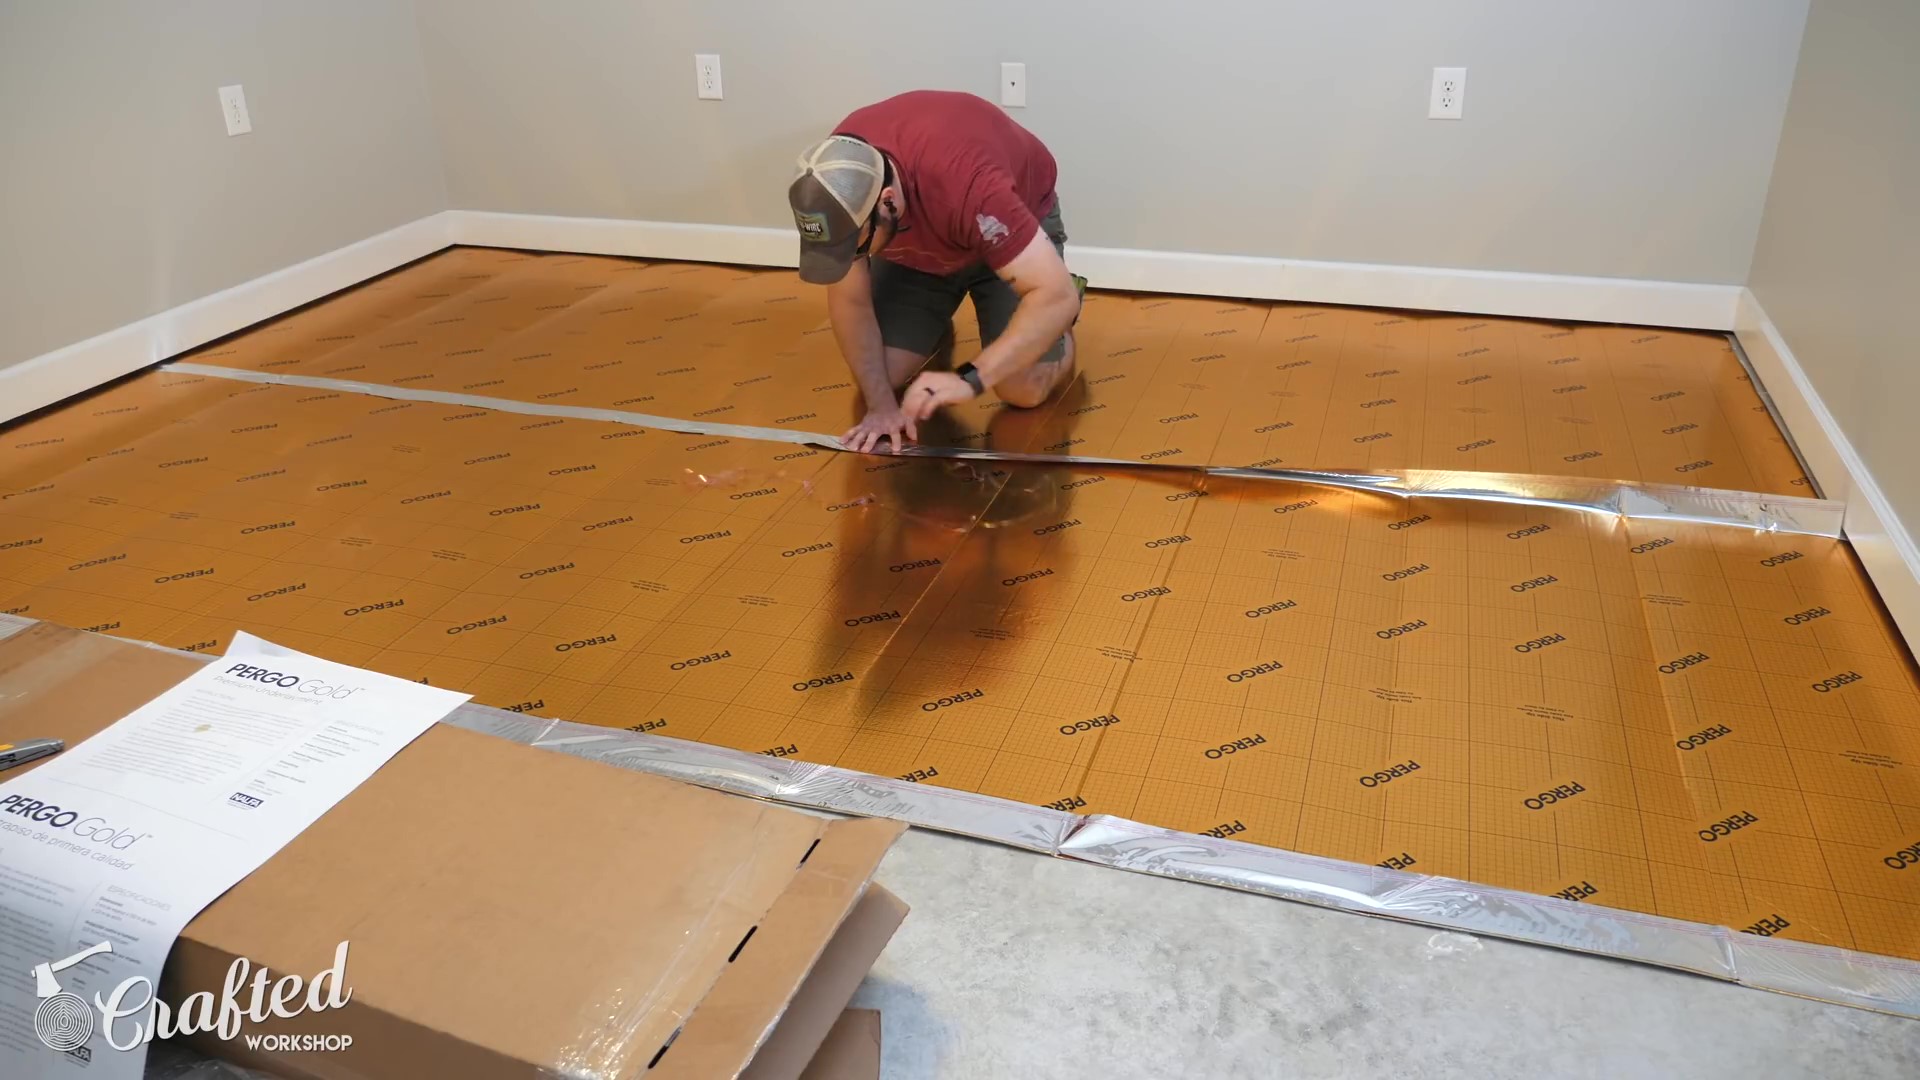
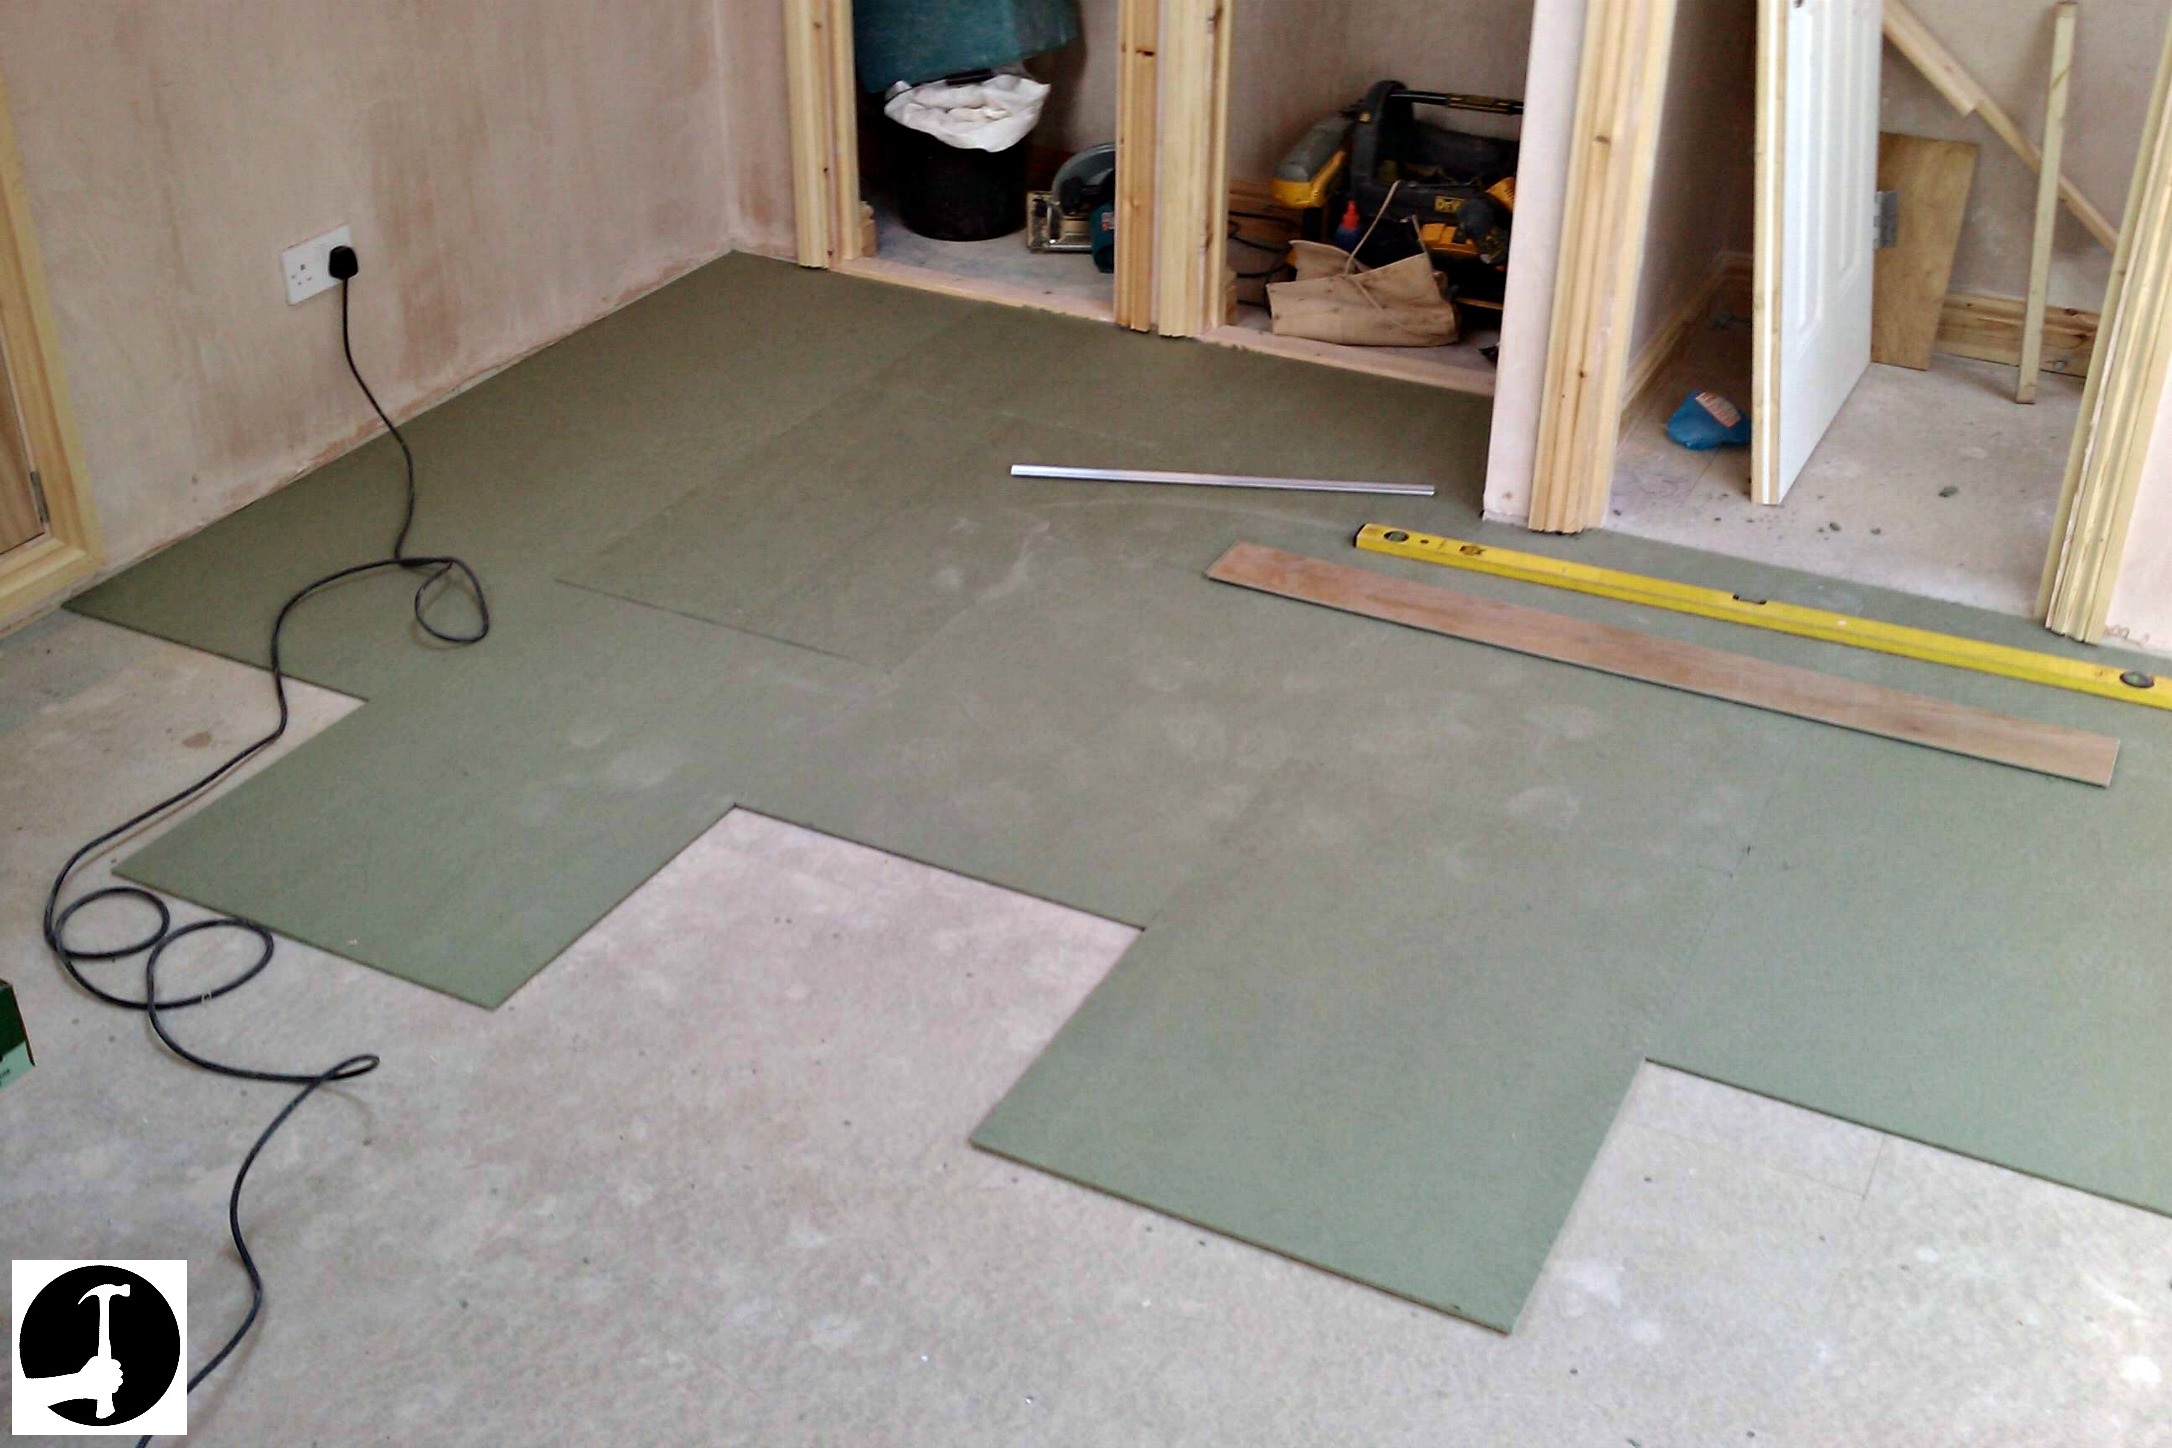
Flooring Underlayment – Materials and Applications – how to lay laminate flooring
/new-floor-installation-185270632-582b722c3df78c6f6af0a8ab.jpg)
11 Steps How to Install Laminate Flooring HireRush Blog – how to lay laminate flooring
Laminate Flooring How To Lay : Step By Step Instructions For Laying Laminate And Vinyl Wolfcraft – how to lay laminate flooring
Which Direction To Lay Laminate Flooring? – how to lay laminate flooring

How To Put Laminate Flooring On A Slab – Tutorial Pics – how to install laminate flooring

Related Posts:
- Oak Grey Laminate Flooring
- Laminate Flooring Living Room Ideas
- How To Remove Laminate Flooring
- Gray Laminate Flooring Ideas
- How To Remove Laminate Floor Glue
- Laminate Floor Edge Filler
- Farmhouse Laminate Flooring
- Dark Laminate Flooring Ideas
- Laminate Floor Uneven Transition
- Laminate Floor Colors Ideas
Laying down laminate flooring on a concrete slab is a great way to improve the look and feel of any room. It’s also a relatively easy and affordable DIY project, making it a great choice for any homeowner looking to make a lasting improvement to their home. In this guide, we’ll walk you through the steps you need to take in order to lay laminate flooring on concrete with ease.
## Choosing Your Laminate Flooring
Before you can begin any work, you’ll need to choose the right type of laminate flooring for your needs. There are several different kinds of laminate flooring available, and each type has its own advantages and disadvantages. When selecting your laminate flooring, consider factors like durability, cost, color, and installation ease.
For example, if you’re looking for an inexpensive option that is easy to install, you may want to go with a floating laminate flooring system. This type of flooring isn’t attached to the concrete slab in any way; instead, each piece is held in place by its own weight and interlocking edges. On the other hand, if you’re looking for an incredibly durable option that can withstand heavy foot traffic, you may want to consider an engineered wood or stone laminate flooring system.
## Preparing the Concrete Slab
Once you’ve selected your laminate flooring, the next step is to prepare the concrete slab beneath it. Start by cleaning the area thoroughly with a vacuum and mop. You’ll also want to make sure that there are no cracks or bumps in the concrete slab which could cause problems later on. If you do notice any cracks or bumps, use a patching compound or leveling compound to smooth them out before you continue.
## Laying Down Underlayment
After preparing the concrete slab, it’s time to lay down your underlayment. This is an important step since it will provide extra cushioning for your laminate flooring and help reduce sound transmission between rooms. Make sure to use the correct type of underlayment for your chosen laminate flooring; some types of laminate require special types of underlayment that have specific installation requirements.
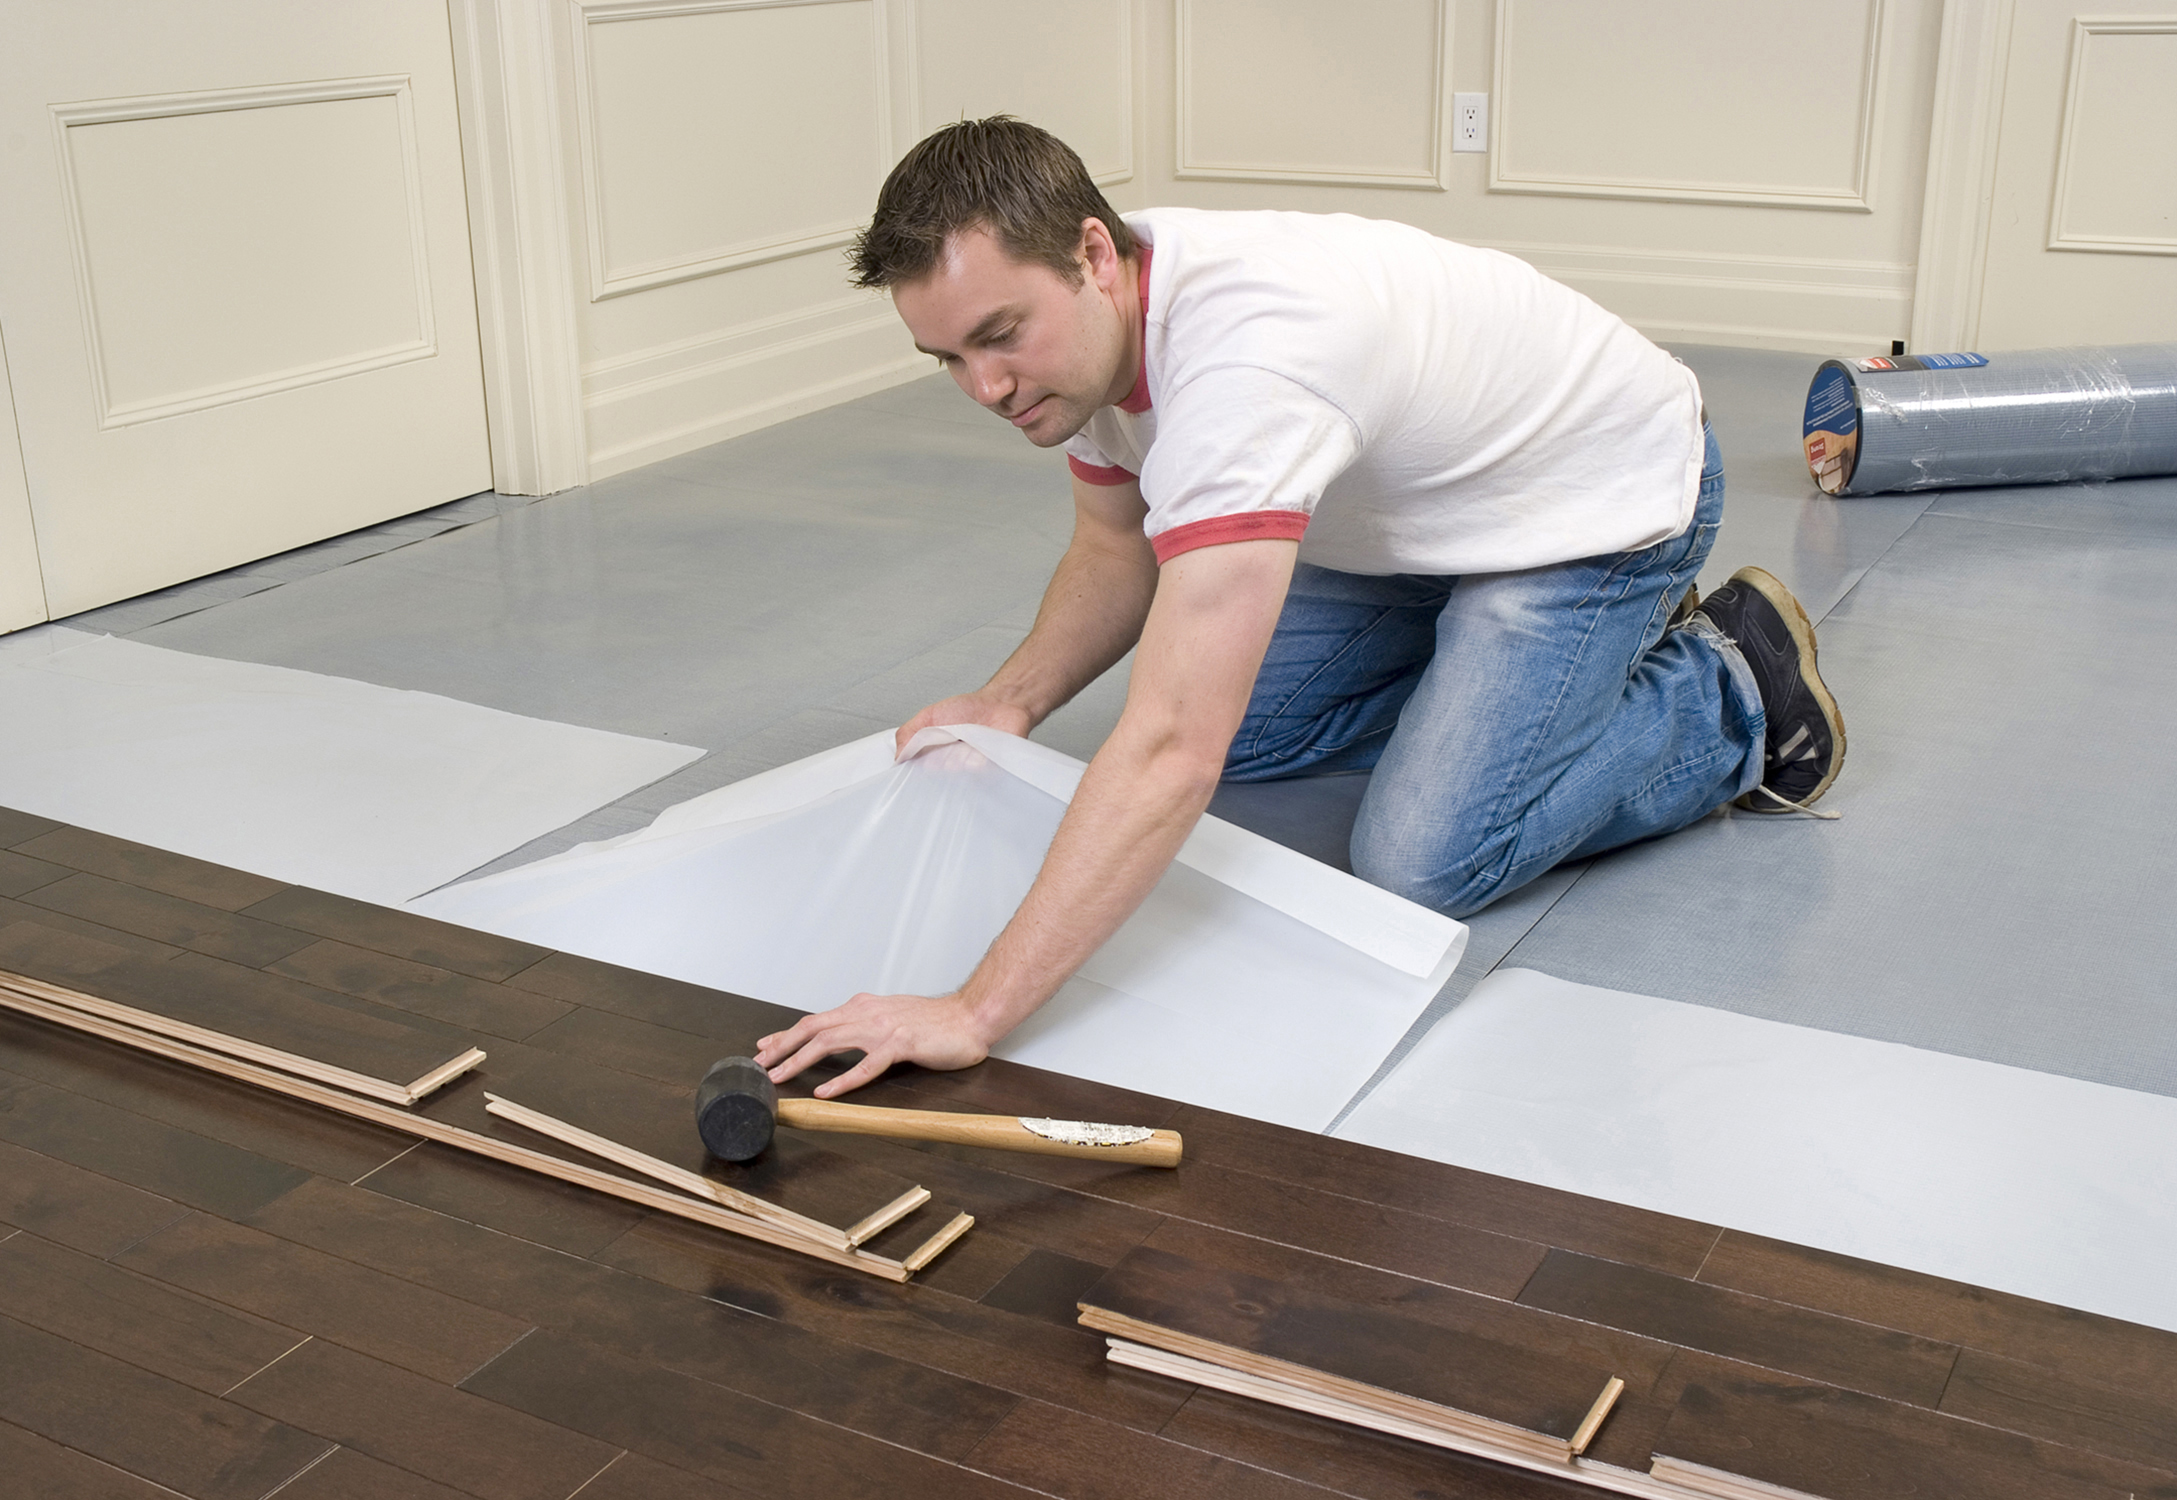
## Installing Your Laminate Flooring
Now that your underlayment is in place, it’s time to start installing your laminate flooring. Depending on the type of laminate flooring you’ve chosen, there are different methods for installation. If you’ve chosen a floating system, start by laying out the first row of planks along one wall. Make sure that each plank is properly aligned with the other pieces before tapping them into place with a mallet. Continue laying out planks until you reach the opposite wall.
If you’ve chosen an engineered wood or stone laminate flooring system, start by laying out your planks as usual before positioning them against the wall at a slight angle. Then use a pneumatic stapler or adhesive glue to secure them in place. Once all of your planks have been installed, use a rubber mallet and tapping block to gently tap them into place and ensure that they are properly aligned.
## Finishing Touches
Once all of your planks have been installed and tapped into place, use a foam roller or brush to apply a thin layer of sealant over the entire floor surface. This will help protect your new laminate floor from spills and other debris while also creating a beautiful glossy finish. Allow the sealant to dry completely before using the room again – usually 24-48 hours should be enough time for it to set properly.
# Conclusion
Laying down laminate flooring on concrete can be a great way to improve the look and feel of any room in your home – and it doesn’t have to be difficult either! With proper preparation and installation techniques, anyone can achieve professional-looking results with just a few simple steps. So don’t wait any longer – start planning out your next DIY project today!