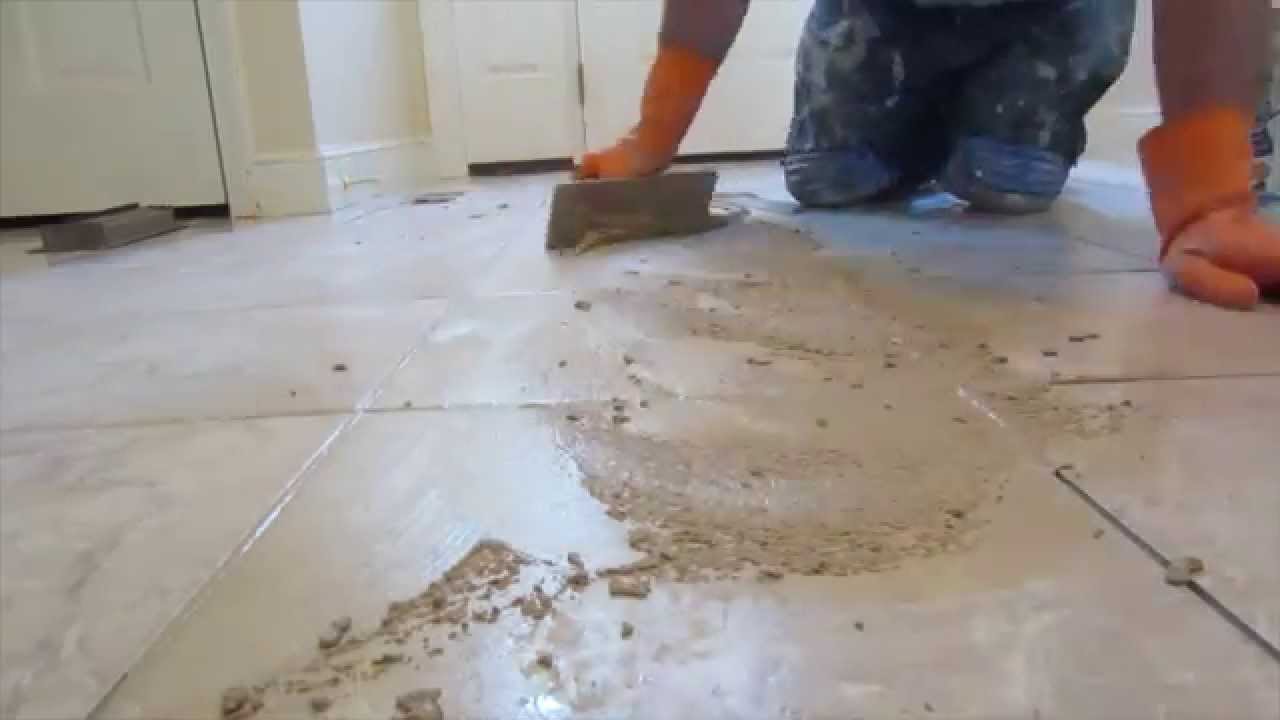
How To Grout A Kitchen Floor
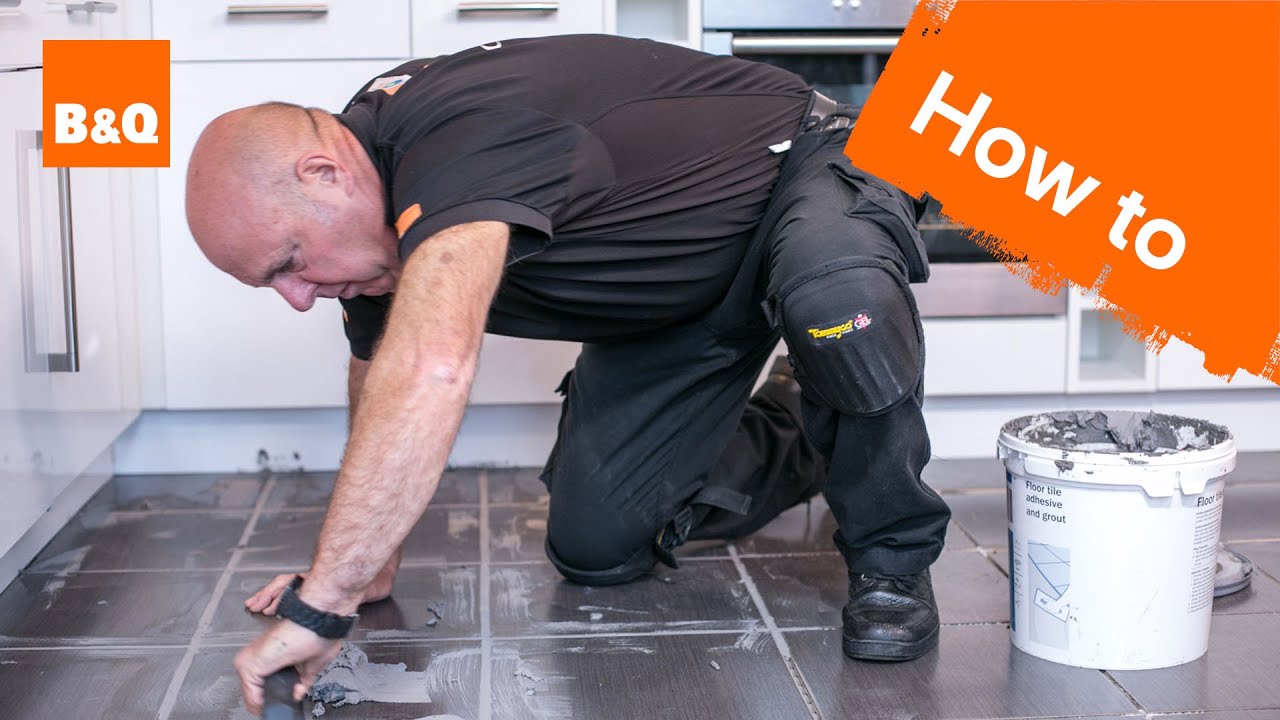
How to tile a floor part 3: grouting
How to Grout a Tile Floor
:max_bytes(150000):strip_icc()/how-to-grout-a-tile-floor-5208084-hero-b781e1682f3e442ca8f199718bb9bc6d.jpg)
How to Grout a Tile Floor: 12 Steps (with Pictures) – wikiHow

Is Your Tile Floor Aged and Grimy? Learn How a Grout Cleaning
This Kitchen Floor Was Revamped Thanks to Our Tile and Grout
Commercial Kitchen Quarry Tile Cleaning u0026 Sealing

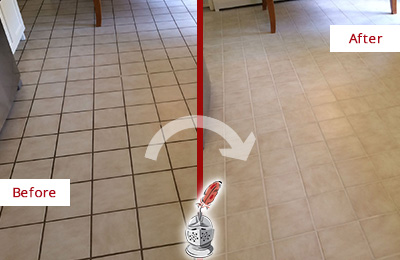
Grout Paint Before and After! Easy Tile Transformation – The Lived

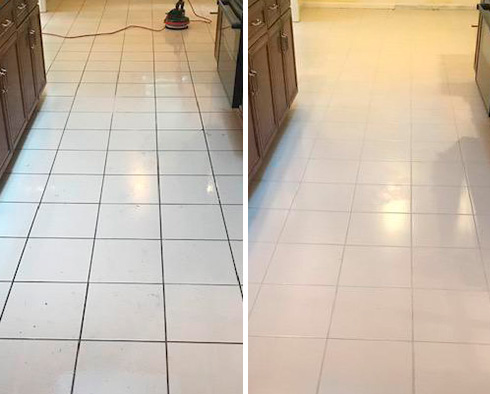
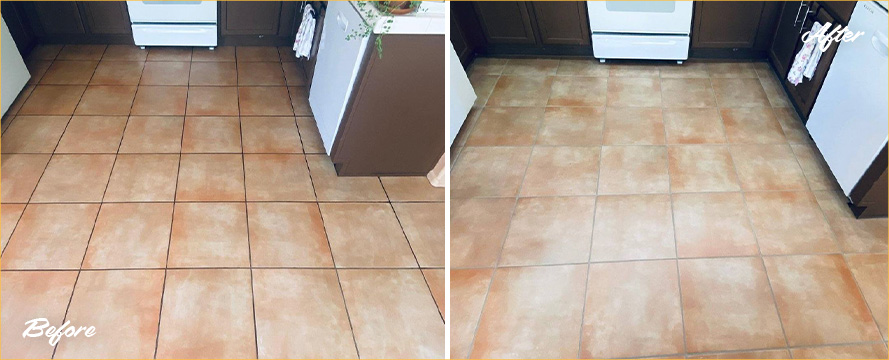
Our Marana Grout Cleaning Crew Works Wonders on This Kitchen Floor
My Momu0027s Kitchen – The Magic Of Making Old Grout Look New Again
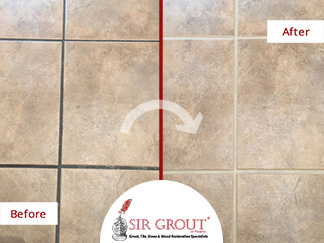
Residential Grout Recoloring and Sealing – Sir Grout Dallas Fort Worth
Related Posts:
- John Lewis Kitchen Flooring
- Kitchen Diner Flooring Ideas
- Wickes Kitchen Floor Tiles
- Kitchen Floor Ideas Gallery
- How To Clean Grout Lines On Kitchen Floor
- Mediterranean Kitchen Floor Tiles
- Kitchen Cherry Floor
- Kitchen Floor Tile Layout
- Kitchen Backsplash Floor And Decor
- Best Type Of Wood Flooring For Kitchen
Grunting Your Kitchen Floor: A Step-By-Step Guide for Perfect Results
How To Grout A Kitchen Floor
When it comes to giving your kitchen an update, you may find yourself considering a few different options. One of the more popular choices is tiling the floors. This can bring a fresh and modern look to any kitchen, but it is important to finish the job properly by grouting the tiles. This is a task that requires some patience, but with the right steps it can be done easily and with perfect results.
What You Will Need
Before you start grouting your kitchen floor, you will need to gather all of the necessary materials and equipment. The most important items are grout, a grout float, a bucket of warm water, and a sponge or cloth. You will also need something to protect yourself such as gloves and safety glasses.
Preparing The Floor
Once you have all of your supplies, the first step is to prepare the floor for grouting. Start by removing any dirt and debris from the surface of the tiles with a vacuum cleaner. Make sure that all of the tiles are firmly in place and that there are no gaps between them. Once you have checked this, it is time to mix the grout.
Mixing The Grout
The grout should be mixed according to the instructions on the package, usually requiring you to add some water until a thick paste forms. Once you have mixed it well, let it sit for about 10 minutes before moving on to the next step.
Applying The Grout
Once you are ready, use your grout float to spread the grout onto the tiles. Make sure that you cover all of the gaps between them and that there are no air bubbles or pockets left behind. Once you have finished this step, let the grout dry for at least 24 hours or as specified on the package instructions.
Cleaning The Tiles
Once the grout has dried, it is time to clean off any excess from the tiles using a damp cloth or sponge. Make sure that you do not scrub too hard as this could damage the tiles or remove too much grout from between them. Once you have finished cleaning, let everything dry for at least an hour before walking on them.
Finishing Up
Now that your kitchen floor has been successfully grouted, it is time to admire your work! If you followed these steps properly then you should have a perfect result with no gaps between your tiles and no excess grout left behind. Congratulations!
SEO Title: Grouting A Kitchen Floor – A Step-By-Step Guide For Perfect Results