Ceramic Tile: How To Lay Ceramic Tile On Concrete
:max_bytes(150000):strip_icc()/can-you-install-tile-directly-on-concrete-1822600-04-458f7bb6c78348c1835cf8054ef36553.jpg)
Laying Ceramic Tile On Cement Floor – Tutorial Pics
How Long Does It Take to Tile a Floor? Hunker How to lay tile, Ceramic floor tile, Concrete

How to Lay Tile: Install a Ceramic Tile Floor In the Bathroom

How to install ceramic tiles on a floor – YouTube
How to Tile a Floor Ceramic floor tiles, Flooring, How to lay tile
How to Tile a Floor Ceramic floor tiles, Flooring, How to lay tile

How to Install Ceramic Tile Floor in the Bathroom en 2020

Laying Ceramic Tile Over Concrete Floor – Flooring Guide by Cinvex
Laying Ceramic Tile On Cement Floor – Tutorial Pics
How to Lay Tile: Install a Ceramic Tile Floor In the Bathroom Family Handyman
Laying Ceramic Tile On Cement Floor – Tutorial Pics

Related Posts:
- Staining Concrete Floors How To
- Refinishing Old Concrete Floors
- Concrete Floor Faux Finish
- Resurfacing A Concrete Floor
- Concrete Floor Sealer And Paint
- Faux Concrete Floor Tiles
- Insulated Concrete Floor Slab Detail
- Concrete Floor Resurfacing Cost
- Polished Concrete Floors How To
- Concrete Floor Vapor Barrier Installation
Getting started on any DIY project can be intimidating, and the thought of laying ceramic tile on a concrete floor is no exception. While it may seem like a daunting task, laying ceramic tile on a concrete floor is actually quite simple with the right tools and materials. With the help of this step-by-step video guide, you’ll have beautiful ceramic tile floors in no time.
Preparing Your Concrete Floor for Ceramic Tile Installation
Before you begin the actual installation process, it’s important to ensure that your concrete floor is adequately prepared. Make sure that any existing paint or other coatings are removed from the surface and that it is clean and free of dirt and debris. Additionally, it’s a good idea to check for any cracks or other signs of damage that could interfere with the installation process. If you find any irregularities, be sure to repair them before you start laying the ceramic tiles.
Gathering the Right Tools and Materials for the Job
Once you’ve prepped your concrete floor, it’s time to gather the tools and materials you’ll need for the job. Here’s a quick list of what you should have on hand:
• Ceramic tiles
• Tile adhesive
• Notched trowel
• Grout and grout sealer
• Tile spacers
• Waterproof membrane
• Sponge
• Bucket
• Level
• Utility knife
• Protective eye wear
• Knee pads
• Gloves
• Safety glasses
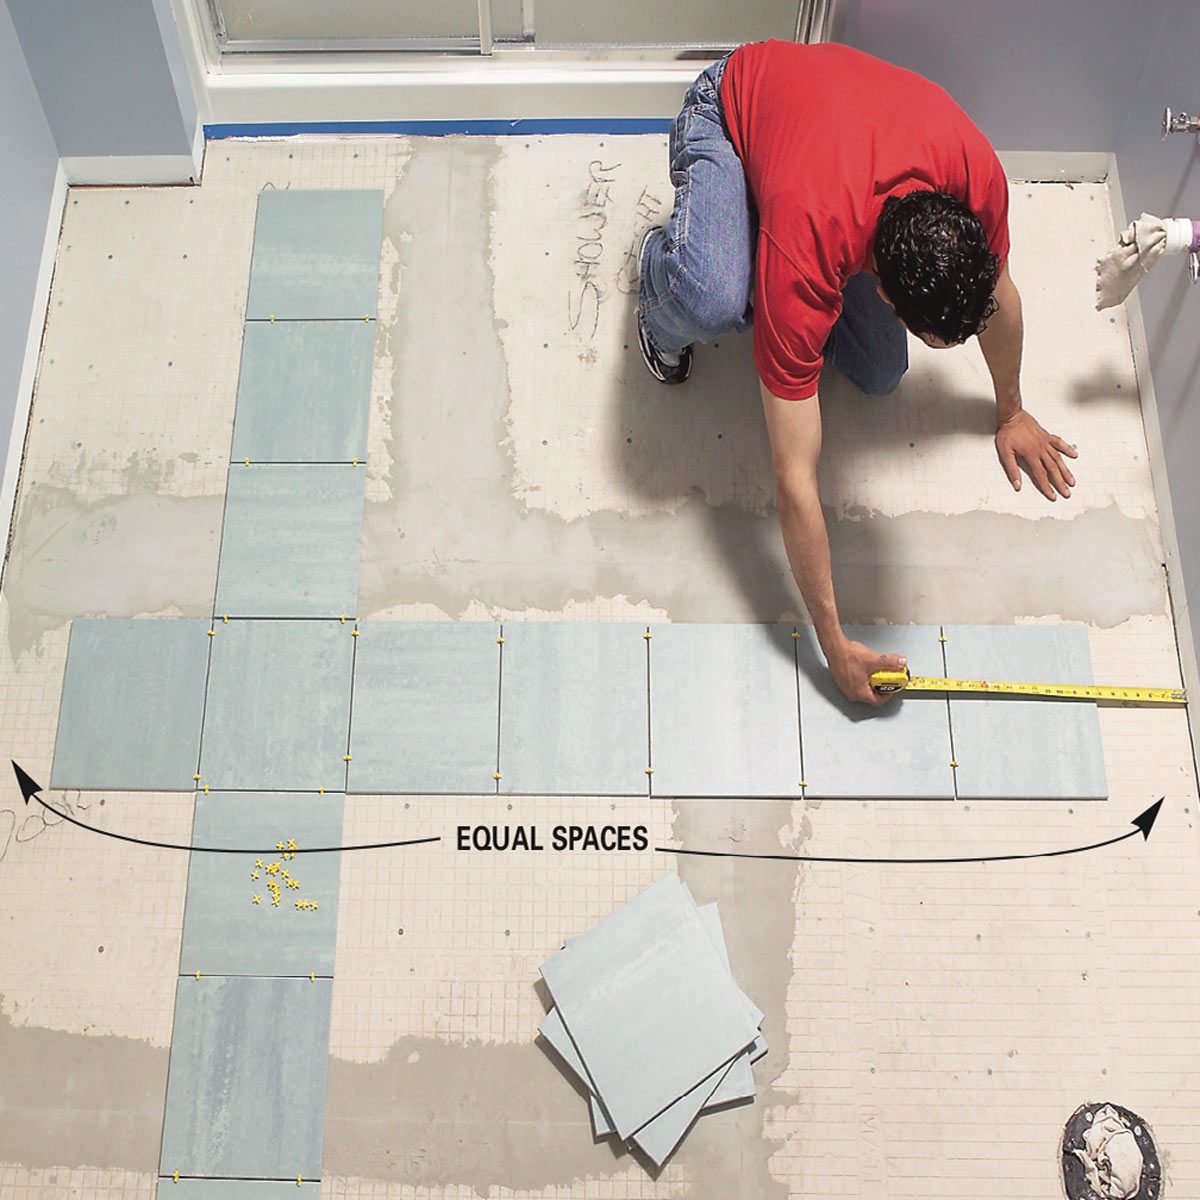
Laying Out Your Ceramic Tiles On The Concrete Floor
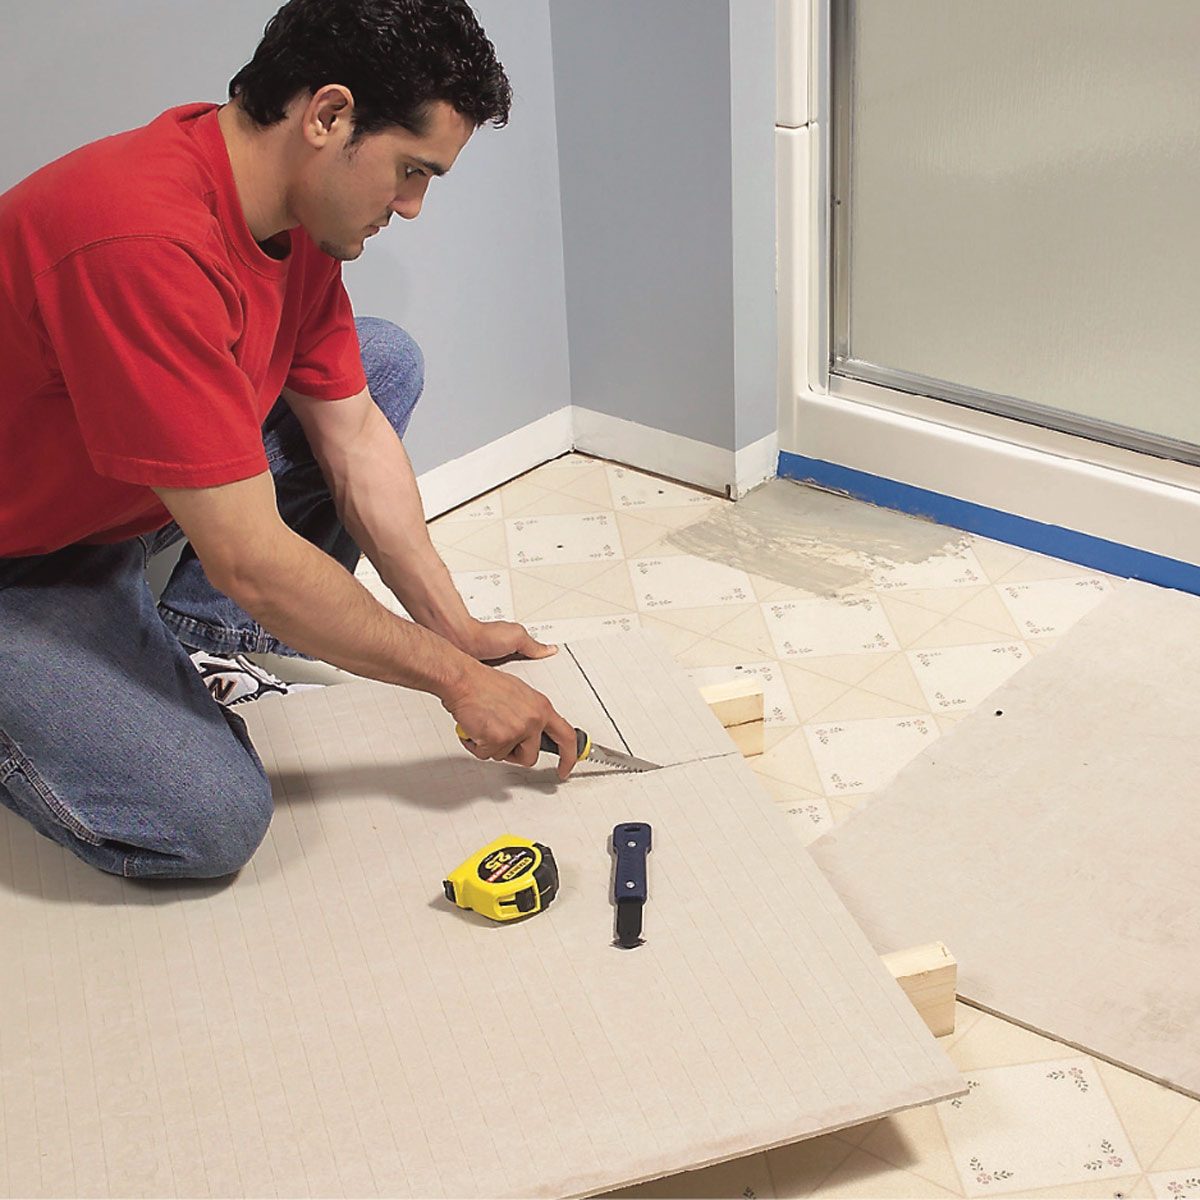
Now that you have all of your tools and materials in place, it’s time to start laying out your ceramic tiles. Begin by measuring the area where you plan to install them. Make sure to leave enough space around the edges for grout and to allow for expansion and contraction. Once you’ve determined how many tiles you’ll need, lay them out on the floor in a dry run, using tile spacers to ensure even spacing between each tile. If necessary, cut tiles to size with a wet saw or utility knife.
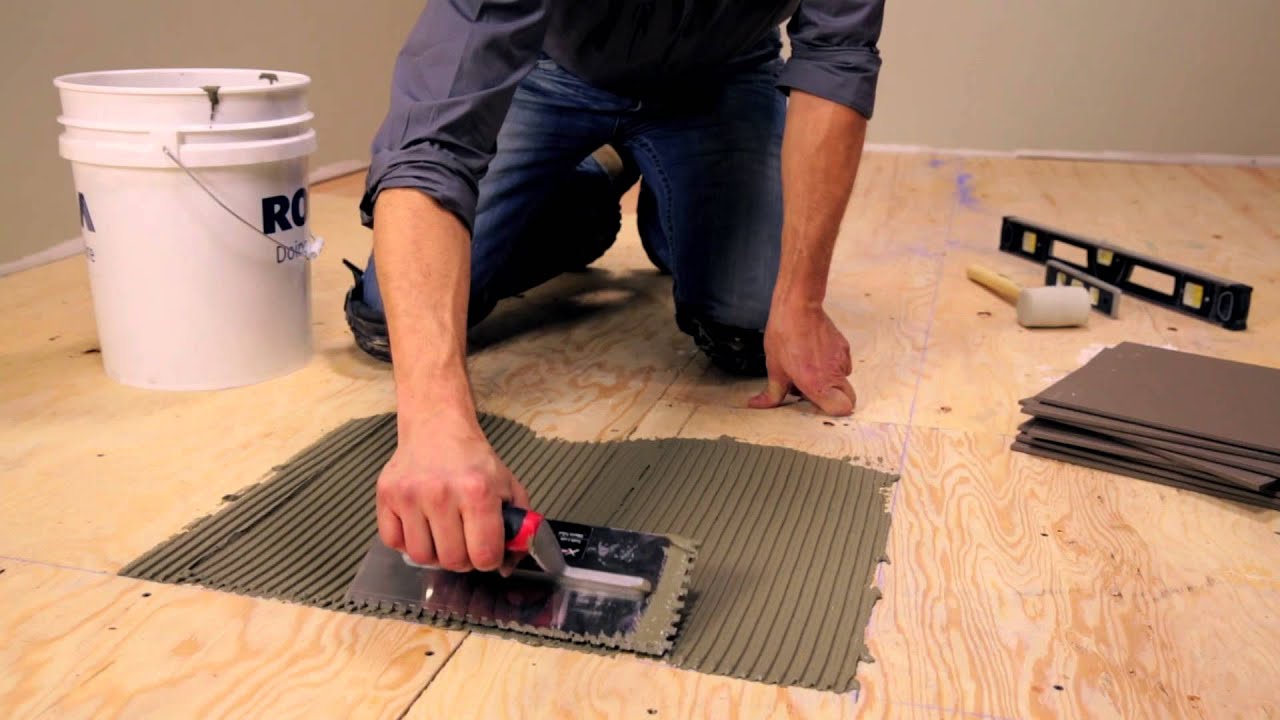
Applying The Tile Adhesive To The Concrete Floor
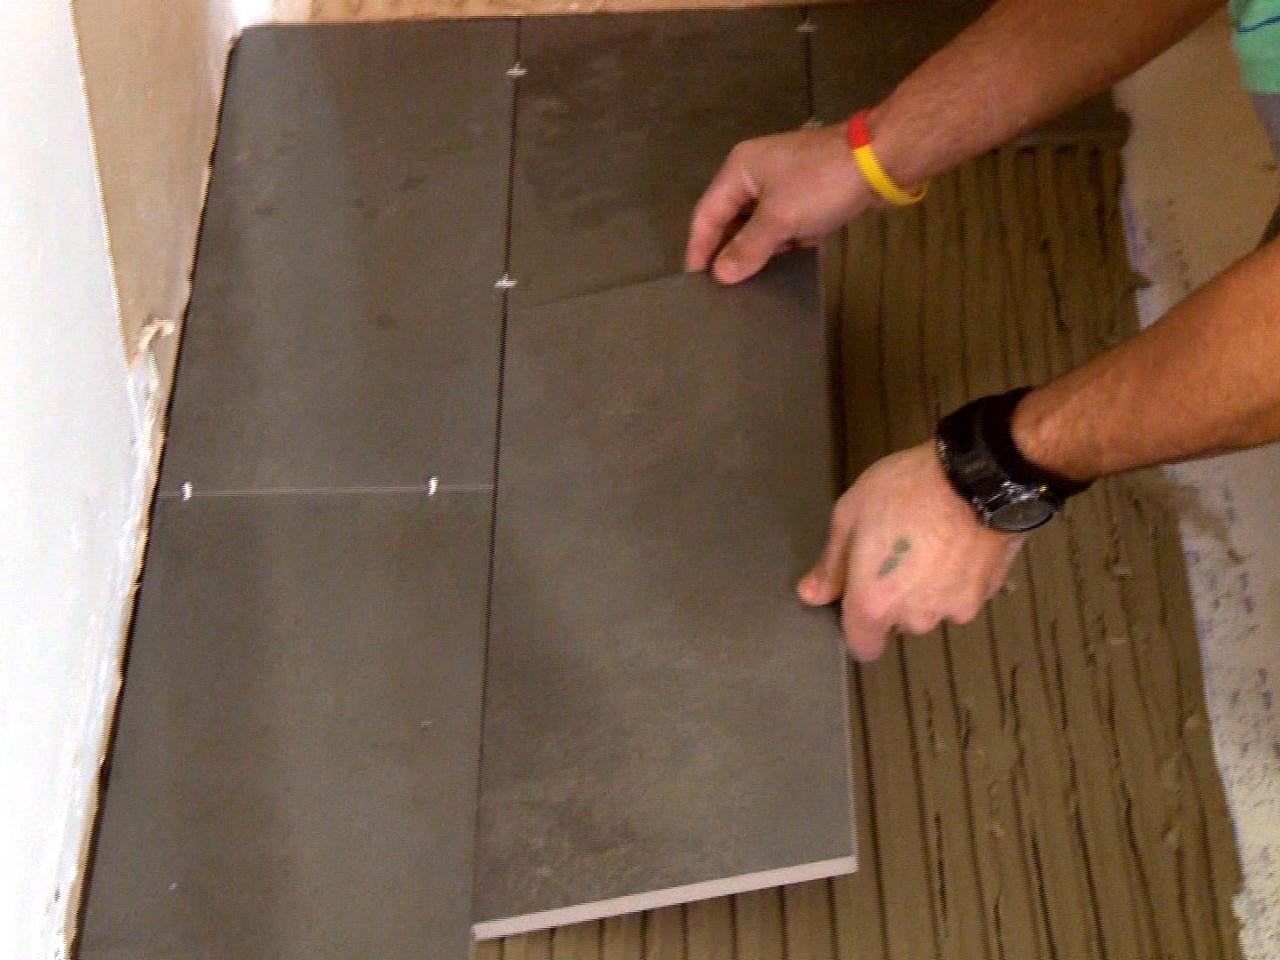
Once your tiles are laid out in their proper positions, it’s time to apply the tile adhesive. Use a notched trowel to spread an even layer of adhesive on the concrete floor. When applying the adhesive, make sure not to spread it too thickly; too much adhesive can cause bubbles or lippage when you lay your tiles down. It’s also important to pay attention to manufacturer’s instructions regarding drying times before moving onto the next step.
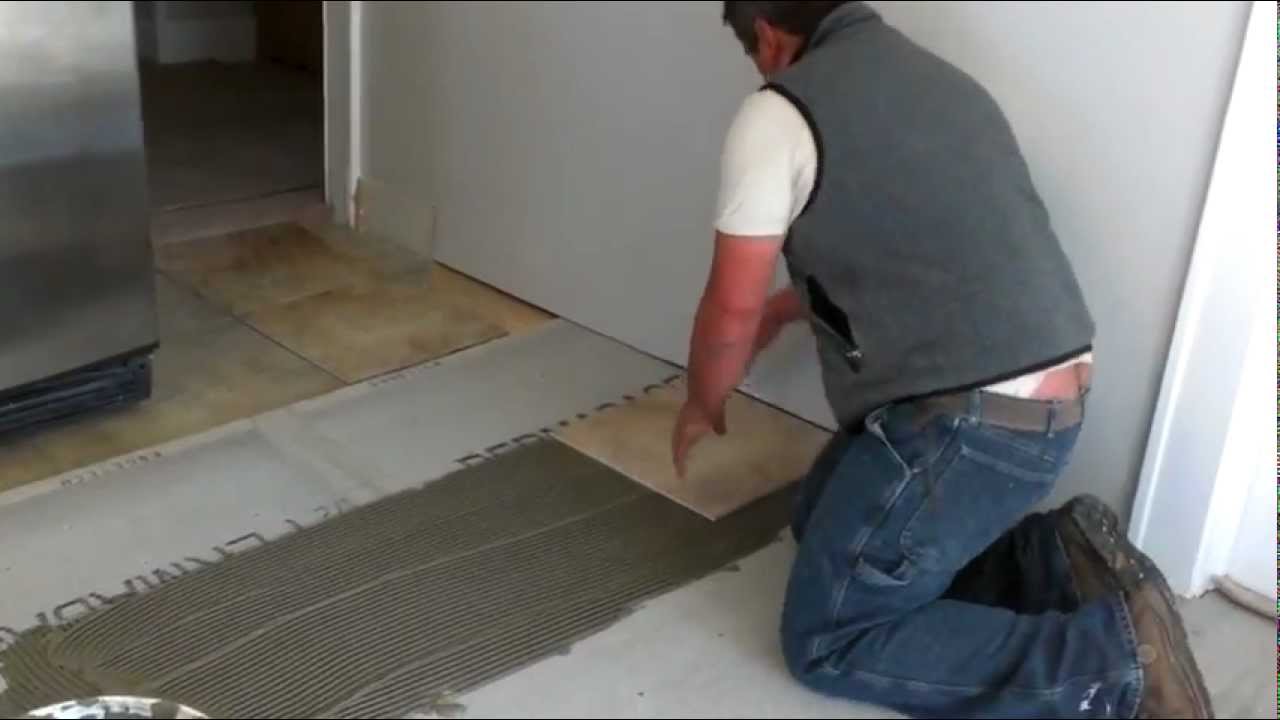
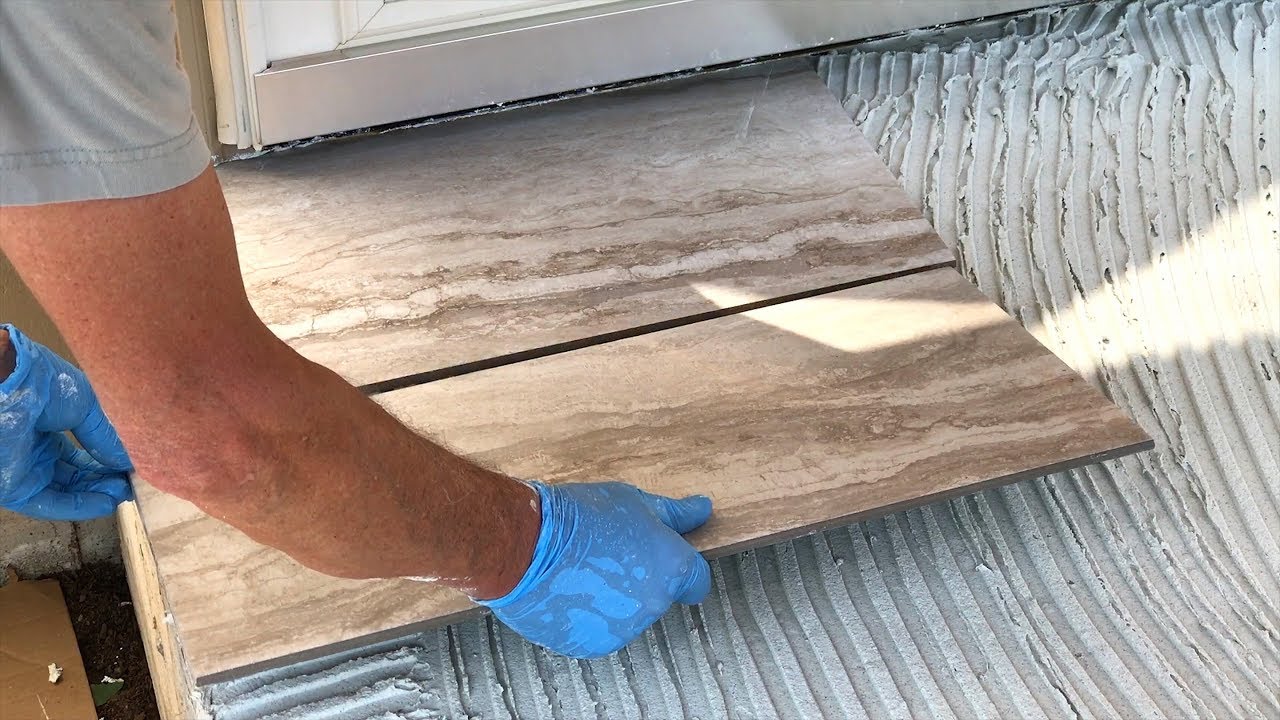
Installing The Ceramic Tiles On The Concrete Floor
Once your adhesive has had enough time to set, it’s time to begin installing your ceramic tiles onto the concrete floor. Start in one corner of your layout and gently press each tile into place using gentle pressure from your hands or a float. As you work, make sure that all of your tiles are level and flush with one another by checking with a level periodically throughout the process. If needed, use a damp sponge to clean up any adhesive that oozes out between tiles as you go along.
Sealing And Grouting The Ceramic Tiles On The Concrete Floor
Once all of your ceramic tiles are laid out and installed on the concrete floor, it’s time for sealing and grouting. Begin by applying a waterproof membrane over all of your tiles with a brush or roller. This will help protect your finished floor from water damage over time. Next, use a grout bag or trowel to fill in all of the gaps between each tile with grout. Make sure that all of the gaps are filled in properly and then use a damp sponge to wipe off any excess grout from the surface of your tiles. Finally seal your grout with a sealer designed specifically for ceramic tile floors to ensure maximum protection against moisture and staining over time.
Enjoying Your New Ceramic Tile Floor On The Concrete Surface
After all of the hard work is finished, it’s finally time for you to enjoy your brand new ceramic tile floors! With proper care and maintenance, these beautiful floors will last for years without