How To Pour A Garage Floor

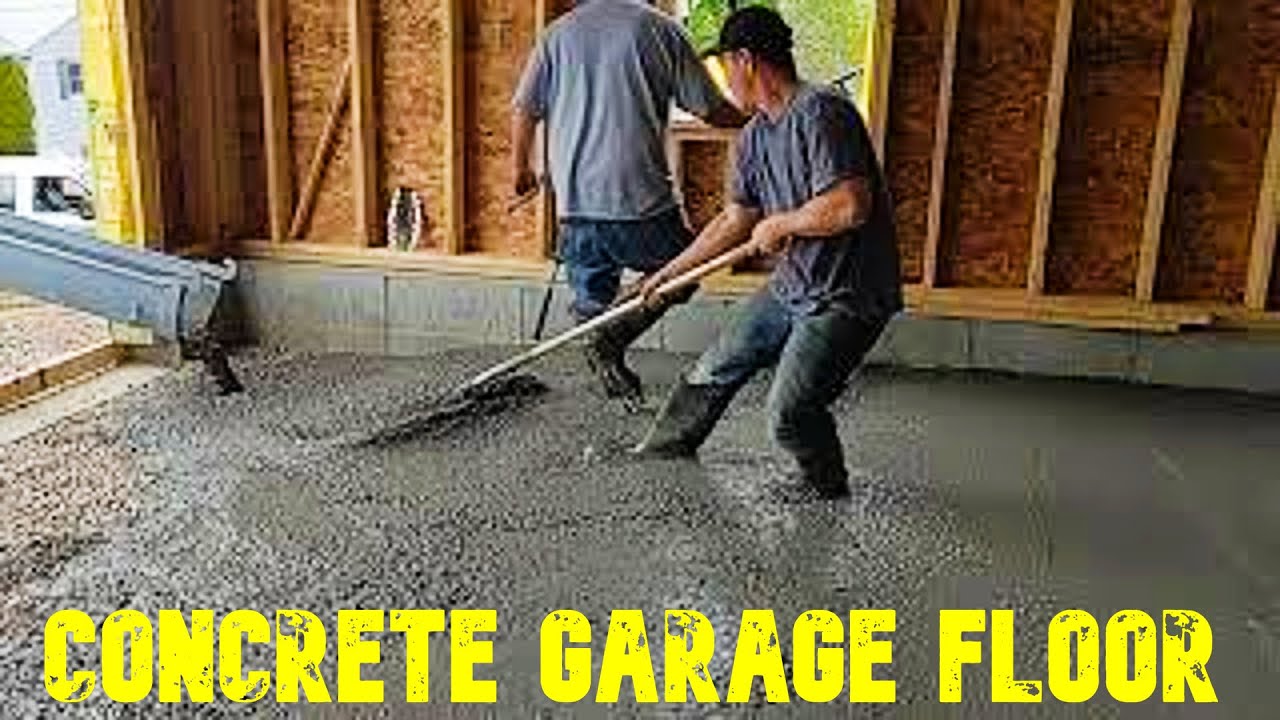
Pouring a Garage Floor – YouTube
Preparing to Pour the Concrete Garage Floor – Project Small House

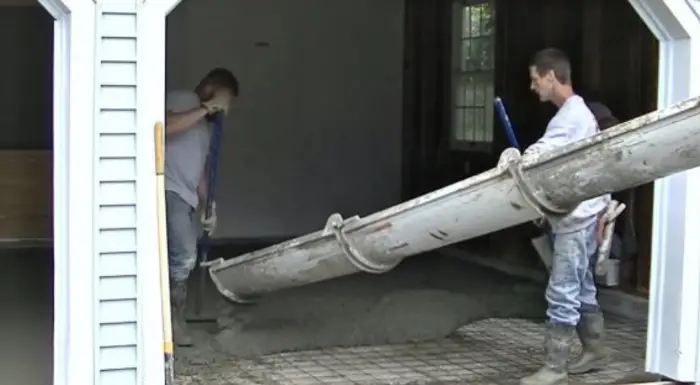
Pouring the Concrete Floor in the Garage – Project Small House

Preparing to Pour the Concrete Garage Floor – Project Small House

How to pour a concrete floor for an existing garage Best How-To Guide
Garage Build Part 13 – Preparing the floor to pour concrete – YouTube

Garage Floor Self Leveling – Tutorial Pics

Design 55 of How To Pour Concrete Slab For Garage ucfaiga
Pouring the Concrete Floor in the Garage – Project Small House

20 Best Simple Floating Garage Floor Ideas – Home Plans & Blueprints

Pouring A Concrete Floor In A Garage – Clsa Flooring Guide
Related Posts:
- Marble Garage Floor
- Cheap Garage Floor Covering
- Garage Floor Coating
- Heavy Duty Garage Flooring
- Checkerboard Garage Floor Tiles
- Garage Floor Sealer Paint
- Epoxyshield Garage Floor Paint
- Benefits Of Epoxy Flooring In Garage
- Garage Floor Preparation For Epoxy
- Garage Workshop Flooring
Having a concrete garage floor offers a number of advantages over other flooring types. Not only does it look great, but it also provides a durable and easy-to-clean surface. Furthermore, it can also help to insulate the space and prevent water from entering. In order to ensure that your garage floor is properly poured, there are a few steps that you need to follow. This comprehensive guide will help you understand the process of pouring a garage floor and provide you with tips for getting the best results.
## Step 1: Preparing The Area
The first step in pouring a garage floor is to prepare the area by removing any existing debris or dirt. You should also check the area for any signs of water damage, as this can affect the integrity of your new floor. Once you have cleared away any existing material, you can then begin to level the area with sand or gravel. This will help create an even surface and ensure that your finished product is smooth and consistent.
## Step 2: Laying The Foundation
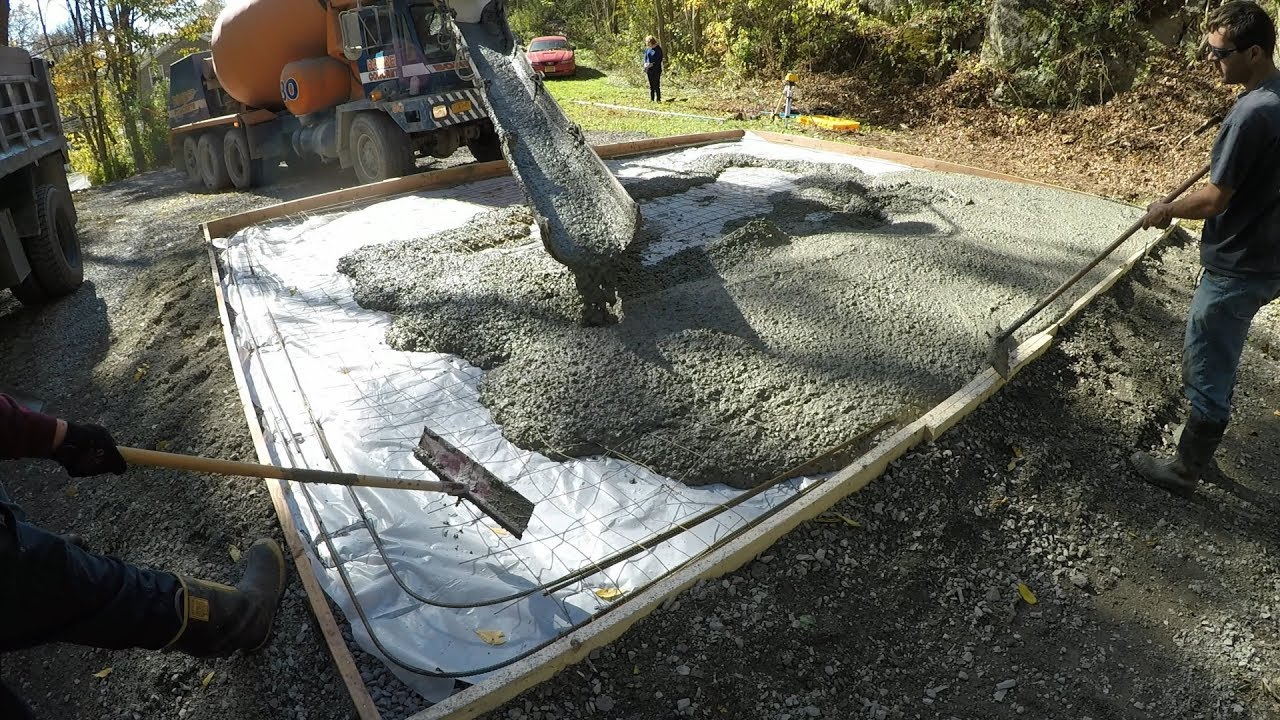
Once you have prepped the area, the next step is to lay the foundation for your concrete garage floor. This is done by creating a base layer using either sand or gravel and then laying down rebar or wire mesh for added strength and stability. You should also ensure that the edges of the foundation are curved inward to help prevent cracking in the future.
## Step 3: Installing The Forms
The third step in pouring a garage floor is to install the forms. These are wooden boards that are used to create a template for your new concrete slab. They should be placed around the perimeter of your foundation and should be securely fastened in place. It is important to make sure that each form fits snugly against the foundation and is level before continuing on to the next step.
## Step 4: Applying The Concrete
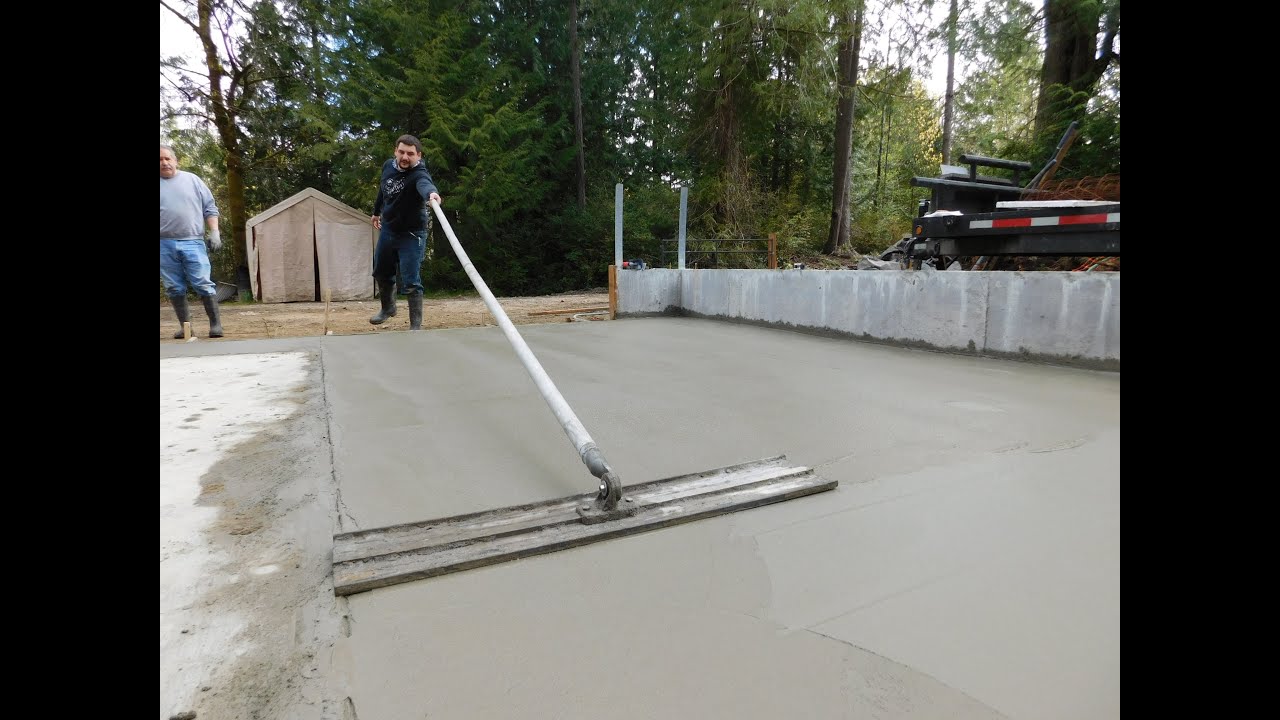
Once you have installed your forms, you can then begin to apply the concrete. This should be done in layers, starting with a thin layer at the bottom before adding thicker layers as you go up. You should use a trowel or float to smooth out the concrete as it dries and should be sure to allow each layer to dry completely before adding another layer on top.
## Step 5: Finishing The Floor
The final step in pouring a garage floor is adding any additional features that you may like, such as coloring or sealing. Once your concrete has dried completely, you can then apply a sealant or other finish of your choice to protect it from weathering and wear and tear over time. You can also add color if desired, although this will need to be done before applying sealant as it can affect the finish if applied afterwards.
Pouring a garage floor is not an overly difficult task, but it does require some knowledge and planning ahead of time in order to get the best results possible. By following these simple steps, you will be able to create a durable and beautiful concrete garage floor that will last for years to come!