Introduction to Laminate Flooring
Laminate flooring has become an increasingly popular choice for homeowners due to its affordability, durability, and versatility. Made from multiple layers of synthetic materials that are fused through a lamination process, laminate flooring mimics the appearance of natural wood, stone, or tile while offering enhanced resistance to scratches, moisture, and general wear and tear. This type of flooring is ideal for high-traffic areas and can be installed in virtually any room of the house.
One of the main advantages of laminate flooring is its ease of installation. Unlike traditional hardwood floors that require nailing or gluing, laminate flooring typically uses a click-and-lock system, which allows the planks to snap together without the need for adhesives. This makes it a popular choice for DIY enthusiasts looking to update their flooring without the expense of professional installation. Moreover, laminate flooring can be installed over existing floors, including concrete, plywood, or even old hardwood, as long as the surface is level and clean.
The variety of design options available with laminate flooring is another significant benefit. Advanced printing technology allows manufacturers to create highly realistic images of wood, stone, and other materials, giving homeowners a wide range of styles and finishes to choose from. Whether you prefer the rustic charm of reclaimed wood, the sleek look of marble, or the contemporary appeal of wide plank flooring, laminate offers something to suit every taste and decor.
Laminate flooring is also known for its durability. The top layer, known as the wear layer, is designed to resist scratches, stains, and fading, making it an excellent choice for homes with pets or children. Additionally, many laminate floors come with a protective underlayment that provides added cushioning and noise reduction, enhancing both comfort and acoustics. This durability ensures that laminate flooring can withstand the demands of everyday life while maintaining its appearance for years to come.
Another important aspect of laminate flooring is its low maintenance requirements. Unlike natural wood floors that need regular sanding and refinishing, laminate flooring can be easily cleaned with a damp mop or a vacuum. Spills and stains can be wiped away quickly, and there’s no need for waxing or polishing. This ease of maintenance makes laminate flooring a practical choice for busy households where time and effort for cleaning are limited.
Finally, laminate flooring is an environmentally friendly option. Many manufacturers use recycled materials in the production of laminate flooring, and the product itself can often be recycled at the end of its life. Additionally, because laminate flooring does not require the harvesting of trees, it helps to preserve natural resources. This eco-friendly aspect, combined with its other benefits, makes laminate flooring a smart and responsible choice for today’s homeowners.

Preparing for Installation Around Doors
Installing laminate flooring around doors requires careful planning and preparation to ensure a seamless and professional-looking finish. One of the first steps is to measure the room and determine the layout of the flooring. This involves deciding where to start the installation and how the planks will be oriented. It’s important to take into account the location of doors and other obstacles, as these will affect the placement and cutting of the laminate planks.
Before beginning the installation, it’s essential to acclimate the laminate flooring to the room’s temperature and humidity. This typically involves leaving the unopened boxes of flooring in the room for at least 48 hours. Acclimation helps to prevent the expansion or contraction of the planks after installation, which can cause gaps or buckling. During this time, it’s also a good idea to inspect the planks for any damage or defects.
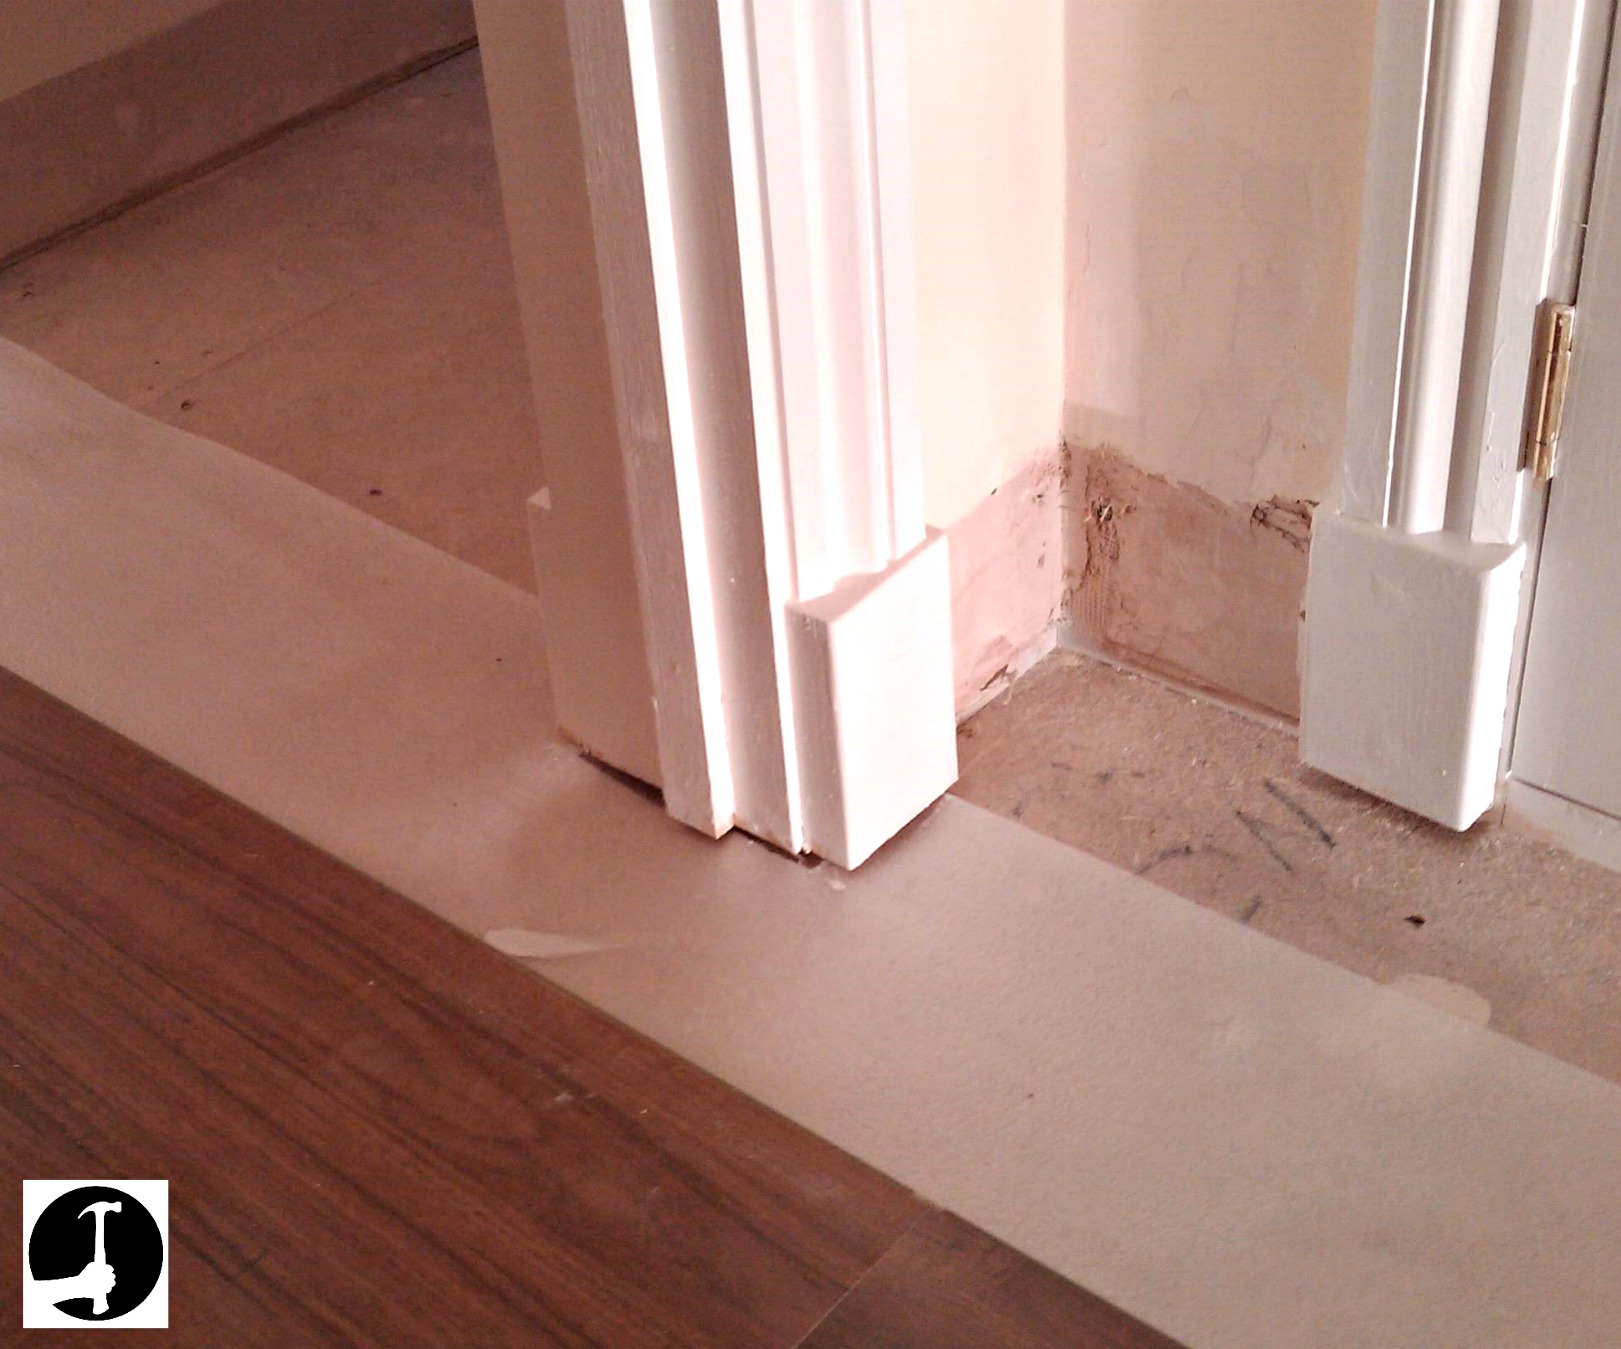
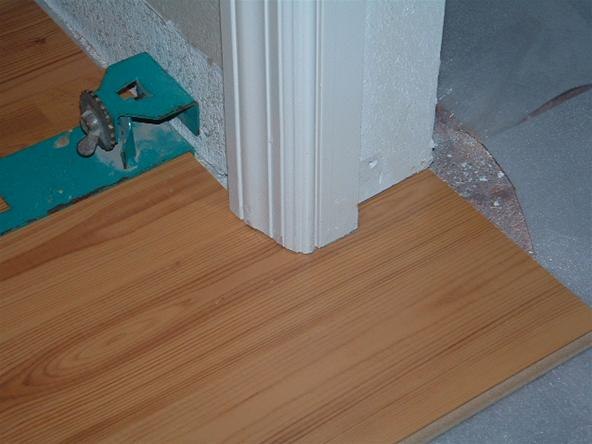
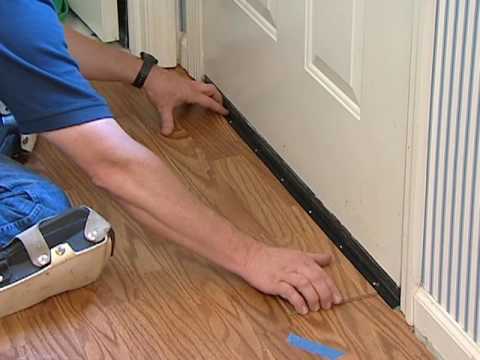
One of the key challenges of installing laminate flooring around doors is ensuring that the planks fit neatly under the door jambs and casings. To achieve this, it’s often necessary to trim the bottom of the door jambs so that the laminate planks can slide underneath. This can be done using a jamb saw or a handsaw. The goal is to create a gap that is just wide enough for the thickness of the laminate flooring, including any underlayment.
Another important consideration when installing laminate flooring around doors is the use of transition strips. Transition strips are used to bridge the gap between different types of flooring or to cover expansion gaps between rooms. When installing laminate flooring in a room with a door, a T-molding or reducer strip may be needed to create a smooth transition between the laminate and the adjacent flooring. These strips come in various styles and finishes to match the laminate flooring.
Proper underlayment is crucial for a successful laminate flooring installation. Underlayment provides a cushion for the laminate planks, reduces noise, and helps to protect against moisture. When installing laminate flooring around doors, it’s important to ensure that the underlayment is cut and laid correctly to avoid any gaps or overlaps. The underlayment should extend to the edge of the door jambs and be securely taped down to prevent movement during installation.
Finally, having the right tools and materials on hand is essential for a smooth installation process. This includes a measuring tape, a saw (either a miter saw, circular saw, or handsaw), a tapping block, a pull bar, spacers, a hammer, and a utility knife. Additionally, safety gear such as gloves and safety glasses should be worn to protect against injury. With proper preparation and the right tools, installing laminate flooring around doors can be a straightforward and rewarding project.
Cutting and Fitting Laminate Planks Around Doorways
Cutting and fitting laminate planks around doorways is a critical part of the installation process that requires precision and attention to detail. The first step is to measure the space where the plank will be installed. This involves measuring the width and length of the space and marking the plank accordingly. It’s important to measure accurately to ensure a snug fit around the door jamb and casing.
Once the measurements are taken, the next step is to cut the laminate plank to fit the space. This can be done using a variety of saws, including a miter saw, circular saw, or jigsaw. When cutting the plank, it’s important to cut on the waste side of the line to allow for any adjustments that may be needed. Additionally, using a fine-toothed blade can help to achieve a clean and precise cut.
When fitting laminate planks around doorways, it’s often necessary to make intricate cuts to accommodate the shape of the door jamb and casing. This may involve cutting notches or angles in the plank to ensure a proper fit. To do this, it can be helpful to use a piece of cardboard or paper to create a template of the shape of the door jamb. This template can then be used to mark the plank before cutting.

In some cases, it may be necessary to cut the plank lengthwise to fit under the door jamb. This is known as ripping the plank. Ripping a plank can be done using a table saw or a circular saw with a guide. It’s important to ensure that the plank is securely clamped in place before cutting to prevent movement and achieve a straight cut. Additionally, using a straight edge or guide can help to ensure accuracy.
After the plank is cut to fit the space, it’s important to test fit it before securing it in place. This involves placing the plank in the space and checking for any gaps or misalignments. If adjustments are needed, the plank can be trimmed using a utility knife or saw. It’s important to take the time to make any necessary adjustments to ensure a tight and professional-looking fit.
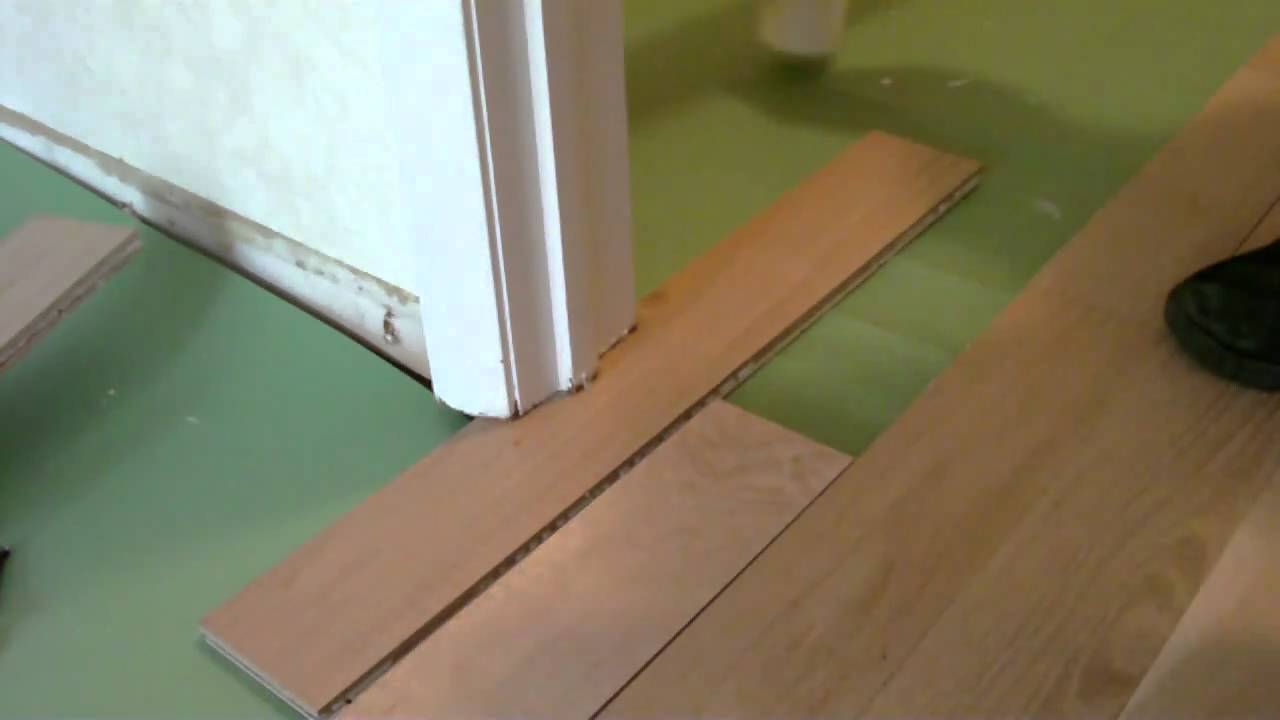
Once the plank is properly fitted, it can be secured in place using the click-and-lock system. This involves aligning the tongue and groove of the plank with the adjacent planks and gently tapping it into place using a tapping block and hammer. It’s important to ensure that the plank is fully locked in place and that there are no gaps between the planks. If a transition strip is needed, it can be installed at this time to create a smooth transition between the laminate flooring and the adjacent flooring.

Installing Transition Strips
Transition strips are an essential component of laminate flooring installation, particularly around doorways, where they help create a smooth and aesthetically pleasing transition between different types of flooring. The first step in installing transition strips is to choose the right type of strip for the job. There are several types of transition strips available, including T-moldings, reducer strips, and end caps, each designed for different types of transitions. It’s important to choose a strip that matches the height and type of flooring on both sides of the transition.
Once the appropriate transition strip is selected, the next step is to measure and cut the strip to fit the doorway. This involves measuring the width of the doorway and marking the transition strip accordingly. The strip can then be cut using a miter saw or a hacksaw. It’s important to make sure that the cut is straight and clean to ensure a proper fit.
Before installing the transition strip, it’s important to prepare the subfloor. This involves cleaning the area and ensuring that it is free of dust, debris, and any old adhesive. If the subfloor is uneven, it may be necessary to level it using a leveling compound. A smooth and even subfloor is essential for a secure and stable installation of the transition strip.
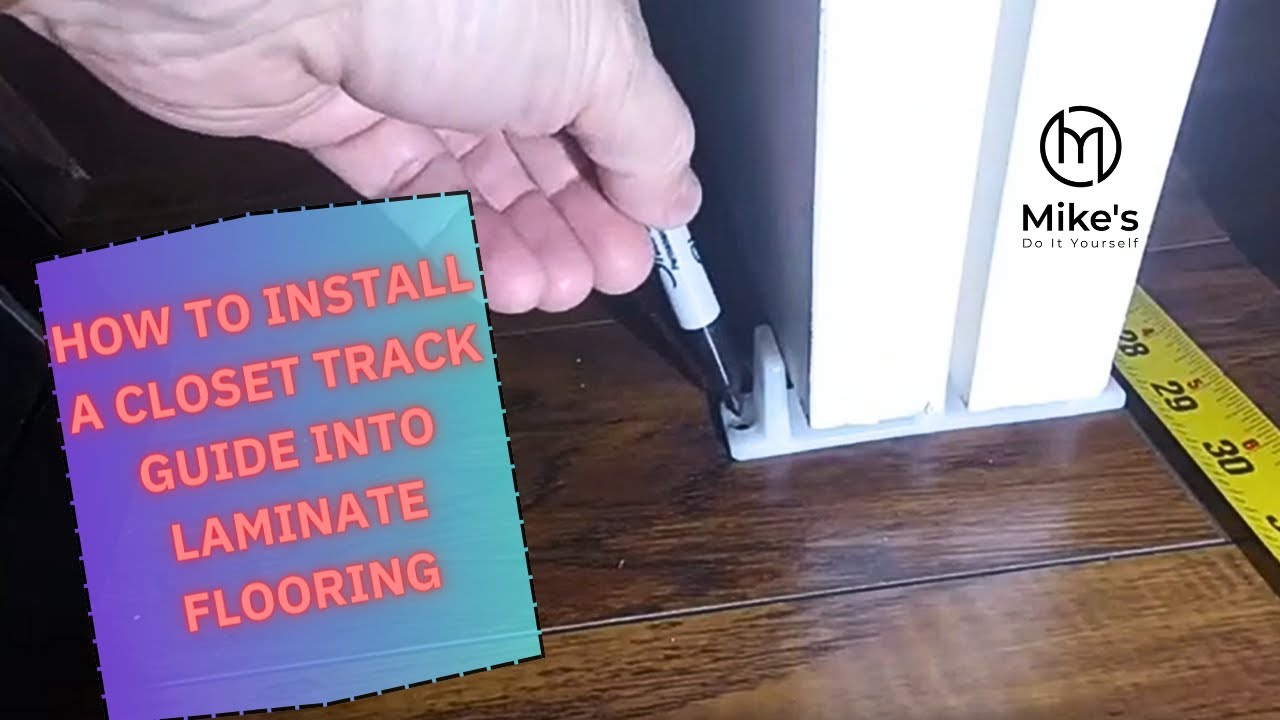
The next step is to install the track that holds the transition strip in place. Most transition strips come with a metal or plastic track that is screwed or glued to the subfloor. The track is typically installed in the center of the doorway, with the transition strip snapping into place over the track. It’s important to follow the manufacturer’s instructions for installing the track, as improper installation can result in an unstable or uneven transition.
Once the track is installed, the transition strip can be snapped into place. This involves aligning the strip with the track and pressing down firmly until it clicks into place. It’s important to ensure that the strip is fully seated in the track and that there are no gaps between the strip and the flooring. If necessary, a rubber mallet can be used to gently tap the strip into place.
After the transition strip is installed, it’s important to check the fit and make any necessary adjustments. This may involve trimming the strip or adjusting the track to ensure a smooth and even transition. It’s also important to ensure that the transition strip is level and secure, as a loose or uneven strip can create a tripping hazard. With proper installation, transition strips can help create a seamless and professional-looking finish for laminate flooring around doorways.
Sealing and Finishing Touches
Sealing and finishing touches are essential steps in the installation of laminate flooring around doors to ensure a polished and professional look. One of the key aspects of sealing laminate flooring is addressing the expansion gaps. These gaps, typically left around the perimeter of the room and around fixed objects like doorways, allow the flooring to expand and contract with changes in temperature and humidity. To cover these gaps, baseboards or quarter round molding can be installed. These moldings not only hide the gaps but also provide a clean and finished appearance.
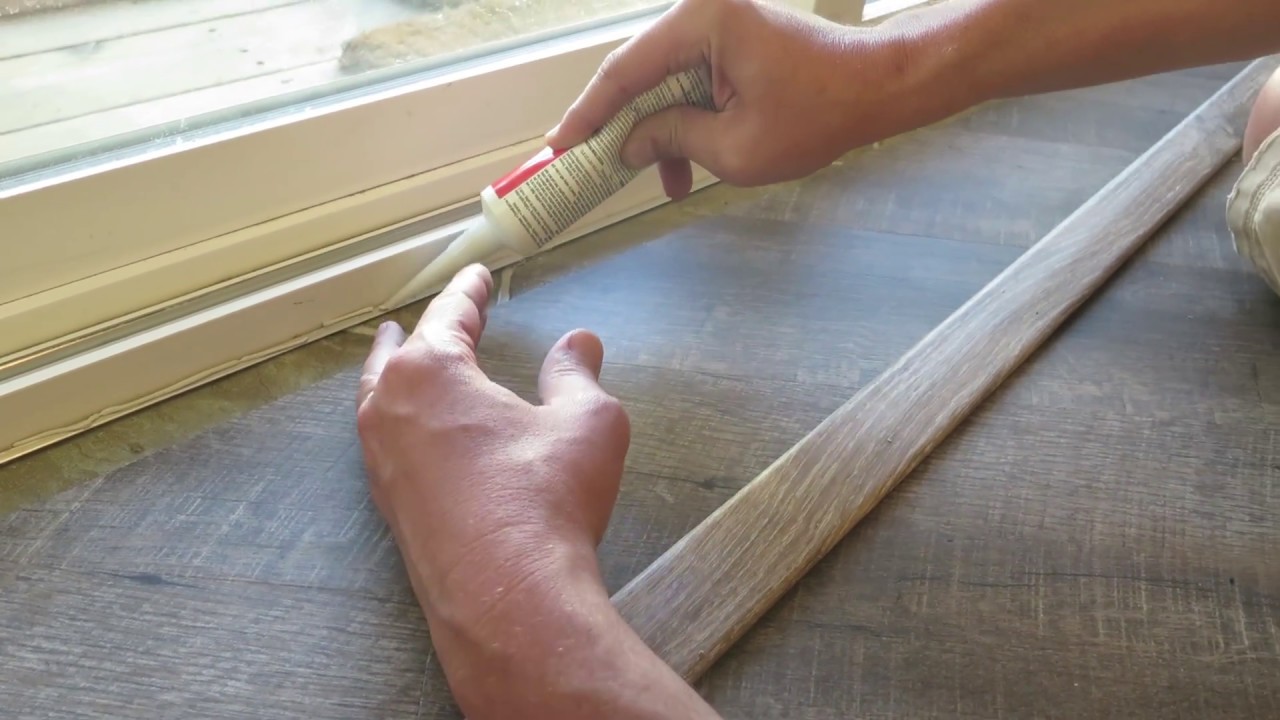
Another important step in sealing laminate flooring is addressing any gaps or seams between the planks. While the click-and-lock system is designed to create tight seams, small gaps can sometimes appear, especially in areas with irregular cuts, such as around doorways. These gaps can be filled with a laminate floor filler or sealant, which matches the color of the flooring. This helps to create a seamless appearance and prevents dirt and debris from getting trapped in the gaps.
When installing laminate flooring in areas that are prone to moisture, such as near exterior doors, it’s important to take additional steps to protect the flooring. This may involve applying a moisture barrier under the laminate flooring or using a silicone sealant around the edges to prevent water from seeping under the planks. Ensuring that the area is properly sealed can help to extend the life of the laminate flooring and prevent damage from moisture.

Finishing touches, such as installing transition strips and door thresholds, are also crucial for achieving a professional look. Transition strips help to create a smooth transition between different types of flooring and cover any gaps between the laminate and adjacent flooring. Door thresholds, which are installed at the base of doorways, provide a finished edge and help to protect the flooring from wear and tear. These finishing touches not only enhance the appearance of the flooring but also contribute to its durability and longevity.
After the flooring and finishing touches are installed, it’s important to thoroughly clean the area to remove any dust or debris from the installation process. This involves sweeping or vacuuming the floor and wiping down the surface with a damp cloth or mop. Cleaning the floor helps to ensure that the laminate retains its appearance and provides a clean and inviting space.
Finally, it’s important to conduct a final inspection to ensure that all aspects of the installation are complete and that the flooring is secure and level. This involves checking for any loose planks, gaps, or uneven areas and making any necessary adjustments. Conducting a thorough inspection helps to ensure that the laminate flooring is installed correctly and that it will provide a durable and attractive surface for years to come.
Maintaining Laminate Flooring Around Doors
Proper maintenance is key to ensuring the longevity and appearance of laminate flooring, especially around doors where the flooring may be subject to increased wear and tear. One of the most important aspects of maintaining laminate flooring is regular cleaning. This involves sweeping or vacuuming the floor to remove dirt and debris that can cause scratches and damage the surface. It’s also important to clean up spills immediately to prevent moisture from seeping into the seams and causing swelling or warping.
Using the right cleaning products is essential for maintaining laminate flooring. It’s important to avoid using abrasive cleaners, waxes, or polishes, as these can damage the protective layer of the laminate. Instead, a damp mop or cloth and a mild cleaner specifically designed for laminate flooring should be used. Additionally, it’s important to avoid using excessive water when cleaning, as standing water can cause the laminate to swell and warp.
Protecting the laminate flooring from scratches and dents is another important aspect of maintenance. This can be achieved by using protective pads under furniture legs, placing mats or rugs in high-traffic areas, and avoiding dragging heavy objects across the floor. In areas around doors, using door mats to trap dirt and moisture can help to protect the flooring and reduce wear and tear.
Regular inspections can help to identify and address any issues with the laminate flooring before they become more serious. This involves checking for signs of wear, such as scratches, dents, or lifting edges, and taking steps to repair or replace damaged planks. It’s also important to check the transition strips and door thresholds to ensure that they are secure and in good condition.
Addressing moisture issues promptly is crucial for maintaining laminate flooring around doors, especially exterior doors. This involves checking for any signs of water damage, such as swelling, warping, or discoloration, and taking steps to address the source of the moisture. Using a silicone sealant around the edges of the flooring and ensuring that the area is properly ventilated can help to prevent moisture-related issues.
Finally, following the manufacturer’s guidelines for care and maintenance can help to ensure that the laminate flooring remains in good condition. This may include recommendations for cleaning products, repair procedures, and general care tips. Adhering to these guidelines can help to extend the life of the laminate flooring and maintain its appearance and functionality.
Common Mistakes to Avoid
When installing laminate flooring around doors, there are several common mistakes that can affect the overall outcome and durability of the flooring. One common mistake is not properly measuring and cutting the planks. Accurate measurements are crucial for ensuring a precise fit around door jambs and casings. Using a template and taking the time to measure carefully can help to avoid gaps and misalignments.
Another mistake is failing to properly prepare the subfloor. An uneven or dirty subfloor can cause issues with the installation and affect the stability of the flooring. It’s important to ensure that the subfloor is clean, dry, and level before installing the laminate planks. Using a leveling compound and cleaning the area thoroughly can help to create a smooth and stable surface for the flooring.
Improperly trimming the door jambs is another common mistake. The bottom of the door jambs needs to be trimmed to allow the laminate planks to slide underneath. Failing to trim the jambs correctly can result in a poor fit and an unprofessional appearance. Using a jamb saw or handsaw and taking the time to trim the jambs accurately can help to achieve a seamless fit.

Neglecting to leave expansion gaps is another mistake that can cause issues with laminate flooring. Laminate flooring needs room to expand and contract with changes in temperature and humidity. Failing to leave adequate expansion gaps around the perimeter of the room and around fixed objects, such as doorways, can cause the flooring to buckle or warp. It’s important to follow the manufacturer’s guidelines for expansion gaps to ensure the longevity and stability of the flooring.
Using the wrong type of transition strip is another common mistake. Different types of transition strips are designed for different types of flooring transitions. Using the wrong strip can result in an uneven transition and create a tripping hazard. It’s important to choose the appropriate transition strip for the specific type of flooring and installation.
Finally, neglecting to properly seal and finish the installation can affect the appearance and durability of the laminate flooring. This includes addressing expansion gaps, filling seams, and installing transition strips and door thresholds. Taking the time to properly seal and finish the installation can help to create a professional and long-lasting result.

How do I cut laminate flooring to fit around door jambs?
Cutting laminate flooring to fit around door jambs requires careful measurement and precision. Start by measuring the space where the plank will be installed and mark the plank accordingly. Use a jamb saw or handsaw to trim the bottom of the door jamb so that the laminate plank can slide underneath. Create a template of the shape of the door jamb using cardboard or paper and transfer the shape to the plank. Use a fine-toothed saw to cut the plank to fit the shape of the door jamb. Test fit the plank and make any necessary adjustments before securing it in place.
What type of transition strip should I use between laminate flooring and other types of flooring?
The type of transition strip to use depends on the height and type of flooring on both sides of the transition. Common types of transition strips include T-moldings, reducer strips, and end caps. T-moldings are used to transition between floors of the same height, reducer strips are used to transition between floors of different heights, and end caps are used to create a finished edge at the end of the laminate flooring. It’s important to choose a transition strip that matches the height and type of flooring and to follow the manufacturer’s installation instructions.
How do I ensure a seamless fit of laminate flooring around doorways?
To ensure a seamless fit of laminate flooring around doorways, start by accurately measuring the space and trimming the door jambs so that the laminate planks can slide underneath. Use a template to mark the shape of the door jamb on the plank and cut the plank to fit. Test fit the plank and make any necessary adjustments. Use a laminate floor filler or sealant to fill any gaps between the planks and the door jamb. Install transition strips and door thresholds to cover expansion gaps and create a smooth transition between different types of flooring.

How do I maintain laminate flooring around doors?
Maintaining laminate flooring around doors involves regular cleaning, using the right cleaning products, protecting the flooring from scratches and dents, and addressing moisture issues promptly. Sweep or vacuum the floor regularly to remove dirt and debris, and clean up spills immediately. Use a damp mop and a mild cleaner designed for laminate flooring, and avoid using abrasive cleaners, waxes, or polishes. Use protective pads under furniture legs and place mats or rugs in high-traffic areas. Check for signs of wear and address any issues promptly to ensure the longevity and appearance of the flooring.
What are common mistakes to avoid when installing laminate flooring around doors?
Common mistakes to avoid when installing laminate flooring around doors include not properly measuring and cutting the planks, failing to prepare the subfloor, improperly trimming the door jambs, neglecting to leave expansion gaps, using the wrong type of transition strip, and neglecting to properly seal and finish the installation. Accurate measurements, careful preparation, and attention to detail are crucial for achieving a professional and durable result. Following the manufacturer’s guidelines and using the right tools and materials can help to avoid these common mistakes.
How do I address expansion gaps around doorways in laminate flooring?
Addressing expansion gaps around doorways in laminate flooring involves leaving a gap between the edge of the laminate planks and the door jamb to allow for expansion and contraction. This gap can be covered with baseboards or quarter-round molding to create a clean and finished appearance. When installing transition strips, leave a gap between the edge of the laminate flooring and the adjacent flooring to allow for movement. Use a laminate floor filler or sealant to fill any gaps between the planks and the door jamb to create a seamless appearance and prevent dirt and debris from getting trapped in the gaps.
Related Posts: