Installing trim for laminate flooring is a crucial step that enhances the overall look and durability of the floor. Start by measuring and cutting the trim pieces to fit around corners, doorways, and edges. Use a miter saw for precise angles. Next, attach the trim using finishing nails or adhesive, ensuring a snug fit against the wall or baseboard. Finish by filling any gaps with caulk and painting or staining the trim to match the flooring for a seamless and polished appearance.
Laminate Flooring Trim Installation

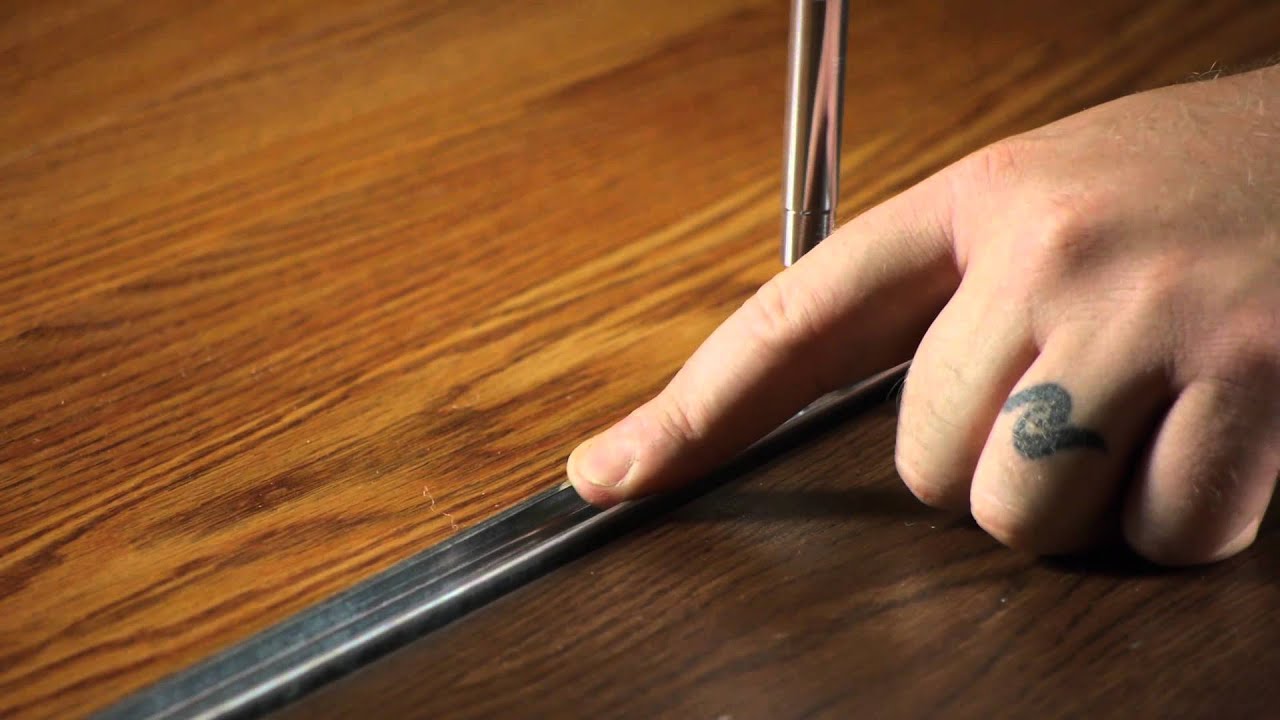
Installing Laminate Flooring : Finishing Trim and Choosing Transition Strips

Installing Laminate Flooring : Finishing Trim and Choosing Transition Strips Diy wood floors

Installing Laminate Flooring on Stairs [with nosing!] – Love Create Celebrate

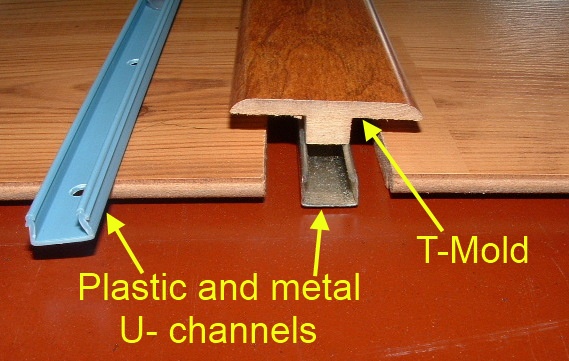
Laminate Floor Trim
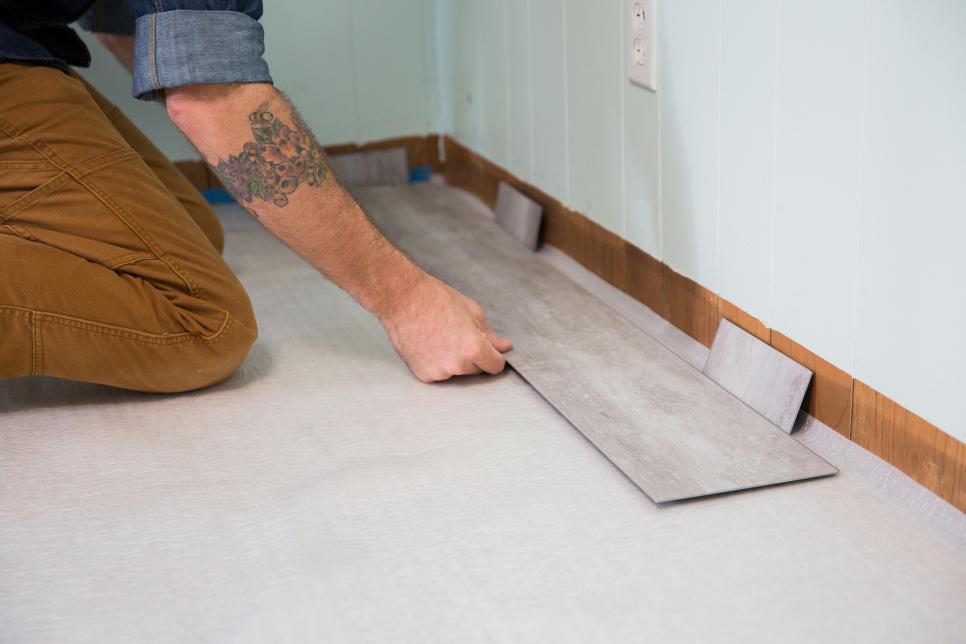
How to Install Laminate Flooring
:max_bytes(150000):strip_icc()/how-to-lay-laminate-flooring-1822250-01-0b84ff37785a4f8b94ab8bd30c300bfb.jpg)
Installing Laminate Flooring : Finishing Trim and Choosing Transition Strips
How Lay Laminate Floor Flooring Ideas : Flooring Ideas
Installing Laminate Flooring : Finishing Trim and Choosing Transition Strips
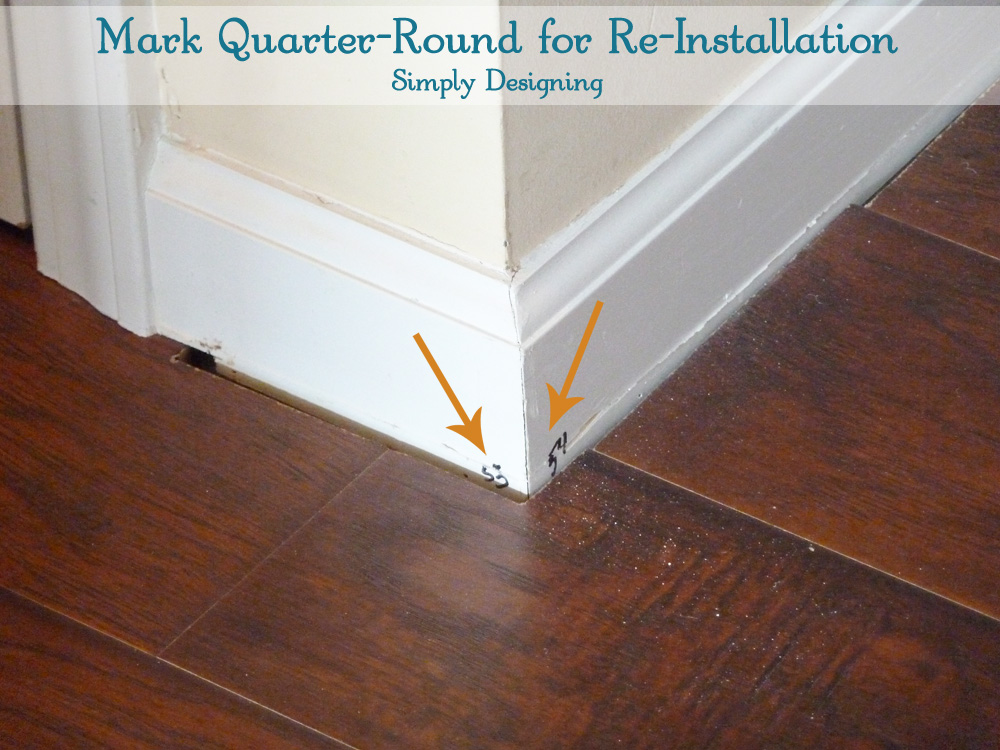
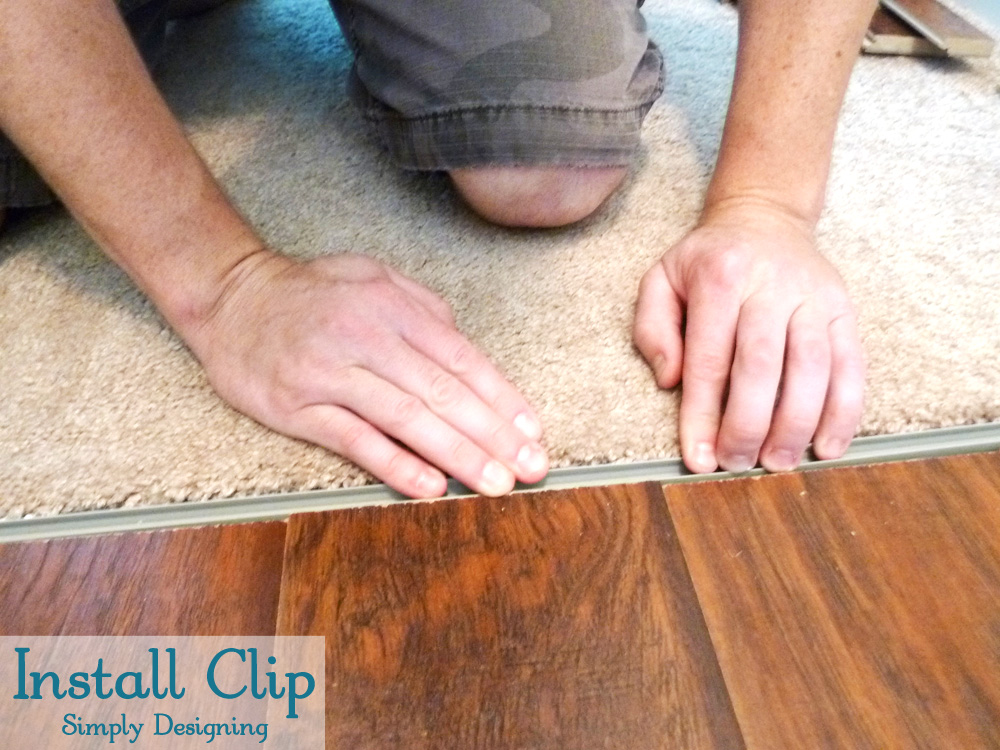
Installing Quarter Round Moldings Flooring, Installing laminate flooring, Floor molding

How to Fix Laminate Flooring Gaps – Episode 5 HowToSpecialist – How to Build, Step by Step DIY

Installing Laminate Transitions, Step by Step Instructions
Related Posts:
- Oak Grey Laminate Flooring
- Laminate Flooring Living Room Ideas
- How To Remove Laminate Flooring
- Gray Laminate Flooring Ideas
- How To Remove Laminate Floor Glue
- Laminate Floor Edge Filler
- Farmhouse Laminate Flooring
- Dark Laminate Flooring Ideas
- Laminate Floor Uneven Transition
- Laminate Floor Colors Ideas
# Laminate Flooring Trim Installation: A Guide to Adding the Finishing Touch to Your Home
When it comes to laminate flooring, trim is an important part of the installation process. Trim can help create a neat and polished look, as well as adding a decorative touch to your home. Installing laminate flooring trim isn’t difficult, but it’s important to follow the proper steps for a successful outcome.
## What You Need for Laminate Flooring Trim Installation
Before you begin installing the trim, there are several tools and materials you’ll need to have on hand:
* An aluminum threshold strip
* Nails or screws
* A hammer or screwdriver
* Wood shims
* Caulking
* A putty knife
* A miter saw
* Sandpaper
* A level
## Step-by-Step Guide to Installing Laminate Flooring Trim
Once you have all the necessary materials and tools, you’re ready to start installing the trim. Here’s a step-by-step guide to help you get started:
### Step 1: Measure and Cut the Threshold Strip
The first step is to measure and cut the threshold strip so it fits properly into the doorway. Use your miter saw to make precise cuts. Make sure that the threshold strip covers any gaps between the flooring and the wall.
### Step 2: Secure the Threshold Strip with Nails or Screws
Once you’ve made the necessary cuts, secure the threshold strip into place with nails or screws. Make sure that you don’t over-tighten them, as this can cause damage to both the flooring and the trim.
### Step 3: Insert Wood Shims if Necessary
If there is any space between the threshold strip and the floor, insert wood shims in order to fill it in. This will ensure that your trim is properly secured and that there are no gaps for air or moisture to enter.
### Step 4: Apply Caulking
Once all of the gaps have been filled in with wood shims, it’s time to apply caulking. This will help protect against water damage and keep your trim looking neat and tidy. Use a putty knife to spread an even layer of caulking around the edges of the trim. Allow it to dry before moving on to the next step.
### Step 5: Sand Down Any Rough Edges
After you’ve applied caulking, use sandpaper to sand down any rough edges. This will help ensure that your trim looks smooth and even when it’s finished.
### Step 6: Make Sure Everything Is Level
The last step is to use your level to make sure that everything is level and even. If there are any gaps or uneven spots, make adjustments until everything is level before moving on.
Once you’ve completed these steps, you should have a beautiful laminate flooring trim installation that adds a professional look and feel to your home. With proper care and maintenance, your laminate flooring trim should last for years to come.