Floating vinyl flooring has become a popular choice for homeowners and renovators due to its durability, ease of installation, and attractive appearance. This type of flooring can mimic the look of natural wood, stone, or tile while providing a cost-effective and resilient surface that is perfect for high-traffic areas. Today we will cover everything you need to know about laying floating vinyl flooring, including preparation, installation techniques, maintenance, and more.
Understanding Floating Vinyl Flooring
- What is Floating Vinyl Flooring?: Floating vinyl flooring is a type of floor covering that “floats” above the subfloor rather than being glued or nailed down. It consists of vinyl planks or tiles that interlock, making it easy to install over various types of subfloors, including concrete, plywood, and existing flooring. This floating installation method allows for slight movement and expansion, which helps prevent issues related to moisture and temperature changes.
- Types of Floating Vinyl Flooring: There are two primary types of floating vinyl flooring: luxury vinyl planks (LVP) and luxury vinyl tiles (LVT). LVP mimics the appearance of hardwood floors, while LVT can resemble stone or ceramic tiles. Both types offer a wide range of colors, patterns, and textures, providing ample design flexibility. Additionally, some vinyl flooring options include an attached underlayment, enhancing comfort and sound absorption.
- Advantages of Floating Vinyl Flooring: Floating vinyl flooring offers several benefits. It is water-resistant, making it suitable for kitchens, bathrooms, and basements. Its durability allows it to withstand heavy foot traffic and wear. The ease of installation and the ability to install it over existing floors without demolition makes it a convenient choice for DIY enthusiasts. Furthermore, floating vinyl flooring is generally more affordable than traditional hardwood or stone flooring, providing a cost-effective solution for home renovations.
- Disadvantages of Floating Vinyl Flooring: Despite its many advantages, floating vinyl flooring has some drawbacks. It can be susceptible to dents and scratches, particularly from heavy furniture or sharp objects. Over time, UV exposure can cause fading, especially in areas with significant sunlight. Additionally, while it is water-resistant, prolonged exposure to standing water can lead to damage. It’s essential to clean up spills promptly and maintain proper moisture control.
- Suitability for Various Environments: Floating vinyl flooring is versatile and can be installed in various environments, including residential and commercial spaces. Its water resistance makes it ideal for bathrooms, kitchens, and laundry rooms. Its durability suits high-traffic areas such as hallways, living rooms, and offices. However, it’s crucial to consider the specific product’s specifications and warranty to ensure it meets the requirements of the intended installation area.
- Environmental Considerations: Many manufacturers now produce eco-friendly floating vinyl flooring options, using recycled materials and low-VOC (volatile organic compounds) adhesives. This reduces the environmental impact and improves indoor air quality. When selecting floating vinyl flooring, look for products with certifications such as FloorScore or GreenGuard to ensure they meet environmental and health standards.
Preparing for Installation
Assessing the Subfloor: Before installing floating vinyl flooring, it is essential to assess the condition of the subfloor. The subfloor must be clean, dry, and level to ensure a successful installation. Remove any existing floor coverings, such as carpet or laminate, and inspect the subfloor for damage. Repair any cracks or holes, and ensure the surface is smooth and even. For concrete subfloors, it is important to check for moisture issues and apply a moisture barrier if necessary.
Gathering Tools and Materials: Having the right tools and materials on hand will make the installation process smoother and more efficient. Essential tools include a tape measure, utility knife, straight edge, spacers, rubber mallet, and a tapping block. You will also need underlayment, if not already attached to the vinyl planks, and transition strips for doorways and room transitions. Gather all materials before starting the installation to avoid interruptions.
Acclimating the Vinyl Flooring: Acclimating the vinyl flooring is a crucial step to prevent issues related to expansion and contraction. Place the vinyl planks or tiles in the installation area for at least 48 hours before installation. This allows the flooring to adjust to the room’s temperature and humidity, ensuring a more stable installation. Follow the manufacturer’s guidelines for acclimation, as they may vary.
Planning the Layout: Planning the layout of the vinyl flooring is essential for achieving a professional and visually appealing result. Start by measuring the room and calculating the number of planks or tiles needed. Plan the layout to avoid narrow pieces along walls and doorways, as these can be challenging to install and may not adhere well. Mark guidelines on the subfloor to help with alignment and ensure a straight installation.
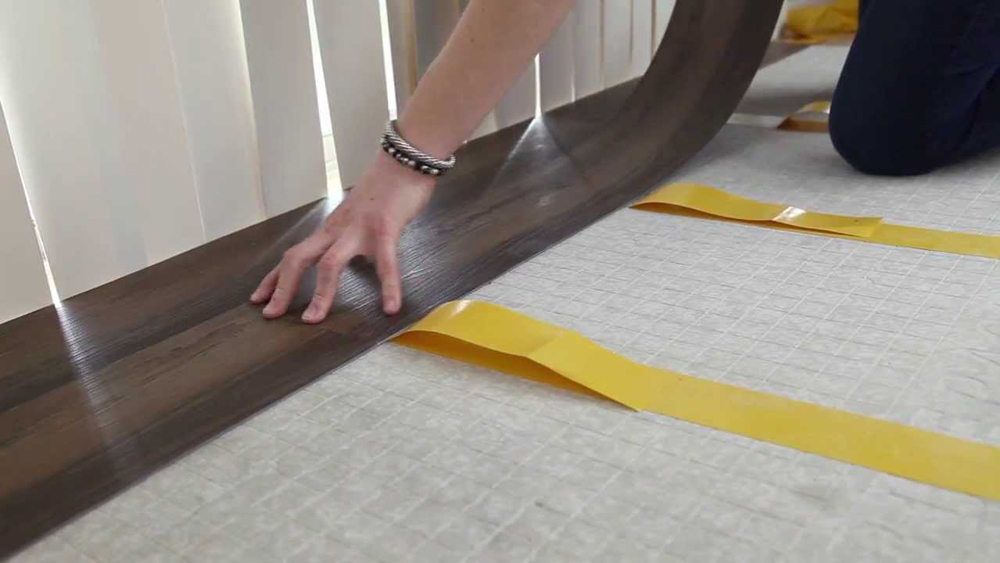
Preparing the Underlayment: If your vinyl flooring does not come with an attached underlayment, you will need to install one. The underlayment provides cushioning, sound insulation, and moisture protection. Roll out the underlayment over the subfloor, ensuring it covers the entire area. Overlap the edges and use tape to secure the seams. Trim any excess material along the edges of the room.
Final Preparations: Before starting the installation, double-check that all necessary preparations are complete. Ensure the subfloor is clean, the underlayment is in place, and the vinyl planks or tiles have acclimated. Gather your tools and review the installation instructions provided by the manufacturer. Taking the time to properly prepare will help ensure a smooth and successful installation process.
/easy-install-plank-vinyl-flooring-1822808-06-3bb4422ca1bd49b080bfa73bce749acc.jpg)
Installation Techniques
Starting the First Row
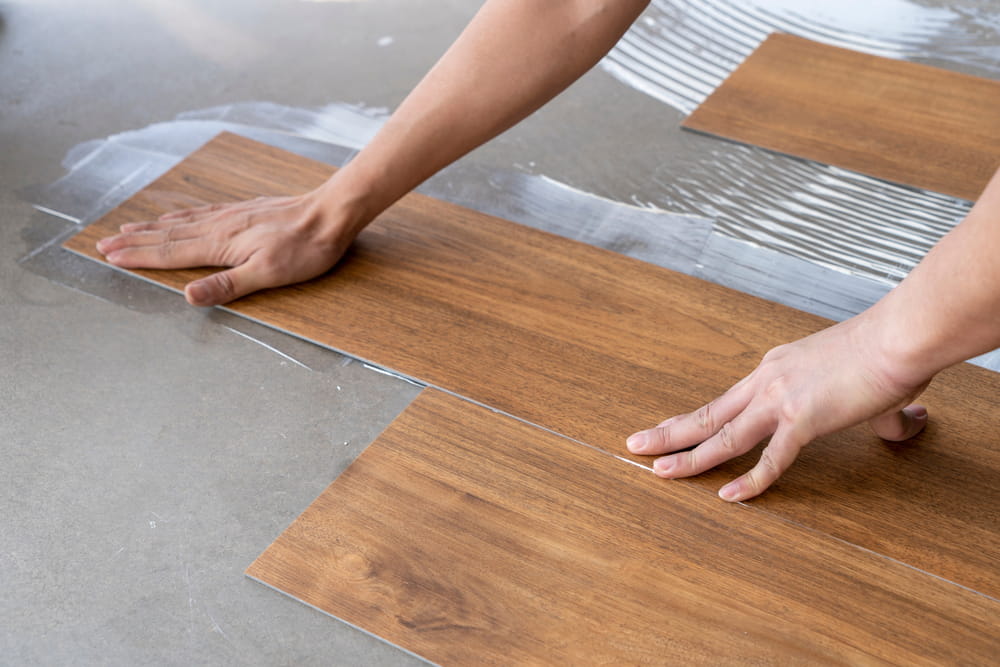
Begin the installation by laying the first row of vinyl planks or tiles along the longest wall in the room. Place spacers between the planks and the wall to allow for expansion. Use a straight edge to ensure the first row is straight and even. If necessary, trim the first plank to fit the starting point. Snap the planks together by inserting the tongue into the groove at an angle and pressing down until they click into place.
Installing Subsequent Rows
Continue installing subsequent rows by aligning the tongue of each plank with the groove of the previous row. Stagger the joints by at least 6 inches to create a more stable and visually appealing floor. Use a rubber mallet and tapping block to ensure a tight fit between planks. Cut the final plank in each row to fit, leaving space for expansion along the walls.
Cutting Around Obstacles
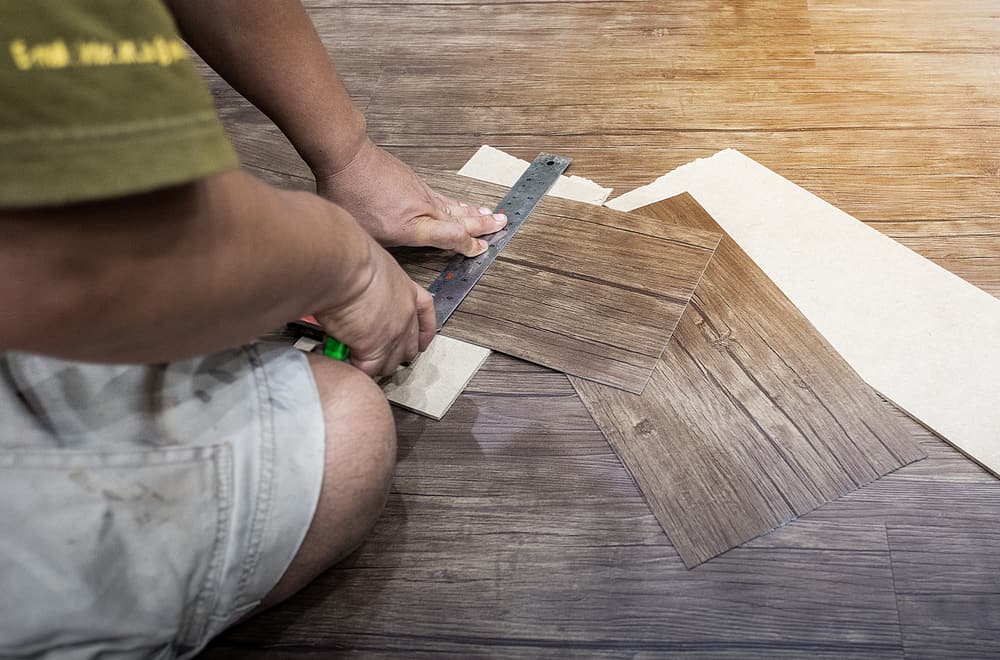
During installation, you may encounter obstacles such as door frames, vents, or cabinets. Measure and mark the vinyl planks to fit around these obstacles. Use a utility knife or jigsaw to make precise cuts. For complex cuts, create a paper template to ensure accuracy. Once cut, fit the planks around the obstacles, ensuring they click securely into place.
:max_bytes(150000):strip_icc()/easy-install-plank-vinyl-flooring-1822808-07-9e82b716c3e94264b4a6084e174e9aeb.jpg)
Finishing the Last Row
The last row may require cutting the planks lengthwise to fit. Measure the gap between the installed floor and the wall, accounting for the expansion space. Use a straight edge and utility knife to cut the planks to the correct width. Install the final row by snapping the planks into place, using a pull bar and mallet to ensure a tight fit. Remove the spacers along the walls once the floor is complete.
Installing Transition Strips
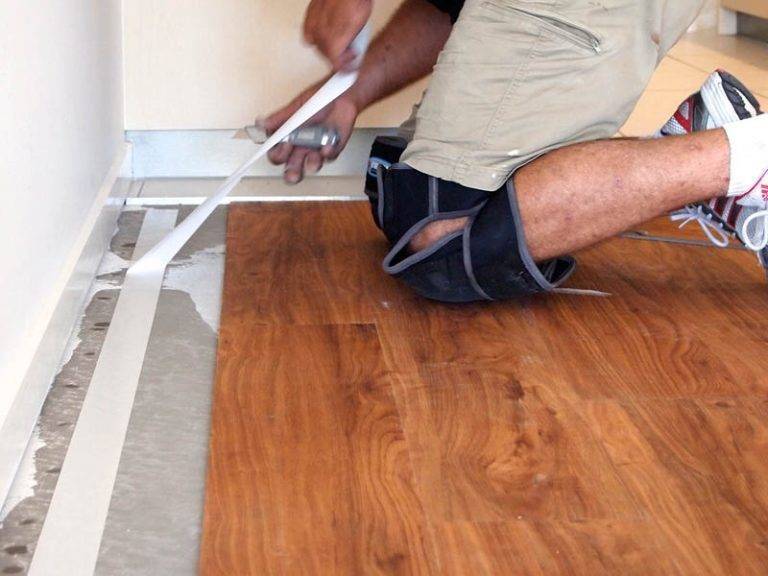
Transition strips are used to create a smooth transition between the vinyl flooring and adjacent floor coverings, such as carpet or tile. Measure and cut the transition strips to fit the doorways and room transitions. Install the strips according to the manufacturer’s instructions, securing them with adhesive or screws. Transition strips not only enhance the appearance of the floor but also prevent tripping hazards.
Post-Installation Inspection
After completing the installation, inspect the floor for any gaps, uneven areas, or loose planks. Ensure all planks are securely clicked into place and that the expansion gaps are consistent along the walls. Clean the floor to remove any dust or debris from the installation process. Finally, review the manufacturer’s care and maintenance guidelines to keep your new floor looking its best.
Maintenance and Care
Regular Cleaning
Regular cleaning is essential to maintain the appearance and longevity of floating vinyl flooring. Sweep or vacuum the floor regularly to remove dirt and debris that can cause scratches. Use a damp mop with a mild cleaner specifically designed for vinyl floors to clean spills and stains. Avoid using harsh chemicals or abrasive cleaning tools, as these can damage the floor’s surface.
Preventive Measures
Implementing preventive measures can help protect your vinyl flooring from damage. Place mats or rugs at entryways to trap dirt and moisture. Use felt pads or furniture coasters under heavy furniture to prevent dents and scratches. Avoid dragging heavy objects across the floor, and trim pets’ nails regularly to prevent scratches.
Dealing with Stains and Spills
Promptly clean up spills to prevent stains and damage. For tough stains, use a soft cloth and a mild cleaner designed for vinyl flooring. Avoid using abrasive scrubbing pads or harsh chemicals, as these can damage the floor’s surface. For stubborn stains, consult the manufacturer’s recommendations or seek professional cleaning services.
Handling Scratches and Dents
Despite its durability, floating vinyl flooring can still get scratched or dented. Minor scratches can often be repaired using a vinyl floor repair kit, which includes a filler and a matching colorant. For deeper scratches or dents, consider replacing the damaged plank. Floating vinyl flooring is designed for easy plank replacement, allowing you to maintain a pristine appearance.
Protecting Against Sunlight
Prolonged exposure to direct sunlight can cause fading and discoloration of vinyl flooring. Use blinds, curtains, or UV-resistant window films to protect the floor from harmful UV rays. Rearrange furniture periodically to prevent uneven fading and ensure consistent exposure to sunlight.
Long-Term Maintenance
In addition to regular cleaning, long-term maintenance includes periodic deep cleaning and inspections. Deep clean the floor using a vinyl floor cleaner every few months to remove built-up dirt and grime. Inspect the floor for any signs of wear, damage, or loose planks. Address any issues promptly to prevent further damage and maintain the floor’s appearance and performance.
Common Mistakes to Avoid
Neglecting Subfloor Preparation
One of the most common mistakes when laying floating vinyl flooring is neglecting proper subfloor preparation. Failing to ensure the subfloor is clean, dry, and level can lead to installation issues, such as uneven planks, gaps, and poor adhesion. Always take the time to thoroughly prepare the subfloor before starting the installation.
Skipping Acclimation
Skipping the acclimation process can result in problems related to expansion and contraction. Vinyl flooring needs time to adjust to the room’s temperature and humidity. Failing to acclimate the flooring can lead to gaps, buckling, or warping after installation. Always follow the manufacturer’s guidelines for acclimation to ensure a stable installation.
Improper Layout Planning
Improper layout planning can result in unsightly gaps, narrow planks along walls, and alignment issues. Take the time to plan the layout carefully, ensuring the planks are evenly spaced and aligned. Avoid starting with a narrow plank along the wall, as this can be difficult to install and may not adhere well.
Using Incorrect Tools
Using incorrect or inadequate tools can lead to a subpar installation. Invest in the right tools, such as a rubber mallet, tapping block, spacers, and a utility knife. Using the proper tools ensures a tight fit between planks and reduces the risk of damage during installation.
Forgetting Expansion Gaps
Forgetting to leave expansion gaps along the walls can cause the flooring to buckle or warp as it expands and contracts with temperature and humidity changes. Always use spacers to maintain consistent expansion gaps around the perimeter of the room. These gaps allow the flooring to move naturally without causing issues.
Not Following Manufacturer’s Instructions
Each vinyl flooring product has specific installation instructions provided by the manufacturer. Ignoring these instructions can lead to installation problems and may void the warranty. Always read and follow the manufacturer’s guidelines for preparation, installation, and maintenance to ensure a successful and lasting floor.
Can floating vinyl flooring be installed over existing flooring?
Yes, floating vinyl flooring can often be installed over existing flooring, such as tile, hardwood, or linoleum, provided the existing floor is clean, dry, and level. The floating installation method allows the vinyl planks or tiles to “float” above the subfloor, making it possible to install them over various surfaces without the need for demolition. However, it’s important to ensure the existing floor is in good condition and does not have any significant damage or uneven areas that could affect the installation. Additionally, check the manufacturer’s guidelines to confirm that the vinyl flooring you choose is suitable for installation over existing floors.
How do I handle uneven subfloors when installing floating vinyl flooring?
Handling uneven subfloors is crucial for a successful floating vinyl flooring installation. If the subfloor is only slightly uneven, you can use a self-leveling compound to fill in low spots and create a smooth, even surface. For more significant unevenness, consider using a plywood underlayment to provide a stable base for the vinyl flooring. Ensure the underlayment is securely fastened and leveled before proceeding with the installation. It’s important to address any subfloor irregularities before laying the vinyl flooring to prevent issues such as gaps, buckling, or poor adhesion.
Can I install floating vinyl flooring in bathrooms and kitchens?
Yes, floating vinyl flooring is an excellent choice for bathrooms and kitchens due to its water-resistant properties. Its ability to withstand moisture makes it suitable for areas prone to spills and humidity. When installing in bathrooms and kitchens, ensure the subfloor is properly prepared and use a moisture barrier if necessary. Additionally, pay extra attention to sealing the edges and seams to prevent water from seeping underneath the flooring. Regular maintenance, such as promptly cleaning up spills and avoiding standing water, will help keep the vinyl flooring in good condition in these areas.
:max_bytes(150000):strip_icc()/easy-install-plank-vinyl-flooring-1822808-09-a1f83db7bdf74f279f45594b897de82d.jpg)
How do I replace a damaged plank in floating vinyl flooring?
Replacing a damaged plank in floating vinyl flooring is relatively straightforward due to the interlocking design. First, remove the baseboards or molding around the perimeter of the room to access the planks. Starting from the nearest wall, carefully lift and disconnect the planks until you reach the damaged one. Replace the damaged plank with a new one, ensuring it clicks securely into place. Reinstall the removed planks in the reverse order, and reattach the baseboards or molding. This method allows you to replace individual planks without disturbing the entire floor, making repairs convenient and cost-effective.
Is it necessary to use an underlayment with floating vinyl flooring?
Using an underlayment with floating vinyl flooring depends on the product and the subfloor condition. Some vinyl flooring options come with an attached underlayment, eliminating the need for an additional layer. If your vinyl flooring does not have an attached underlayment, using one can provide several benefits, such as cushioning, sound insulation, and moisture protection. An underlayment can also help smooth out minor imperfections in the subfloor. Always check the manufacturer’s recommendations regarding underlayment usage for your specific vinyl flooring product to ensure optimal performance and warranty compliance.
How long does floating vinyl flooring typically last?
The lifespan of floating vinyl flooring can vary depending on factors such as product quality, installation, and maintenance. High-quality vinyl flooring can last 15-20 years or more with proper care. Regular cleaning, avoiding harsh chemicals, and promptly addressing spills and stains can help extend the floor’s life. Additionally, implementing preventive measures such as using mats at entryways and furniture pads can protect the floor from damage. Following the manufacturer’s care and maintenance guidelines will help ensure the longevity and appearance of your floating vinyl flooring.

Related Posts: