No grout ceramic tile flooring is an innovative approach to tile installation that eliminates the need for traditional grout lines. This method offers a sleek, modern appearance and simplifies maintenance, making it an attractive option for homeowners seeking a clean, seamless look. However, installing no grout ceramic tile flooring requires careful planning and execution to ensure durability and aesthetic appeal. This article covers all aspects of no grout ceramic tile flooring, from preparation to installation and maintenance, along with common mistakes to avoid and frequently asked questions.
Understanding No Grout Ceramic Tile Flooring
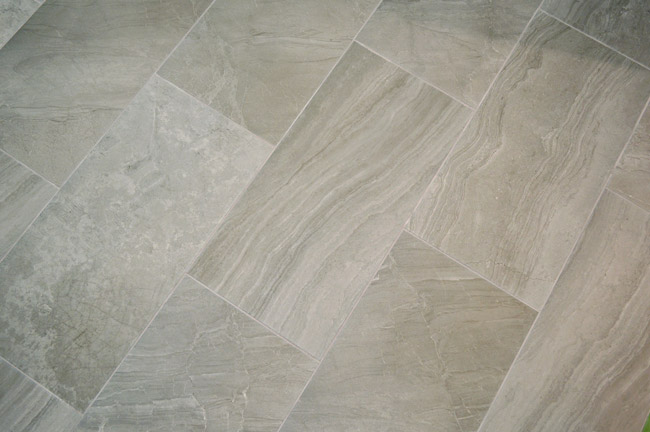
- The Concept of No Grout Flooring: No grout ceramic tile flooring, also known as rectified tile flooring, involves installing tiles with extremely tight joints, typically 1/16 inch or less, creating a virtually seamless surface. This is achieved by using rectified tiles, which are precisely cut to uniform dimensions with sharp, clean edges. The absence of traditional grout lines offers a sleek and modern aesthetic, ideal for contemporary interior designs.
- Advantages of No Grout Flooring: One of the primary benefits of no grout flooring is its visual appeal. The seamless surface creates a smooth, uninterrupted flow, enhancing the sense of space and cleanliness. Additionally, no grout lines mean fewer places for dirt and grime to accumulate, making the floor easier to clean and maintain. The tight joints also reduce the risk of grout cracking or discoloration over time, contributing to the longevity of the floor.
- Disadvantages and Considerations: While no grout flooring offers many advantages, it also comes with certain challenges. The installation process is more demanding and requires precise alignment and cutting of tiles to achieve the desired seamless look. Additionally, the lack of grout lines means there is less flexibility to accommodate slight variations in tile size or subfloor irregularities, which can result in a less forgiving installation process. Careful planning and execution are essential to avoid issues such as lippage (uneven tile edges).
- Suitable Applications: No grout ceramic tile flooring is suitable for a variety of applications, including residential and commercial spaces. It is particularly popular in areas where a modern, minimalist aesthetic is desired, such as kitchens, bathrooms, and living rooms. However, it is essential to consider the specific requirements of each space, such as moisture levels and foot traffic, to ensure the chosen tiles and installation methods are appropriate.
- Types of Ceramic Tiles: Several types of ceramic tiles can be used for no grout flooring, including porcelain, glazed, and unglazed tiles. Porcelain tiles are a popular choice due to their durability, low water absorption, and wide range of designs. Glazed ceramic tiles offer a protective coating that enhances resistance to stains and scratches, while unglazed tiles provide a more natural, textured finish. Choosing the right type of tile depends on the specific needs and aesthetic preferences of the space.
- Cost Considerations: The cost of no grout ceramic tile flooring can vary depending on factors such as tile quality, size, and installation complexity. Rectified tiles, which are necessary for this type of installation, tend to be more expensive than standard tiles due to the precision cutting process. Additionally, the meticulous installation process may require professional expertise, adding to the overall cost. However, the long-term benefits of a seamless, easy-to-maintain floor can outweigh the initial investment.

Preparing for No Grout Ceramic Tile Installation
Assessing the Subfloor
Proper subfloor preparation is crucial for a successful no-grout ceramic tile installation. The subfloor must be clean, dry, level, and stable to prevent issues such as tile cracking or uneven surfaces. Start by thoroughly cleaning the subfloor to remove any debris, dust, or contaminants that could interfere with the adhesive bond. Inspect the subfloor for any cracks, holes, or uneven areas and repair them as needed to create a smooth, even surface.
Moisture Considerations
Moisture can significantly impact the integrity of your no grout ceramic tile floor, particularly in areas such as bathrooms and kitchens. Before installation, conduct a moisture test to determine the moisture levels in the subfloor. If high moisture levels are detected, take appropriate measures to mitigate the issue, such as installing a moisture barrier or using a suitable waterproofing membrane. This step is essential to prevent tile movement and adhesive failure due to moisture intrusion.
Choosing the Right Adhesive
Selecting the right adhesive is essential for ensuring a strong bond between the tiles and the subfloor. Use a high-quality, flexible adhesive that is specifically designed for rectified tiles and no grout installations. These adhesives typically offer superior bonding strength and flexibility to accommodate slight movements in the subfloor. Follow the manufacturer’s instructions for mixing and applying the adhesive to achieve the best results.
Acclimating the Tiles
Acclimating the ceramic tiles to the installation environment helps prevent issues related to expansion and contraction. Lay the tiles out in the room where they will be installed for at least 24-48 hours before beginning the installation. This allows the tiles to adjust to the temperature and humidity of the space, reducing the risk of movement or warping after installation. Ensure the room is maintained at a consistent temperature during this period.
Planning the Layout
A well-planned layout is essential for achieving a seamless no grout ceramic tile floor. Begin by measuring the room and marking the center point to establish a starting point for the tile layout. Dry-lay the tiles to visualize the final appearance and make any necessary adjustments to the pattern or alignment. Pay close attention to the edges and corners, as precise cutting and alignment are crucial for achieving tight joints and a seamless look.
Gathering Tools and Materials
Having the right tools and materials on hand will make the installation process more efficient and accurate. Essential tools include a tile cutter or wet saw, notched trowels, a level, a tape measure, spacers, and a rubber mallet. You will also need high-quality adhesive, a mixing paddle, and clean cloths for wiping down the tiles. Ensure all tools are clean and in good working condition before you begin the installation process.

Installing No Grout Ceramic Tiles
Mixing and Applying the Adhesive
Mix the adhesive according to the manufacturer’s instructions, ensuring it reaches the right consistency. The adhesive should be smooth and free of lumps, with a texture similar to a thick paste. Using a notched trowel, spread a thin layer of adhesive onto the subfloor, working in small sections to prevent the adhesive from drying out before you can set the tiles. Hold the trowel at a 45-degree angle to create ridges in the adhesive, which helps ensure a strong bond between the tile and the subfloor.
Setting the Tiles
Begin laying the tiles according to your layout plan, starting from the center of the room and working outward. Press each tile firmly into the adhesive, using a slight twisting motion to ensure full contact. Maintain tight joints between the tiles, using spacers if necessary to achieve uniform spacing. Use a level to check that each tile is even with the surrounding tiles, adjusting as needed to prevent lippage. Work systematically, completing one section before moving on to the next.
Cutting the Tiles
Cutting tiles to fit around edges, corners, and obstacles is often necessary to achieve a seamless look. Use a wet saw with a diamond blade for precise cuts, ensuring clean edges that align perfectly with adjacent tiles. Measure the area where the cut tile will be placed, marking the tile with a pencil before cutting. Always wear safety goggles and gloves when cutting tiles to protect yourself from sharp edges and flying debris.
Adjusting and Aligning Tiles
Throughout the installation process, regularly check the alignment and spacing of the tiles to ensure a seamless appearance. Use a rubber mallet to tap the tiles gently into place, making minor adjustments as needed. Pay close attention to the edges and corners, ensuring they align perfectly with adjacent tiles. Take your time during this step, as precise alignment is crucial for achieving the desired seamless look.
Allowing the Adhesive to Cure
After all the tiles are set, allow the adhesive to cure for at least 24 hours. This is crucial to ensure that the tiles are securely bonded to the subfloor. Avoid walking on the tiles during this period to prevent them from shifting. Once the adhesive is fully cured, you can proceed with cleaning the tile surface and inspecting the installation for any necessary touch-ups.
Cleaning the Tiles
Before final inspection, thoroughly clean the surface of the tiles to remove any excess adhesive. Use a damp sponge or cloth to wipe away any residue, being careful not to disturb the tiles. Cleaning at this stage will help you identify any imperfections and ensure a pristine finish. Allow the tiles to dry completely before conducting a final inspection and making any necessary adjustments.

Sealing and Protecting No Grout Ceramic Tile Floors
The Importance of Sealing
While no grout ceramic tile floors do not have traditional grout lines that require sealing, it is still essential to seal the tile surfaces to protect against stains and damage. Sealing provides a protective barrier that helps maintain the tiles’ appearance and durability over time. This step is particularly important in high-traffic areas and spaces prone to spills and moisture, such as kitchens and bathrooms.
Choosing the Right Sealant
Select a sealant specifically designed for ceramic tiles. There are two main types of sealants: penetrating sealants, which absorb into the tile and provide internal protection, and surface sealants, which create a protective layer on the tile surface. Penetrating sealants are generally recommended for no-grout ceramic tile floors as they do not alter the tile’s appearance and offer long-lasting protection. Ensure the sealant you choose is appropriate for the specific type of ceramic tile you have installed.
Applying the Sealant
Before applying the sealant, make sure the tile surface is clean and dry. Using a clean, dry cloth or a sealant applicator, apply the sealant evenly across the tile surfaces. Work in small sections to ensure full coverage. Allow the sealant to penetrate the tiles for the recommended amount of time, usually about 15-30 minutes. Wipe off any excess sealant with a clean cloth to prevent residue buildup on the tile surface.
Allowing the Sealant to Cure
After applying the sealant, allow it to cure for the time specified by the manufacturer. This typically ranges from 24 to 48 hours. During this curing period, avoid walking on the floor or placing any objects on it. Proper curing is essential to ensure the sealant fully bonds with the tiles, providing maximum protection.
Regular Maintenance
Even with a sealed surface, regular maintenance is necessary to keep your no grout ceramic tile floor looking its best. Clean spills immediately to prevent stains, and use a pH-neutral cleaner specifically designed for ceramic tiles. Avoid using acidic or abrasive cleaners, as these can damage the sealant and the tiles themselves. Regularly inspect the sealant and reapply as needed, typically every 1-2 years, to maintain the protective barrier.
Preventing Damage
To prevent damage to your no grout ceramic tile floor, take precautions such as using mats or rugs in high-traffic areas and placing protective pads under furniture legs. Avoid dragging heavy objects across the floor, as this can scratch or chip the tiles. Regularly sweep or vacuum the floor to remove dirt and debris that could cause abrasion. These preventative measures will help extend the life of your no grout ceramic tile floor and keep it looking pristine.

Common Mistakes to Avoid
Skipping Subfloor Preparation
One of the most common mistakes in no grout ceramic tile installation is neglecting proper subfloor preparation. An uneven or unstable subfloor can lead to cracked tiles and uneven surfaces. Always ensure the subfloor is clean, level, and properly prepared before beginning the installation process.
Incorrect Adhesive Selection
Using the wrong adhesive can result in poor adhesion and tile movement. It is crucial to select a high-quality, flexible adhesive specifically designed for rectified tiles and no grout installations. Follow the manufacturer’s instructions carefully for mixing and application to achieve the best results.
Poor Tile Alignment
Failing to align the tiles precisely can compromise the seamless look of no grout flooring. Take your time during the layout and installation process to ensure that each tile is perfectly aligned with adjacent tiles. Use a level and spacers to maintain uniform spacing and prevent lippage.
Rushing the Installation
Rushing through the installation process can lead to mistakes and imperfections. No grout ceramic tile installation requires meticulous attention to detail and patience. Take your time to ensure each step is completed accurately, from subfloor preparation to tile setting and sealing.
Inadequate Sealing
Neglecting to seal the tiles or using an inappropriate sealant can leave your floor vulnerable to stains and damage. Always use a high-quality sealant specifically designed for ceramic tiles, and follow the manufacturer’s instructions for application and maintenance. Regularly inspect the sealant and reapply as needed.
Ignoring Maintenance
Even with a well-installed and sealed floor, regular maintenance is essential to keep your no-grout ceramic tile floor in top condition. Clean spills promptly, use appropriate cleaners and take preventive measures to protect the tiles from damage. Ignoring maintenance can lead to deterioration and reduce the lifespan of your floor.

What is no grout ceramic tile flooring?
No grout ceramic tile flooring, also known as rectified tile flooring, involves installing ceramic tiles with extremely tight joints, typically 1/16 inch or less. This method eliminates the need for traditional grout lines, creating a seamless and modern look. The tiles used in this type of installation are precisely cut to uniform dimensions, allowing for tight, even spacing and a sleek appearance.
What are the benefits of no grout ceramic tile flooring?
The primary benefits of no grout ceramic tile flooring include a sleek, seamless appearance and easier maintenance. Without grout lines, there are fewer places for dirt and grime to accumulate, making the floor easier to clean. Additionally, the tight joints reduce the risk of grout cracking or discoloration over time, contributing to the floor’s longevity. This type of flooring is particularly popular in modern and contemporary interior designs.
Can I install no grout ceramic tile flooring myself?
While it is possible to install no grout ceramic tile flooring yourself, it is a complex and demanding process that requires precision and attention to detail. DIY installation is recommended only for those with prior experience in tile work and a thorough understanding of the necessary steps and tools. Hiring a professional installer is often the best option to ensure a flawless finish and avoid costly mistakes.
How do I maintain no grout ceramic tile flooring?
Maintaining no grout ceramic tile flooring involves regular cleaning and preventive measures to protect the tiles. Use a pH-neutral cleaner specifically designed for ceramic tiles, and avoid acidic or abrasive cleaners that can damage the surface. Clean spills immediately to prevent stains, and use mats or rugs in high-traffic areas. Regularly inspect the sealant and reapply as needed to maintain the protective barrier.
Are there any special considerations for installing no grout flooring in high-moisture areas?
Yes, installing no grout ceramic tile flooring in high-moisture areas such as bathrooms and kitchens requires careful consideration. Ensure the subfloor is properly prepared and waterproofed to prevent moisture from seeping into the tiles. Use a high-quality penetrating sealant to protect the tiles from water damage and stains. Regular maintenance and prompt cleaning of spills are essential to keep the tiles in good condition.
How long does it take to install no-grout ceramic tile flooring?
The time required to install no grout ceramic tile flooring depends on several factors, including the size of the area, the complexity of the layout, and the experience of the installer. Generally, a professional installation of an average-sized room can take between 3 to 5 days. This includes time for subfloor preparation, tile layout, adhesive application, tile setting, and sealing. Allow additional time for curing and drying between each step to ensure a successful installation.
wood look porcelain tile no grout Porcelain tile floor kitchen

No Grout Tile Flooring

Can I Install Tile Without Grout?

Bathroom Floor Tile Without Grout
Related Posts: