Penny Floor DIY

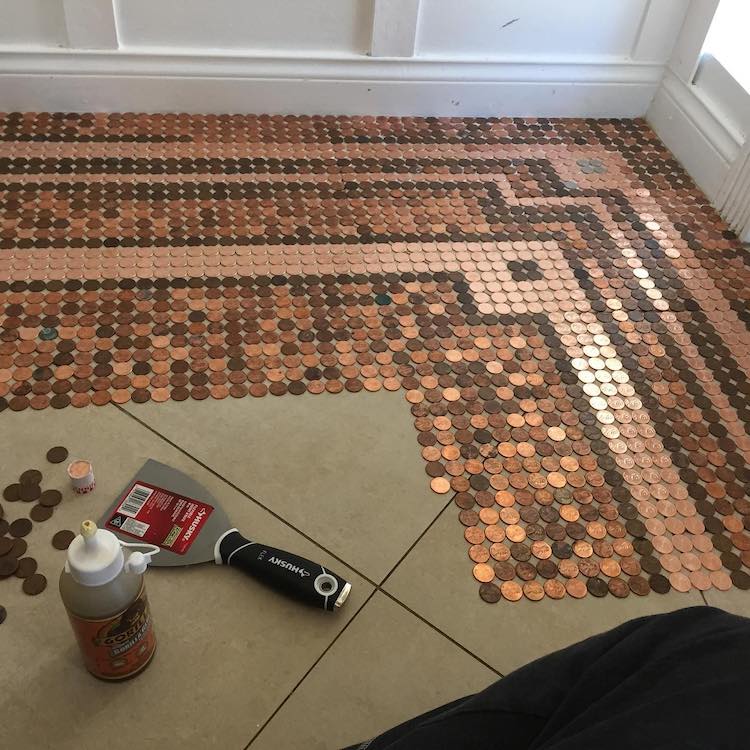
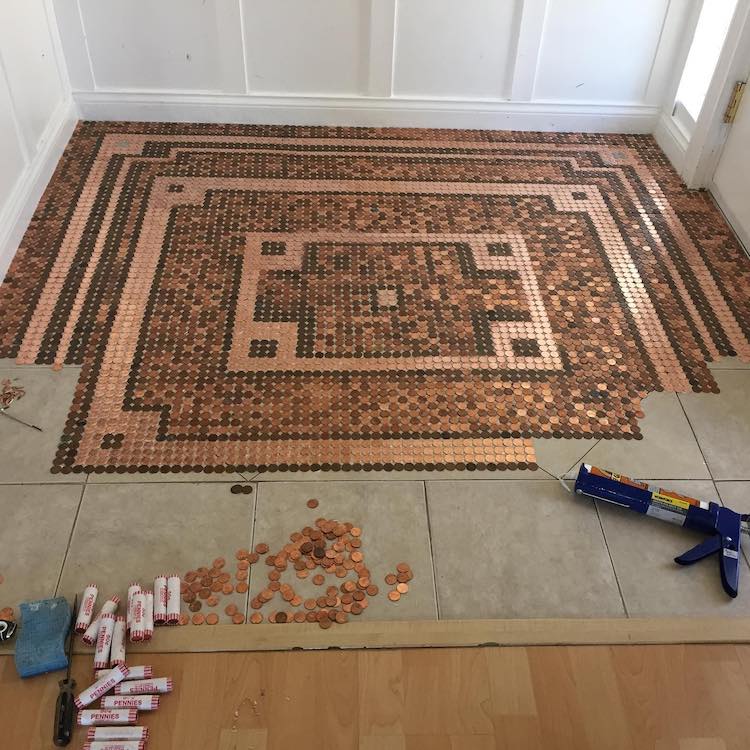
DIY Penny Floor: Week Two

Pin on Penny tile

My penny floor!! Penny floor, Diy flooring, Penny tiles bathroom

Jeweler Creates Her Own DIY Penny Floor Using 7,500 Pennies
Pin on For the Home

Jeweler Creates Her Own DIY Penny Floor Using 7,500 Pennies
Guy made this penny floormore than twenty years ago..! Penny floor, Flooring, Kitchen

Kitchen penny floor in Eagle-Vail in process www.idoweddingservices.com Penny floor, Penny

Mixed Media Penny floor designs, Floor design, Penny floor

Floor made out of pennies! Found chache of 31,140 pennies in the most unusual place ever-penny6

Related Posts:
- Small Kitchen Floor Plan Ideas
- Laminate Flooring In Kitchen
- Black Slate Tile Kitchen Floor
- How To Lay Tile In Kitchen Floor
- Red Kitchen Floor
- Cheap Kitchen Laminate Flooring
- Decorative Kitchen Floor Mats
- Contemporary Kitchen Flooring Ideas
- Kitchen Ceramic Tile Floor
- Quarry Tile Kitchen Floor
Penny floors have become a popular way to spruce up kitchens, bathrooms, and other living spaces with something unique and eye-catching. Whether you’re looking to do a full-scale renovation or just want to add a little bit of flair to your home, installing a penny kitchen floor is an easy and affordable way to go.
It’s important to note that while penny floors are a great way to add some personality to your home, they do require some special preparation and care in order to ensure that they last for years to come. In this guide, we’ll walk you through the steps required to successfully install a penny kitchen floor in your home.
## What You’ll Need for Your Penny Kitchen Floor
The first step in any project is making sure that you have all the materials you need. When it comes to penny kitchen floors, there are a few key items that you’ll need to have on hand before you get started.
* Penny coins – of course! This project works best with pennies from before 1982 since those coins are made out of 95% copper which is more durable than the newer pennies which are made from zinc.
* A sealant – this will help protect your floor from moisture and will also make it easier to clean.
* A tile cutter – this will make it easier to cut the pennies into the shapes and sizes you need for your floor.
* Grout – this will help fill in any gaps between the pennies and ensure that they stay in place.
* Adhesive – this will help secure the pennies to the subfloor.
## Preparing Your Subfloor
Before you get started with laying down the pennies, it’s important to make sure that your subfloor is properly prepared. This means cleaning it thoroughly and making sure that any cracks or holes are filled in. You should also use a leveler on the subfloor if necessary in order to make sure that everything is even and flat.
## Installing Your Penny Kitchen Floor
Once your subfloor is ready, it’s time to start laying down the pennies! Begin by cutting them into small pieces with a tile cutter and then using an adhesive to stick them onto the subfloor. Make sure that the coins are lined up evenly and fill in any gaps with grout as needed. Once everything is in place, use a sealant over the top of the pennies in order to protect them from moisture and dirt.
## Caring For Your Penny Kitchen Floor
Once your penny kitchen floor is installed, it’s important to take good care of it in order to keep it looking its best for years to come. To do this, make sure that you mop regularly with a damp mop and mild detergent in order to remove any dirt or grime. You should also avoid using abrasive cleaners or scrubbing too hard as this could damage the finish of your floor. In addition, make sure that you re-seal your floor every one or two years in order to keep it protected from moisture.
Installing a penny kitchen floor can be a great way to add some personality and style to your home without breaking the bank. By following these steps, you can easily create an eye-catching floor that will last for years if properly cared for!