Guide to Choose and Install Rubber Garage Flooring
Rubber garage flooring is becoming an increasingly popular option among homeowners who are looking to upgrade their garage spaces. It provides a durable, slip-resistant surface that can withstand heavy weights, such as vehicles and equipment, and offers cushioning that reduces fatigue and noise. If you’re considering rubber flooring for your garage, understanding its benefits, installation process, and maintenance requirements is key to making an informed decision. Today we will talk about rubber garage flooring and explore everything you should know to create a functional and stylish garage space.
The Benefits of Rubber Garage Flooring
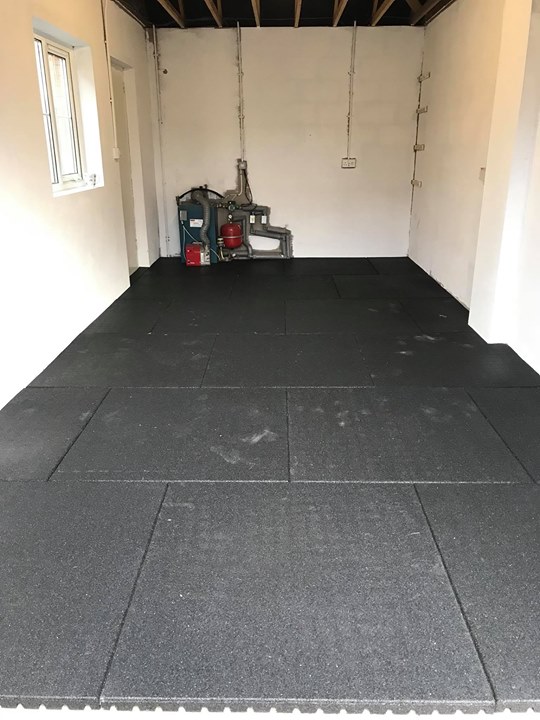
Rubber garage flooring offers several advantages that make it an appealing choice for many homeowners. One of the primary benefits is its durability. Rubber flooring is designed to withstand heavy loads and resist damage from impacts, abrasions, and chemicals. This makes it perfect for a garage environment, where the floor is often exposed to cars, heavy tools, and potentially damaging substances like oil and gasoline.
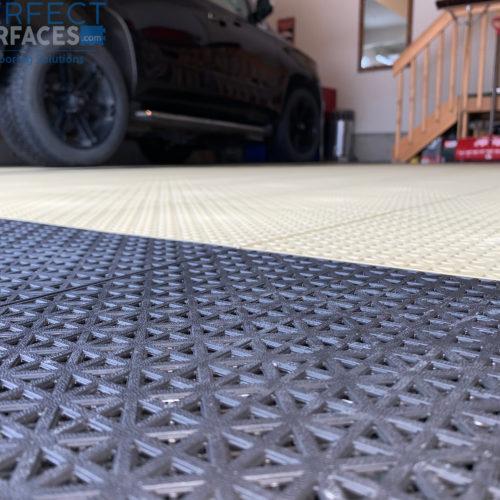
Another significant benefit of rubber flooring is its slip resistance. Garages can often become slippery, especially when wet, which can pose a safety hazard. Rubber flooring has a naturally textured surface that provides excellent grip, even when wet, reducing the risk of slips and falls. This makes it a great choice for those who use their garages not just for parking cars but also as workshops or fitness spaces.
Comfort is also a notable advantage of rubber flooring. Unlike hard concrete, rubber provides a cushioned surface that reduces fatigue, making it easier to stand and work for extended periods. This cushioning effect also helps to absorb noise, which can be beneficial if you use your garage as a workspace or if you frequently move heavy equipment around.
Rubber garage flooring is also incredibly easy to maintain. It doesn’t absorb liquids, making spills easy to clean up. Most stains can be wiped away with a damp cloth or mop, and regular sweeping or vacuuming will keep the floor looking its best. This low maintenance requirement is ideal for busy homeowners who want a functional garage without a lot of upkeep.
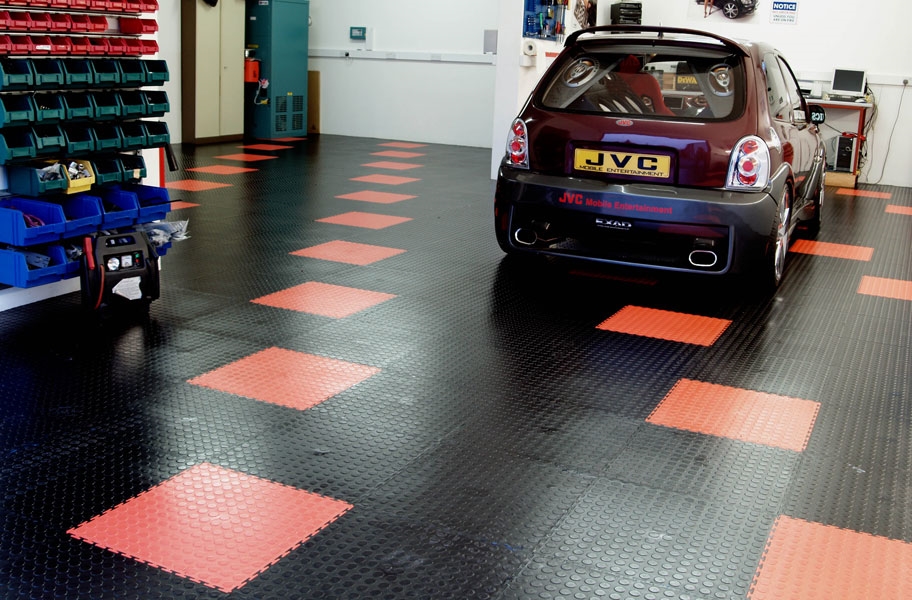
The versatility of rubber flooring is another significant benefit. It comes in a variety of colors, patterns, and thicknesses, allowing you to customize the look of your garage to suit your style. Whether you prefer a classic black or gray floor, a colorful checkerboard pattern, or something more unique, rubber flooring provides plenty of options.
Finally, rubber flooring is environmentally friendly. Many rubber garage floors are made from recycled materials, such as old tires, making them a sustainable choice for those looking to reduce their environmental impact. Additionally, rubber flooring can be recycled at the end of its life, further minimizing its environmental footprint.

Choosing the Right Type of Rubber Flooring for Your Garage
When it comes to selecting rubber flooring for your garage, there are several types to consider, each with its own set of advantages. The most common types are rubber tiles, rubber mats, and rolled rubber flooring. Understanding the differences between these options will help you choose the best one for your specific needs.
Rubber tiles are a popular choice for garages because they are easy to install and offer great flexibility. They come in various sizes, typically ranging from 12×12 inches to 36×36 inches, and can be interlocked to cover large or small areas. This modular design allows you to easily replace individual tiles if they become damaged without having to replace the entire floor. Rubber tiles are also available in a variety of colors and patterns, giving you the freedom to create a customized look for your garage.
Rubber mats are another excellent option, particularly for those looking for an easy, no-fuss installation. Mats typically come in standard sizes, such as 4×6 feet, and can be placed directly on the garage floor without adhesives. This makes them ideal for renters or anyone who wants a temporary flooring solution that can be easily removed. Rubber mats are also great for creating designated work areas within a larger garage space, providing extra cushioning and protection where needed.

Rolled rubber flooring is a good choice if you want a seamless look and more extensive coverage. Rolls can cover large areas with minimal seams, which not only enhances the aesthetic appeal but also makes cleaning and maintenance easier. Rolled rubber flooring is available in various thicknesses, which can be selected based on the intended use of the garage. Thicker rolls provide more cushioning and sound insulation, making them ideal for multi-use garages that double as gyms or workshops.
When choosing rubber flooring, consider the thickness that best suits your needs. Thinner options, like those around 1/4 inch, are suitable for areas with light traffic and minimal impact, such as storage spaces. For garages that will see heavy use or serve as workshops, thicker options, such as those around 1/2 inch or more, are recommended to provide additional durability and cushioning.
It’s also important to consider the aesthetic appeal of your rubber flooring. While black is the most common color, rubber flooring comes in various colors and designs that can complement the look of your home. Consider selecting a color or pattern that matches your garage’s overall design theme, whether it’s sleek and modern, rugged and industrial, or something unique.
Last, make sure to choose a rubber flooring product that is specifically designed for garage use. This ensures it has the necessary properties, like chemical resistance and load-bearing capacity, to withstand the demands of a garage environment. Check the manufacturer’s specifications to ensure the product meets your needs.
Preparing Your Garage for Rubber Flooring Installation
Proper preparation of your garage floor is crucial for a successful rubber flooring installation. The first step is to thoroughly clean the floor. Remove all items from the garage, sweep away any debris, and clean the floor with a degreaser to remove any oil or grease stains. A clean surface ensures that the rubber flooring adheres properly and lays flat without any bumps or bubbles.
After cleaning, inspect the garage floor for any cracks or damage. While rubber flooring can cover minor imperfections, larger cracks or holes should be repaired before installation to ensure a smooth and even surface. Use a concrete patching compound to fill in any gaps, and allow it to cure according to the manufacturer’s instructions. This step is essential to prevent any unevenness in the rubber flooring.
Once the floor is clean and repaired, measure the dimensions of your garage to determine how much rubber flooring you’ll need. It’s always a good idea to order a little extra to account for mistakes or future repairs. If you’re using tiles or mats, lay them out in a dry run to ensure you have enough material and to plan the layout. This step will help you visualize the final result and make any necessary adjustments before installation.

Consider the condition of your garage floor before installing rubber flooring. If the floor is particularly uneven or has a lot of imperfections, you may need to level it before proceeding. Self-leveling compounds can be used to create a smooth, even surface, which is especially important for rolled rubber flooring. This step ensures that the flooring will lay flat and look professional once installed.
Next, consider applying a primer or sealer to the garage floor. While not always necessary, a primer can help improve adhesion for rubber tiles or rolls, particularly if your garage floor is porous or has a lot of moisture. A sealer can also provide an extra layer of protection against moisture, which is important if you live in an area with high humidity or if your garage is prone to flooding.
Finally, gather all the necessary tools and materials for the installation. Depending on the type of rubber flooring you’re using, this may include a utility knife for cutting, a measuring tape, a straightedge, a rubber mallet for fitting tiles together, and adhesive if you’re using glue-down tiles or rolls. Having everything you need on hand will make the installation process smoother and more efficient.

Installing Rubber Garage Flooring: Step-by-Step
Installing rubber garage flooring can be a straightforward DIY project with the right preparation and tools. Start by laying out the flooring material to acclimate to the garage’s temperature and humidity for at least 24 hours. This is especially important for rubber rolls, as they need time to flatten out and adjust to the garage environment, reducing the risk of buckling or warping after installation.
Begin the installation by laying the rubber tiles, mats, or rolls in one corner of the garage. If you’re using interlocking tiles, start from the corner and work your way outwards, fitting the tiles together like a puzzle. Use a rubber mallet to gently tap the tiles into place, ensuring a snug fit. For rubber mats, simply lay them down in the desired location, aligning them carefully to avoid gaps.
When installing rolled rubber flooring, unroll the material across the garage floor, aligning it along the wall. Use a straightedge and utility knife to trim any excess material, ensuring a precise fit. If you’re installing multiple rolls, lay them out one at a time, making sure to butt the seams tightly together to create a seamless look. For a more secure installation, consider using double-sided carpet tape or adhesive along the seams.
If you choose to glue down your rubber flooring, follow the manufacturer’s instructions for applying the adhesive. Spread the adhesive evenly across the floor using a notched trowel, working in small sections to prevent it from drying before the flooring is laid. Carefully place the rubber tiles or rolls onto the adhesive, pressing firmly to ensure a good bond. Use a heavy roller to press the flooring down and remove any air bubbles.
Once all the flooring is laid, inspect the installation for any gaps, bubbles, or uneven seams. If you find any issues, adjust the tiles or rolls as needed before the adhesive sets. For interlocking tiles, ensure all seams are tightly fitted and use a mallet to tap any loose edges into place. If you’re using glue-down flooring, use a roller to smooth out any bubbles and ensure a flat, even surface.
Allow the flooring to set and cure according to the manufacturer’s instructions before moving any items back into the garage. This curing period is crucial to ensure the adhesive or seams have fully bonded and the flooring is securely in place. Once the flooring is fully cured, you can start enjoying your new, durable, and stylish garage floor.

Maintaining Your Rubber Garage Flooring
Maintaining rubber garage flooring is relatively easy, but regular care will help extend its life and keep it looking its best. Start by sweeping or vacuuming the floor regularly to remove dirt, dust, and debris. Rubber floors are resistant to dirt and stains, but keeping them clean will help prevent any buildup that could potentially cause damage over time.
For a deeper clean, mop the floor with a mild detergent and warm water. Avoid using harsh chemicals or abrasive cleaners, as these can damage the rubber and cause it to degrade over time. If you have a spill, clean it up promptly to prevent any potential staining or damage to the flooring material.
Inspect your rubber flooring periodically for any signs of wear or damage, especially in high-traffic areas. If you notice any cuts, tears, or areas where the flooring is starting to come loose, address these issues immediately. Small repairs can often be made with adhesive or a rubber patch kit, but more extensive damage may require replacing individual tiles or mats.
Consider applying a rubber floor conditioner or sealer to your garage floor to help maintain its appearance and protect it from damage. These products can help restore the shine and elasticity of the rubber, making it look like new. Be sure to follow the manufacturer’s instructions for application and reapplication to achieve the best results.
If you use your garage for heavy-duty activities, such as auto repair or as a home gym, consider placing additional mats or protective coverings in high-use areas. This can help reduce wear and tear on the rubber flooring and extend its life. For example, placing a mat under a weight bench or car jack can prevent indentation marks and protect the flooring from heavy weights.
Lastly, avoid exposing your rubber flooring to direct sunlight for extended periods, as UV rays can cause the rubber to fade and degrade over time. If your garage has windows, consider using blinds or curtains to block out sunlight, or apply a UV-resistant coating to the flooring for added protection. Taking these simple steps will help ensure your rubber garage floor remains in great condition for years to come.

Common Mistakes to Avoid
Choosing the Wrong Thickness
One of the most common mistakes when selecting rubber garage flooring is choosing the wrong thickness for your needs. Thinner flooring may not provide enough cushioning or protection in high-traffic areas, leading to premature wear and tear. Always consider the intended use of your garage when selecting the thickness of your rubber flooring to ensure it meets your durability and comfort needs.
Improper Surface Preparation
Installing rubber flooring on a dirty or uneven surface can lead to problems down the line, such as bubbles, gaps, or flooring that shifts out of place. Properly clean and repair your garage floor before installation to ensure the rubber adheres correctly and lays flat. Skipping this step can result in a less durable and visually appealing floor.
Not Allowing the Flooring to Acclimate
Failing to allow your rubber flooring to acclimate to the garage environment can result in warping or buckling after installation. Rubber needs time to adjust to the temperature and humidity of the space, so lay it out for at least 24 hours before installing. This will help prevent any issues with fit and ensure a smooth, even installation.
Ignoring Adhesive Guidelines
If you’re using adhesive to install your rubber flooring, not following the manufacturer’s guidelines can lead to poor adhesion and flooring that lifts or shifts over time. Always use the recommended type and amount of adhesive, and follow the instructions for application to ensure a strong bond and a durable installation.
Cutting Corners on Installation
Rushing through the installation process or not taking the time to measure and cut accurately can lead to gaps, uneven seams, or a floor that doesn’t fit properly. Take your time to measure carefully, cut precisely, and fit the tiles or rolls together tightly to ensure a professional-looking result that will last for years.
Neglecting Regular Maintenance
Even though rubber flooring is low-maintenance, neglecting regular care can lead to dirt buildup, staining, and premature wear. Regularly sweep or vacuum your floor and clean up spills promptly to keep your flooring looking its best. Failing to maintain your rubber flooring can reduce its lifespan and lead to costly replacements sooner than necessary.
Is rubber garage flooring resistant to oil and chemicals?
Yes, rubber garage flooring is highly resistant to oil, chemicals, and other automotive fluids. This makes it an excellent choice for garages, as spills can be easily cleaned up without causing damage to the floor. However, it’s still a good practice to clean up spills promptly to prevent any potential staining or deterioration over time.
Can rubber flooring be installed over existing concrete floors?
Absolutely, rubber flooring can be installed directly over existing concrete floors, which is one of its main advantages. The key is to ensure the concrete is clean, dry, and free of any cracks or damage that could affect the rubber’s adhesion or the smoothness of the installation. Proper preparation will result in a more durable and aesthetically pleasing finish.
How does rubber flooring perform in extreme temperatures?
Rubber flooring is known for its ability to perform well in a wide range of temperatures. It remains flexible in cold weather and does not become overly soft or sticky in the heat. However, extreme temperatures may affect the floor’s longevity, so it’s wise to consider additional measures, like using a UV-resistant coating if your garage is subject to prolonged sunlight exposure.

Is rubber garage flooring suitable for heavy equipment or vehicles?
Yes, rubber garage flooring is specifically designed to handle heavy equipment and vehicles. It’s durable and resistant to wear and tear, making it an ideal choice for garages that serve as workshops or storage spaces for heavy machinery. Just be sure to choose a thicker rubber flooring option if your garage will see a lot of heavy use to ensure maximum protection and longevity.
Can I install rubber garage flooring myself, or should I hire a professional?
Installing rubber garage flooring can be a DIY project if you’re comfortable with measuring, cutting, and fitting the material. Most rubber flooring options, such as tiles and mats, are relatively straightforward to install. However, if you’re opting for glued-down rolls or if your garage floor requires extensive preparation, hiring a professional may be worth the investment to ensure a perfect finish.
How do I clean and maintain my rubber garage floor?
Cleaning and maintaining rubber garage flooring is simple. Regularly sweep or vacuum to remove dirt and debris, and mop with a mild detergent and warm water for a deeper clean. Avoid harsh chemicals or abrasive tools that could damage the rubber. Periodically inspect the floor for any damage and make repairs as needed to keep your floor looking and performing its best.

Related Posts: