When I decided to revamp my home’s flooring, glass tile floor designs caught my eye. The luminous, versatile, and unique properties of glass tiles seemed perfect for creating a modern, elegant, and visually striking look. Through my research and personal experience, I discovered the many facets of glass tile flooring. Here, I’ll share my insights on the benefits, design options, installation process, maintenance tips, and more.
The Beauty and Benefits of Glass Tile Flooring
Aesthetic Appeal
One of the primary reasons I was drawn to glass tile flooring was its stunning aesthetic appeal. Glass tiles come in a myriad of colors, shapes, and finishes, offering endless design possibilities. Their reflective properties create a luminous effect, making spaces feel brighter and more open. This was particularly beneficial in areas of my home with limited natural light.
Durability and Strength
Despite their delicate appearance, glass tiles are incredibly durable and resistant to wear and tear. I learned that high-quality glass tiles can withstand heavy foot traffic and are less prone to chipping and cracking than some natural stones. This durability made glass tile flooring a practical choice for both residential and commercial spaces.
Eco-Friendly Option
As someone who is environmentally conscious, I appreciate that glass tiles are often made from recycled materials. This makes them an eco-friendly flooring option. Additionally, the longevity of glass tiles means less frequent replacements, reducing waste over time. Choosing glass tile flooring allowed me to combine style with sustainability.
Versatility in Design
The versatility of glass tiles was another major factor in my decision. They can be used in various applications, from floors to walls to backsplashes. I loved the idea of creating a cohesive look by incorporating glass tiles in multiple areas of my home. Their ability to blend seamlessly with other materials, such as wood or stone, also appealed to my design sensibilities.
Hygienic and Easy to Clean
Maintaining cleanliness in my home is a top priority, and glass tile flooring excels in this regard. The non-porous surface of glass tiles resists stains and bacteria, making them easy to clean and highly hygienic. A simple wipe with a damp cloth or mop keeps them looking pristine. This low-maintenance aspect was a significant advantage for my busy lifestyle.
Value Addition
Installing glass tile flooring can add value to a property due to its modern and luxurious appeal. Whether I plan to stay in my home for years or consider selling in the future, I knew that glass tile flooring would be an attractive feature for potential buyers. Its unique and eye-catching design elements can set a property apart in the real estate market.
Exploring Design Options
Mosaic Patterns
One of the most exciting aspects of working with glass tiles is the opportunity to create intricate mosaic patterns. I experimented with different color combinations and layouts to design a unique mosaic floor that became the focal point of my space. Mosaics allow for creativity and personalization, making each installation one-of-a-kind.
Geometric Shapes
Geometric shapes are a popular trend in glass tile flooring. From hexagons to diamonds to arabesques, the variety of shapes available allowed me to experiment with different patterns and designs. These shapes can create a modern, contemporary look or a classic, timeless appeal, depending on the chosen color palette and layout.
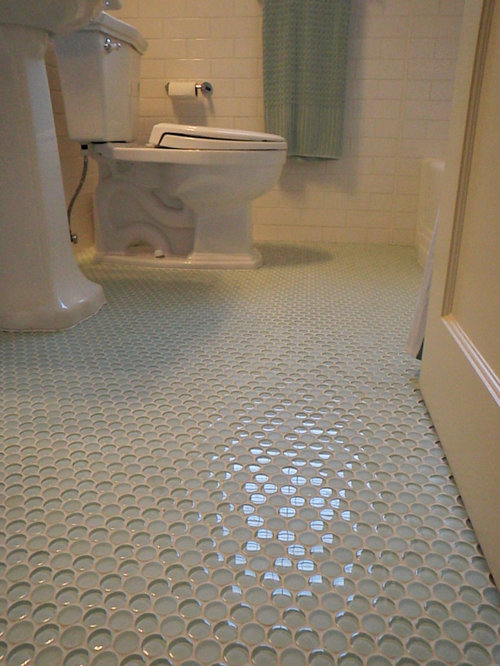
Gradient and Ombre Effects
Creating gradient and ombre effects with glass tiles adds depth and visual interest to a room. I played with various shades of a single color to achieve a subtle transition that brought a dynamic and sophisticated look to my floor. This technique works particularly well in larger spaces, where the gradual color change can be fully appreciated.
/mosaic-floor-118388533-resized-56a2fd863df78cf7727b6d08.jpg)
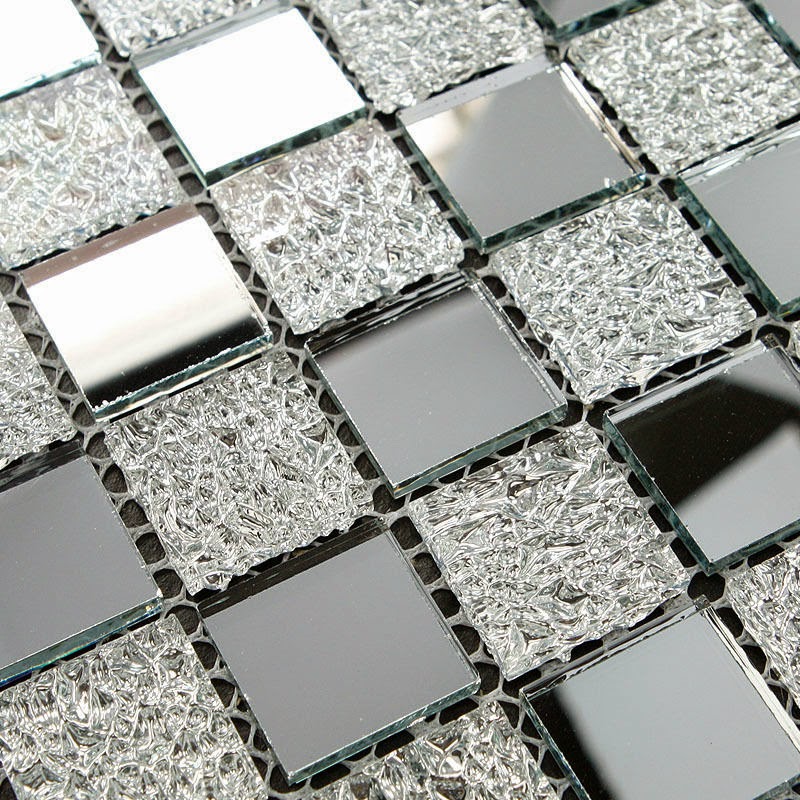
Reflective and Iridescent Finishes
The reflective and iridescent finishes of glass tiles can enhance the luminosity of a room. I opted for iridescent tiles in a few areas, which added a touch of glamour and sophistication. These finishes catch and reflect light beautifully, creating a shimmering effect that changes with the angle of the light source.
Custom Designs
For those looking for a truly unique floor, custom glass tile designs are an option. I worked with a designer to create a custom pattern that reflected my style and taste. This bespoke approach allowed me to incorporate specific colors, shapes, and motifs that were meaningful to me, resulting in a floor that is both functional and a work of art.
Blending Materials
Blending glass tiles with other materials, such as natural stone or wood, can create a stunning and cohesive design. I used glass tiles as accents within a larger stone floor, which added a modern touch to a classic look. This combination of materials provided texture and contrast, enhancing the overall aesthetic of the space.

Installation Process: What to Expect
Preparing the Subfloor
Before installing glass tiles, it’s crucial to prepare the subfloor properly. The surface must be clean, level, and free of any debris. I made sure to address any imperfections and apply a suitable underlayment to ensure a smooth and stable foundation. Proper preparation is key to preventing issues like cracking or uneven tiles.
Choosing the Right Adhesive
Selecting the right adhesive is vital for a successful installation. I opted for a high-quality thin-set mortar specifically designed for glass tiles. This type of adhesive provides the necessary bond strength and flexibility. It’s important to follow the manufacturer’s recommendations for mixing and application to achieve the best results.
Laying Out the Tiles
Planning the layout before starting the installation helped me achieve a balanced and visually appealing design. I dry-laid the tiles to determine the best arrangement and make any necessary adjustments. This step is particularly important when working with patterns or custom designs to ensure that everything lines up correctly.

Cutting the Tiles
Cutting glass tiles requires precision and the right tools. I used a wet saw with a diamond blade to make clean, accurate cuts. Safety is paramount, so I wore protective gear and handled the tiles carefully. Taking the time to measure and cut the tiles correctly ensured a professional-looking finish.
Setting the Tiles
Once the adhesive was ready, I began setting the tiles. Working in small sections, I applied the thin-set mortar and placed the tiles according to the planned layout. Using spacers helped maintain consistent gaps for grouting. Pressing each tile firmly into the adhesive ensured good contact and prevented any air pockets.
Grouting and Sealing
After the adhesive had set, it was time to grout the tiles. I chose a grout color that complemented the glass tiles and applied it with a rubber float, filling the gaps between the tiles. Cleaning the excess grout with a damp sponge was essential to prevent it from hardening on the surface. Once the grout was dry, I applied a sealer to protect both the grout and the tiles, enhancing their durability and ease of maintenance.

Maintenance and Care Tips
Regular Cleaning
Maintaining the pristine appearance of glass tile flooring involves regular cleaning. I use a soft mop or cloth to remove dust and dirt, avoiding abrasive materials that could scratch the surface. A mild, pH-neutral cleaner works best for routine cleaning, keeping the tiles shiny and beautiful.
Addressing Spills and Stains
Although glass tiles are resistant to stains, it’s important to address spills promptly. I clean up spills immediately with a damp cloth to prevent any potential staining. For tougher spots, a mixture of water and vinegar can effectively clean without damaging the tiles. Regularly addressing spills helps maintain the floor’s appearance.
Sealing Grout
Sealing the grout is a crucial step in maintaining glass tile flooring. I reseal the grout every six months to prevent moisture penetration and staining. Applying the sealer is straightforward: I use a small brush to apply it evenly over the grout lines, allowing it to penetrate and then wiping away any excess.

Preventing Scratches
To prevent scratches, I place felt pads under furniture and avoid dragging heavy objects across the floor. Additionally, using rugs or mats in high-traffic areas helps protect the glass tiles from dirt and debris. These precautions keep the tiles looking smooth and polished.
Managing Humidity
Managing humidity levels is important for the longevity of glass tile flooring. Excessive humidity can affect the adhesive and grout. I use a dehumidifier in my home, especially during the summer months, to maintain a stable environment. This helps prevent potential issues and ensures the durability of the flooring.
Regular Inspections
Regular inspections help identify any issues early on. I periodically check for signs of wear, such as chipped or cracked tiles or grout deterioration. If I notice any damage, I address it promptly to prevent further problems. This proactive approach helps maintain the floor’s beauty and functionality.

Advantages Over Other Flooring Options
Glass Tile vs. Ceramic Tile
While ceramic tiles are a popular choice for flooring, glass tiles offer a unique aesthetic appeal with their luminous and reflective properties. Ceramic tiles are durable and versatile, but they lack the depth and shimmer that glass tiles provide. For a modern and eye-catching design, glass tiles were the superior choice for me.
Glass Tile vs. Porcelain Tile
Porcelain tiles are known for their strength and durability, but they don’t offer the same level of visual interest as glass tiles. The variety of colors and finishes available in glass tiles allowed me to create a more dynamic and personalized design. While porcelain is a practical option, the unique beauty of glass tiles makes them more appealing.
Glass Tile vs. Natural Stone
Natural stone tiles, such as marble or granite, offer a timeless and classic look. However, they can be porous and require regular sealing. Glass tiles, on the other hand, are non-porous and easier to maintain. The reflective properties of glass tiles also add a level of sophistication and brightness that natural stone can’t match.
Glass Tile vs. Vinyl
Vinyl flooring is an affordable and low-maintenance option, but it doesn’t provide the same level of luxury and elegance as glass tiles. The visual depth and luminosity of glass tiles create a high-end look that vinyl cannot replicate. For those seeking a more upscale design, glass tiles are the better choice.
Glass Tile vs. Wood
Wood flooring offers warmth and a natural aesthetic, but it is susceptible to water damage and requires regular maintenance. Glass tiles are water-resistant and easy to clean, making them a practical choice for areas prone to moisture. The sleek and modern appearance of glass tiles also complements contemporary design styles better than wood.
Glass Tile vs. Concrete
Concrete flooring is durable and industrial in appearance, but it can be cold and uninviting. Glass tiles bring a level of elegance and sophistication that concrete lacks. The reflective nature of glass tiles also helps to brighten up a space, making it feel more welcoming and lively.

Common Mistakes to Avoid
Improper Subfloor Preparation
One common mistake is not properly preparing the subfloor before installation. Any imperfections in the subfloor can lead to issues with the tiles, such as cracking or uneven surfaces. It’s crucial to ensure the subfloor is clean, level, and free of debris. Taking the time to prepare the subfloor correctly will result in a more durable and professional-looking installation.
Using the Wrong Adhesive
Using the wrong adhesive can compromise the bond between the tiles and the subfloor. It’s important to choose an adhesive specifically designed for glass tiles. I made sure to use a high-quality thin-set mortar that provides the necessary strength and flexibility. Following the manufacturer’s instructions for mixing and application is also essential for a successful installation.
Neglecting Grout Sealing
Sealing the grout is often overlooked but is crucial for maintaining the integrity of the floor. Unsealed grout can absorb moisture and stains, leading to deterioration over time. I ensure that the grout is sealed after installation and reseal it regularly to protect it from damage and keep it looking clean.

Inconsistent Tile Spacing
Inconsistent tile spacing can ruin the overall appearance of the floor. Using spacers helps maintain uniform gaps between tiles, ensuring a neat and professional finish. I took my time during installation to place each tile accurately and check the spacing consistently.
Cutting Tiles Incorrectly
Cutting glass tiles incorrectly can result in jagged edges and a poor fit. Using the right tools, such as a wet saw with a diamond blade, and measuring carefully before cutting is essential. I practiced cutting a few tiles before starting the installation to get a feel for the process and ensure clean, precise cuts.
Rushing the Installation
Rushing through the installation process can lead to mistakes and a subpar finish. Taking the time to plan the layout, set the tiles carefully, and allow the adhesive and grout to cure properly is crucial for a successful outcome. I dedicated enough time to each step of the process, ensuring a professional and durable installation.

What are the benefits of glass tile flooring?
Glass tile flooring offers several benefits, including its aesthetic appeal, durability, eco-friendliness, and versatility in design. The reflective properties of glass tiles create a bright and open feel, while their non-porous surface makes them easy to clean and maintain. Glass tiles are also made from recycled materials, making them an environmentally friendly option.
How do I clean and maintain glass tile flooring?
Cleaning and maintaining glass tile flooring is straightforward. Regularly sweep or vacuum to remove dust and debris, and use a soft mop or cloth with a mild, pH-neutral cleaner for routine cleaning. Avoid abrasive materials and acidic cleaners that could scratch or damage the tiles. Promptly clean up spills to prevent potential staining, and reseal the grout every six months to maintain its integrity.
Can I install glass tile flooring myself, or should I hire a professional?
While it is possible to install glass tile flooring as a DIY project, hiring a professional is recommended for the best results. Professional installers have the experience and tools necessary to ensure a precise and durable installation. They can handle tasks such as subfloor preparation, tile cutting, and grouting with expertise, resulting in a professional finish.
What design options are available with glass tile flooring?
Glass tile flooring offers a wide range of design options, including mosaic patterns, geometric shapes, gradient effects, reflective and iridescent finishes, custom designs, and blending with other materials. These options allow for creativity and personalization, making it easy to create a unique and visually stunning floor.
How durable is glass tile flooring?
High-quality glass tile flooring is very durable and resistant to wear and tear. Glass tiles can withstand heavy foot traffic and are less prone to chipping and cracking than some natural stones. Proper installation, regular maintenance, and taking precautions to prevent scratches and damage will ensure the longevity of glass tile flooring.
Is glass tile flooring suitable for all areas of the home?
Glass tile flooring is suitable for many areas of the home, including kitchens, bathrooms, entryways, and living spaces. Its water resistance and easy maintenance make it particularly well-suited for areas prone to moisture. However, it’s important to consider the slip resistance of the tiles, especially in wet areas, and choose a finish that provides adequate traction.

Related Posts: