Improve your bathroom’s functionality and style by learning how to build a raised bathroom floor. Whether you need to conceal plumbing, improve drainage, or create a new aesthetic, a raised floor offers practical solutions and design flexibility. With careful planning, quality materials, and precise construction techniques, you can transform your bathroom into a more efficient and visually appealing space. Discover the steps to achieve a professional, durable raised bathroom floor.
How To Build A Raised Bathroom Floor

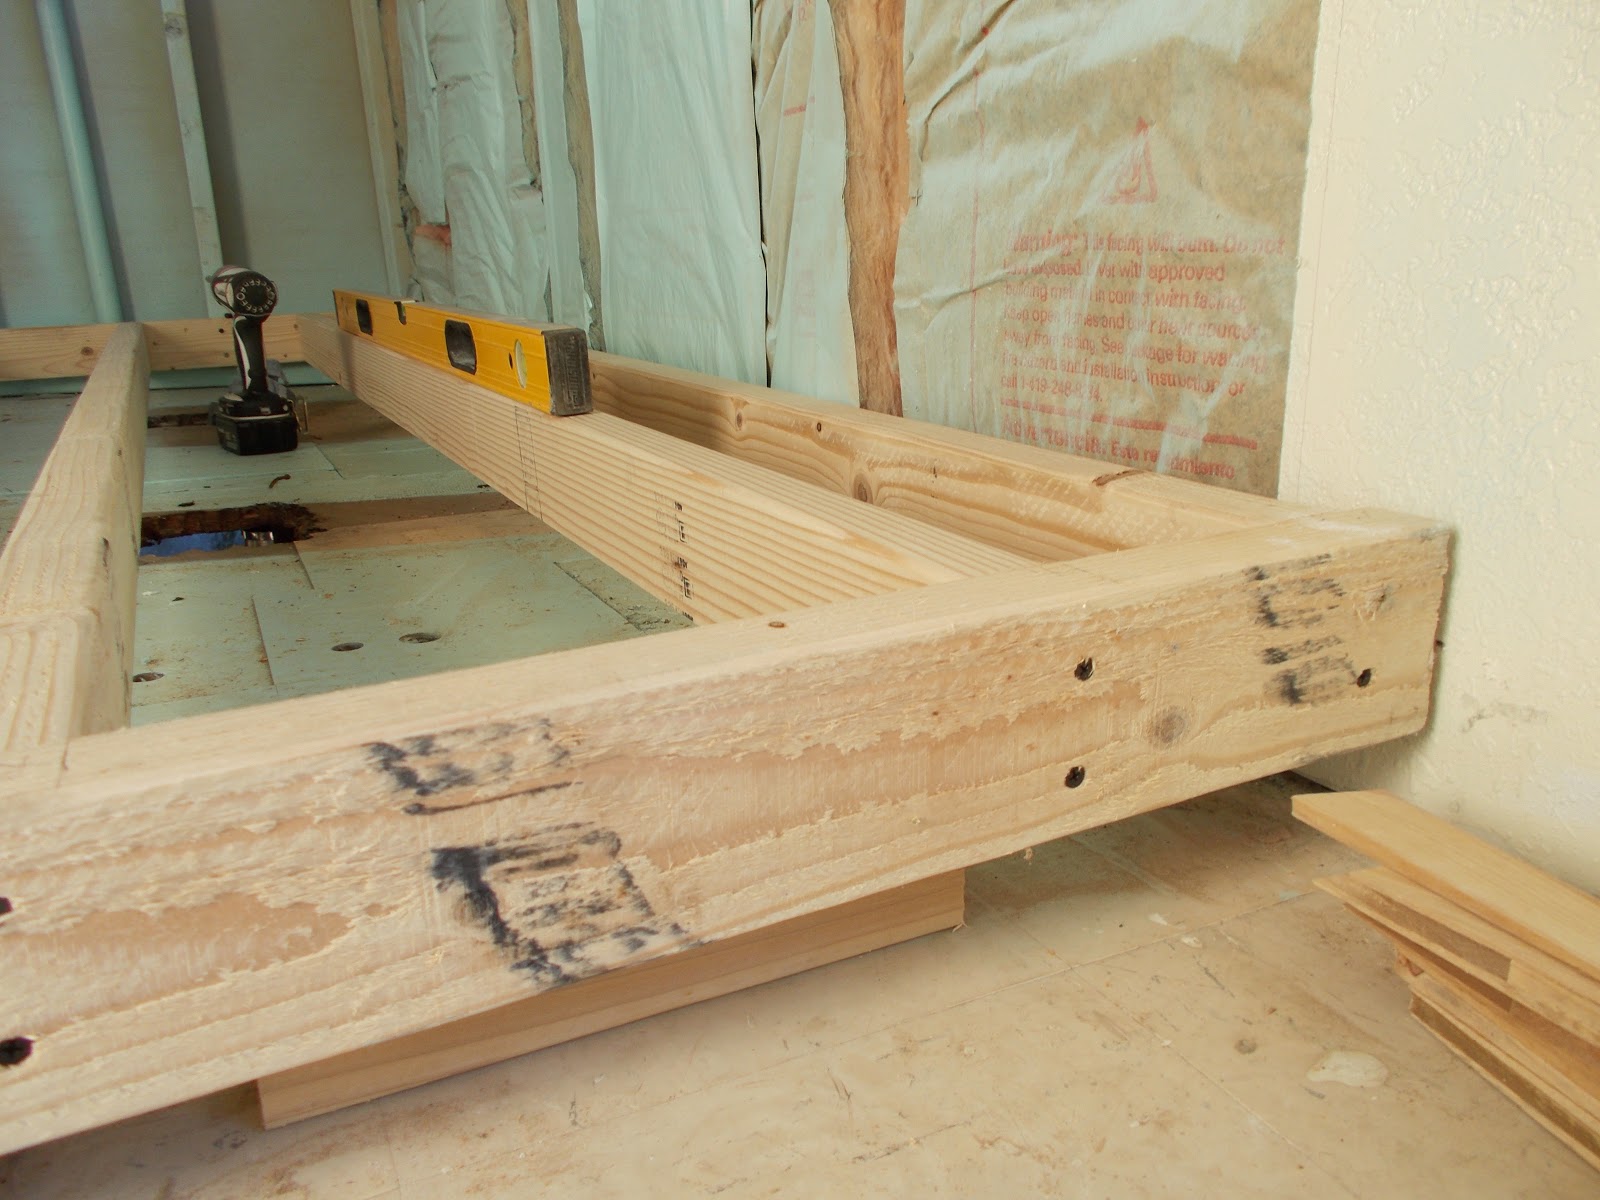
Leveling the Bathroom Floor
OLD DIRTY WOOD: HOUSE RENOVATION

Raised Bathroom Floor Basement – Flooring Site
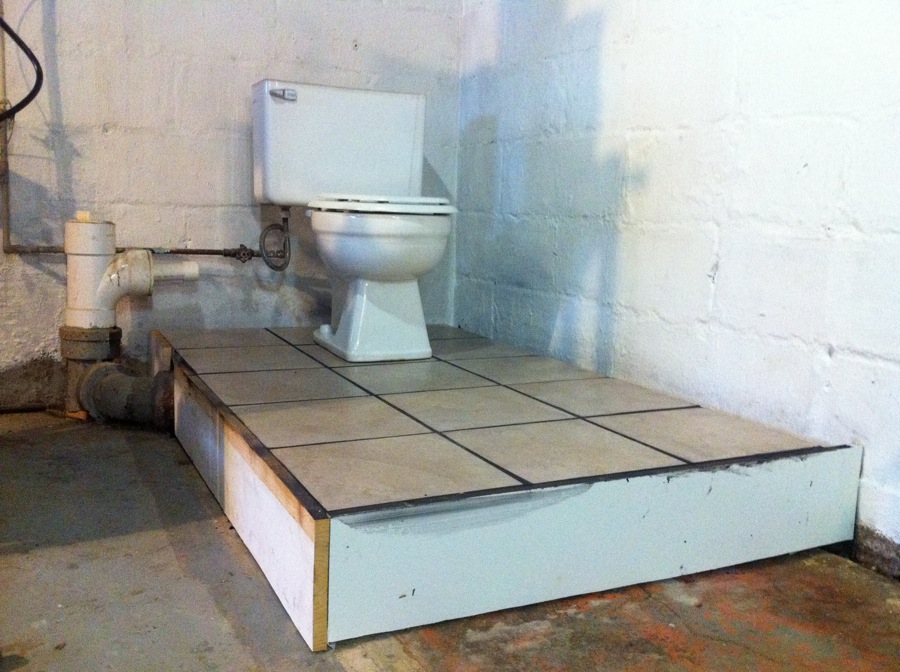
Bathroom Remodel: Raised Drainage Platform Bathrooms remodel, Basement bathroom design

Raised Bathroom Floor Ideas – Wet Room Advantages Disadvantages You Should Know – To make the
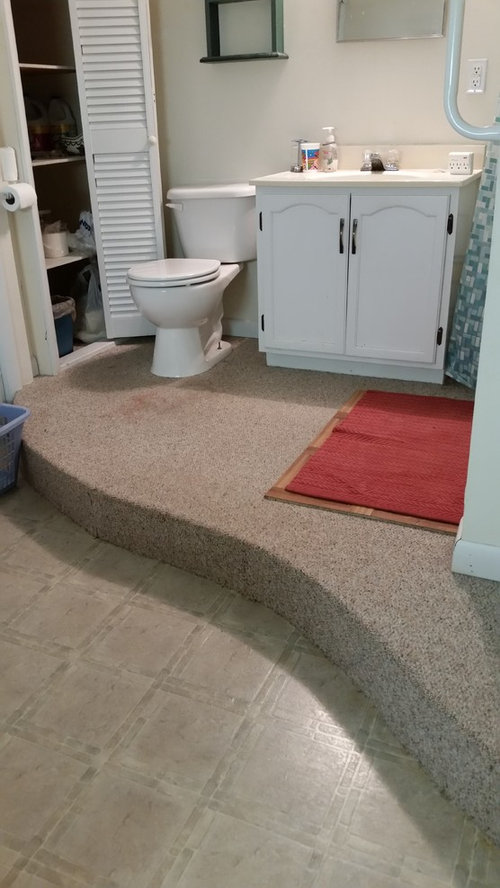
Raised floor over plumbing. Laundry room, bathroom. Plumbing, Bathroom plumbing, Laundry room

Raised Bathroom Floor Basement – Flooring Site

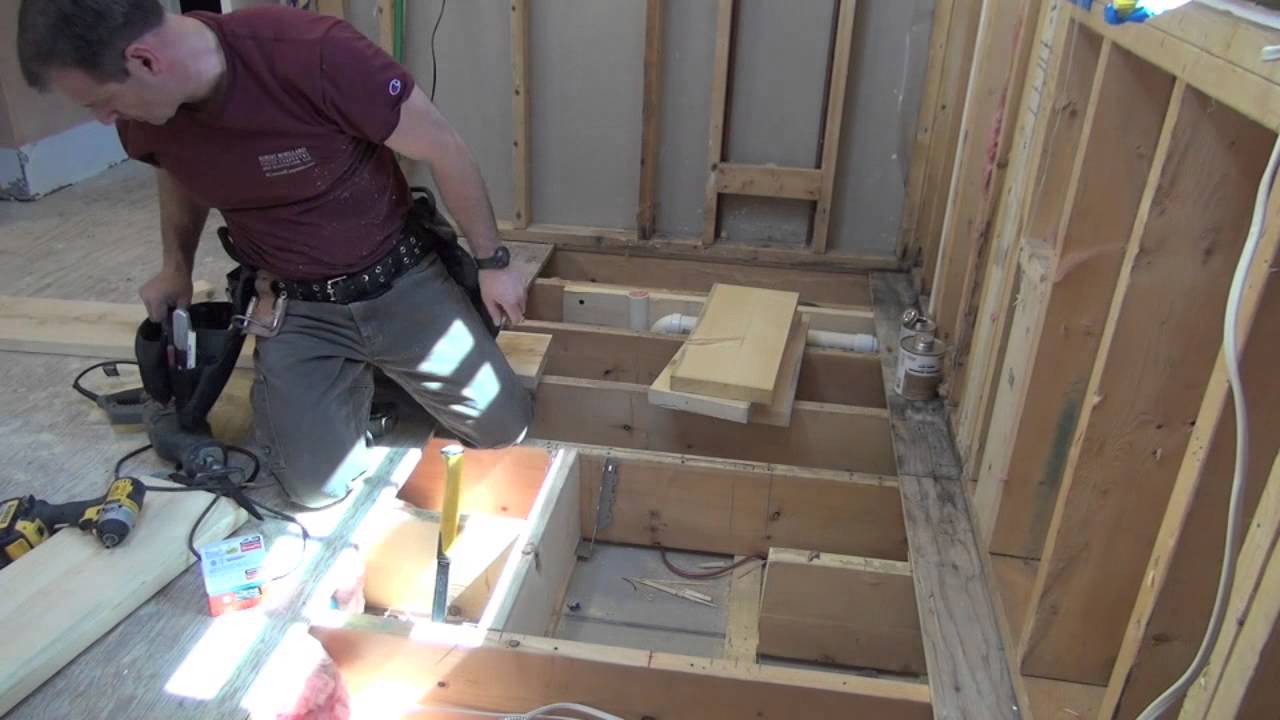
Bathroom Remodelling Part 7 – YouTube [Framing openings in floor joists]
raised floor.for. athroom in garage – Google Search Basement bathroom design, Small basement

Pin by Laurel Miranda on Bailey’s House Shower remodel, Shower remodel diy, Small shower remodel

Pin on A Glimpse Of Marcus Marty Home Improvements

Related Posts:
- French Country Bathroom Flooring
- Mid Century Modern Bathroom Flooring
- Rustic Bathroom Floor Tiles
- Purple Bathroom Flooring
- How To Clean Bathroom Floor Stains
- Tile Design Bathroom Floor
- Terracotta Bathroom Floor
- Cool Bathroom Floor Ideas
- Light Bathroom Floor Tiles
- Classic Bathroom Floor Tile Ideas
Create a Raised Bathroom Floor for a Luxury Look and Feel
How To Build A Raised Bathroom Floor
When considering making a major renovation to your home, there are a lot of things to consider. One of the exciting possibilities is to create a raised bathroom floor. It can be an eye-catching feature in your bathroom that adds sophistication, luxury, and comfort to the room. In this article, we will be discussing how to install a raised bathroom floor and the benefits that are associated with it.
Benefits of Installing a Raised Bathroom Floor
A raised bathroom floor is becoming increasingly popular for homeowners who are looking to give their bathrooms an upgrade. Installing this type of flooring is an excellent way to create a luxurious look and feel in any bathroom. There are several benefits that come with installing a raised bathroom floor, including:
1. Increased Comfort: A raised bathroom floor adds extra cushioning and support which can add even more comfort for those who use the space. This is especially beneficial if elderly family members or individuals with impaired mobility will be using the space frequently. It will help them to move around without as much difficulty or strain on their bodies.
2. Adds Place for Utilities: A raised floor provides plenty of storage space for any plumbing pipes, vents, or other services that may need to run under the bathtub or sink area. This added storage space also allows you to hide away any unsightly pipes or vents and provides an attractive finished look when the project is completed.
3. Increase Durability: With a raised bathroom floor, your tiles will be better protected from water damage. This can also help you extend the life of your floor since it helps direct water away from areas where it could cause damage over time.
4. Install Easier: When you have a raised bathroom floor, tiles can be installed much easier than if you were to choose flat tile floors. This is because the raised surface provides an easier surface onto which to adhere the tiles.
Preparing The Room For Installation
Before beginning installation of your new raised bathroom floor, there are certain steps that need to be taken to ensure the area is properly prepared. Here’s what you should do before starting:
1. Clear Out The Room: Begin by clearing out the room of all furniture and personal items so that installation can begin. This will make it much easier for you to work in the area when it comes time to install your flooring materials such as tiles or laminate boards.
2. Assess Subfloor Damage: Take some time to assess the current subflooring and make sure it is in good condition before laying down any new flooring materials. If you notice any weak spots in the subfloor or damage from water leakage, these need to be attended to first before you move forward with installation.
3. Mark Level Lines: Once you have assessed the existing subflooring, you will need to mark level lines on the wall for where your new flooring will go up against it or around any partially enclosed spaces in the bathroom like showers or tubs. This step is critically important for providing an even surface on which your tiles can be properly installed.
Installing The Raised Bathroom Floor
Now that you have prepared the room for installation, it’s time to start laying down your new raised bathroom floor! Here are the steps that should be followed during installation:
1. Place Plywood Sheets: Begin by placing sheets of plywood over the existing subflooring in order to provide support for your new tile material that will go on top of them. Cut them into strips or pieces as needed so they fit perfectly into your desired shape or form.
2. Secure Plywood Pieces Together: Use construction adhesive and screws to secure each plywood piece together along the edges so they form one solid platform across your entire area of choice in bathtub or shower areas as well as around sinks, toilets, and other fixtures if necessary.
3. Install Tile Materials: Place whatever type of tile materials you have chosen over top of the plywood pieces and secure them in place with construction adhesive as per instructions on each individual packaging or brand specification guidebook for tile material installation requirements. Use spacers between each tile as needed for perfect Alignment and even gaps.
4. Grout Tile Pieces: Once all of your tiles are in place, you can grout the edges of each tile as desired for a finished look. Take your time when grouting to ensure that the entire area looks smooth and beautiful upon completion.
A raised bathroom floor is an excellent way to add extra storage space and an attractive aesthetic to your bathroom. With these steps, you can easily prepare your space and install a raised bathroom floor of your own.
What type of material is best for a raised bathroom floor?
The ideal material for a raised bathroom floor is ceramic tile, as it is waterproof, easy to clean, and won’t absorb moisture. Other materials that can be used include linoleum, vinyl, and laminate.
What are the benefits of having a raised bathroom floor?
1. Increased accessibility: Raised bathroom floors provide better access to those with limited mobility or those in wheelchairs.
2. Improved insulation: A raised floor helps to insulate a bathroom from cold floors by providing an air and sound barrier between the ground and the upper floor.
3. Easier cleaning: A raised floor makes it easier to clean under the floor without having to move furniture or other obstacles.
4. Increased storage space: Depending on the height of the raised floor, you may be able to add extra storage underneath it. This can be great for linen closets or for storing towels, extra toilet paper, and other bathroom supplies.
5. Better drainage: Raised floors help water and other materials drain away instead of pooling in an area, preventing mold buildup and water damage in your bathroom.
Q: What are the drawbacks of having a raised bathroom floor?
The main drawback of having a raised bathroom floor is that it can be difficult and expensive to install, since it requires special surface preparation and waterproofing techniques. Additionally, if the bathroom floor is too high, it can be difficult to step up onto it and can create an awkward feeling when using the bathroom. Finally, raised floors may make it more difficult to access pipes and other plumbing fixtures beneath the floor.
Q: What are the benefits of having a raised bathroom floor?
A: The benefits of having a raised bathroom floor include increased accessibility, improved drainage, and better hygiene. Accessibility is improved because it makes it easier for people with mobility issues to access the bathroom. Raised floors also help to reduce the chance of water damage from flooding, by allowing water and waste to drain away quickly. Additionally, a raised floor helps to keep the space hygienic by discouraging the growth of mold and bacteria.