Trippy Bathroom Floor
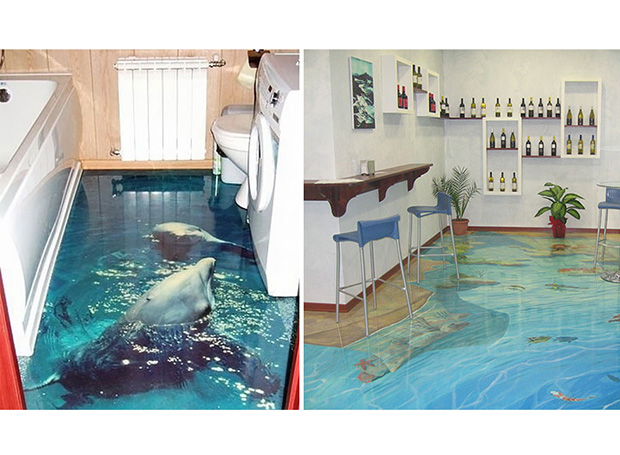
In pictures: Trippy 3D bathroom floors Evening Times
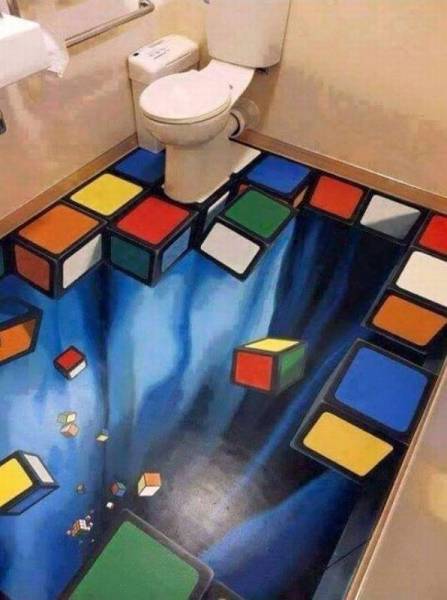
[pic] Trippy bathroom floor [x-post from r/pics] : woahdude

Trippy 3-D Photo Epoxied Floor Designs For Your Home – Geekologie

3D Bathrooms and amazing way to decorate Floor art, 3d floor art, 3d street art

Trippy 3-D Photo Epoxied Floor Designs For Your Home – Geekologie

Astonishing 3D Floor Ideas That Will Blow Your Mind 3d floor art, Floor wallpaper, Floor murals

3d bathroom floor epoxy designs – Gale Alger

Bathroom Floor Painting Illusion – Modern Bathroom Design

Épinglé par jim sur Improvements Déco toilettes, Sol 3d, Décoration toilettes

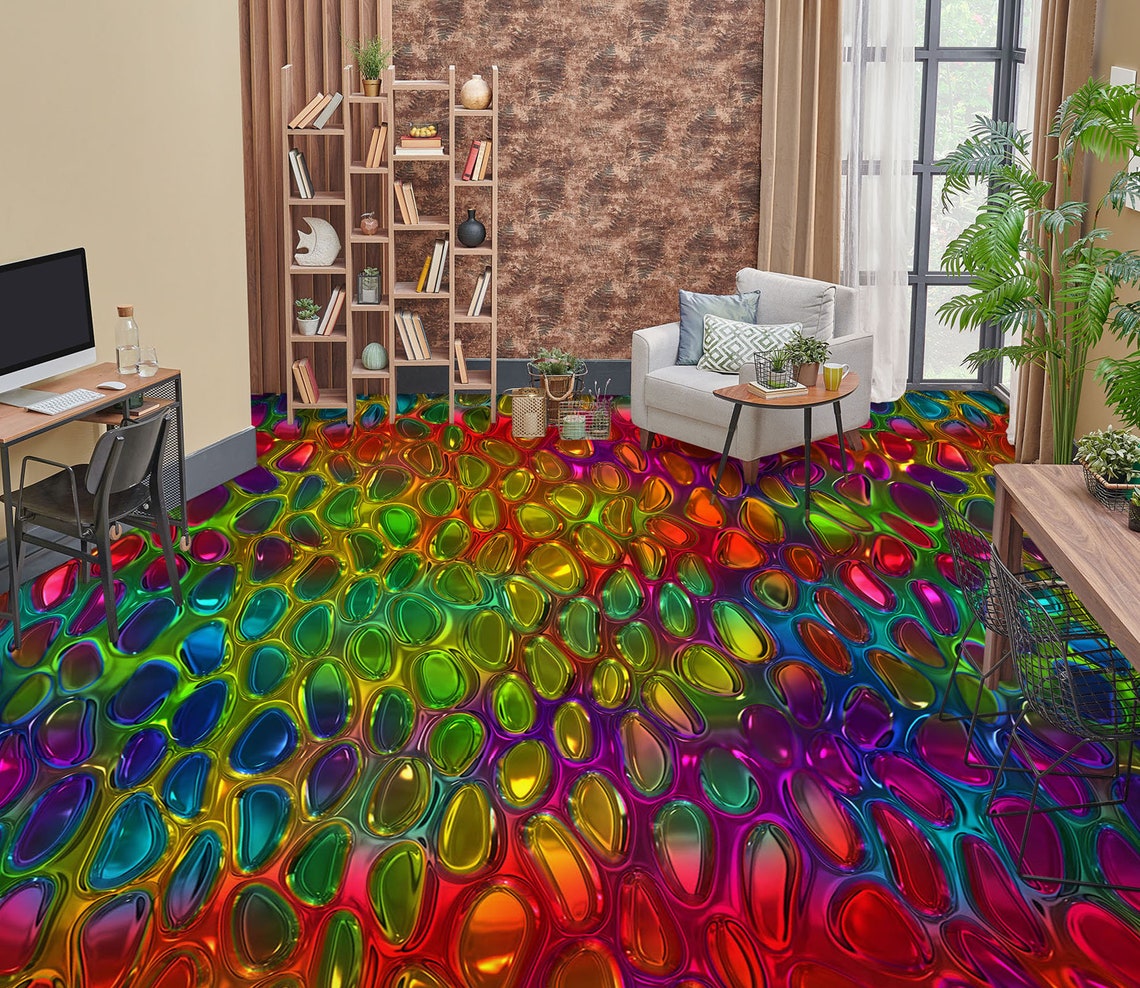
3D Psychedelic Pebbles 4362 Floor Wallpaper Murals Etsy
Related Posts:
- French Country Bathroom Flooring
- Mid Century Modern Bathroom Flooring
- Rustic Bathroom Floor Tiles
- Purple Bathroom Flooring
- How To Clean Bathroom Floor Stains
- Tile Design Bathroom Floor
- Terracotta Bathroom Floor
- Cool Bathroom Floor Ideas
- Light Bathroom Floor Tiles
- Classic Bathroom Floor Tile Ideas
When it comes to sprucing up the look of your bathroom, there are plenty of options available. Whether you’re looking for a more modern look or something a bit more eclectic, there’s no shortage of creative ways to give your bathroom a unique touch. One of the most eye-catching ideas is to create a trippy bathroom floor. With just a few materials and some imagination, you can create a truly unique bathroom floor that will be sure to turn heads.
What is a Trippy Bathroom Floor?
A trippy bathroom floor refers to a type of flooring that features bold, colorful patterns and textures. The goal is to make the floor look like an abstract painting, with all sorts of shapes and colors coming together in an eye-catching way. The overall effect is often quite mesmerizing, and it can add a lot of character to your bathroom.
Materials Needed for a Trippy Bathroom Floor
Creating a trippy bathroom floor doesn’t require expensive materials or tools. All you need are some basic supplies, such as paint, tape, and sealant. You’ll also need some creativity and patience in order to create the desired effect.
Step 1: Prepare the Floor
The first step is to prepare the floor for painting. This means cleaning it thoroughly and making sure that it is free from dust and debris. Once it’s clean, you can begin taping off any areas that you don’t want painted. This will help ensure that the design you create stays neat and even.
Step 2: Choose Your Color Palette
Once the floor is prepped, it’s time to decide on your color palette. For a trippy bathroom floor, bold colors are best. Bright blues, greens, purples, and yellows will all work well together. You can also incorporate some black and white accents if you’d like.
Step 3: Paint Your Design
Now that you have your colors picked out, it’s time to start painting. Begin by sketching out your design on paper first. This will help you visualize the final result before you start applying paint to the floor. Then, use painter’s tape to outline the areas where each color will go. Once the tape is in place, start painting! If you’re feeling adventurous, add some three-dimensional elements with sponges or stencils for extra texture and depth.
Step 4: Seal the Floor
Once your design is complete, it’s important to seal the floor so that it stays looking its best for years to come. To do this, use a sealant designed specifically for floors. This will help protect the paint from scratches or fading over time.
Conclusion
With just a few materials and some imagination, you can easily create a truly unique and eye-catching trippy bathroom floor in no time! Whether you’re looking for something modern or more eclectic, this type of design will be sure to turn heads and add character to your bathroom space.