Grout can be the bane of our kitchen floor’s existence. It seems like no matter how often we mop and scrub, those little lines between our tiles just keep getting darker and dingier. Over time, dirt, grease, and food particles accumulate in the porous surface of grout, making it a magnet for grime. But don’t worry – with a little elbow grease and the right techniques, you can get your grout looking fresh and clean again. Let’s discuss the process of cleaning dirty kitchen floor grout and restoring your kitchen’s sparkle.
Understanding Grout and Why It Gets Dirty
Grout is a porous material made up of water, cement, and sand, used to fill the gaps between tiles. Its porous nature makes it highly susceptible to staining and dirt accumulation. When you think about it, the kitchen is a prime spot for grime – it’s where we cook, eat, and sometimes even socialize. With all the spills, splatters, and foot traffic, it’s no wonder the grout can become so filthy.
The porousness of grout means it absorbs liquid easily, which can be anything from water to oil. When these liquids dry up, they leave behind residues that attract more dirt. Over time, these residues build up, leading to discoloration. Furthermore, kitchens often deal with grease, which can create a sticky layer that holds onto dirt even more stubbornly.
Understanding why grout gets dirty is the first step in knowing how to clean it effectively. By addressing the root causes, we can better prevent and tackle the buildup. For instance, if you notice grease is a major issue, focusing on degreasing solutions might be your best bet. It’s also essential to recognize that regular maintenance can significantly reduce the workload when it comes time to do a deep clean.
In high-traffic areas like kitchens, grout can also be worn down by the constant movement of feet, leading to tiny cracks and crevices where dirt can settle. This makes it even harder to clean, as dirt gets lodged in places that are tough to reach. Additionally, the type of grout used can impact how quickly it gets dirty; unsealed grout is more prone to staining compared to sealed grout.
Last, the color of your grout can influence how dirty it appears. Light-colored grout shows stains and dirt more readily than darker grout. While darker grout might hide dirt better, it doesn’t mean it’s cleaner – it just means the dirt is less visible. Understanding these nuances can help you choose the right cleaning method and maintain the cleanliness of your kitchen floor grout.

Prepping Your Kitchen for Grout Cleaning
Before diving into the actual cleaning, it’s crucial to prep your kitchen. This step ensures you have everything you need and that your cleaning efforts will be as effective as possible. Start by clearing the floor of any items like rugs, chairs, and stools. Having a clear space allows you to move freely and focus solely on cleaning.
Next, sweep or vacuum the floor to remove loose dirt and debris. This initial step prevents you from spreading the dirt around when you start scrubbing. If you skip this step, you might end up with a muddy mess, making your job even harder. Ensure you get into the corners and along the edges where dirt tends to accumulate.
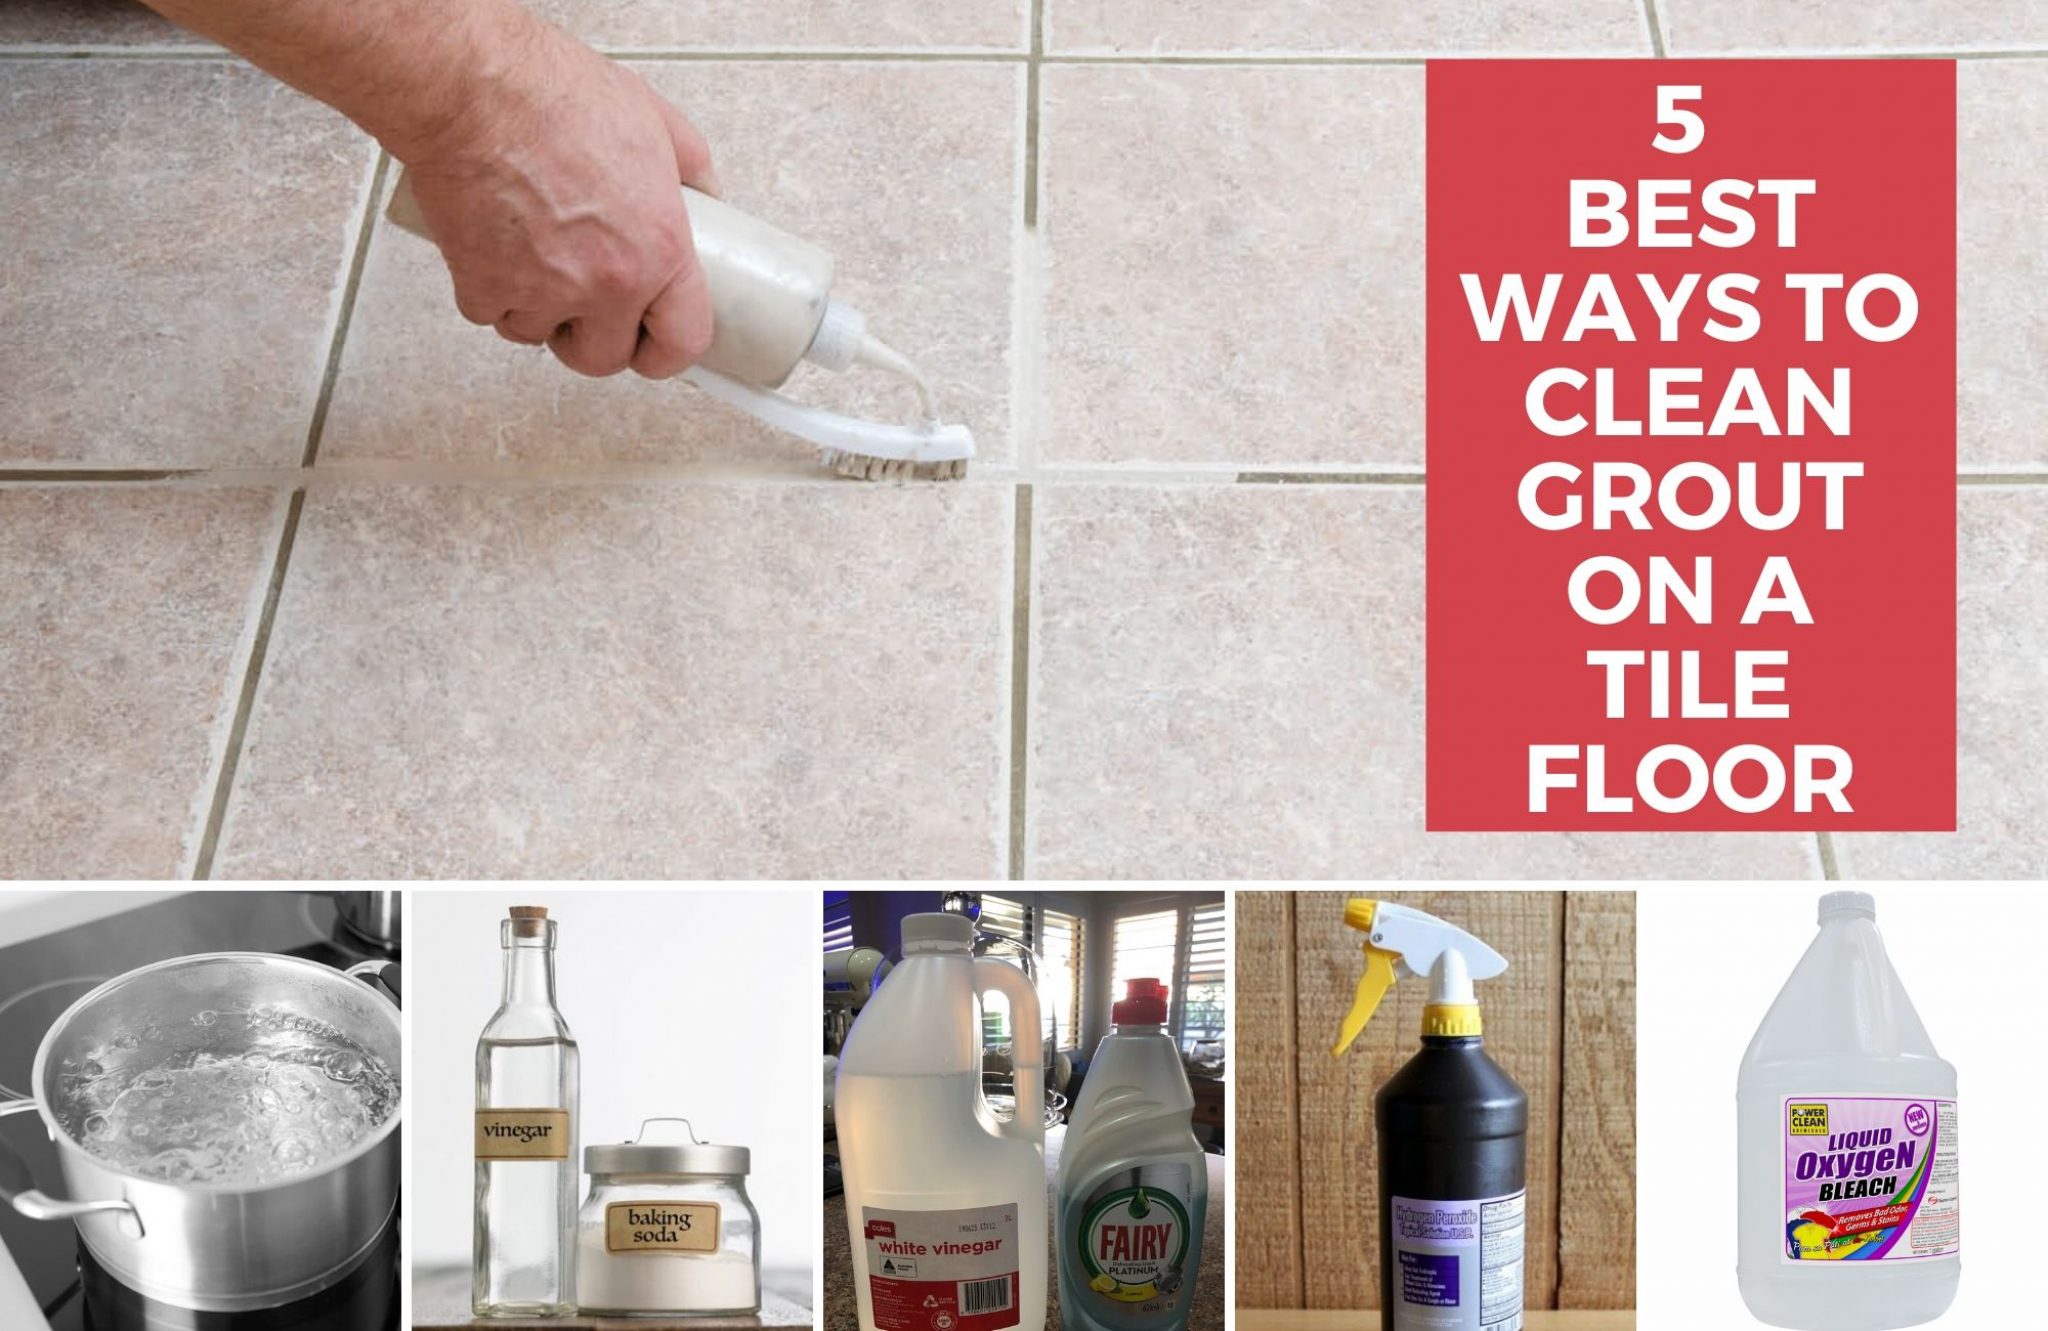
After sweeping, it’s time to gather your cleaning supplies. Depending on the severity of the dirt, you might need different types of cleaners. Common household items like baking soda, vinegar, hydrogen peroxide, and dish soap can work wonders. For tougher stains, you might need a commercial grout cleaner or a steam cleaner. Make sure you also have a stiff-bristled brush or an old toothbrush, as these tools are essential for scrubbing grout lines effectively.
It’s also wise to wear gloves to protect your hands from harsh chemicals, especially if you’re using commercial cleaners. Additionally, if you’re working with products that produce fumes, ensure your kitchen is well-ventilated by opening windows or turning on fans. Safety should always come first, so read the labels of any products you use to understand their potential hazards.
Once your supplies are ready, it’s a good idea to do a patch test with your chosen cleaner on a small, inconspicuous area of the grout. This step helps ensure that the cleaner doesn’t damage or discolor the grout. After confirming that it’s safe, you can proceed with cleaning the entire floor.
Finally, set aside enough time to do the job thoroughly. Cleaning grout isn’t typically a quick task, especially if it’s heavily stained. Allocate a few hours to ensure you can work methodically without rushing. Proper preparation can make the cleaning process smoother and more efficient, ultimately leading to better results.

Using Natural Cleaners for Grout Cleaning
Natural cleaners are a fantastic option for those who prefer eco-friendly solutions or want to avoid harsh chemicals. One of the most popular natural cleaners for grout is a mixture of baking soda and vinegar. Baking soda acts as a mild abrasive that can scrub away dirt, while vinegar’s acidity helps to dissolve grime and disinfect the area.
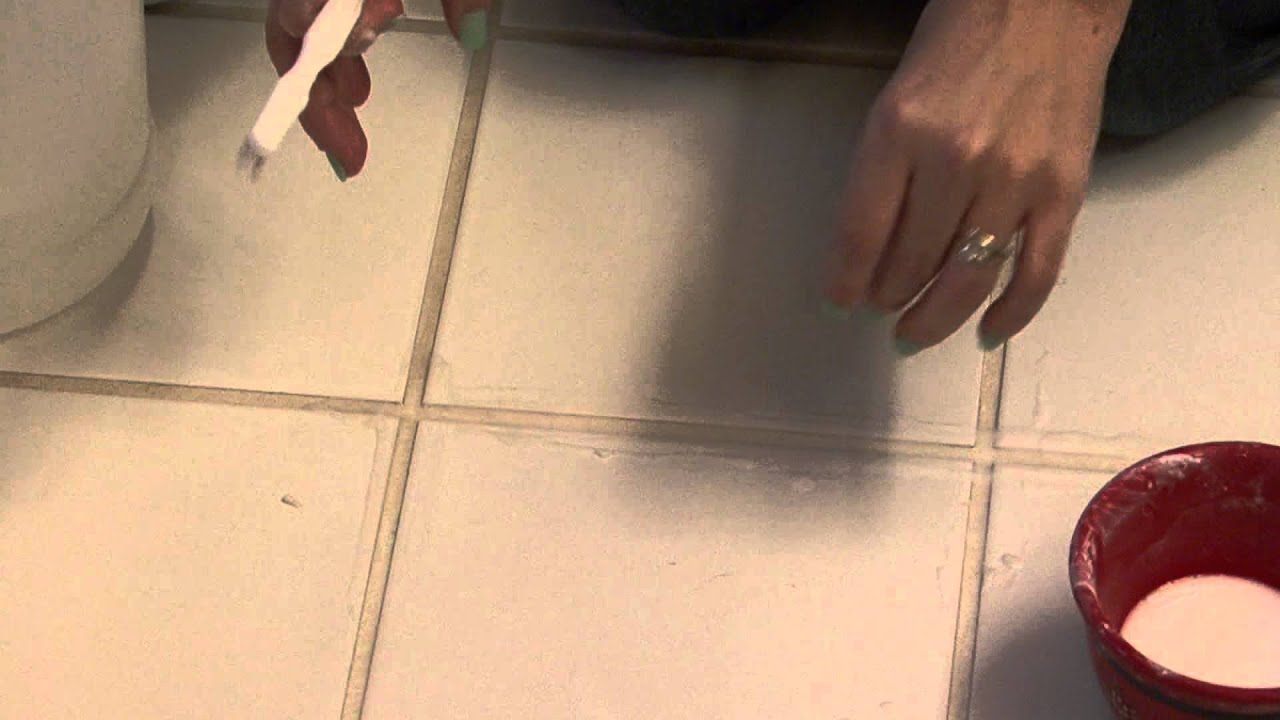
To start, make a paste by mixing baking soda with a small amount of water. Apply this paste generously to the grout lines using your fingers or an old toothbrush. Allow it to sit for about 10 minutes, which gives the baking soda time to work its magic on the grime. Next, pour vinegar into a spray bottle and spritz it over the baking soda paste. You’ll notice a fizzing reaction, which indicates the two ingredients are interacting and breaking down the dirt.
After the fizzing subsides, take your brush and scrub the grout lines. The baking soda paste will have loosened the dirt, making it easier to scrub away. Work in small sections to ensure you give each part enough attention. Once you’ve scrubbed the entire area, wipe away the residue with a damp cloth or mop the floor to remove any remaining baking soda and vinegar.

Another effective natural cleaner is hydrogen peroxide. This powerful oxidizer can break down stains and disinfect at the same time. Mix hydrogen peroxide with baking soda to form a paste and apply it to the grout lines. Let it sit for about 10 minutes before scrubbing with a brush. The hydrogen peroxide will help to lift stains and brighten the grout.
For those who prefer a less abrasive option, a mixture of lemon juice and baking soda can also be effective. Lemon juice has natural bleaching properties and a pleasant scent. Mix equal parts of lemon juice and baking soda to create a paste, apply it to the grout, let it sit, and then scrub away the grime.
These natural methods are not only effective but also safe for both you and the environment. They’re particularly useful if you have pets or small children who spend a lot of time on the floor. Plus, they often cost less than commercial cleaners, making them a budget-friendly option for maintaining clean grout.

Commercial Grout Cleaners: When and How to Use Them
Sometimes, natural cleaners might not cut it, especially if your grout is severely stained. This is where commercial grout cleaners come into play. These products are specially formulated to tackle tough stains and can be highly effective when used correctly. Knowing when and how to use them can save you a lot of time and effort.
Commercial grout cleaners come in various forms, including sprays, gels, and powders. Each type has its own set of instructions, so it’s crucial to read the label carefully. Generally, these products contain stronger chemicals than natural cleaners, so wearing gloves and ensuring proper ventilation is a must.
To start, choose a small, inconspicuous area of your grout to test the cleaner. This test ensures the product won’t damage or discolor your grout. Apply the cleaner according to the instructions and let it sit for the recommended amount of time. This period allows the chemicals to penetrate the grout and break down the stains.

After the waiting period, use a stiff-bristled brush to scrub the grout lines. The cleaner will have loosened the dirt, making it easier to scrub away. Work in small sections to ensure thorough cleaning. Once you’ve scrubbed the area, wipe away the residue with a damp cloth or mop the floor. Rinse the area with clean water to remove any remaining cleaner.
For particularly stubborn stains, you might need to repeat the process. However, be cautious about using commercial cleaners too frequently, as strong chemicals can degrade the grout over time. It’s a good practice to switch back to milder cleaners or natural alternatives for regular maintenance.
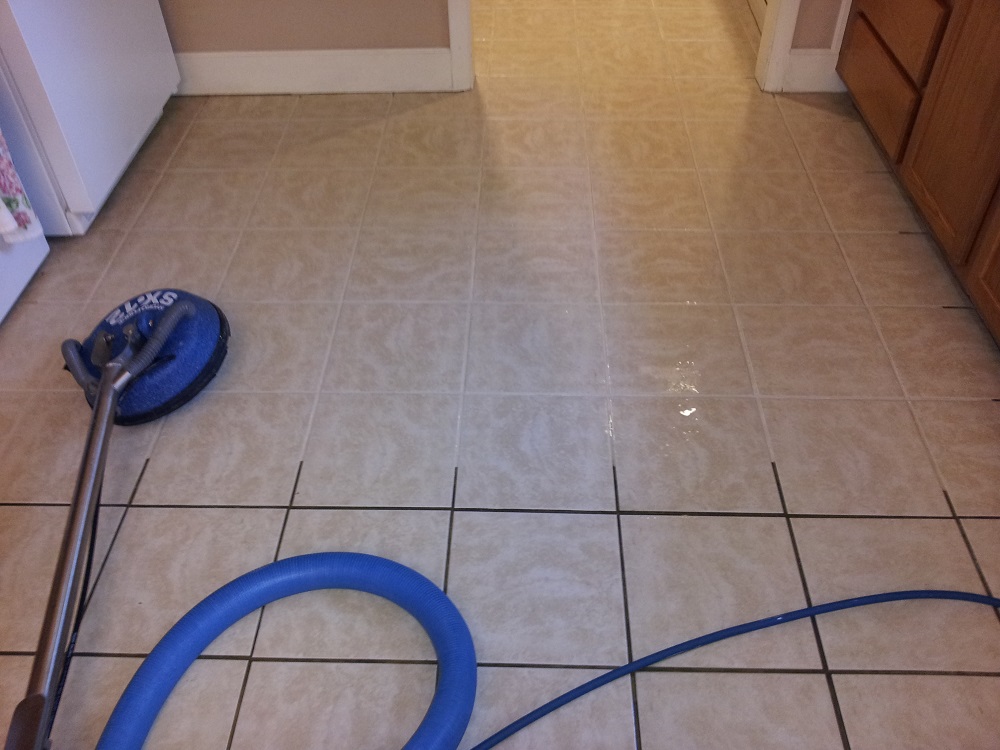
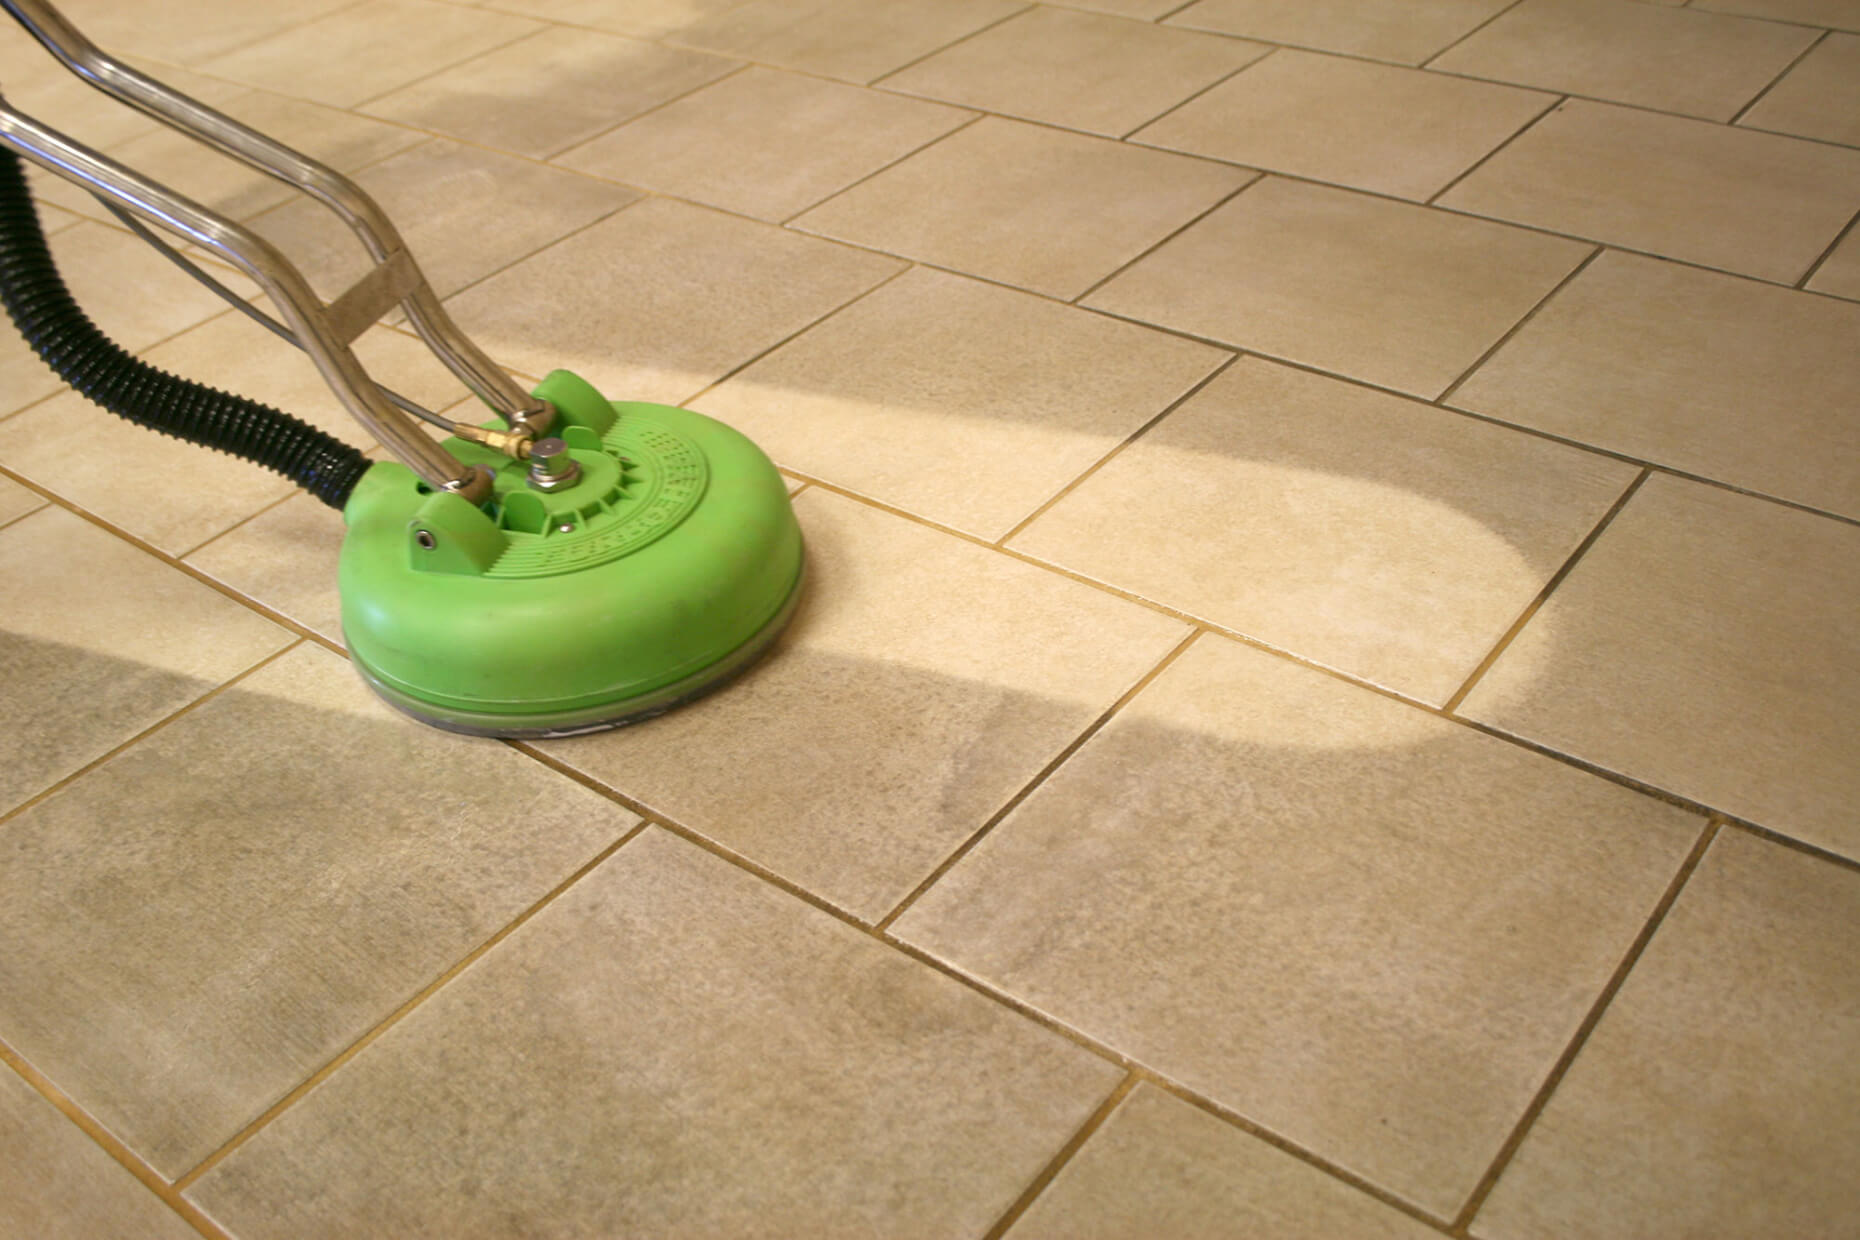
In cases where the grout is extremely dirty or stained beyond what commercial cleaners can handle, consider using a steam cleaner. These devices use high-temperature steam to break down dirt and grime without the need for chemicals. Steam cleaners are highly effective and can sanitize your floors, making them a great investment for long-term grout maintenance.
Commercial grout cleaners are powerful tools in your cleaning arsenal, but they should be used with care. By following the instructions and taking the necessary precautions, you can achieve a deep clean without damaging your grout. They’re particularly useful for deep cleaning sessions when your grout needs a little extra help to get back to its original state.
Maintaining Clean Grout: Tips and Tricks
Keeping your kitchen floor grout clean can seem like an uphill battle, but with a few tips and tricks, you can maintain its cleanliness and reduce the frequency of deep cleaning sessions. Regular maintenance is key to preventing dirt buildup and prolonging the life of your grout.
First and foremost, implement a regular sweeping and mopping routine. Sweeping your kitchen floor daily or every other day helps to remove loose dirt and debris before it has a chance to settle into the grout lines. Follow up with mopping at least once a week using a mild cleaner or a mixture of water and vinegar. This routine helps to prevent grime from accumulating and keeps your grout looking fresh.
Another effective maintenance tip is to wipe up spills immediately. In the kitchen, spills are inevitable, but allowing them to sit can lead to stains and dirt buildup. Keep a microfiber cloth or paper towels handy to quickly clean up spills as they happen. For greasy spills, use a bit of dish soap and water to break down the grease before wiping it up.
Sealing your grout is another crucial step in maintaining its cleanliness. Grout sealer creates a protective barrier that prevents dirt, grease, and moisture from penetrating the porous surface. Depending on the type of sealer you use, you might need to reapply it every six months to a year. Sealing is especially important for kitchen floors due to the high potential for spills and stains.
For routine cleaning, consider using a pH-neutral cleaner specifically designed for tile and grout. These cleaners are gentle enough for regular use but effective at removing dirt and grime. Avoid using harsh chemicals or abrasive tools, as these can damage the grout over time.
Using mats and rugs in high-traffic areas can also help protect your grout. Place a mat in front of the sink and stove where spills and splatters are most likely to occur. Not only do mats protect the grout from stains, but they also reduce wear and tear caused by constant foot traffic.
Lastly, don’t forget about regular inspections. Periodically check your grout for any signs of damage or cracks. Addressing these issues early can prevent dirt from getting lodged in hard-to-clean places. If you notice any cracks, repair them promptly using grout repair products available at most hardware stores.
By incorporating these tips and tricks into your cleaning routine, you can maintain clean grout and enjoy a sparkling kitchen floor all year round. Consistent maintenance not only keeps your kitchen looking great but also saves you time and effort in the long run.
Common Mistakes to Avoid When Cleaning Grout
Cleaning grout might seem straightforward, but there are common mistakes that can make the process less effective or even damage your grout. Being aware of these pitfalls can help you avoid them and ensure your grout-cleaning efforts are successful.
One common mistake is using too much water during the cleaning process. While it might seem like more water equals more cleaning power, excessive water can seep into the grout and weaken it over time. This can lead to cracks and further dirt accumulation. Always use a damp cloth or mop rather than soaking the floor.
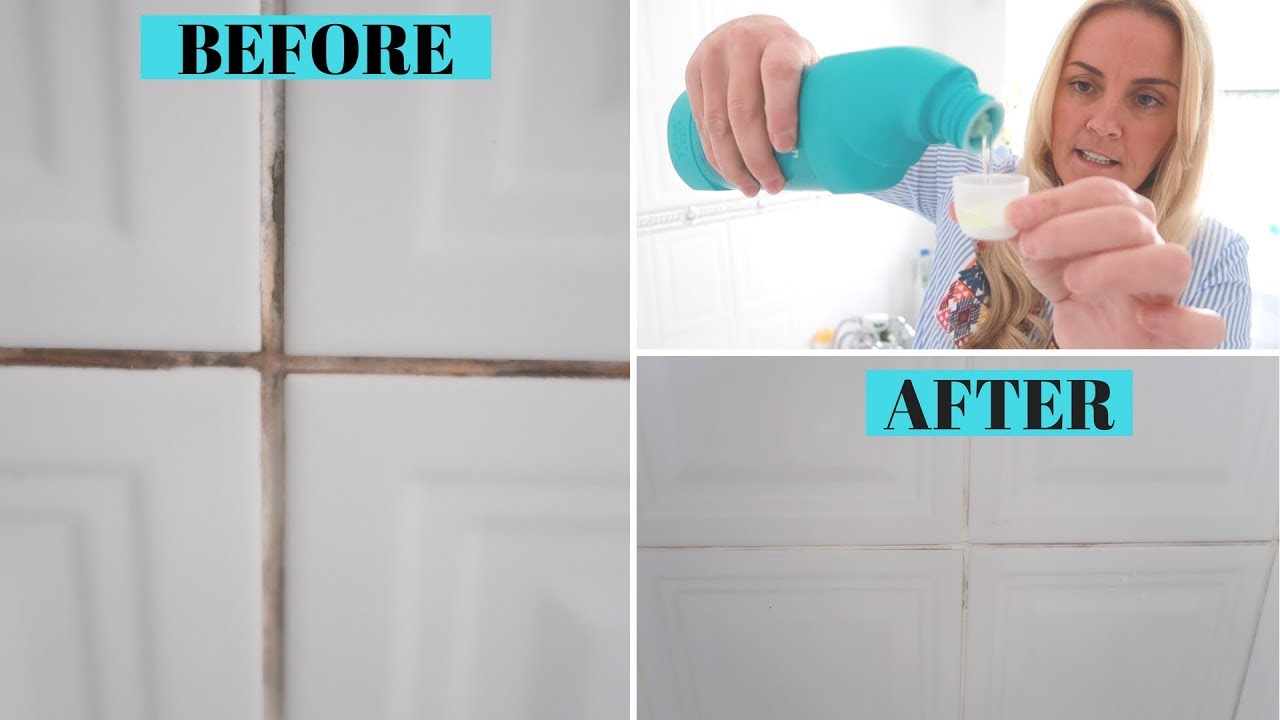
Another mistake is using harsh chemicals or bleach. While these might seem like quick fixes for tough stains, they can erode the grout and cause discoloration. Bleach, in particular, can be too harsh for grout and should be used sparingly and diluted if at all. Opt for gentler, pH-neutral cleaners or natural solutions like vinegar and baking soda.
Using abrasive tools like wire brushes or steel wool is also a big no-no. These tools can scratch the tiles and damage the grout, making it more susceptible to dirt and staining in the future. Stick to using stiff-bristled brushes or old toothbrushes for scrubbing grout lines.
Another mistake is not allowing enough time for cleaning solutions to work. Many people apply a cleaner and immediately start scrubbing, but this doesn’t give the solution enough time to break down the dirt. Let the cleaner sit for the recommended amount of time before scrubbing to ensure it can effectively lift the grime.
Skipping the step of sealing grout is another common error. Sealing is crucial for protecting grout from stains and moisture. If you skip this step, you’re more likely to encounter stubborn stains that are difficult to remove. Make sure to apply a grout sealer regularly, according to the manufacturer’s instructions.
Lastly, neglecting regular maintenance is a mistake that can lead to more work in the long run. It’s easy to let grout cleaning slide, but regular sweeping, mopping, and spot cleaning can prevent dirt from building up and make deep cleaning sessions less daunting. Consistency is key to maintaining clean grout and extending its lifespan.
By avoiding these common mistakes, you can ensure your grout cleaning efforts are effective and your kitchen floor remains in top condition. Proper care and attention to detail can make a significant difference in the cleanliness and longevity of your grout.
How often should I clean my kitchen floor grout?
Regular maintenance is essential for keeping grout clean. Ideally, you should sweep or vacuum your kitchen floor daily to remove loose dirt and debris. Mopping with a mild cleaner once a week helps prevent grime buildup. For deep cleaning, depending on your household’s activity level, aim to clean the grout thoroughly every few months. If you seal your grout, it will require less frequent deep cleaning, as the sealer provides a protective barrier against stains.
Can I use bleach to clean my kitchen floor grout?
While bleach can be effective at whitening grout, it’s not always the best choice due to its harsh nature. Bleach can erode the grout over time and cause discoloration. It’s also not environmentally friendly and can produce harmful fumes. If you decide to use bleach, make sure it’s diluted and that you use it sparingly. A safer option is to use milder cleaners like vinegar and baking soda or commercial grout cleaners specifically formulated to be safe for grout.
What’s the best way to prevent my kitchen floor grout from getting dirty?
Preventing grout from getting dirty involves a combination of regular maintenance and protective measures. Sweep and mop your kitchen floor regularly to keep dirt and debris at bay. Clean up spills immediately to prevent stains from setting. Applying a grout sealer is crucial, as it creates a barrier that repels stains and moisture. Using mats and rugs in high-traffic areas can also protect the grout from wear and tear and reduce the amount of dirt that gets tracked onto the floor.
Can I use a steam cleaner on my kitchen floor grout?
Yes, steam cleaners are a great tool for cleaning grout. They use high-temperature steam to break down dirt and grime without the need for harsh chemicals. Steam cleaning is particularly effective for sanitizing and deep cleaning grout. However, ensure that your tiles and grout are in good condition before using a steam cleaner, as the high heat and pressure can cause damage if there are any cracks or weak spots.
What should I do if my grout is severely stained?
For severely stained grout, start with a commercial grout cleaner or a mixture of hydrogen peroxide and baking soda. Apply the cleaner, let it sit for the recommended time, and then scrub with a stiff-bristled brush. For stubborn stains that don’t come out with these methods, consider using a steam cleaner. In extreme cases, you might need to regrout the affected areas. This involves removing the old grout and applying new grout, which can restore the appearance of your floor.
Is sealing grout necessary, and how often should it be done?
Sealing grout is highly recommended as it protects against stains and moisture. The frequency of sealing depends on the type of sealer used and the amount of traffic your kitchen floor receives. Generally, you should seal grout every six months to a year. To check if your grout needs sealing, sprinkle a few drops of water on it. If the water absorbs quickly, it’s time to reseal. Regular sealing can significantly extend the life of your grout and keep it looking clean.

Related Posts: