How To Install A Wood Floor On Concrete

Best Way To Install Engineered Hardwood Flooring On Concrete Slab – Hawes Richard

Installing Hardwood Flooring Over Concrete NIVAFLOORS.COM

Laying A Floating Wooden Floor On Concrete – Together with the renewed look that is given to

How To Install Wood Flooring On Concrete Floor – Flooring Site
Wood Flooring On Concrete Installation – Flooring Site

Pin on DIY Home Decore

16 Unique Installing Engineered Hardwood Floors On Concrete Slab Unique Flooring Ideas

How To Install Wood Tile Floor On Concrete – Best Home Design
Elastilon® Revolutionizes Hardwood Floor Installation
Diy Engineered Hardwood Floor Installation On Concrete NIVAFLOORS.COM

How To Install Wood Flooring On Concrete Floor – Flooring Site

Related Posts:
- Grey Parquet Wood Flooring
- How To Install Pergo Wood Flooring
- Dark Black Wood Flooring
- Solid Wood Flooring White
- Pallet Wood Flooring Ideas
- Wood Floor Chevron Pattern
- Wood Flooring Home Ideas
- Wood Floor Filler Resin
- Glossy Wood Flooring Ideas
- Pergo Wood Flooring Installation
Installing a wood floor on concrete can be a challenging but rewarding task. With proper tools, materials, and technique, you can achieve the look you desire with minimal effort and cost. Whether you are a homeowner or a professional installer, this guide will walk you through the basics of installing a new wood floor on concrete.
## Preparation for Installation
Before beginning your installation job, make sure you have the necessary materials and tools. The materials you will need include:
– Wood planks
– Underlayment
– Nails or screws
– Expansion space
– Sealer
– Adhesive
– Floor leveling compound
Tools required include:
– Hammer
– Drill
– Saw
– Screw gun
– Hand sander
– Heat gun (optional)
Now that you have gathered all of the necessary materials and tools, it’s time to begin your installation.
## Step One: Prepare Your Concrete Floor
For your wood flooring to be installed correctly, it’s essential that you begin by preparing the surface of your concrete floor for installation. This will involve cleaning off any dirt or debris from the surface, and then sanding it down with a hand sander. Once this is done, use a broom to sweep away any dust, and use a damp cloth to wipe away any remaining dirt or grime. Make sure the surface is absolutely clean before continuing.
## Step Two: Level Up Your Concrete Floor
Once the surface of your concrete floor is prepped, use a floor leveling compound to fill in any low spots or cracks in the cement. Let the leveling compound dry according to manufacturer instructions before moving onto the next step.
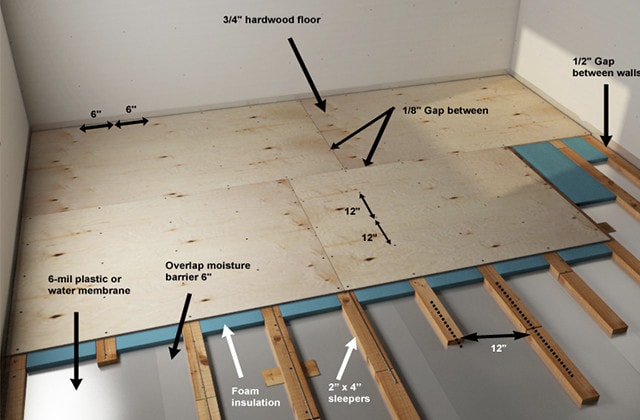
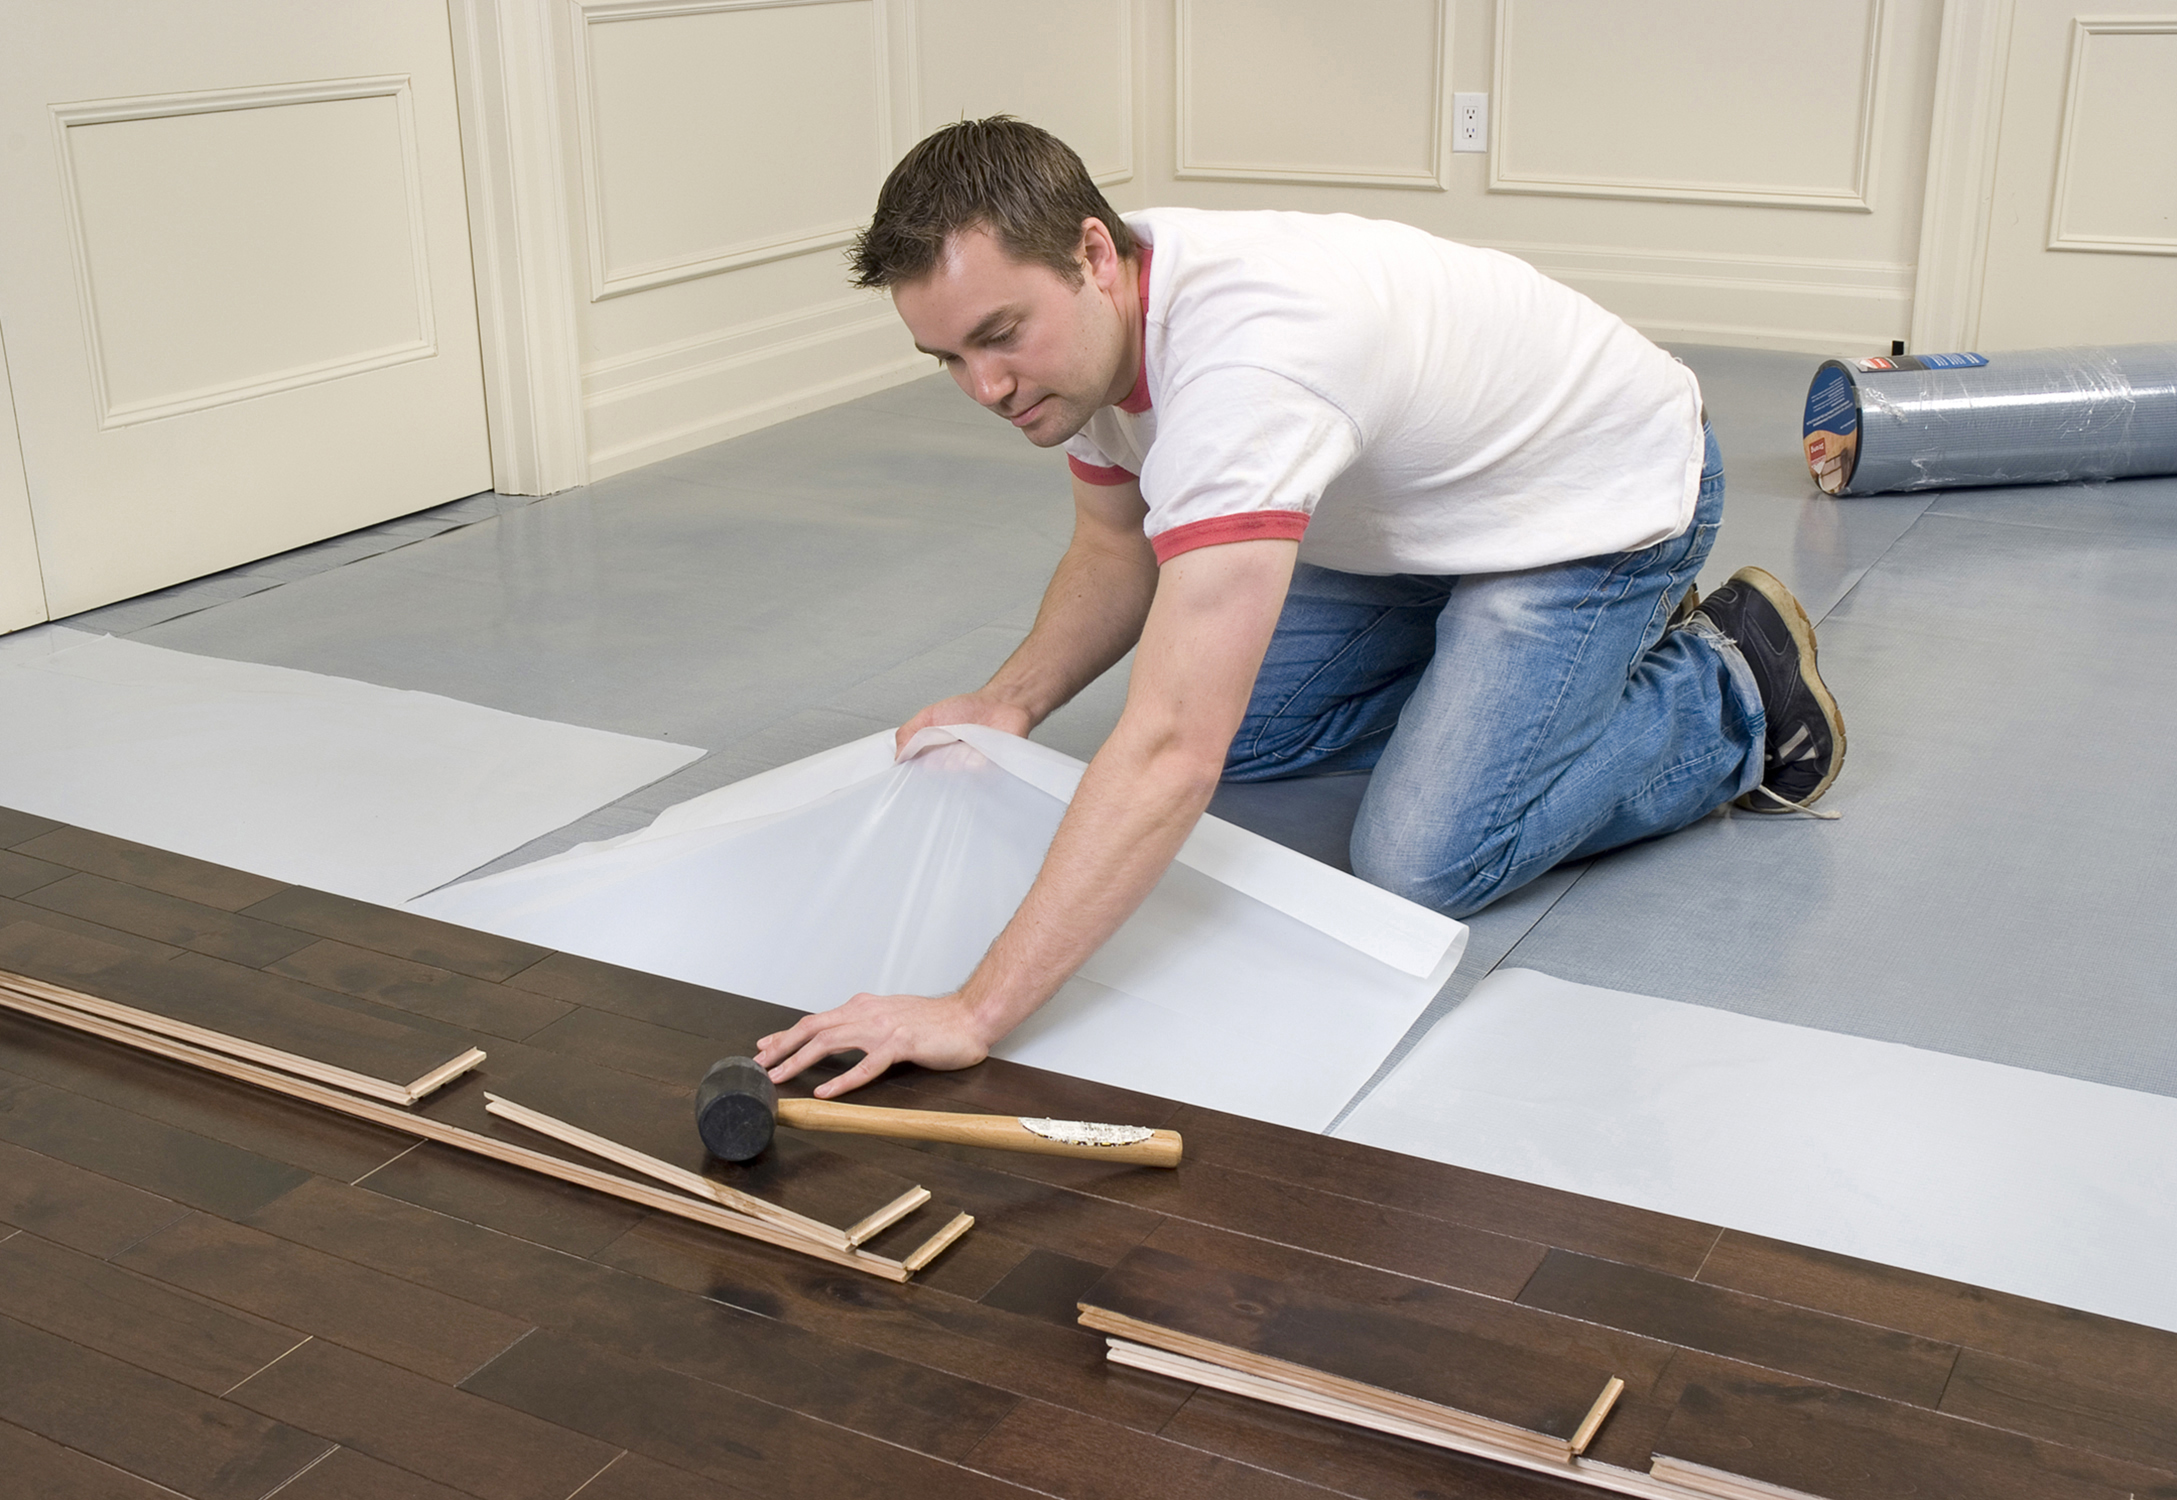
## Step Three: Lay Down Underlayment and Expansion Space
Lay down your underlayment across the entire surface of your prepared concrete floor. Spread it evenly with a trowel or roller. After that, cut pieces of expansion space material to fit in areas where two pieces of wood flooring meet together such as doorways or closets. Expansion space material allows for movement between pieces of wood flooring as temperatures change.
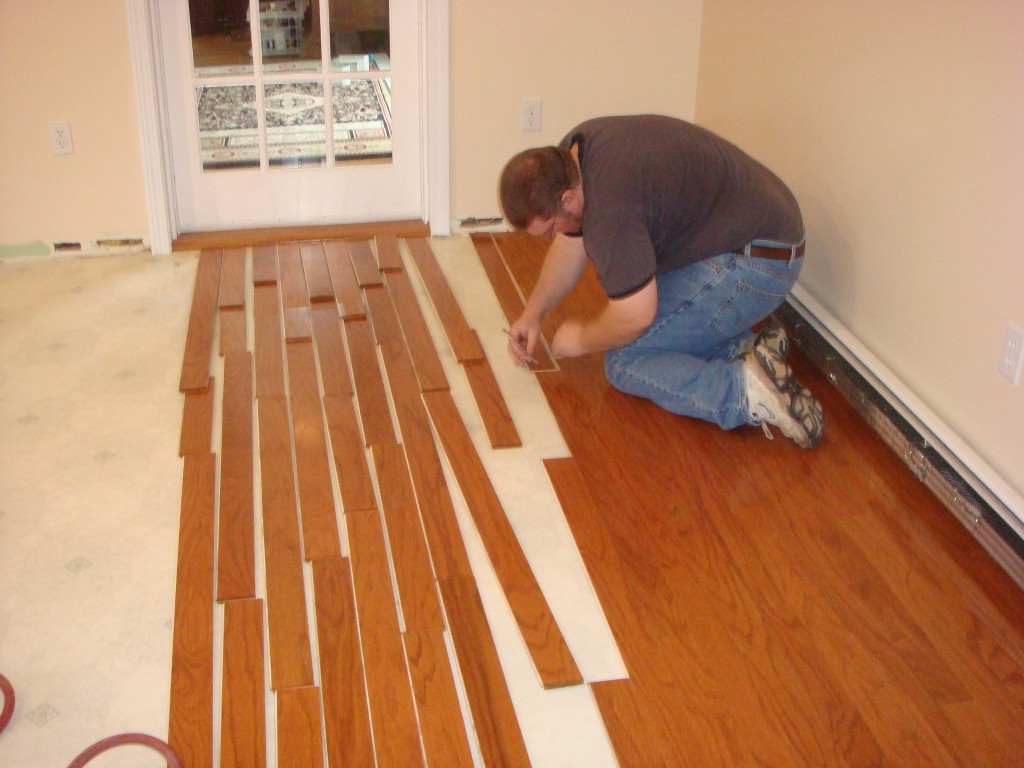
## Step Four: Begin Installing The Wood Planks!
Now that your concrete floor is prepped and ready to go, it’s time to start installing the wood planks! Start by laying out the first row of wood planks across the widest part of the room, making sure they are straight. When laying down each piece, use either glue or nails/screws to secure them into place on top of the underlayment and around expansion spaces cut earlier. Continue laying down each consecutive row one after another until all of your wood planks are in place! Make sure each plank fits snugly together without any large gaps between pieces.
## Step Five: Finishing Off The Wood Floor
When all of your wood planks have been laid down and secured in place, it’s now time for some cosmetic touches! You may choose to use sandpaper to smooth out any uneven spots on the surface of the wood planks. Afterwards, apply sealant to protect against moisture and other damages over time. Finally finish off your installation job with a heat gun (optional), which can give your new wood floor an extra bit of shine and appeal!
Congratulations! You have just finished installing a beautiful new wood floor on concrete! With these steps, you can make tackling a challenging DIY project like this much easier while still achieving outstanding results. Now that everything is done, enjoy your new hardwood floor installation for years to come!
What tools are needed to install a wood floor on concrete?
Tools needed to install a wood floor on concrete include the following:-Manual or Powered Hand Saw
-Masonry Nails or Self-tapping Concrete Screws
-Tape Measure
-Chalk Line
-Rubber Mallet
-Hammer
-Drill and Bits
-Flooring Adhesive
-Vacuum Cleaner
-Putty Knife or Trowel
-Utility Knife
-Hand or Orbital Sander
-Caulk Gun
-Heat Gun (optional)