Marble floor tiles bring unparalleled elegance and timeless beauty to any space. The luxurious appearance and durability make marble a popular choice for high-end flooring. However, installing marble floor tiles requires meticulous preparation and execution to achieve a flawless finish. This guide provides a comprehensive overview of the process, from initial preparation to final sealing, ensuring your marble floor installation is both beautiful and long-lasting.
Preparing for Installation
- Selecting the Right Marble Tile: Choosing the right marble tile is the first step in ensuring a successful installation. Marble comes in various colors, patterns, and finishes, each offering a unique aesthetic. When selecting your tiles, consider the overall design of the room and the specific qualities of different marble types. Carrara, Calacatta, and Emperador are popular choices, each with distinct characteristics. It’s also essential to purchase an additional 10-15% of tiles to account for cutting and potential breakage.
- Measuring the Space: Accurate measurement of the installation area is crucial. Begin by measuring the length and width of the floor space to determine the square footage. For irregularly shaped rooms, break the area into smaller sections and measure each individually. This will help you calculate the total number of tiles required and ensure that you order the correct amount. Additionally, consider the layout of the tiles and plan for any patterns or borders you wish to include.
- Preparing the Subfloor: A stable and level subfloor is essential for a successful marble tile installation. Inspect the subfloor for any cracks, holes, or uneven areas and repair them accordingly. If the subfloor is concrete, ensure it is clean, dry, and free from any debris. For wooden subfloors, it is often necessary to install a cement backer board to provide a solid and moisture-resistant base. Proper preparation of the subfloor will prevent issues such as tile cracking or uneven surfaces in the future.
- Acclimating the Marble Tiles: The marble is a natural stone that can expand and contract with changes in temperature and humidity. To prevent issues after installation, it is crucial to acclimate the marble tiles to the room where they will be installed. Lay the tiles out in the room for at least 48 hours before installation. This allows them to adjust to the room’s conditions, reducing the risk of expansion or contraction post-installation.
- Gathering Tools and Materials: Having the right tools and materials on hand will make the installation process smoother and more efficient. Essential tools include a tile cutter or wet saw, trowels, a level, a tape measure, and a rubber mallet. Additionally, you will need materials such as thin-set mortar, grout, spacers, and a sealant specifically designed for marble. Ensure all tools are clean and in good working condition before you begin.
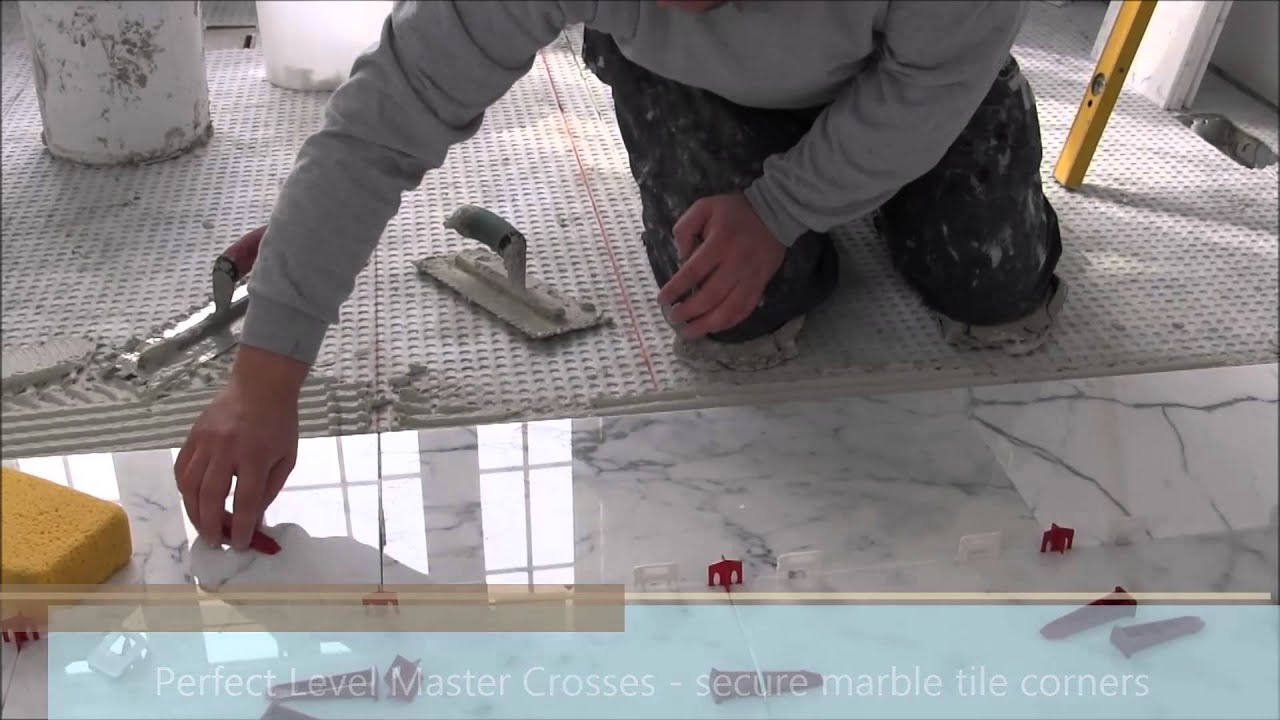
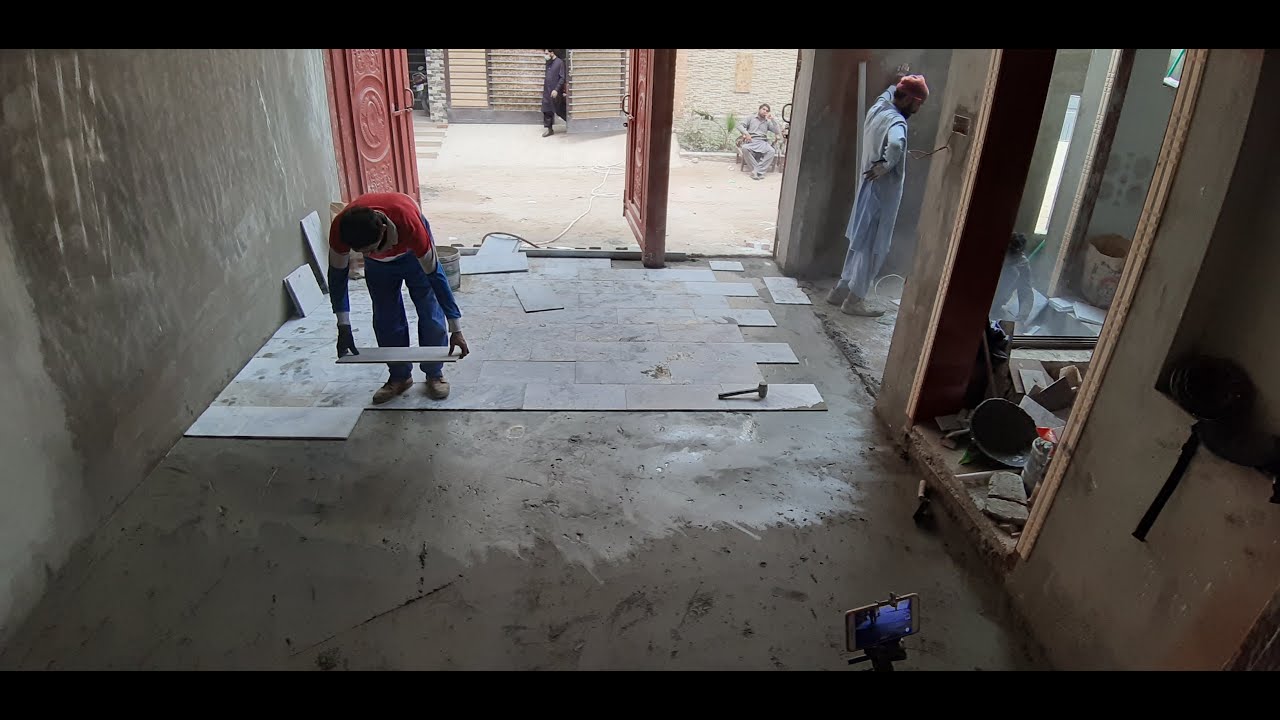
- Creating a Layout Plan: Before you start setting the tiles, it’s important to create a detailed layout plan. This involves deciding on the starting point, typically the center of the room, and working outwards. Dry-lay the tiles without adhesive to visualize the final look and make any necessary adjustments. Use spacers to maintain consistent gaps between tiles, which will be filled with grout later. This planning phase is crucial for achieving a balanced and aesthetically pleasing design.
Laying the Marble Tiles
Mixing the Thin-Set Mortar
The first step in laying the marble tiles is to mix the thin-set mortar. Follow the manufacturer’s instructions carefully to achieve the right consistency. The mortar should be thick enough to hold the tiles in place but still easy to spread. Use a mixing paddle attached to a drill for thorough blending. Let the mixture sit for a few minutes before re-mixing to ensure all ingredients are well incorporated.
Applying the Mortar
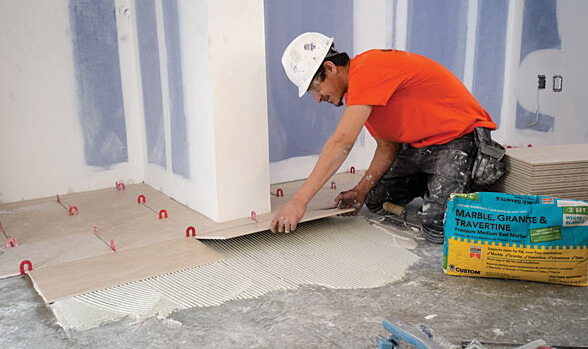
Using a notched trowel, spread a thin layer of mortar onto the subfloor, working in small sections to prevent the mortar from drying out before you can lay the tiles. Hold the trowel at a 45-degree angle to create ridges in the mortar, which help to ensure a strong bond between the tile and the subfloor. Apply a thin layer of mortar to the back of each tile as well (known as back-buttering) for added adhesion.
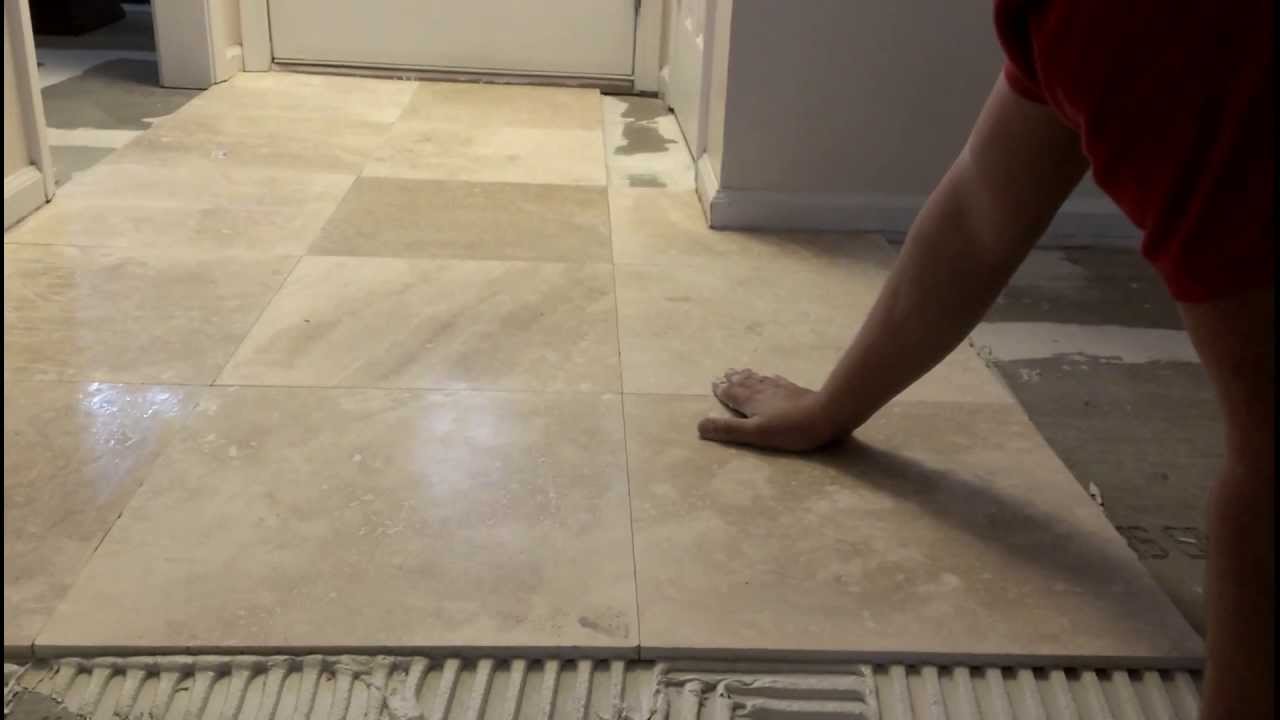
Setting the Tiles
Begin laying the tiles according to your layout plan. Press each tile firmly into the mortar, using a slight twisting motion to ensure full contact. Place spacers between each tile to maintain even gaps. Use a level to check that each tile is even with the surrounding tiles. If necessary, tap the tiles lightly with a rubber mallet to adjust their height. Work systematically, completing one section before moving on to the next.
Cutting the Tiles
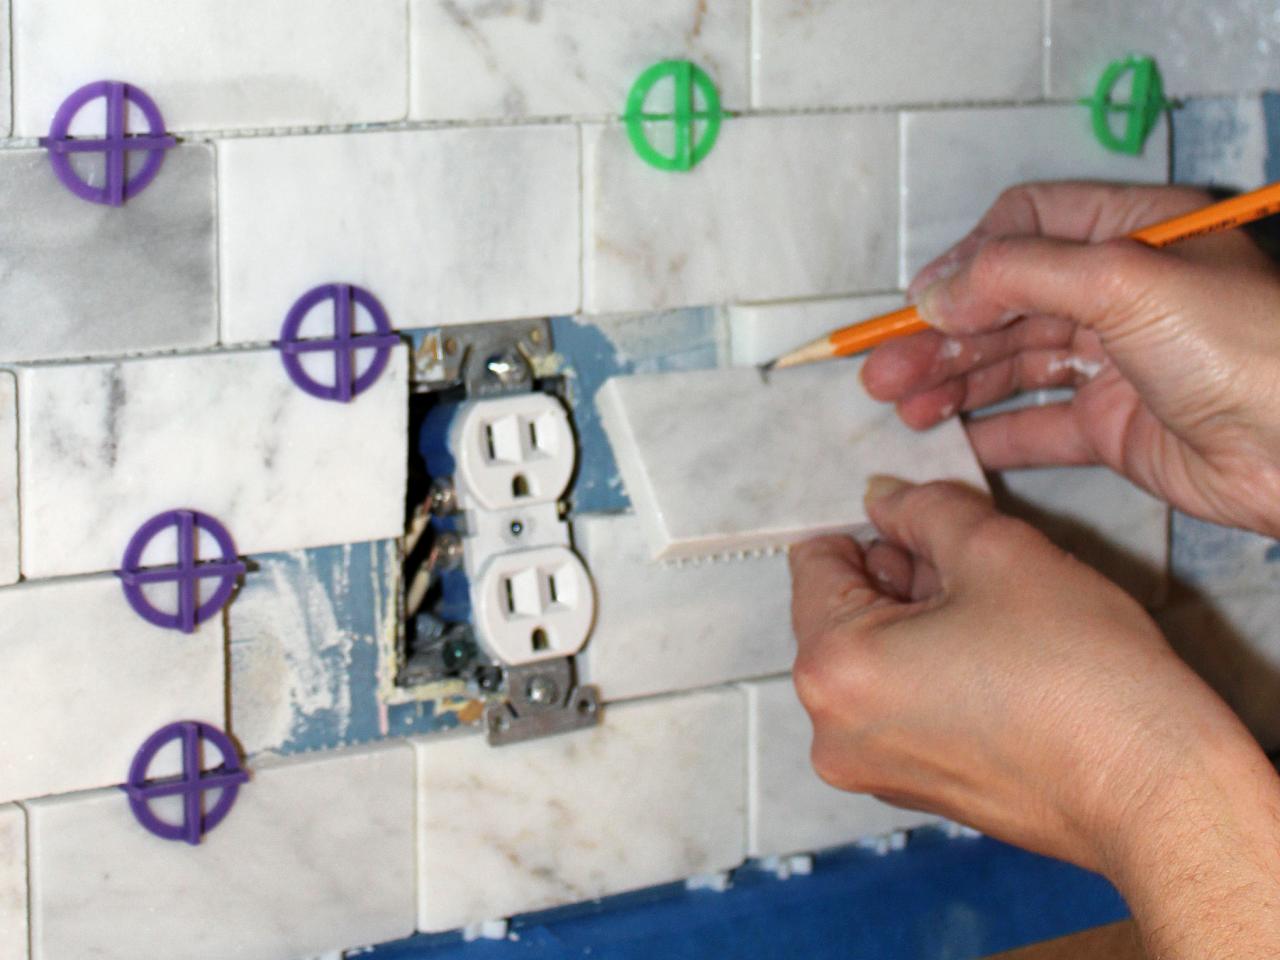
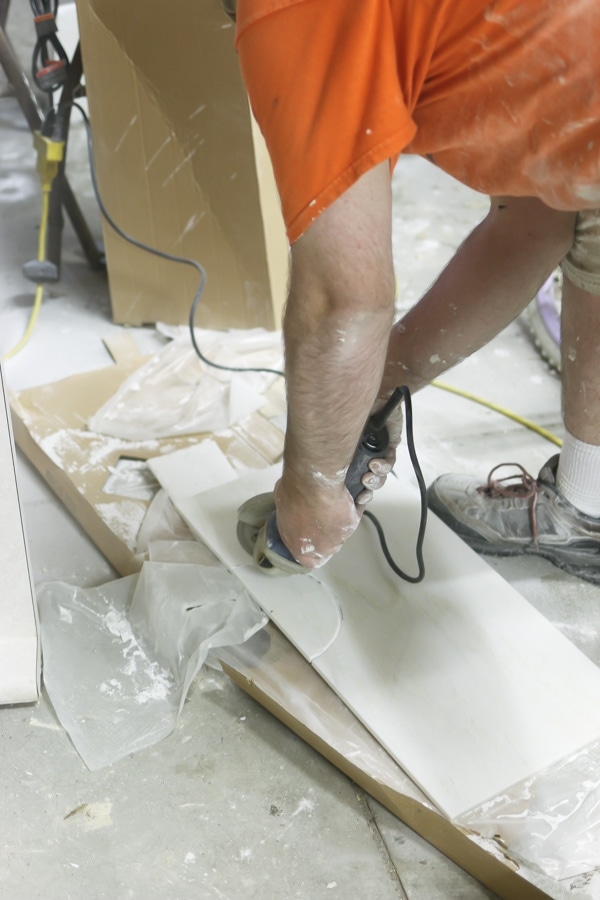
Cutting marble tiles to fit around edges and corners is often necessary. Use a wet saw with a diamond blade for precise cuts. Measure the area where the cut tile will be placed, marking the tile with a pencil. Make sure to cut slowly and steadily to avoid chipping the marble. Always wear safety goggles and gloves when cutting tiles to protect yourself from sharp edges and flying debris.
Allowing the Mortar to Cure
After all the tiles are set, allow the mortar to cure for at least 24 hours. This is crucial to ensure that the tiles are securely bonded to the subfloor. Avoid walking on the tiles during this period to prevent them from shifting. Once the mortar is fully cured, you can remove the spacers in preparation for grouting.
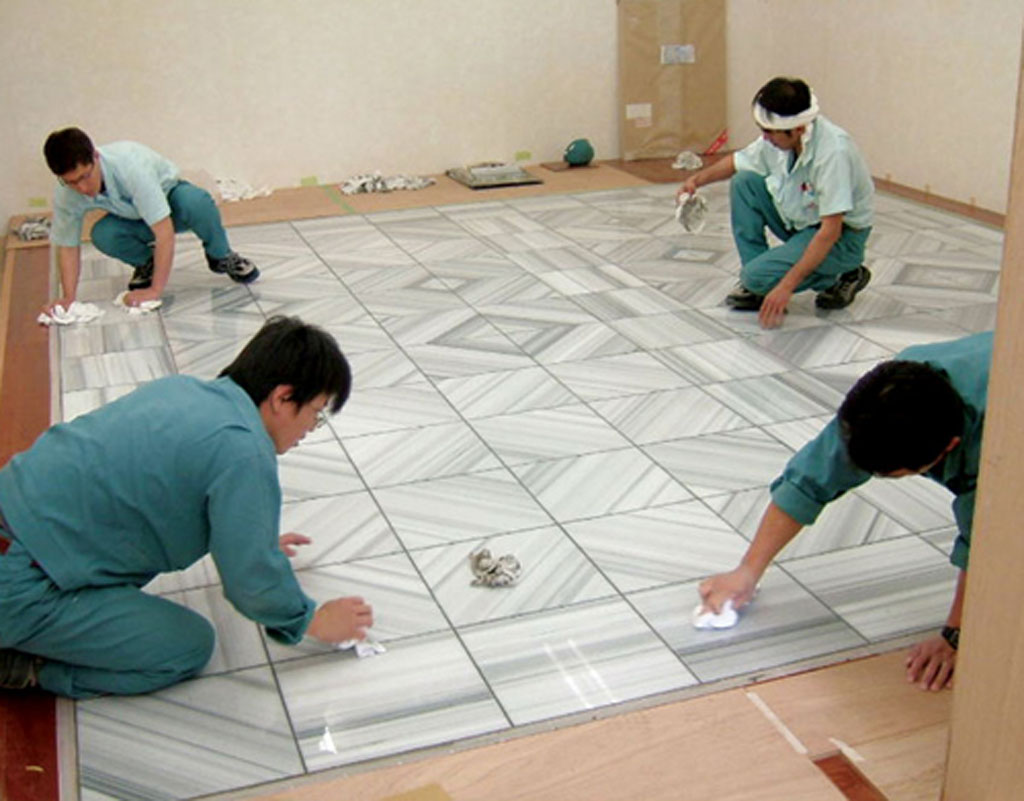
Cleaning the Tiles
Before grouting, thoroughly clean the surface of the tiles to remove any excess mortar. Use a damp sponge or cloth to wipe away any residue, being careful not to disturb the tiles. Cleaning at this stage will make the grouting process easier and ensure a cleaner finish. Allow the tiles to dry completely before proceeding to the next step.
Grouting the Marble Tiles
Selecting the Right Grout
Choosing the right grout is essential for both the appearance and durability of your marble floor. Unsanded grout is typically recommended for marble tiles, as sanded grout can scratch the surface of the marble. Grout comes in various colors, so select one that complements the color of your marble tiles. If you want a seamless look, choose a grout color that matches the marble closely.
Mixing the Grout
Follow the manufacturer’s instructions to mix the grout to the correct consistency. The grout should be smooth and free of lumps, with a texture similar to toothpaste. Use a grout float to mix and apply the grout, ensuring it is evenly blended. Let the mixture sit for a few minutes before re-stirring to ensure all components are well combined.
Applying the Grout
Using a grout float, spread the grout diagonally across the tiles, pressing it into the joints. Work in small sections to ensure the grout does not dry before you can clean the tiles. Make sure all gaps are filled, removing excess grout from the tile surfaces with the edge of the float. Hold the float at a 45-degree angle to scrape off any surplus grout, which will help with the cleaning process later.
Cleaning Excess Grout
After the grout has been applied, wait about 15-20 minutes before cleaning the tiles. Use a damp sponge to wipe away excess grout from the tile surfaces. Rinse the sponge frequently in clean water to avoid spreading grout residue. Be careful not to remove grout from the joints during this process. Allow the grout to cure according to the manufacturer’s instructions, usually about 24 hours.
Polishing the Marble
Once the grout has cured, use a soft cloth or a buffing pad to polish the marble tiles. This will remove any remaining grout haze and bring out the natural shine of the marble. If necessary, use a marble-specific cleaner to enhance the finish. Polishing not only improves the appearance but also prepares the surface for sealing.
Inspecting the Finished Surface
Inspect the entire floor for any gaps, cracks, or uneven areas in the grout. Touch up any imperfections with additional grout if needed. This final inspection ensures that the floor is not only beautiful but also structurally sound. Once you are satisfied with the grout, allow the floor to dry completely before applying the sealant.
:max_bytes(150000):strip_icc()/5-56a2fc793df78cf7727b6a26.jpg)
Sealing the Marble Tiles
Importance of Sealing
Sealing marble tiles is a crucial step in protecting the stone from stains and damage. Marble is a porous material, which means it can absorb liquids and stains if not properly sealed. A high-quality sealant will provide a protective barrier, keeping your marble floor looking pristine for years. Sealing also makes cleaning easier and helps maintain the natural beauty of the marble.
Choosing the Right Sealant
Select a sealant specifically designed for marble or natural stone. There are two main types of sealants: topical sealants, which sit on the surface, and penetrating sealants, which absorb into the stone. Penetrating sealants are generally recommended for marble floors as they provide better protection against stains and do not alter the appearance of the stone. Ensure the sealant you choose is appropriate for the specific type of marble you have installed.
Applying the Sealant
Before applying the sealant, make sure the floor is completely dry and free of dust and debris. Using a clean, dry cloth or a sealant applicator, apply the sealant evenly across the marble tiles. Work in small sections to ensure full coverage. Allow the sealant to penetrate the marble for the recommended amount of time, usually about 15-30 minutes. Wipe off any excess sealant with a clean cloth.
Allowing the Sealant to Cure
After applying the sealant, allow it to cure for the time specified by the manufacturer. This typically ranges from 24 to 48 hours. During this curing period, avoid walking on the floor or placing any objects on it. Proper curing is essential to ensure the sealant fully bonds with the marble, providing maximum protection.
Applying Additional Coats
Depending on the porosity of the marble and the specific sealant used, you may need to apply multiple coats. Follow the manufacturer’s instructions regarding the number of coats and the drying time between each application. Applying additional coats enhances the protective barrier and extends the lifespan of your marble floor.
Regular Maintenance
Even after sealing, regular maintenance is necessary to keep your marble floor looking its best. Clean spills immediately to prevent stains, and use a pH-neutral cleaner specifically designed for marble. Avoid using acidic or abrasive cleaners, as these can damage the sealant and the marble itself. Regularly inspect the sealant and reapply as needed, typically every 1-2 years.
Common Mistakes to Avoid
Skipping the Subfloor Preparation
One of the most common mistakes in marble tile installation is neglecting proper subfloor preparation. An uneven or unstable subfloor can lead to cracked tiles and uneven surfaces. Always ensure the subfloor is clean, level, and properly prepared before beginning the installation process.
Incorrect Mortar Mixing
Mixing the thin-set mortar incorrectly can result in poor adhesion and tile movement. Follow the manufacturer’s instructions carefully and mix the mortar to the right consistency. Using a mixing paddle attached to a drill ensures thorough blending and prevents issues with the mortar setting properly.
Improper Tile Layout
Failing to plan the tile layout can lead to an uneven and unbalanced appearance. Take the time to dry-lay the tiles and create a detailed layout plan before applying the mortar. This step helps identify any necessary adjustments and ensures a visually pleasing result.
Not Back-Buttering the Tiles
Back-buttering the tiles, or applying a thin layer of mortar to the back of each tile, enhances adhesion and prevents hollow spots. Skipping this step can result in tiles that are not securely bonded to the subfloor, leading to potential movement and damage.
Rushing the Grouting Process
Grouting is a critical step that requires patience and precision. Rushing through the grouting process can lead to uneven joints and excess grout on the tile surfaces. Take your time to apply the grout evenly and clean the tiles thoroughly to achieve a professional finish.
Neglecting to Seal the Marble
Marble is a porous material that requires proper sealing to protect against stains and damage. Neglecting to seal the marble or using an inappropriate sealant can result in a floor that is vulnerable to stains and etching. Always use a high-quality sealant and follow the manufacturer’s instructions for application and maintenance.
How long does it take to install marble floor tiles?
The time required to install marble floor tiles depends on several factors, including the size of the area, the complexity of the layout, and the experience of the installer. Generally, a professional installation of an average-sized room can take between 3 to 5 days. This includes time for subfloor preparation, tile layout, mortar application, tile setting, grouting, and sealing. Allow additional time for curing and drying between each step to ensure a successful installation.
Can I install marble floor tiles myself?
While it is possible to install marble floor tiles yourself, it is a complex and labor-intensive process that requires a high level of skill and attention to detail. DIY installation is recommended only for those with prior experience in tile work and a thorough understanding of the necessary steps and tools. Hiring a professional installer is often the best option to ensure a flawless finish and avoid costly mistakes.
How do I clean and maintain marble floor tiles?
Regular cleaning and maintenance are essential to keep marble floor tiles looking their best. Use a pH-neutral cleaner specifically designed for marble, and avoid acidic or abrasive cleaners that can damage the stone. Clean spills immediately to prevent stains, and use mats or rugs in high-traffic areas to reduce wear. Regularly inspect the sealant and reapply as needed, typically every 1-2 years, to maintain the protective barrier.
What should I do if a marble tile cracks?
If a marble tile cracks, it is important to address the issue promptly to prevent further damage. Depending on the severity of the crack, you may be able to repair it with a marble filler or epoxy. For larger cracks or multiple damaged tiles, it may be necessary to replace the affected tiles. Consult a professional for advice on the best course of action based on the extent of the damage.
How often should marble floor tiles be sealed?
The frequency of sealing depends on the type of marble, the amount of foot traffic, and the specific sealant used. Generally, marble floor tiles should be sealed every 1-2 years to maintain their protective barrier. Regularly inspect the sealant and reapply as needed to ensure maximum protection against stains and damage. Follow the manufacturer’s recommendations for the best results.
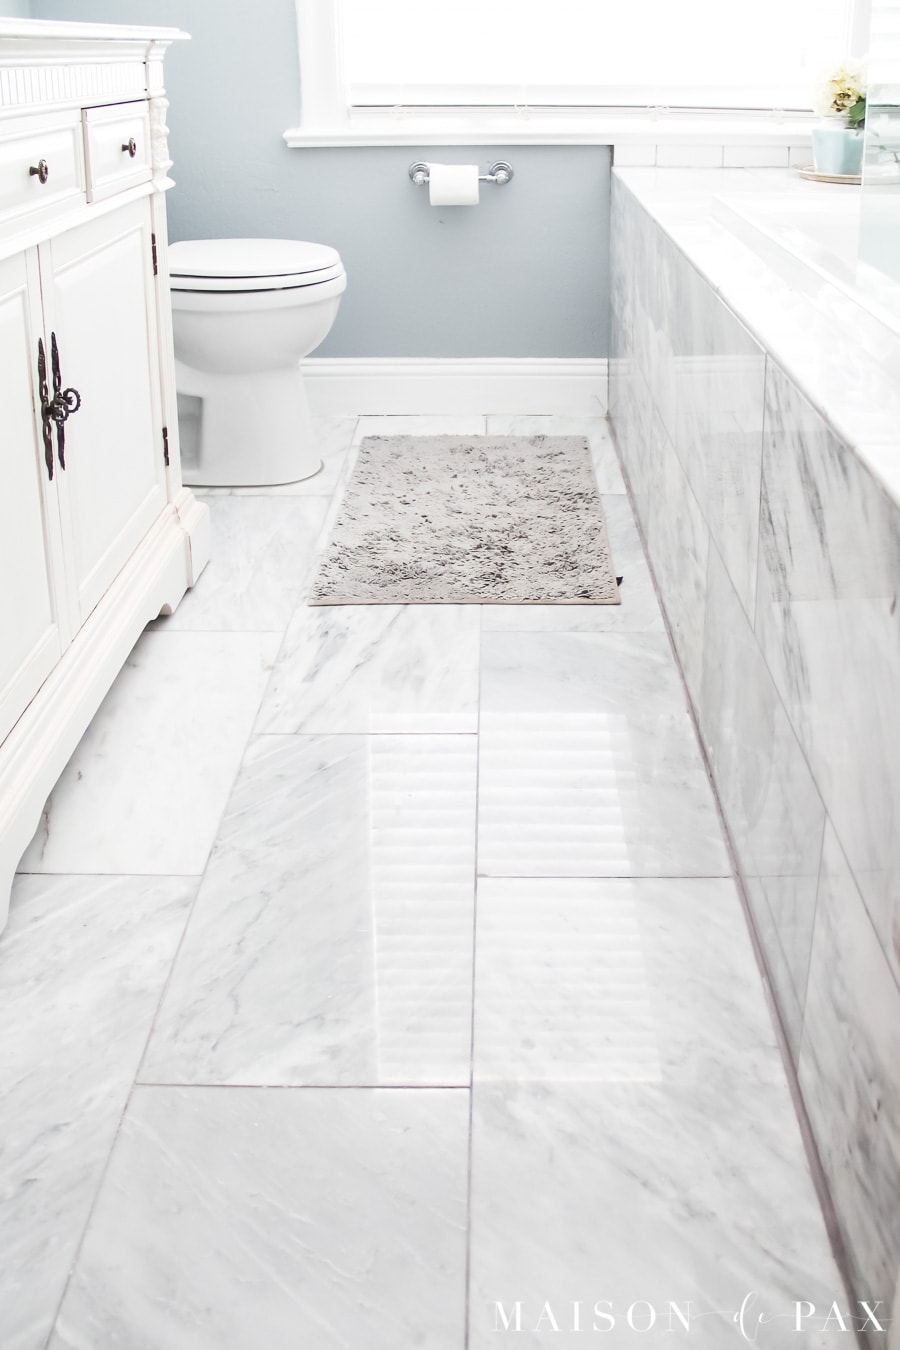
Are there any special considerations for installing marble in high-moisture areas?
Marble can be installed in high-moisture areas such as bathrooms and kitchens, but special considerations are necessary. Ensure the subfloor is properly prepared and waterproofed to prevent moisture from seeping into the marble. Use a high-quality penetrating sealant to protect the marble from water damage and stains. Regular maintenance and prompt cleaning of spills are essential to keep the marble in good condition. Additionally, consider using smaller tiles or mosaic patterns in areas with high moisture exposure to reduce the risk of cracking and movement.
Laying Of Marble Flooring – Flooring Tips

How to Install Marble Tile
How to install marble tiles
How to Install Hardwood Floor Over the Marble or Tile
Laying A Marble Floor – Flooring Ideas
How to Install Marble Floor Tiles
/1-56a2fc775f9b58b7d0cffd75.jpg)
Related Posts: