Replacing a bathroom floor tile can seem like a daunting task, but with the right tools, materials, and a bit of patience, it’s a project that you can handle yourself. Whether you’re dealing with a single cracked tile or looking to refresh the look of your entire bathroom, knowing how to replace a bathroom floor tile is a useful skill. I will guide you through the process step-by-step, ensuring you have all the information you need to achieve professional-looking results.
Assessing the Damage and Preparing for the Job
Understanding the Scope of the Project
Before diving into the project, it’s important to assess the extent of the damage. Are you replacing a single tile, multiple tiles, or the entire floor? Understanding the scope will help you plan the project, purchase the correct amount of materials, and allocate enough time for the job.
Gathering the Necessary Tools and Materials
To replace a bathroom floor tile, you’ll need several tools and materials. These include a hammer, chisel, putty knife, tile adhesive, grout, a notched trowel, tile spacers, and replacement tiles. Having everything on hand before you start will make the process smoother and prevent unnecessary trips to the hardware store.
Safety Precautions
Safety should always be a priority when undertaking any DIY project. Wear safety goggles to protect your eyes from flying debris when removing the old tile. Gloves can protect your hands from sharp tile edges and chemicals found in some adhesives and grouts.
Cleaning the Work Area
A clean work area is essential for a successful tile replacement. Remove any furniture or items from the bathroom floor and give the area a thorough sweep. This will ensure that no debris interferes with the adhesive and that you have a clear space to work in.
Identifying Replacement Tiles
Matching the replacement tiles to the existing ones can be challenging. If you have spare tiles left over from the original installation, use those. If not, take a sample tile to the store to find the closest match. Keep in mind that even slight variations in color or texture can be noticeable once the tile is installed.
Planning the Layout
If you are replacing multiple tiles or redoing the entire floor, plan the layout before you start. This will help you avoid awkward cuts and ensure a more professional finish. Use a chalk line to mark the layout on the floor.

Removing the Damaged Tile
Scoring the Grout Lines
Begin by scoring the grout lines around the damaged tile. Use a utility knife to cut through the grout, being careful not to damage the surrounding tiles. This will help prevent the surrounding tiles from chipping when you remove the damaged one.
Loosening the Tile
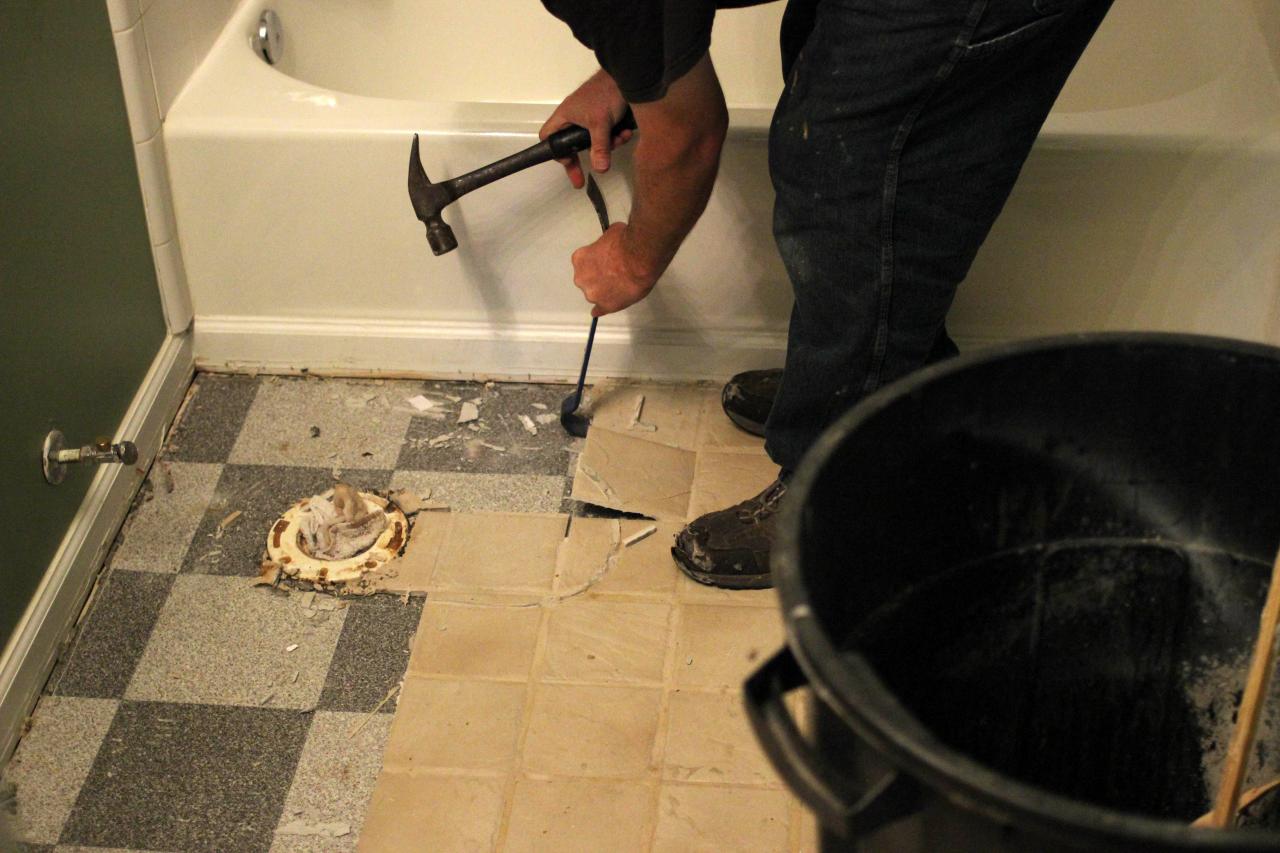
Once the grout lines are scored, use a hammer and chisel to carefully break up the damaged tile. Start in the center and work your way out to the edges. Be gentle to avoid damaging the underlayment or adjacent tiles.
Removing the Tile Pieces
After loosening the tile, remove the pieces by prying them up with a putty knife. If the tile is stubborn, use the hammer and chisel to break it into smaller pieces for easier removal. Make sure to remove all the pieces, including any fragments stuck in the adhesive.
Cleaning the Adhesive
With the tile removed, you’ll need to clean the old adhesive from the subfloor. Use a putty knife or a scraper to remove as much adhesive as possible. The surface should be smooth and clean before applying new adhesive.
Inspecting the Subfloor
Inspect the subfloor for any damage. If the subfloor is damaged, it will need to be repaired or replaced before you can proceed. A solid, level subfloor is crucial for the new tile to adhere properly and to prevent future issues.
Preparing for New Tile Installation
After cleaning and inspecting the subfloor, vacuum or sweep the area to remove any dust or debris. A clean surface ensures better adhesion for the new tile.
Installing the Replacement Tile
Applying Tile Adhesive
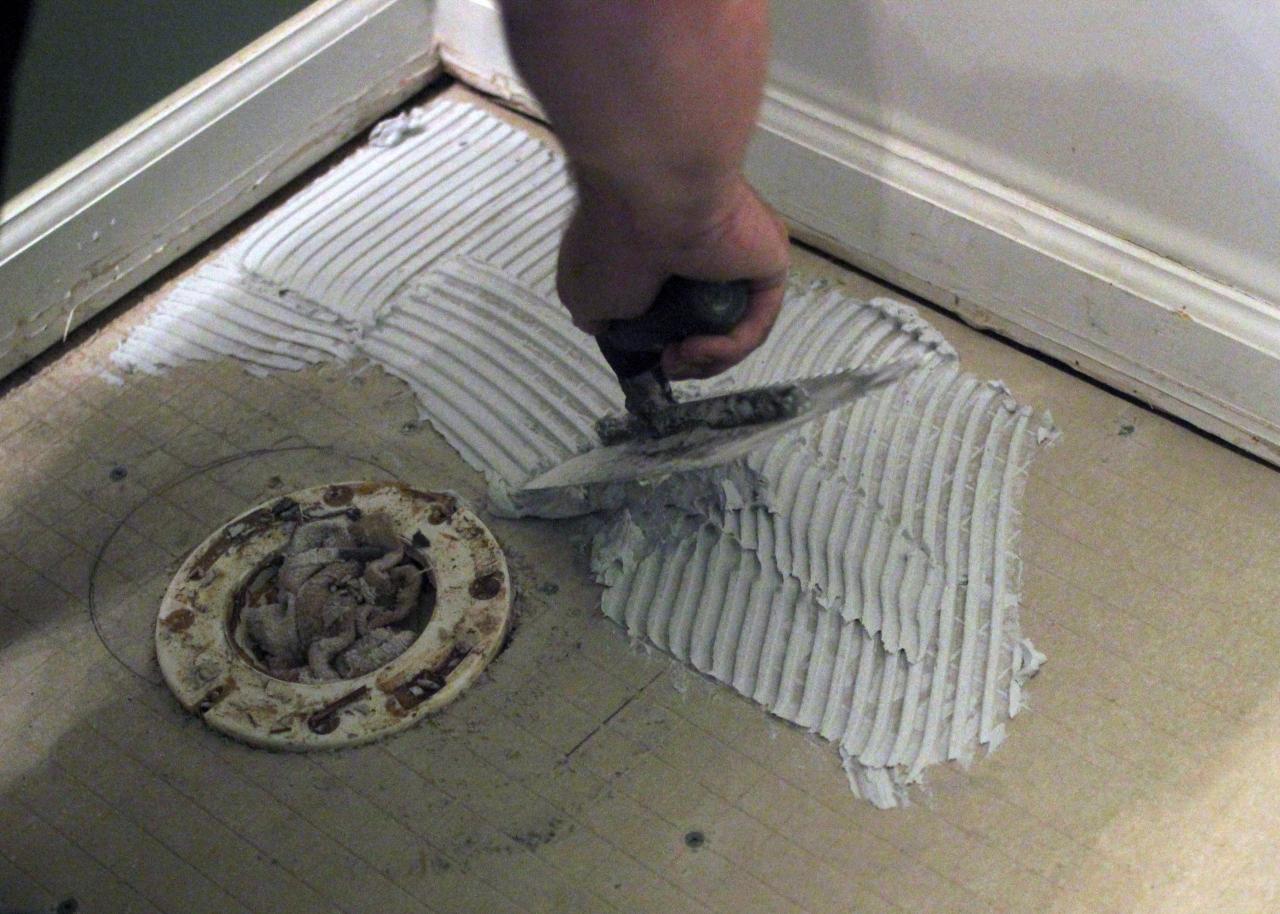
Use a notched trowel to spread tile adhesive on the subfloor where the new tile will go. Hold the trowel at a 45-degree angle to create grooves in the adhesive. This helps the tile bond more securely.
Placing the New Tile
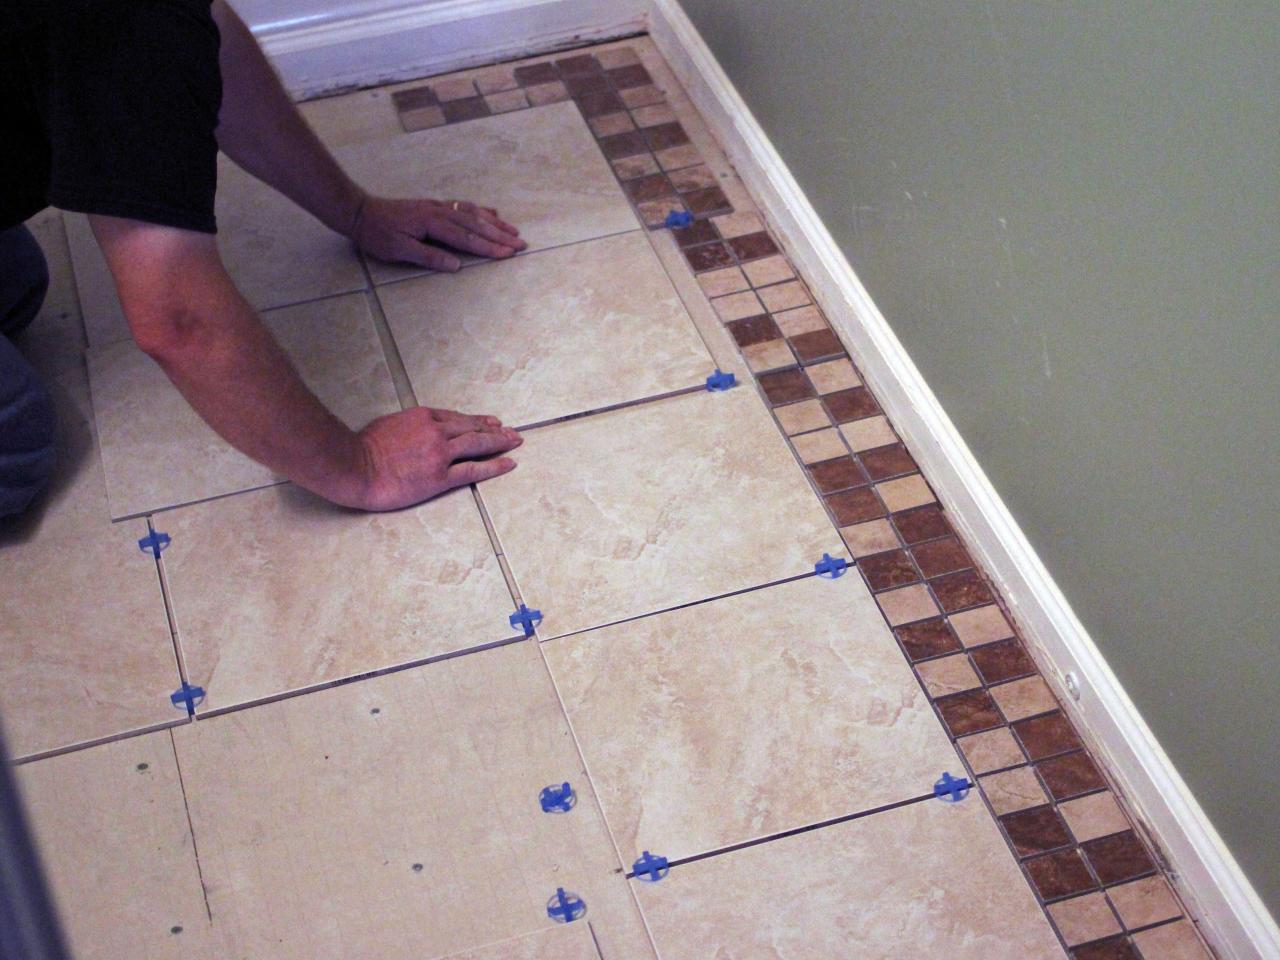
Carefully place the new tile into the adhesive, pressing it firmly to ensure a good bond. Use tile spacers around the edges to maintain even grout lines. Make sure the tile is level with the surrounding tiles.
Adjusting the Tile
If necessary, adjust the tile to ensure it aligns with the surrounding tiles. Use a level to check that the tile is flush with the existing floor. If the tile is not level, gently tap it with a rubber mallet to adjust its position.
Allowing Adhesive to Set
Allow the adhesive to set according to the manufacturer’s instructions. This usually takes about 24 hours. Avoid walking on the tile during this time to prevent it from shifting.
Removing Tile Spacers
Once the adhesive has set, remove the tile spacers. Be careful not to disturb the tile. This step is important to ensure that the grout lines remain even and clean.
Cleaning Excess Adhesive
Before applying grout, clean any excess adhesive that may have squeezed up between the tiles. Use a putty knife or a small brush to remove the adhesive, ensuring the grout lines are clean and ready for grouting.
Grouting the Tile
Mixing the Grout
Follow the manufacturer’s instructions to mix the grout. It should have a smooth, peanut butter-like consistency. Mix only as much as you can use within 30 minutes, as grout can dry quickly.
Applying the Grout
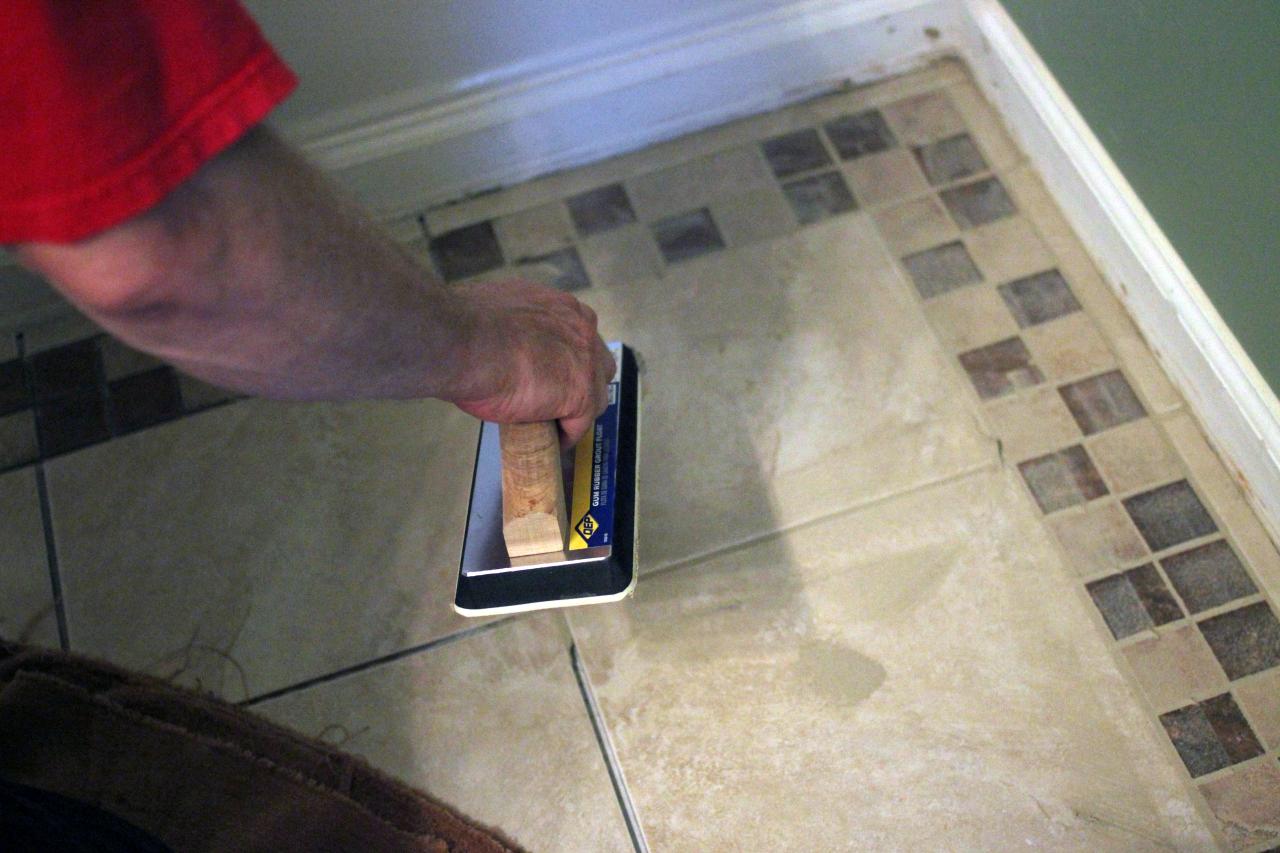
Use a rubber grout float to apply the grout to the joints between the tiles. Hold the float at a 45-degree angle and press the grout into the joints, ensuring they are completely filled.
Removing Excess Grout
After filling the joints, use the float to remove excess grout from the surface of the tiles. Hold the float at a steep angle and scrape diagonally across the tiles to avoid pulling grout out of the joints.
Cleaning the Tile Surface
Allow the grout to set for about 15-20 minutes, then use a damp sponge to clean the tile surface. Rinse the sponge frequently and be gentle to avoid disturbing the grout lines.
Curing the Grout
Allow the grout to cure according to the manufacturer’s instructions. This usually takes about 24-48 hours. Avoid walking on the floor during this time to allow the grout to set properly.
Sealing the Grout
Once the grout has cured, apply a grout sealer to protect it from moisture and stains. Follow the manufacturer’s instructions for application and drying times. Sealing the grout will extend its lifespan and keep it looking fresh.
Common Mistakes to Avoid
Skipping the Subfloor Inspection
One of the most common mistakes is failing to inspect the subfloor for damage. A damaged subfloor can lead to tile instability and future problems. Always check and repair the subfloor as needed before proceeding with tile installation.
Not Using Enough Adhesive
Using too little adhesive can cause the tile to loosen over time. Ensure you apply a sufficient amount of adhesive and use a notched trowel to create grooves for better bonding.
Rushing the Adhesive Setting Time
Patience is key when working with tile adhesive. Rushing the setting time can cause the tile to shift and result in uneven surfaces. Always allow the adhesive to set fully as per the manufacturer’s instructions.
Neglecting Tile Spacers
Tile spacers are crucial for maintaining even grout lines. Neglecting to use spacers can lead to uneven spacing and an unprofessional finish. Always use spacers and remove them carefully after the adhesive has set.
Improper Grout Application
Applying grout incorrectly can result in weak joints and potential tile movement. Ensure you fill the joints completely with grout and remove any excess from the tile surface. Allow adequate curing time for the grout.
Skipping Grout Sealing
Grout sealing is often overlooked but is essential for protecting the grout from moisture and stains. Skipping this step can lead to discoloration and damage over time. Always seal the grout after it has cured.
How do I choose the right replacement tile?
When choosing a replacement tile, it’s important to match it as closely as possible to the existing tiles. Bring a sample of the old tile to the store to find a close match in color, size, and texture. If the original tile is no longer available, consider replacing tiles in a less noticeable area or using a contrasting tile to create a design feature.
Can I replace a tile without removing the surrounding tiles?
Yes, you can replace a single tile without removing the surrounding ones. Carefully score the grout lines around the damaged tile and use a chisel and hammer to remove it. Be gentle to avoid damaging the adjacent tiles. Clean the area thoroughly before installing the new tile.
What type of adhesive should I use for bathroom floor tiles?
For bathroom floor tiles, use a high-quality thin-set mortar. This adhesive is specifically designed for tile installation and provides a strong bond. Make sure the adhesive is suitable for the type of tile you are using and follow the manufacturer’s instructions for mixing and application.
How long does it take to replace a bathroom floor tile?
Replacing a single bathroom floor tile typically takes about 24-48 hours, including drying and curing times for the adhesive and grout. The actual removal and installation process can be completed in a few hours, but you’ll need to allow time for the adhesive and grout to set properly.
Can I walk on the tile immediately after installation?
No, you should avoid walking on the tile immediately after installation. Allow the adhesive to set for at least 24 hours before walking on the tile. This will prevent the tile from shifting and ensure a strong bond. Similarly, allow the grout to cure for the recommended time before subjecting the floor to regular use.
How often should I seal the grout in my bathroom?
It’s recommended to seal the grout in your bathroom every 6-12 months. Regular sealing protects the grout from moisture, stains, and mold, extending its lifespan and keeping it looking clean. Follow the manufacturer’s instructions for applying grout sealer and reapply as needed to maintain protection.
How to Install Bathroom Floor Tile how-tos DIY
Related Posts:


