Wood Floor Restoration DIY

7 Common Mistakes on DIY Wood Floor Restoration Projects – N-Hance Wood floor restoration

How to Refinish Hardwood Floors – Making Manzanita Diy flooring, Diy hardwood floor

Frugal DIY Hardwood Floor Refinishing for Beginners – Pretty Passive

Top 21 Diy Hardwood Floor Refinishing – Home, Family, Style and Art Ideas

Top 21 Diy Hardwood Floor Refinishing – Home, Family, Style and Art Ideas
The top 21 Ideas About Diy Hardwood Floor Refinish – Home, Family, Style and Art Ideas
Interior:Antique Refinish Hardwood Floors Carpet Glue Also Refinish Hardwood Floors Dark Things

Five Reasons Why Hardwood Floor Refinishing Isn’t a DIY Project

21 Of the Best Ideas for Refinish Wood Floor Diy – Home, Family, Style and Art Ideas
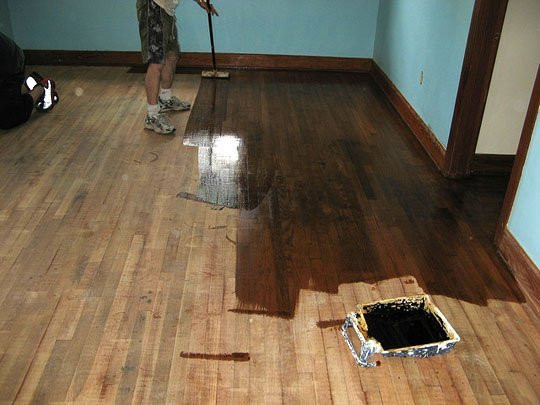
diy hardwood floor refinishing – before picture with water damage and the works. The

What To Know Before Refinishing Your Floors Wood floor stain colors, Hardwood floor colors

Related Posts:
- Grey Parquet Wood Flooring
- How To Install Pergo Wood Flooring
- Dark Black Wood Flooring
- Solid Wood Flooring White
- Pallet Wood Flooring Ideas
- Wood Floor Chevron Pattern
- Wood Flooring Home Ideas
- Wood Floor Filler Resin
- Glossy Wood Flooring Ideas
- Pergo Wood Flooring Installation
Hardwood floors can add a sense of elegance and sophistication to a room, but over time they can become scratched, stained and dull. Thankfully, wood floor restoration is a cost-effective and easy way to get your floors looking their best again. Whether you’re looking to do the job yourself or hire a professional wood floor refinisher, here’s what you need to know about restoring hardwood floors.
Prepping and Cleaning Wood Floors
Before beginning any restoration process, it’s important to make sure your floors are in good condition and free of dirt, dust, and debris. If your floors look okay but you just want to restore the shine, begin by vacuuming the area with an attachment for hardwood floors. If you need to remove any stains, use a gentle wood cleaner to spot treat. Make sure the cleaner is specifically formulated for the type of finish on your floors.
Steps for Refinishing Wood Floors
Once you’re sure the area is clean and prepped, it’s time to begin the refinishing process. The exact steps will vary depending on your project, but here are some general guidelines for DIYers.
Renovating Your Floors
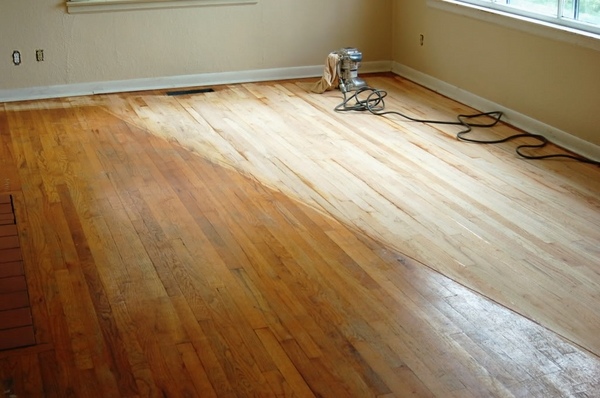
Begin by sanding down the surface of your floor. You can rent a floor sander from most hardware stores for this process. Start using a coarse grit in order to remove any existing finish and scratches, then gradually move up to finer sandpaper until the floor is smooth. If you have an unfinished hardwood floor, skip this step.
Adding Stain
For finished hardwood floors, stain can be applied using either a cloth or brush to get an even coat. Be sure to keep the stain off of skirting boards and doors with a cloth or brush dipped in paint remover – otherwise it won’t look as good after the job is done. Once you have applied the stain, let it dry for at least 24 hours before continuing.
Sealing Floors
After sanding and staining have been completed (if applicable), sealant should be applied in order to protect the wood from moisture and general wear-and-tear. Use a roller or brush to apply the sealant in thin layers. Let each layer dry completely before adding another one – usually taking around one day per layer depending on temperature and humidity levels – before applying one final coat of polyurethane sealant. This should give your floor a nice glossy finish and make it easier to clean.
Finishing Touches
Once all of these steps have been completed, it’s time for some final touches. Inspect the surface for any nail holes that need filling in if sanded floors were used. If desired, you can also add rugs or mats in order to protect certain sections of your floors from wear-and-tear and make them last longer.
The Bottom Line
As you can see, restoring hardwood floors is an achievable task with patience and knowledge about the right techniques and supplies needed. DIYers should keep in mind that results may vary based on their own skillset as well as quality of supplies used – so don’t be afraid to seek out professional help if needed – but done correctly you’ll have beautiful hardwood floors that can stand the test of time!