When I decided to renovate my kitchen, one of the biggest decisions I faced was choosing the right flooring. After much research and consideration, I settled on wood laminate flooring. It struck the perfect balance between style, durability, and cost-effectiveness. Today I’ll share everything I’ve learned about wood laminate flooring in the kitchen, covering its benefits, installation process, maintenance, and more. Let’s dive in!
The Appeal of Wood Laminate Flooring
Aesthetic Versatility
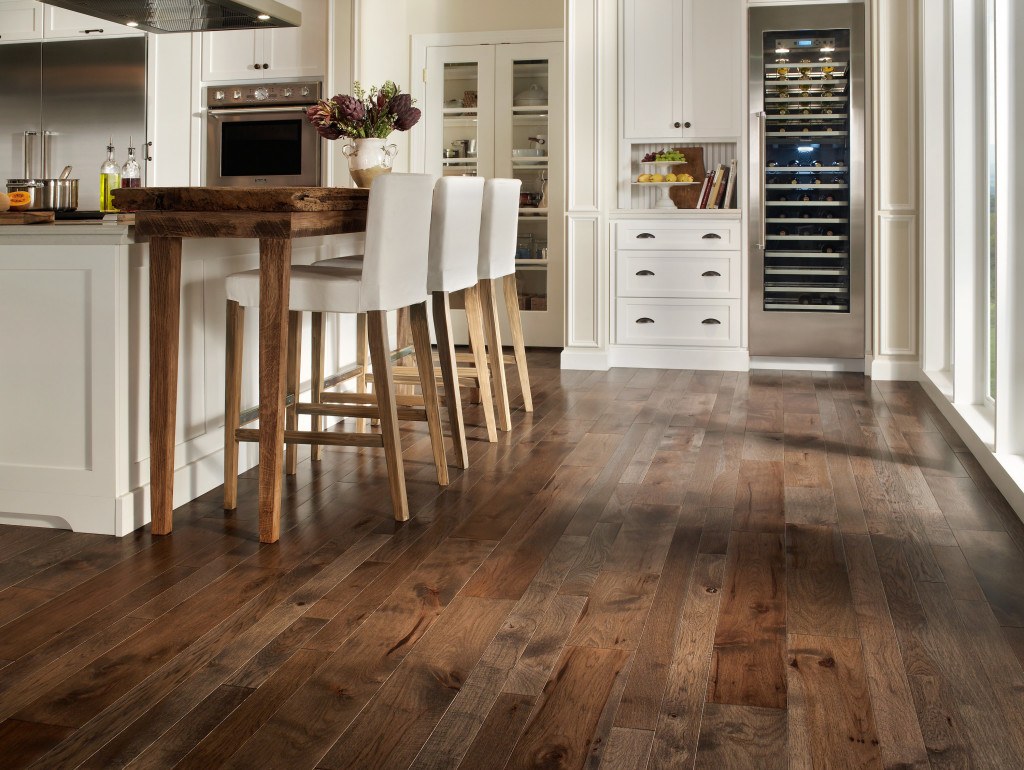
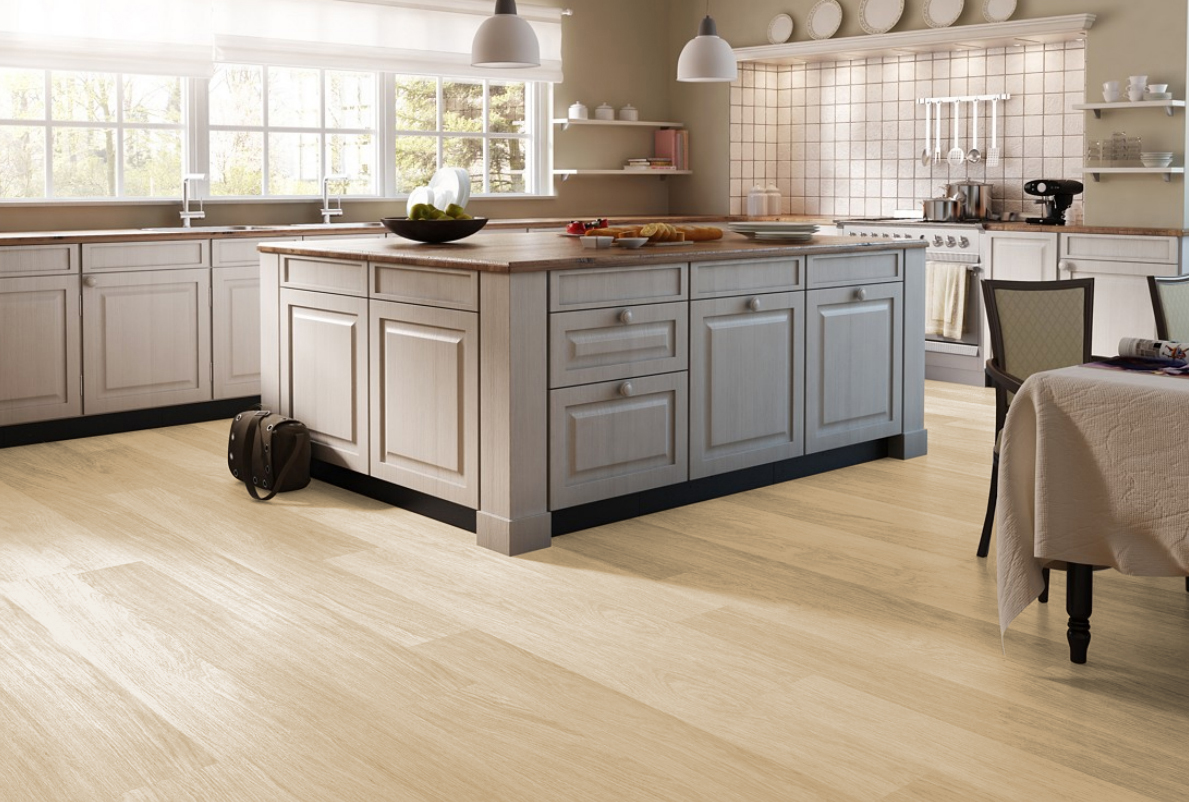
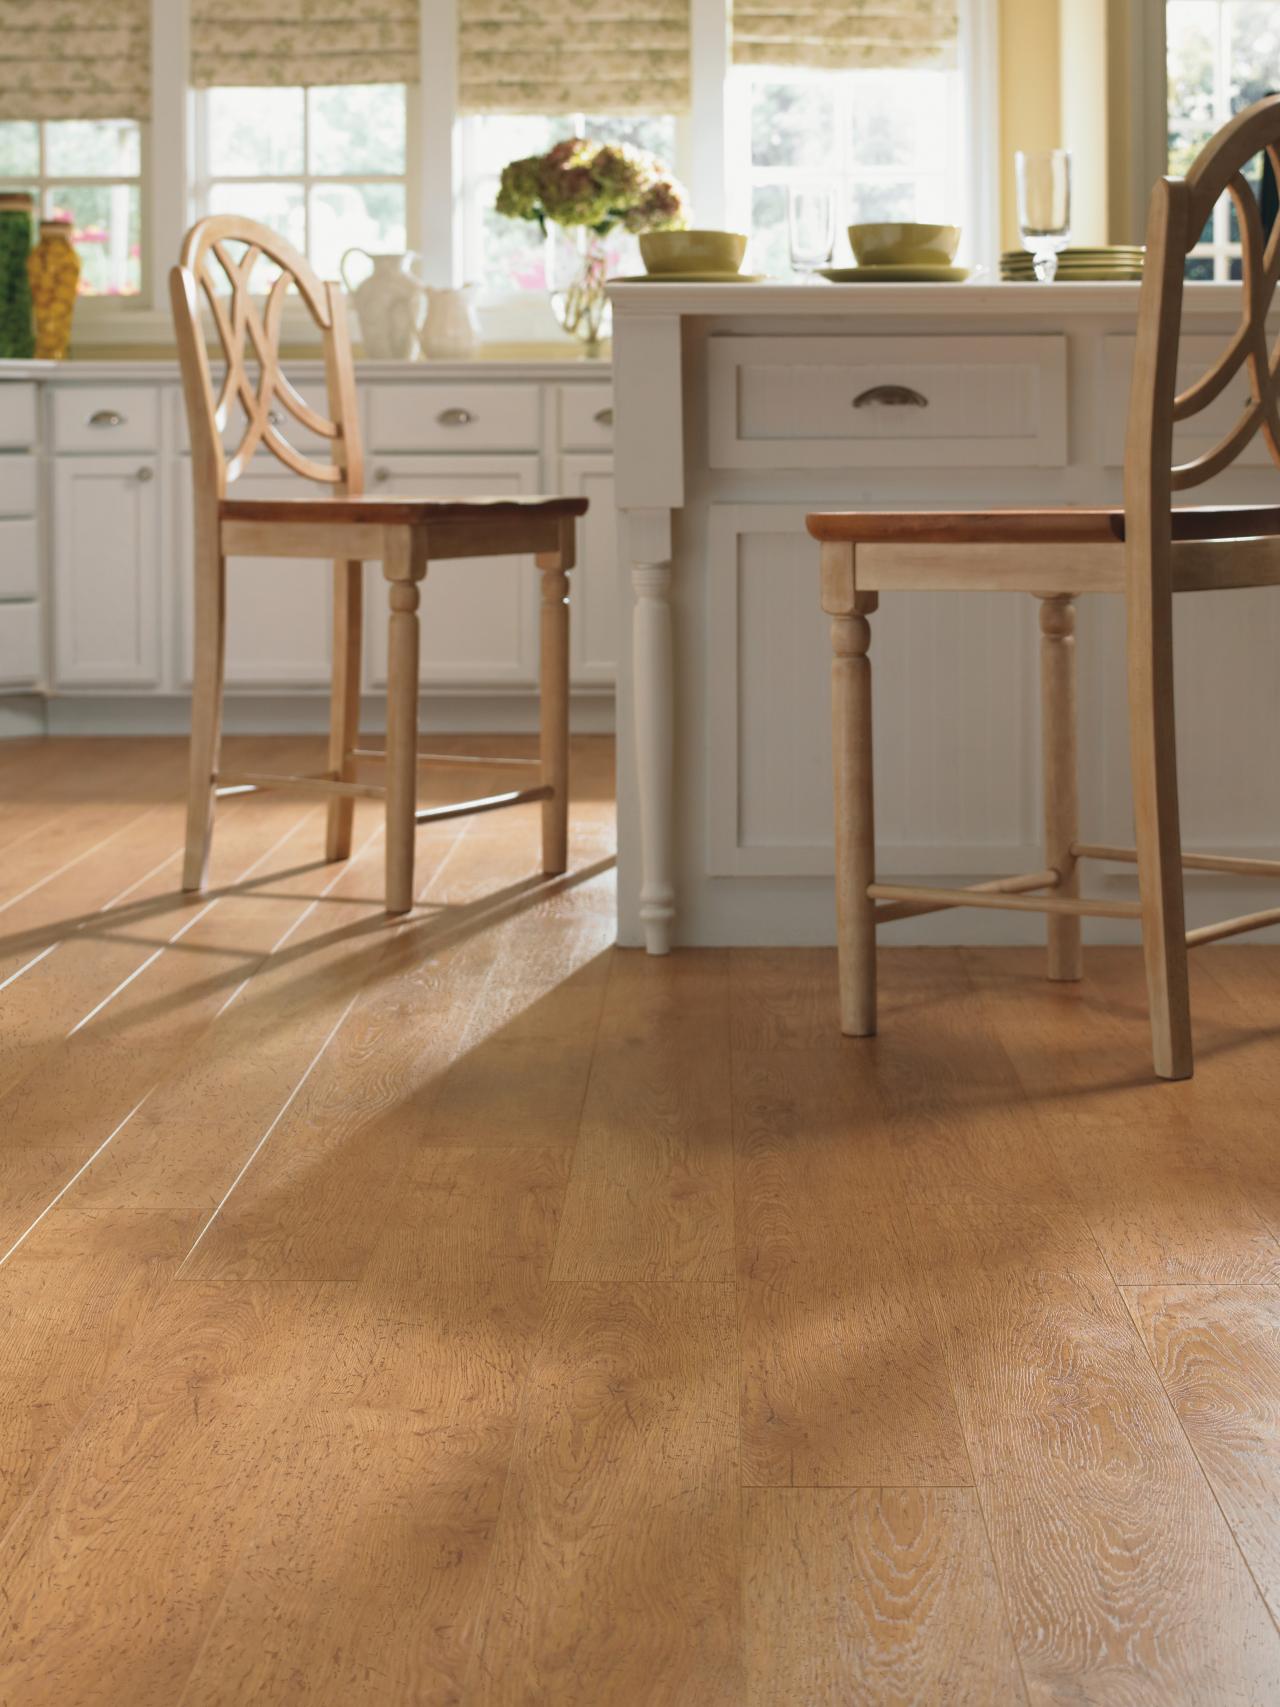
One of the main reasons I chose wood laminate flooring for my kitchen is its aesthetic versatility. Wood laminate can mimic the look of various wood species, from oak to maple to walnut, offering a wide range of finishes and styles. This allowed me to find a design that perfectly matched my kitchen decor. Whether you prefer a rustic, traditional look or a sleek, modern aesthetic, there’s a wood laminate option to suit your taste.
Durability and Resilience
Kitchens are high-traffic areas that are prone to spills, stains, and heavy foot traffic. Wood laminate flooring is designed to withstand these challenges. It’s made of several layers, including a wear layer that protects against scratches and a core layer that adds stability. This construction makes it highly durable and resilient, which is crucial for maintaining a beautiful kitchen floor over time.
Cost-Effectiveness
Another major advantage of wood laminate flooring is its cost-effectiveness. While it offers the look of real wood, it comes at a fraction of the price. This was particularly appealing to me because it allowed me to achieve the high-end look I wanted without breaking the bank. Additionally, the installation costs are generally lower compared to hardwood, which further contributes to its affordability.
Ease of Installation
Speaking of installation, wood laminate flooring is known for being relatively easy to install, even for DIY enthusiasts like myself. Many laminate flooring options come with a click-lock system that makes installation straightforward. You can lay the flooring over most existing surfaces without the need for nails or glue. This not only saves time but also reduces labor costs if you decide to hire a professional.
Low Maintenance
Maintaining wood laminate flooring is a breeze, which is a huge plus for a busy kitchen. Unlike hardwood, laminate doesn’t require regular sanding or refinishing. Regular sweeping and occasional damp mopping are usually sufficient to keep it looking pristine. This low-maintenance feature was a significant factor in my decision, as it allowed me to spend more time enjoying my kitchen rather than worrying about its upkeep.
Environmental Considerations
Lastly, wood laminate flooring can be an environmentally friendly choice. Many manufacturers use sustainable practices and materials, and some laminates are made with recycled content. Additionally, because laminate doesn’t require the harvesting of hardwood trees, it can be a more sustainable option compared to traditional wood flooring. This aspect was important to me as I wanted to make a responsible choice for my home and the environment.

Installation Process: Step by Step
Preparing the Subfloor
Before installing wood laminate flooring, it’s crucial to prepare the subfloor properly. In my case, I had to ensure the subfloor was clean, dry, and level. Any debris or uneven areas can affect the installation and the final look of the flooring. I took the time to vacuum thoroughly and use a leveling compound to address any dips or high spots. This preparation step is essential for a smooth and long-lasting installation.
Acclimating the Flooring
Acclimating the laminate flooring to the kitchen environment is another important step. I let the unopened boxes of flooring sit in the kitchen for at least 48 hours to adjust to the room’s temperature and humidity. This helps prevent any expansion or contraction after installation, ensuring the planks fit together perfectly. Skipping this step can lead to gaps or buckling down the line.
Laying the Underlayment
An underlayment is necessary to provide a moisture barrier and a cushioning effect. I chose an underlayment specifically designed for laminate flooring, which helps to reduce noise and provide additional comfort underfoot. Laying the underlayment is straightforward; it involves rolling it out over the entire subfloor and securing it with tape. This layer is essential for protecting the laminate and improving the overall feel of the floor.

Installing the Laminate Planks
With the subfloor prepared and the underlayment in place, I was ready to start laying the laminate planks. I began in a corner of the room, laying the first row of planks with the tongue side facing the wall. Using spacers to maintain a small gap between the planks and the wall is crucial for allowing the flooring to expand. The click-lock system made it easy to connect the planks by simply snapping them together.
Cutting and Fitting
As I worked my way across the room, I had to cut the planks to fit around cabinets, appliances, and doorways. A miter saw and a jigsaw were invaluable tools for making precise cuts. Ensuring a snug fit around these obstacles was essential for a polished look. I also staggered the seams to create a more natural appearance and to add strength to the floor.
Finishing Touches
After all the planks were laid, I removed the spacers and installed the baseboards and transition strips. These finishing touches not only cover the expansion gaps but also give the floor a professional, finished appearance. I was careful to leave a small gap between the baseboards and the flooring to allow for any future expansion. This step completed the installation process, leaving me with a beautiful, new kitchen floor.

Maintenance Tips for Longevity
Regular Cleaning
Keeping my wood laminate flooring clean is essential for maintaining its appearance and durability. I make it a habit to sweep or vacuum the floor regularly to remove dirt and debris that can cause scratches. Using a vacuum with a soft brush attachment or a broom with soft bristles is ideal for preventing any damage to the surface.
Dealing with Spills
Spills are inevitable in the kitchen, but addressing them promptly can prevent damage to the laminate. Whenever I spill something, I wipe it up immediately with a damp cloth and then dry the area thoroughly. This prevents moisture from seeping into the seams and causing the planks to swell or warp. For tougher spills, a gentle laminate floor cleaner can be used.
Avoiding Harsh Cleaners
Using the right cleaning products is crucial for maintaining the integrity of wood laminate flooring. I avoid harsh cleaners, abrasive scrubbing pads, and wax-based products, as they can damage the protective wear layer. Instead, I use a laminate floor cleaner recommended by the manufacturer or a mild solution of water and vinegar for regular cleaning.

Protecting from Furniture
Furniture can cause scratches and dents in laminate flooring if not properly protected. I made sure to place felt pads under the legs of all chairs, tables, and other furniture in the kitchen. These pads help to reduce friction and prevent damage when moving furniture. For heavier items, I use furniture coasters or sliders to distribute the weight and avoid any dents.
Managing Moisture
Although wood laminate flooring is more resistant to moisture than hardwood, it’s still important to manage moisture levels in the kitchen. I use mats and rugs in areas prone to spills, such as around the sink and dishwasher, to provide an extra layer of protection. Additionally, I ensure that my kitchen is well-ventilated to prevent excess humidity, which can affect the flooring over time.
Periodic Inspections
Regular inspections help me identify any issues early on and address them before they become major problems. I periodically check for signs of wear, such as scratches, dents, or gaps between the planks. If I notice any damage, I can often replace individual planks without having to redo the entire floor. This proactive approach helps to extend the life of my laminate flooring.

Style and Design Options
Choosing the Right Finish
One of the exciting aspects of wood laminate flooring is the variety of finishes available. From hand-scraped to glossy to matte, the options are extensive. When I was choosing my flooring, I considered the overall look I wanted to achieve. A hand-scraped finish offers a rustic, vintage feel, while a glossy finish provides a sleek, modern look. The finish you choose can significantly impact the kitchen’s ambiance.
Color Considerations
Color is another crucial factor in selecting wood laminate flooring. Light colors can make a kitchen feel larger and more open, while dark colors add warmth and coziness. I chose a medium-tone laminate that complements my kitchen cabinets and countertops. It’s important to consider how the floor color will interact with other elements in the kitchen, including the walls, appliances, and fixtures.
Texture and Pattern
The texture and pattern of the laminate can also enhance the kitchen’s overall design. Some laminates have a smooth, uniform texture, while others feature embossed or distressed patterns that mimic the natural variations of real wood. I opted for a textured laminate that adds depth and interest to the floor, making it feel more authentic and less uniform.
Matching Decor
When selecting wood laminate flooring, it’s essential to consider how it will coordinate with the rest of the kitchen decor. I looked at my cabinets, countertops, and backsplash to ensure that the flooring would complement these elements. By choosing a laminate that harmonizes with the existing decor, I was able to create a cohesive and visually pleasing kitchen design.
Trends and Timeless Choices
While it’s tempting to follow the latest trends, I aimed for a timeless look that would remain stylish for years to come. Classic wood tones and simple, elegant patterns tend to be more enduring than trendy colors or overly complex designs. By opting for a timeless choice, I ensured that my kitchen would look fresh and appealing regardless of changing trends.
Customization Options
Some wood laminate flooring options offer customization features, such as beveled edges, mixed plank widths, or unique finishes. These options can add a personal touch to the kitchen floor, making it truly unique. I considered these customization options to create a floor that reflects my style and preferences, adding character and individuality to my kitchen.
Comparing Laminate to Other Flooring Options
Laminate vs. Hardwood
One of the first comparisons I made was between laminate and hardwood flooring. While hardwood offers natural beauty and longevity, it requires more maintenance and is susceptible to water damage. Laminate, on the other hand, is more resistant to scratches and moisture, making it a practical choice for the kitchen. The cost difference was also a significant factor, as laminate is generally more affordable than hardwood.
Laminate vs. Vinyl
Vinyl flooring is another popular option for kitchens, known for its durability and water resistance. However, I found that laminate offers a more authentic wood look and a wider range of design options. While vinyl is slightly more resistant to moisture, the aesthetic appeal and variety of laminate were more important to me. Additionally, laminate is often easier to install and maintain.
Laminate vs. Tile
Tile flooring is a common choice for kitchens due to its durability and water resistance. However, I found that tile can be cold and hard underfoot, which was a concern for my comfort. Laminate flooring provides a warmer and softer feel, which is more comfortable for standing and walking. The installation process for laminate is also less labor-intensive compared to tile.

Laminate vs. Engineered Wood
Engineered wood flooring is a hybrid option that offers some of the benefits of both hardwood and laminate. It has a real wood veneer over a plywood or fiberboard core, making it more stable than solid hardwood. While engineered wood offers a genuine wood look, it’s more expensive than laminate. For my budget and needs, laminate provided the best combination of affordability and appearance.
Laminate vs. Linoleum
Linoleum is a natural, eco-friendly flooring option that is durable and easy to maintain. However, I found that its aesthetic options are more limited compared to laminate. While linoleum is a great choice for those prioritizing sustainability, laminate offered a wider range of designs and a more realistic wood look. The ease of installation and lower cost of laminate were also deciding factors for me.
Making the Final Decision
Ultimately, the decision to choose wood laminate flooring for my kitchen came down to balancing aesthetics, durability, and cost. While each flooring option has its advantages, laminate offered the best combination of features for my needs. Its realistic wood appearance, ease of installation, low maintenance, and affordability made it the ideal choice for my kitchen renovation.

Common Mistakes to Avoid
Overlooking Moisture Management
One of the most common mistakes when installing wood laminate flooring in the kitchen is overlooking moisture management. Kitchens are prone to spills and humidity, and failing to address this can lead to damage. I made sure to use a moisture barrier underlayment and placed mats around the sink and dishwasher to protect against spills. Proper moisture management is crucial for maintaining the integrity of the flooring.
Skipping Acclimation
Skipping the acclimation process is another mistake that can cause problems down the line. Allowing the laminate planks to acclimate to the room’s temperature and humidity prevents expansion and contraction after installation. I let my laminate sit in the kitchen for 48 hours before installation. This step is essential to ensure a proper fit and avoid gaps or buckling.
Improper Subfloor Preparation
Failing to properly prepare the subfloor can result in an uneven surface and poor installation. I took the time to clean, level, and dry the subfloor before laying the underlayment and laminate planks. Addressing any imperfections in the subfloor is critical for a smooth and long-lasting installation. Ignoring this step can lead to issues such as creaking or separation of the planks.
Using the Wrong Cleaning Products
Using the wrong cleaning products can damage the protective wear layer of laminate flooring. I avoid harsh chemicals, abrasive pads, and wax-based products, as they can cause scratches and dull the finish. Instead, I use a laminate-specific cleaner or a mild solution of water and vinegar. Proper cleaning practices help maintain the floor’s appearance and longevity.
Neglecting Expansion Gaps
Expansion gaps are necessary to allow the laminate flooring to expand and contract with temperature and humidity changes. Failing to leave these gaps can cause the planks to buckle or separate. I used spacers to maintain a small gap around the perimeter of the room during installation. Ensuring these gaps are left and later covered with baseboards or trim is essential for a successful installation.
Ignoring Manufacturer’s Instructions
Ignoring the manufacturer’s instructions can lead to various issues, from improper installation to voided warranties. I carefully read and followed the instructions provided with my laminate flooring. These guidelines are designed to ensure the best results and prevent common mistakes. Adhering to the manufacturer’s recommendations is crucial for a trouble-free installation and long-lasting floor.

Is wood laminate flooring suitable for kitchens?
Yes, wood laminate flooring is suitable for kitchens due to its durability, water resistance, and ease of maintenance. It’s designed to withstand high traffic and spills, making it a practical choice for this area. However, proper installation and maintenance are essential to ensure its longevity in a kitchen environment.
How do I clean and maintain wood laminate flooring in the kitchen?
Cleaning and maintaining wood laminate flooring in the kitchen involves regular sweeping or vacuuming to remove dirt and debris. Spills should be wiped up promptly to prevent moisture damage. It’s important to use a laminate-specific cleaner or a mild solution of water and vinegar for regular cleaning and to avoid harsh chemicals and abrasive pads that can damage the surface.
Can I install wood laminate flooring myself, or should I hire a professional?
Wood laminate flooring is designed for easy installation, making it a suitable DIY project for those with basic handyman skills. Many laminate flooring options feature a click-lock system that simplifies the process. However, if you’re not comfortable with DIY projects or have a complex kitchen layout, hiring a professional can ensure a flawless installation.
What are the benefits of wood laminate flooring compared to hardwood?
Wood laminate flooring offers several benefits compared to hardwood, including lower cost, easier installation, and better resistance to scratches and moisture. While hardwood provides a natural, timeless look, laminate can mimic the appearance of various wood species at a fraction of the price. Laminate is also low-maintenance, requiring less upkeep than hardwood.
How long does wood laminate flooring typically last in a kitchen?
The lifespan of wood laminate flooring in a kitchen can vary depending on the quality of the product and the level of care and maintenance. High-quality laminate flooring can last 15-25 years or more with proper care. Regular cleaning, prompt spill management, and avoiding excessive moisture exposure can help extend the life of laminate flooring in the kitchen.
Are there any specific brands or products you recommend for wood laminate flooring in kitchens?
While there are many reputable brands for wood laminate flooring, some of my recommendations include Pergo, Armstrong, and Mohawk. These brands are known for their high-quality products, durability, and wide range of design options. It’s important to choose a product that fits your specific needs and preferences and to read reviews and seek recommendations before making a final decision.

Related Posts: