Understanding the Causes of Damage to Epoxy Garage Floors
Epoxy garage floors are known for their durability and resilience, but like any surface, they can suffer from wear and tear over time. Understanding the causes of damage is the first step in effectively repairing and maintaining your epoxy floor. One of the most common causes of damage is heavy impact. Dropping heavy tools, equipment, or even a car jack can lead to chips, cracks, or gouges in the epoxy coating. These types of damage not only affect the appearance of your floor but can also lead to further deterioration if not addressed promptly.
Another significant cause of damage is exposure to harsh chemicals. Garage floors are often exposed to various chemicals, including oil, gasoline, antifreeze, and cleaning solvents. While epoxy is resistant to many chemicals, prolonged exposure can cause the surface to break down, leading to discoloration, peeling, or bubbling. Understanding the types of chemicals your floor is exposed to can help in selecting the right repair materials and methods.
Thermal stress is another factor that can contribute to the deterioration of epoxy floors. Garages experience fluctuations in temperature, especially if they are not climate-controlled. In colder climates, the expansion and contraction of the concrete beneath the epoxy can cause the coating to crack or delaminate. Recognizing the impact of thermal stress is crucial in addressing and preventing future damage.
Moisture is another common culprit behind epoxy floor damage. Water or moisture can seep into the concrete substrate before the epoxy is applied, leading to adhesion issues. Over time, this trapped moisture can cause the epoxy to lift or bubble. If you notice bubbles or blisters on your garage floor, it could be a sign that moisture is present beneath the surface, requiring attention before any repairs are made.
Improper installation can also lead to premature damage. If the epoxy was not applied correctly, with inadequate surface preparation or incorrect mixing ratios, the floor may not adhere properly to the concrete. This can result in peeling, flaking, or uneven surfaces. Understanding the importance of proper installation can help prevent these issues and ensure a long-lasting repair.
Last, natural wear and tear from daily use can cause gradual damage to an epoxy floor. Over time, foot traffic, vehicle tires, and the movement of heavy objects can wear down the surface, leading to a dull appearance or worn-out areas. Regular maintenance and prompt repair of minor issues can help extend the life of your epoxy floor and keep it looking its best.
Identifying Common Epoxy Garage Floor Problems
When dealing with epoxy garage floor repair, identifying the specific issues is crucial to determining the right course of action. One of the most common problems is cracking. Cracks can appear due to various reasons, including the settling of the concrete beneath the epoxy, thermal expansion, or impact damage. These cracks can start small but may expand over time if not repaired, compromising the integrity of the floor.
Peeling or flaking is another issue that many homeowners encounter with epoxy floors. This problem usually occurs when the epoxy fails to adhere properly to the concrete substrate. Poor surface preparation, such as not cleaning or etching the concrete thoroughly before applying the epoxy, can lead to this problem. Peeling can also occur if the epoxy is applied in unfavorable conditions, such as in high humidity or at low temperatures.
Bubbles or blisters on the surface of the epoxy are often a sign of moisture trapped beneath the coating. This can happen if the concrete was not fully dry before the epoxy was applied or if moisture is seeping up from the ground through the concrete. These bubbles not only mar the appearance of the floor but can also weaken the bond between the epoxy and the concrete, leading to further peeling or cracking.
Stains and discoloration are other common issues with epoxy garage floors. While epoxy is generally resistant to stains, certain chemicals or spills can cause discoloration if not cleaned up promptly. Oil, gasoline, and even some cleaning agents can leave stains that are difficult to remove, affecting the appearance of your floor.
Another issue to be aware of is the dulling or fading of the epoxy coating over time. This can be caused by regular wear and tear, UV exposure if your garage receives natural light, or the use of harsh cleaning products. A dull or faded floor not only looks unattractive but can also indicate that the protective properties of the epoxy are wearing down.
Last, delamination, where the epoxy separates from the concrete surface, is a serious problem that requires prompt attention. Delamination can occur due to moisture, improper installation, or structural movement in the concrete. When delamination happens, the affected areas need to be thoroughly repaired to prevent further damage and restore the integrity of the floor.

Essential Tools and Materials for Epoxy Floor Repair
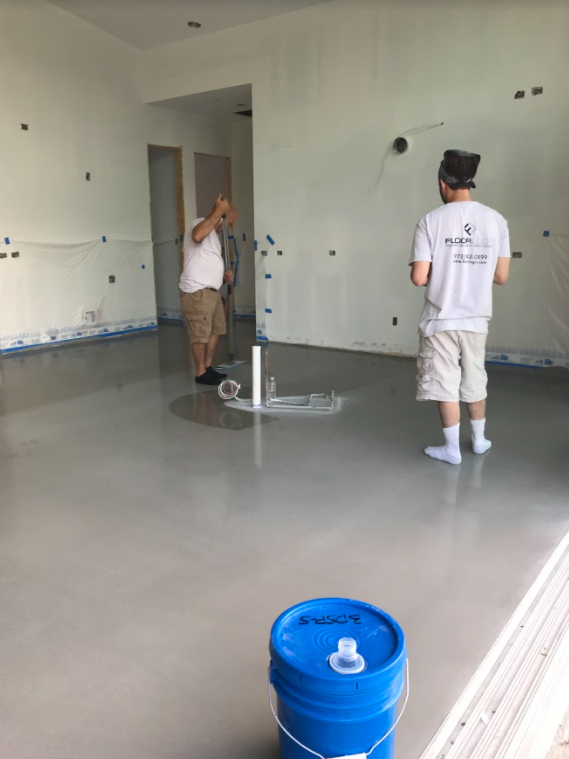
Having the right tools and materials is essential for successfully repairing an epoxy garage floor. The first tool you’ll need is a concrete grinder or floor buffer, which is used to prepare the damaged area by removing any loose or flaking epoxy. This step is crucial for ensuring that the repair materials adhere properly to the surface. If you don’t have access to a grinder, you can also use a wire brush or a paint scraper for smaller areas, but a grinder will provide the best results.
For cracks and gouges, a high-quality epoxy crack filler or patching compound is necessary. These products are designed to fill in the damaged areas and provide a smooth, even surface for the new epoxy coating. Make sure to choose a filler that is compatible with your existing epoxy floor and can withstand the same level of wear and tear.
Another essential material is the epoxy resin and hardener, which are the main components of the epoxy coating. When purchasing epoxy, it’s important to choose a product that is specifically designed for garage floors, as these formulations are more durable and resistant to chemicals, impacts, and temperature changes. Additionally, you may want to consider an epoxy with UV inhibitors if your garage receives a lot of natural light, as this will help prevent fading and discoloration.
Surface preparation materials, such as a degreaser, cleaner, and etching solution, are also important. Before applying any new epoxy, the surface must be thoroughly cleaned and etched to ensure proper adhesion. A degreaser will remove any oil, grease, or contaminants, while an etching solution will open up the pores of the concrete, allowing the epoxy to bond more effectively.
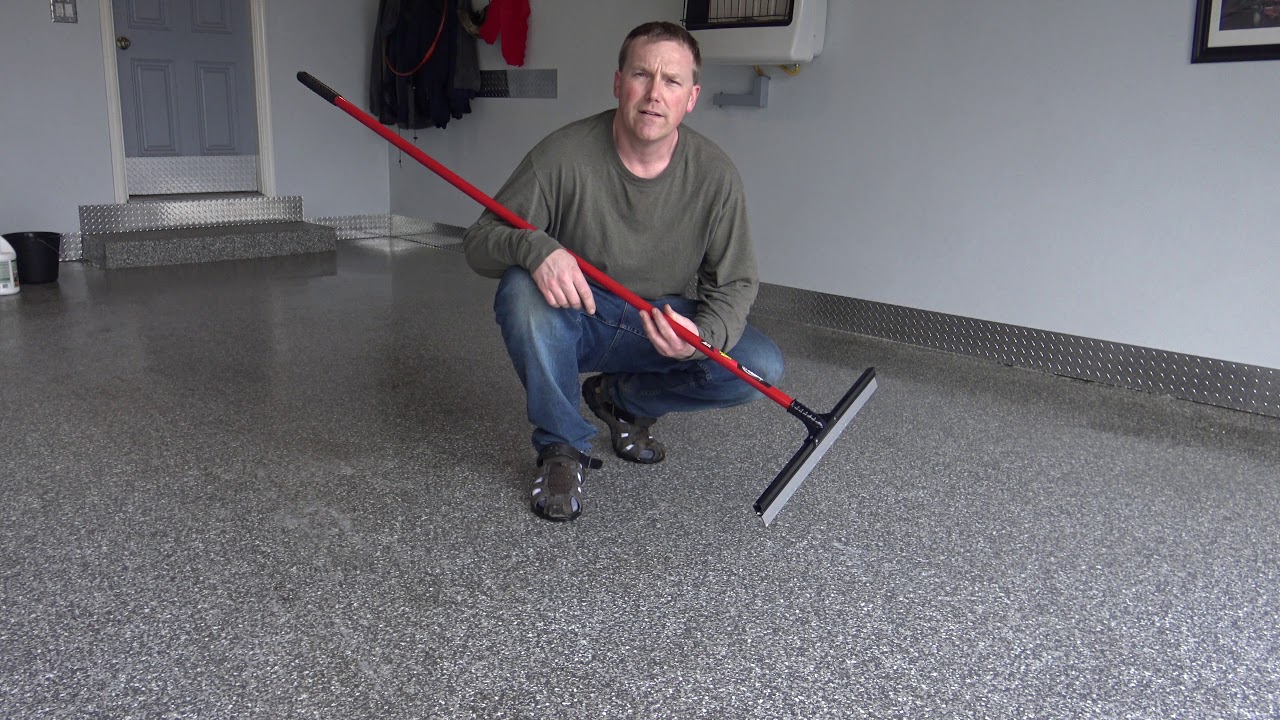
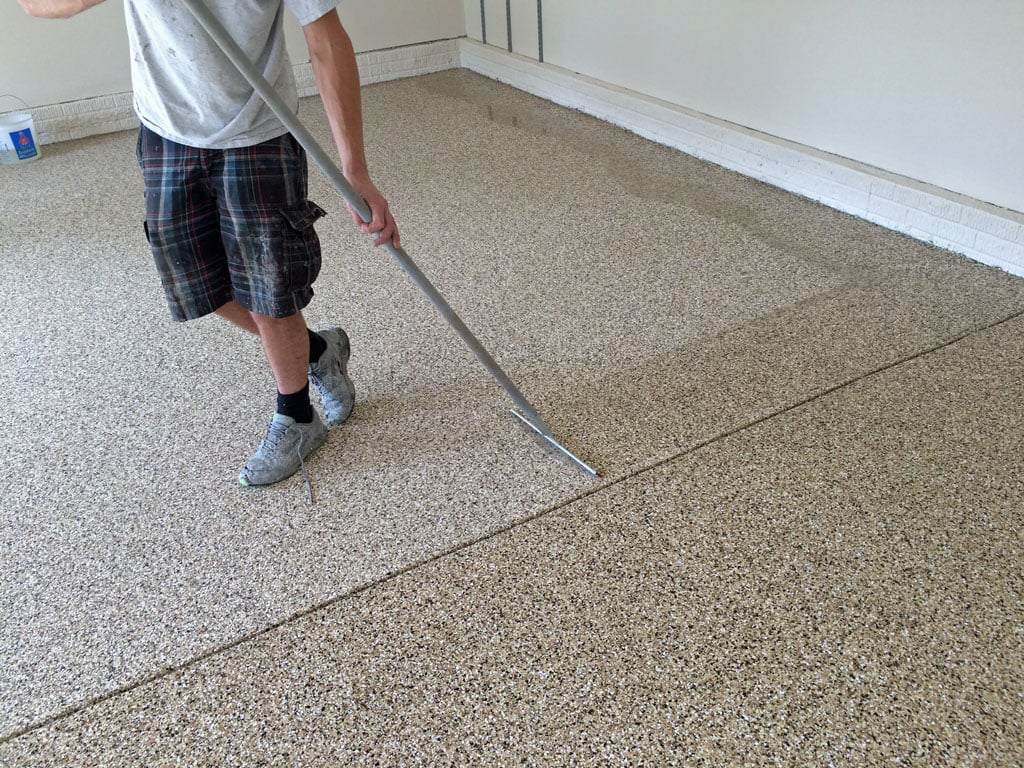
To apply the epoxy, you’ll need a variety of tools, including a paint roller with a long handle, a paintbrush for edges and corners, and a squeegee to spread the epoxy evenly across the floor. It’s also a good idea to have a mixing paddle for your drill, which will help you mix the epoxy resin and hardener thoroughly before application.
Last, safety gear is crucial when working with epoxy and other chemicals. This includes gloves, safety goggles, and a respirator to protect against fumes. Epoxy can be hazardous if it comes into contact with your skin or if you inhale the fumes, so taking the proper safety precautions is essential for a successful and safe repair project.

Step-by-Step Guide to Repairing Epoxy Garage Floors
Repairing an epoxy garage floor may seem daunting, but with the right approach, it can be a manageable project that yields excellent results. The first step is to thoroughly clean the damaged area. Use a degreaser to remove any oil, grease, or other contaminants, and then rinse the area with water. Allow the floor to dry completely before moving on to the next step, as moisture can interfere with the adhesion of the repair materials.
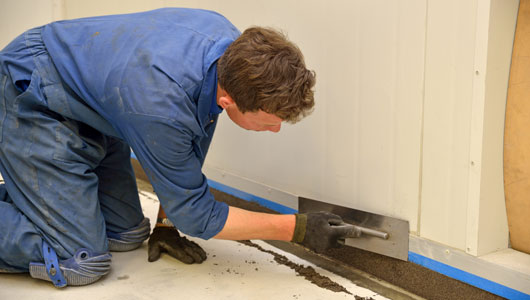
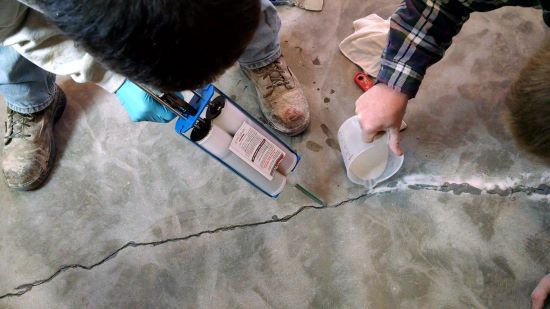
Next, assess the extent of the damage. For cracks and gouges, use a concrete grinder or wire brush to remove any loose debris and roughen up the surface. This will help the epoxy crack filler adhere better. Once the area is prepped, apply the epoxy crack filler using a putty knife or trowel, making sure to fill the entire crack or gouge. Smooth the surface and allow the filler to cure according to the manufacturer’s instructions.
For areas where the epoxy coating has peeled or flaked, use a grinder or floor buffer to remove any loose or damaged material. Be sure to feather the edges of the remaining epoxy so that the repair will blend seamlessly with the surrounding area. Once the damaged epoxy has been removed, clean the area again to remove any dust or debris.
Before applying new epoxy, it’s important to etch the concrete to ensure proper adhesion. Use an etching solution to open up the pores of the concrete, then rinse the area thoroughly and allow it to dry. Once the surface is prepped, mix the epoxy resin and hardener according to the manufacturer’s instructions. Be sure to mix thoroughly, as improper mixing can lead to curing issues.
Apply the epoxy using a roller, starting at the farthest corner of the garage and working your way toward the exit. Use a squeegee to spread the epoxy evenly and a paintbrush for edges and corners. If you’re repairing a small area, you may only need to apply one coat, but for larger areas or more severe damage, multiple coats may be necessary. Allow each coat to cure fully before applying the next.
Once the final coat of epoxy has been applied, allow the floor to cure completely before walking or driving on it. This can take anywhere from 24 to 72 hours, depending on the temperature and humidity levels. After the epoxy has fully cured, your garage floor will be ready for use, with the repaired areas seamlessly blending with the rest of the floor.

Preventing Future Damage to Your Epoxy Garage Floor
Maintaining the longevity of your epoxy garage floor requires proactive measures to prevent future damage. One of the most effective ways to protect your floor is by placing mats or rugs in high-traffic areas and under vehicles. These protective coverings can help minimize the impact of heavy objects, reduce wear and tear, and prevent staining from oil, grease, or other chemicals.
Another important step is to clean spills immediately. While epoxy is resistant to many chemicals, prolonged exposure can still cause damage. If you spill oil, gasoline, or any other substance on your floor, clean it up as soon as possible using a mild detergent and water. Avoid using harsh chemicals or abrasive cleaners, as these can break down the epoxy coating and lead to discoloration or peeling.
Regular maintenance is also key to preventing future damage. Sweep or vacuum your garage floor regularly to remove dirt, dust, and debris that can scratch the surface. If your floor begins to lose its shine or show signs of wear, consider applying a fresh topcoat of epoxy to restore its appearance and protective properties. This simple step can extend the life of your floor and keep it looking new.
To protect your floor from moisture, ensure that your garage is properly ventilated and that any leaks or water sources are addressed promptly. Moisture can seep into the concrete and cause the epoxy to lift or bubble, leading to further damage. Using a dehumidifier in your garage during humid months can also help reduce moisture levels and protect your floor.
Another preventive measure is to use floor protectors under heavy furniture or equipment. These protectors can prevent dents, scratches, and other damage caused by the movement of heavy objects. If you have a workbench or other stationary equipment in your garage, consider using rubber mats or padding under the legs to distribute the weight evenly and protect the epoxy coating.
Finally, consider applying a UV-resistant topcoat if your garage receives a lot of natural light. UV exposure can cause epoxy floors to fade or discolor over time, especially in areas where sunlight is most intense. A UV-resistant topcoat will help protect your floor from the damaging effects of the sun and keep it looking vibrant and fresh.

Hiring a Professional vs. DIY Epoxy Floor Repair
When it comes to repairing an epoxy garage floor, one of the biggest decisions you’ll face is whether to tackle the project yourself or hire a professional. Both options have their advantages and drawbacks, and the right choice depends on factors such as your skill level, the extent of the damage, and your budget.
For DIY enthusiasts, repairing an epoxy floor can be a rewarding project. It allows you to save money on labor costs and gives you complete control over the process. With the right tools and materials, most minor repairs, such as filling cracks or touching up peeling areas, can be done without professional help. However, DIY repairs require a good understanding of the process and the willingness to invest time in proper preparation and application.
On the other hand, hiring a professional ensures that the job is done correctly and efficiently. Professionals have the experience and expertise to handle more complex repairs, such as extensive cracking, delamination, or large-scale resurfacing. They also have access to specialized tools and high-quality materials that may not be readily available to the average homeowner. While the cost of hiring a professional can be higher, the peace of mind that comes with a guaranteed result is often worth the investment.
Another factor to consider is the time commitment involved in repairing an epoxy floor. DIY repairs can be time-consuming, especially if you’re unfamiliar with the process. Surface preparation, mixing, application, and curing all take time, and any mistakes made during these steps can lead to further issues down the road. Hiring a professional can save you time and ensure that the job is completed quickly and efficiently.
The complexity of the repair is another important consideration. While small cracks or chips can often be repaired with DIY methods, more extensive damage, such as large areas of peeling or delamination, may require professional intervention. A professional can assess the underlying causes of the damage and recommend the best course of action to ensure a long-lasting repair.
Last, consider the long-term maintenance of your epoxy floor. Professionals can provide advice on the best products and techniques for maintaining your floor after the repair, ensuring that it remains in good condition for years to come. They can also offer warranties or guarantees on their work, providing additional security and protection for your investment.
Common Mistakes to Avoid
Skipping Proper Surface Preparation: One of the most common mistakes is failing to prepare the surface properly before applying epoxy. This includes not cleaning or etching the concrete thoroughly, which can result in poor adhesion and peeling.
Using the Wrong Epoxy Product: Not all epoxy products are created equal. Using a product not designed for garage floors or one that doesn’t match the existing epoxy can lead to issues like discoloration or uneven curing.
Ignoring Moisture Issues: Applying epoxy over a concrete surface that hasn’t been properly dried or sealed can lead to moisture problems, such as bubbles or blisters forming under the coating.
Improper Mixing of Epoxy Components: Mixing the epoxy resin and hardener incorrectly, either by not following the manufacturer’s instructions or by not mixing thoroughly, can lead to incomplete curing and a weak, brittle surface.
Applying Epoxy in Unfavorable Conditions: Temperature and humidity play a crucial role in the curing process of epoxy. Applying epoxy in conditions that are too cold, too hot, or too humid can result in poor adhesion, extended curing times, or surface imperfections.
Rushing the Curing Process: Allowing sufficient time for the epoxy to cure is essential for a durable finish. Walking or driving on the floor too soon can damage the surface and lead to the need for additional repairs.
How Long Does an Epoxy Garage Floor Last After Repair?
A well-maintained epoxy garage floor can last 5 to 10 years or more after a repair, depending on the quality of the repair, the amount of traffic the floor receives, and how well the floor is maintained. Regular cleaning, proper protection from heavy impacts, and occasional reapplication of a topcoat can significantly extend the life of the floor.
Can All Types of Damage Be Repaired on an Epoxy Floor?
Most types of damage, including cracks, chips, peeling, and discoloration, can be repaired on an epoxy floor. However, the success of the repair depends on the extent of the damage and the underlying cause. In cases of severe damage, such as extensive delamination or structural issues with the concrete, complete resurfacing or replacement may be necessary.
Is It Possible to Repair Epoxy Flooring in Cold Weather?
Repairing epoxy flooring in cold weather is possible but requires special considerations. Epoxy cures best in temperatures between 60°F and 80°F. In colder conditions, the curing process may slow down, or the epoxy may not cure properly. Using a space heater or waiting for warmer conditions is recommended to ensure a successful repair.
Can I Apply New Epoxy Over an Existing Coating?
Yes, you can apply new epoxy over an existing coating, but the surface must be properly prepared to ensure good adhesion. This typically involves sanding or grinding the existing coating to remove any gloss and provide a rough surface for the new epoxy to bond to. Proper surface preparation is key to a successful re-coating.
How Do I Prevent Future Cracks in My Epoxy Garage Floor?
To prevent future cracks, it’s important to address any underlying issues with the concrete, such as settling or moisture problems. Using control joints can help manage the natural movement of concrete and prevent cracking. Additionally, avoiding heavy impacts and protecting the floor with mats or rugs can reduce the likelihood of cracks developing.
What Should I Do If My Epoxy Floor Starts to Yellow?
Yellowing of an epoxy floor can be caused by UV exposure or the use of low-quality epoxy products. If your floor starts to yellow, applying a UV-resistant topcoat can help prevent further discoloration. For existing yellowing, a professional may be able to sand down the affected area and reapply a fresh coat of epoxy to restore the floor’s original appearance.
Epoxy Flooring Installation Process – Garage Floor Coating Install

Garage Floor Self Leveling Epoxy Dandk Organizer

What makes the best Garage Floor Coating?
Related Posts: