Fish Scale Tile Floor

5 ways to use fish scale tiles in your home Fish scale tile, Moroccan fish scale tile

Mermaid Fish Scale Tile Fish scale tile, Fish scales, Mermaid tile

How to Tile Moroccan Fish Scale Tile, construction2style on remodelaholic Fish scale tile

Łuski ♡ Fish scale tile, Tiles, Design

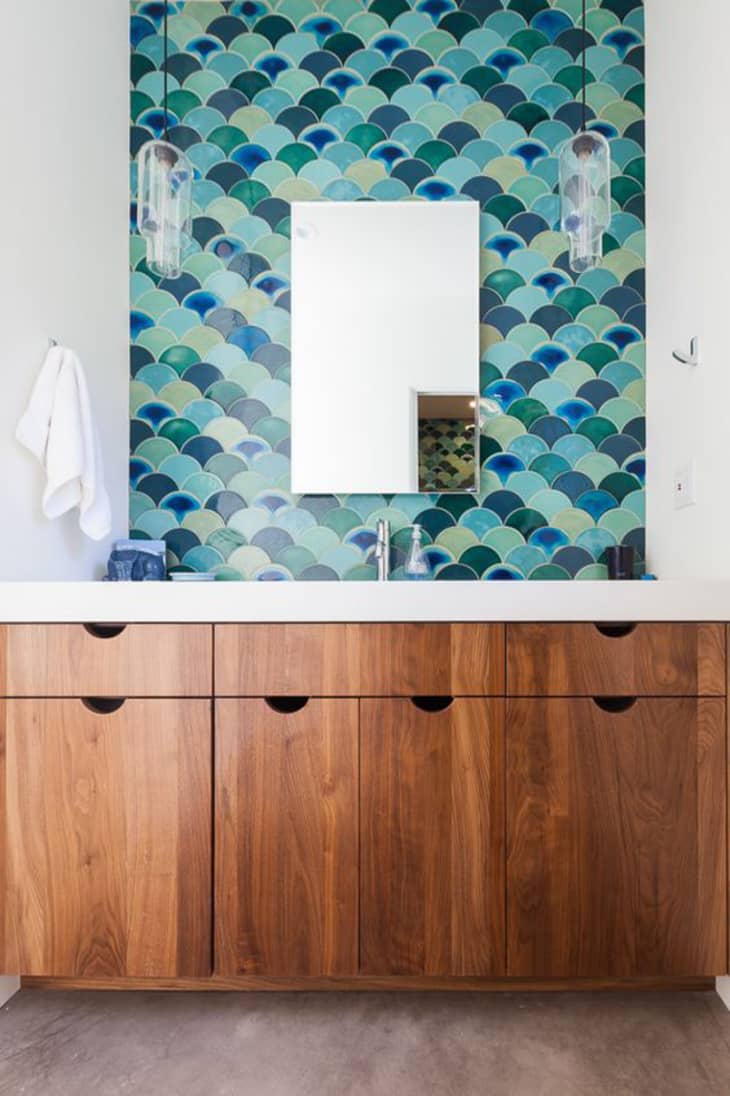
Fish scale tiles! Fish scale tile, New house bathroom, Fish scales

Ceramic Fish Scale Mosaic Tiles – Gray – Rocky Point Tile – Online Tile Store

Totally On Trend: Fabulous Fish Scale Tiles for the Bath & Kitchen Apartment Therapy
Blue glass fish scale tile Beach house bathroom, Bistro design, Blue backsplash kitchen

Stone Center Online Carrara White Marble Medium Fish Scale Fan Shape Mosaic Tile Honed for

Looking For Fish Scale Tiles? Where to Find Our Favorites Fish scale tile, Fish scale tile

Moroccan fish scale tiles 1 m2 10.76 Sq ft Scallop Moroccan Etsy Moroccan fish scale tile

Related Posts:
- Cuban Tile Floors
- Easy Way To Grout Tile Floor
- Types Of Marble Tile Flooring
- Slate Tile Floor
- Classic Bathroom Tile Floors
- Tile Floor Color Ideas
- Wet Mops For Tile Floors
- Staining Saltillo Tile Floors
- Terrazzo Tile Floor Outdoor
- Tile Flooring For Screened Porch
SEO Title: How to Install Fish Scale Tile Flooring for a Unique Look in Your Home
Fish scale tile flooring is the perfect way to add a unique look to any room in your home. Whether you’re looking to upgrade an existing floor or create a brand-new design, fish scale tiles offer a beautiful and eye-catching alternative to traditional flooring options. But before you start planning your new tiling project, it’s important to understand how to properly install fish scale tile flooring.
In this guide, we’ll cover the steps involved in installing fish scale tile flooring, as well as some creative ideas for how you can incorporate this unique tile material into your home. Read on for all the details!
What Is Fish Scale Tile Flooring?
Fish scale tile flooring is a type of ceramic tile that features a unique scallop-shaped design. The pattern is made up of individual tiles that are arranged in overlapping circles, creating an eye-catching pattern that will add life and personality to any space. Fish scale tiles come in a variety of materials, colors, and sizes, so you can easily find one to match your existing decor or create a brand-new look.
Benefits of Installing Fish Scale Tile Flooring
Fish scale tile flooring offers a number of benefits for homeowners who are looking to upgrade their floors. Here are just a few of the reasons why this type of tile is such a popular choice:
– Easy to Clean: Fish scale tiles are easy to clean and maintain, making them a great choice for busy households. The tiles are resistant to staining and do not require any special cleaning products or techniques.
– Durable: Fish scale tiles are more durable than many other types of flooring materials, so they can stand up to heavy foot traffic without showing signs of wear and tear.
– Unique Design: The unique scalloped shape of fish scale tiles adds visual interest and character to any room. You can choose from a variety of colors and patterns to create an eye-catching design that will be sure to impress.
How to Install Fish Scale Tile Flooring
Installing fish scale tile flooring is not as difficult as it may seem. With the right tools and supplies, you can complete the project in just a few hours. Here’s how it’s done:
Step 1: Prepare the Floor
Before you begin installing the tiles, you’ll need to prepare the floor surface by cleaning it thoroughly and removing any existing dirt or debris. For best results, use a vacuum cleaner with an attachment designed for hard floors. Once the floor is clean, apply a layer of adhesive using a notched trowel and let it dry according to the manufacturer’s instructions.
Step 2: Measure and Cut the Tiles
Once the adhesive has dried, it’s time to begin laying out the fish scale tiles. Start by measuring and cutting the tiles so they fit snugly against walls and around corners. When cutting the tiles, be sure to use the appropriate safety gear, such as goggles and gloves.
Step 3: Lay Out the Tiles
Once all of the tiles have been cut, it’s time to lay them out on the floor. Start with one corner of the room and work your way outward in sections, making sure each tile is properly lined up with its neighbors. Be sure to follow the manufacturer’s instructions regarding spacing between each tile; this will ensure that the finished product looks even and uniform.
Step 4: Apply Adhesive
Now that all of the tiles have been laid out on the floor, it’s time to apply adhesive. Using a notched trowel, spread adhesive onto each tile one at a time and press down firmly until it adheres completely. Make sure there are no gaps between each tile; if there are any air pockets, fill them in with additional adhesive using a putty knife or similar tool.
Step 5: Let Dry
Once all of the tiles have been adhered to the floor, let them dry for at least 24 hours before walking on them or applying any sealant or grout. After that time has elapsed, you can apply sealant or grout (if desired) according to manufacturer’s instructions. And that’s all there is to it