How to Epoxy Garage Floor: A Step-by-Step Guide
Epoxy flooring is an excellent way to upgrade your garage, offering durability, easy maintenance, and a polished look. Epoxy coatings can transform a dull, cracked concrete floor into a high-performance surface that withstands stains, chemicals, and heavy traffic. Whether you’re a DIY enthusiast or looking to improve your home’s value, applying an epoxy coating to your garage floor can be a rewarding project. Let me walk you through everything you need to know, from preparation and application to finishing and maintenance.
Understanding the Benefits of Epoxy Garage Flooring
Epoxy garage flooring comes with a multitude of benefits, making it a popular choice among homeowners. First and foremost, epoxy is known for its durability. It forms a hard, thick coating that bonds directly to the concrete, creating a surface that can handle heavy weights, like vehicles and equipment, without chipping or cracking. This makes it ideal for garages, which often serve as storage areas for more than just cars.
Another significant advantage of epoxy flooring is its resistance to stains and chemicals. Garages are prone to spills from oil, gasoline, and other chemicals, but an epoxy-coated floor can resist these substances, making cleanup much easier. Unlike bare concrete, which can absorb liquids and become stained, epoxy creates a non-porous surface that repels spills and prevents stains.
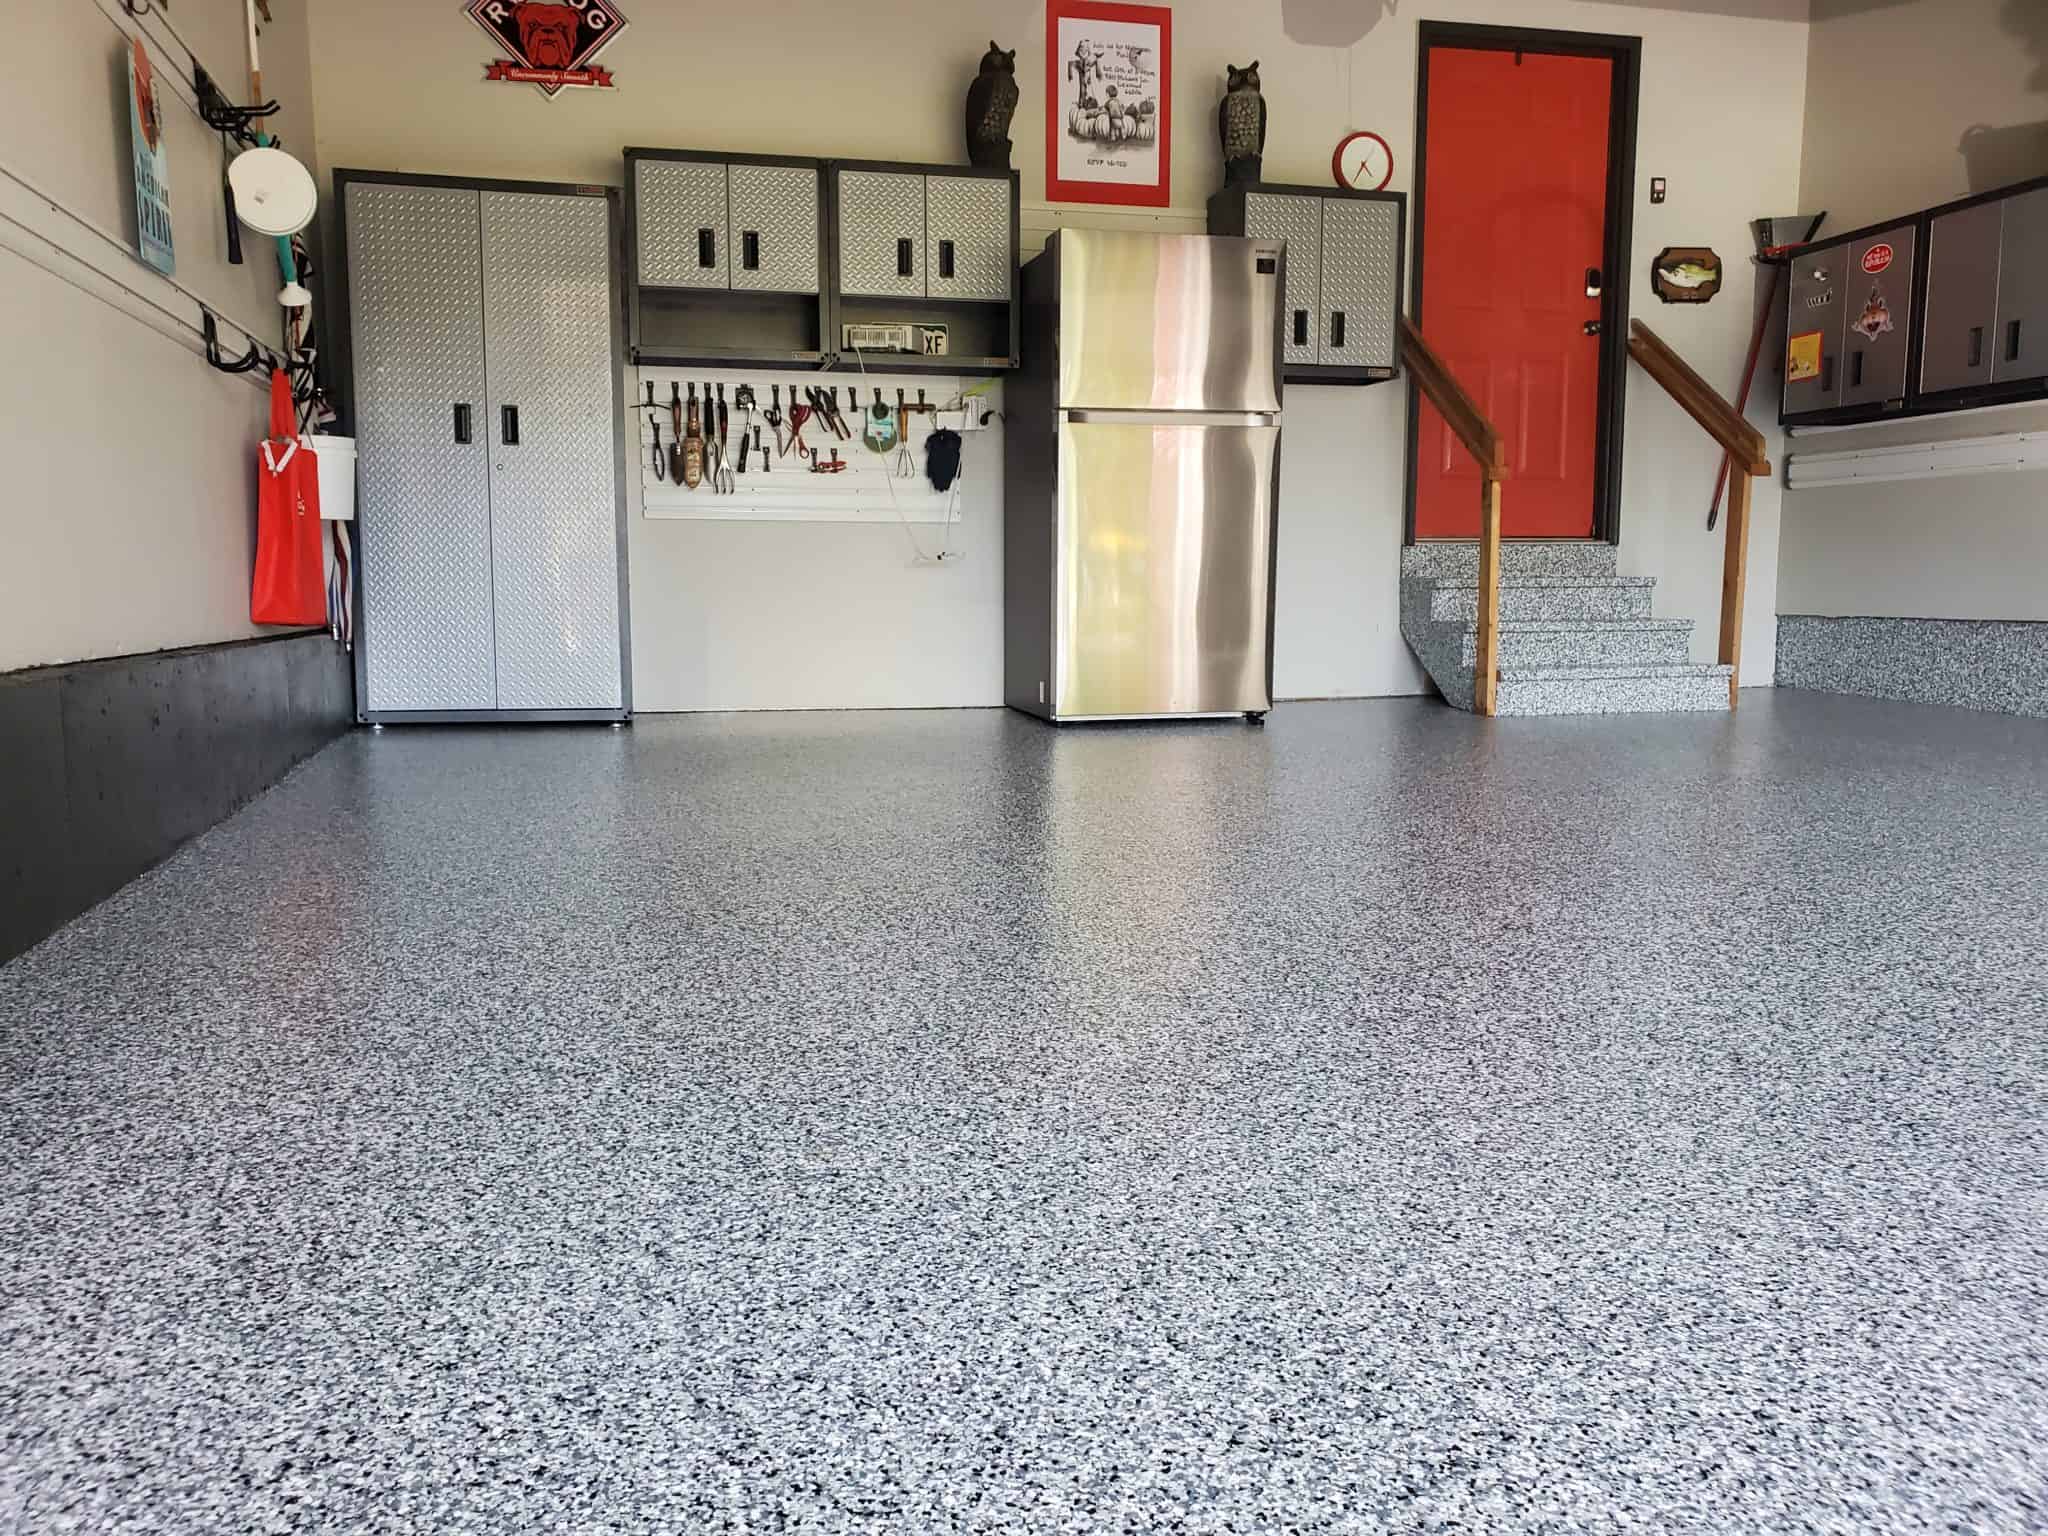
The aesthetic appeal of epoxy flooring is also a major draw. It comes in a variety of colors and finishes, including solid colors, metallics, and even decorative flakes that can mimic the appearance of granite or terrazzo. This allows you to customize the look of your garage to match your style or the rest of your home.
Safety is another important benefit of epoxy flooring. The glossy finish can be customized with anti-slip additives to provide traction, reducing the risk of slips and falls. Additionally, the reflective surface of epoxy flooring can improve the lighting in your garage by up to 300%, making it a safer and more functional workspace.
Epoxy flooring is also incredibly easy to maintain. Because it’s a smooth, sealed surface, dirt and debris can be easily swept away, and spills can be wiped up without leaving a trace. This low maintenance requirement is a big plus for busy homeowners who want a clean and functional garage without a lot of upkeep.
Finally, epoxy flooring can enhance the value of your home. A clean, well-maintained garage with a high-quality epoxy floor can be a selling point for potential buyers, adding both aesthetic appeal and functional value. By investing in epoxy flooring, you’re not just improving your garage—you’re making a lasting upgrade to your home.

Preparing Your Garage Floor for Epoxy Coating
Before you start applying epoxy to your garage floor, proper preparation is crucial to ensure a durable and long-lasting finish. The first step is to clean the floor thoroughly. Remove all items from the garage and sweep away any dirt and debris. Next, use a degreaser to eliminate any oil stains or grease spots, as these can prevent the epoxy from adhering properly. It’s essential to remove all traces of dirt, oil, and other contaminants to ensure the epoxy bonds well with the concrete.
After cleaning, the next step is to inspect the floor for any cracks or damage. Small cracks can often be filled with a concrete repair compound, while larger cracks may require a more extensive repair. This step is vital because any imperfections in the concrete will be visible through the epoxy coating. Use a concrete patching material to fill in cracks and holes, and allow it to cure according to the manufacturer’s instructions.
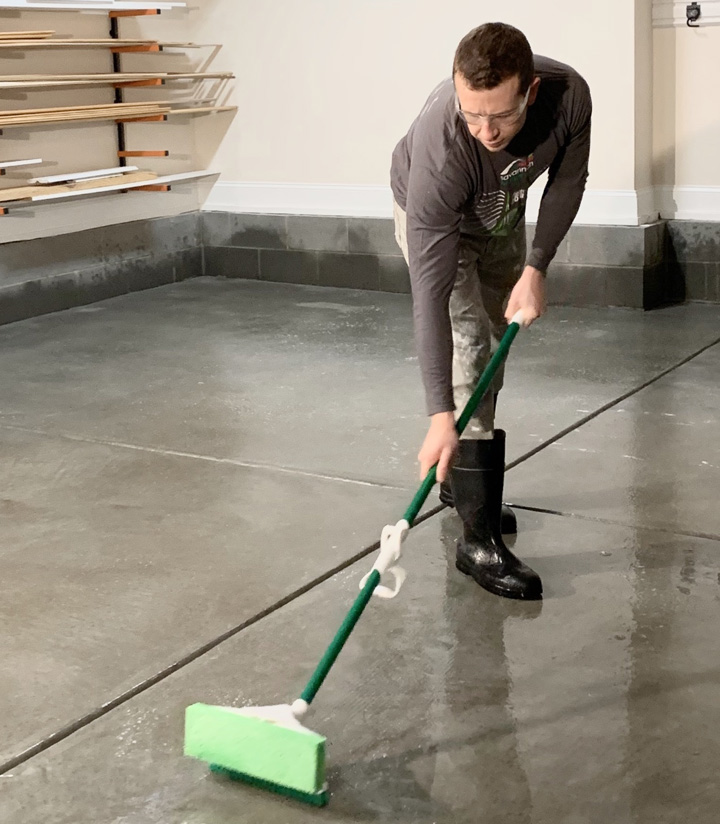
Once the floor is clean and repaired, it’s time to etch the concrete. Etching is a process that involves applying an acid solution to the floor to create a rough texture, allowing the epoxy to adhere more effectively. You can use a commercial concrete etcher or a muriatic acid solution. Be sure to follow all safety precautions when handling acids, including wearing protective gloves and eyewear. Apply the etching solution with a stiff-bristled brush and rinse thoroughly with water. Allow the floor to dry completely before moving on to the next step.

Moisture testing is a critical yet often overlooked step in preparing your garage floor for epoxy. Concrete is porous and can absorb moisture, which can cause the epoxy to peel if it tries to bond to a damp surface. To test for moisture, tape a piece of plastic sheeting to the floor and leave it for 24 hours. If condensation forms under the plastic, the floor is too damp for epoxy, and you’ll need to address the moisture issue before proceeding.
Once the floor is etched and moisture-free, the next step is to sand the surface. This might seem redundant after etching, but sanding helps to remove any remaining stains and smooth out the concrete surface, providing an optimal base for the epoxy. Use a floor buffer with a sanding attachment for the best results, and make sure to vacuum the floor thoroughly after sanding to remove all dust.
Finally, apply a primer to the floor. Primer helps to seal the concrete and provide a better bond for the epoxy. Make sure to use a primer that is compatible with the type of epoxy you plan to use. Apply the primer with a roller, working in small sections to ensure even coverage. Allow the primer to dry completely before moving on to the epoxy application.
Choosing the Right Epoxy for Your Garage Floor
Selecting the right epoxy is crucial for achieving a professional-looking finish that will last for years. There are several types of epoxy coatings available, each with its own set of advantages and disadvantages. The most common types are water-based epoxy, solvent-based epoxy, and 100% solid epoxy. Understanding the differences between these types will help you choose the best option for your needs.
Water-based epoxy is the most user-friendly option, especially for DIY projects. It’s easier to apply and clean up, making it a good choice for beginners. However, it’s not as durable as other types of epoxy and may require reapplication more frequently. If you’re looking for a cost-effective solution and don’t mind a bit of maintenance, water-based epoxy could be a good fit.
Solvent-based epoxy offers greater durability and a higher level of protection against chemicals and stains. It also provides a glossier finish, which many homeowners find appealing. However, solvent-based epoxy has a strong odor and requires adequate ventilation during application. It’s also more challenging to apply than water-based epoxy, making it better suited for those with some experience in flooring projects.
100% solid epoxy is the most durable and long-lasting option, often used in commercial and industrial settings. It provides a thick, hard finish that can withstand heavy traffic, impact, and chemical exposure. While it’s the most challenging type of epoxy to apply, requiring a more precise mixing and application process, the results are well worth the effort. If you’re looking for a professional-grade finish that will last for decades, 100% solid epoxy is the way to go.
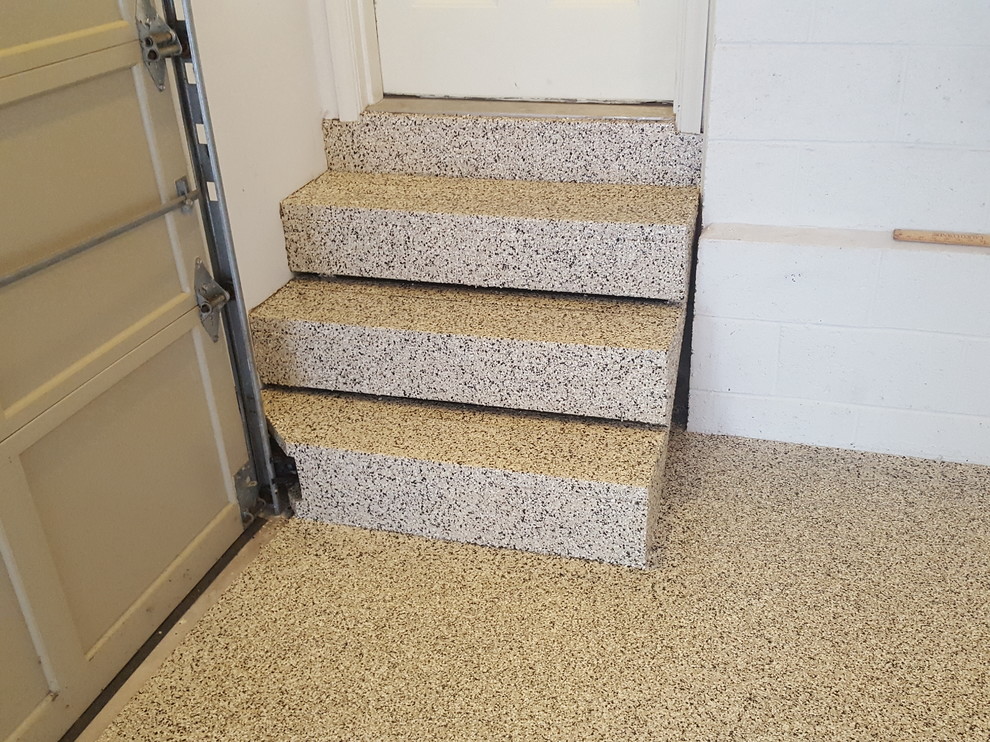
Color and finish are also important considerations when choosing your epoxy. Epoxy coatings come in a wide range of colors, from neutrals like gray and tan to bold hues like red and blue. You can also opt for a clear epoxy if you want to showcase the natural look of your concrete floor. Additionally, many epoxy kits come with decorative flakes or chips that can be broadcast onto the wet epoxy to add texture and visual interest.
Anti-slip additives are another important feature to consider, especially if your garage floor is prone to becoming slippery when wet. These additives can be mixed into the epoxy or sprinkled on top to provide additional traction. This is particularly important in areas that are frequently exposed to water or chemicals, as it can help prevent slips and falls.
Finally, consider the curing time and temperature requirements of the epoxy you choose. Some types of epoxy require specific temperature ranges for proper curing, which may not be ideal for all climates. Make sure to check the manufacturer’s recommendations and choose an epoxy that is suitable for your garage’s environment and your schedule.

Applying the Epoxy Coating
Applying epoxy to your garage floor can seem daunting, but with the right preparation and tools, it’s a manageable DIY project. Start by mixing the epoxy according to the manufacturer’s instructions. This typically involves combining the resin and hardener components, which must be mixed thoroughly to ensure a consistent finish. Use a drill with a mixing paddle attachment to mix the epoxy for at least two to three minutes.
Once your epoxy is mixed, begin applying it to the floor in small sections. It’s important to work quickly, as epoxy can start to harden within a short period after mixing. Pour the epoxy onto the floor and spread it evenly using a squeegee. A squeegee helps to distribute the epoxy evenly and remove any air bubbles that may form during application. Work in manageable sections, typically 4×4 feet, to ensure even coverage.
After spreading the epoxy with a squeegee, use a roller to back-roll the coating. This process helps to smooth out the epoxy and ensures a consistent thickness across the floor. Use a lint-free roller with an extension pole to reach all areas comfortably. Be sure to overlap each pass slightly to avoid roller marks and ensure a seamless finish.
If you’re using decorative flakes or chips, this is the time to apply them. While the epoxy is still wet, broadcast the flakes evenly across the surface. To achieve a uniform look, sprinkle the flakes by hand while standing on the previously coated sections to avoid disturbing the wet epoxy. The amount of flakes you use will depend on the desired look, from a light sprinkling to full coverage.
Allow the first coat of epoxy to dry according to the manufacturer’s recommendations, which is usually about 12 to 24 hours. Once the first coat is dry, assess the floor for any uneven spots or areas that need a second coat. If necessary, mix a new batch of epoxy and apply a second coat using the same method as the first. A second coat can help provide additional durability and a more uniform finish.
After the final coat is applied, allow the epoxy to cure for at least 72 hours before walking on it and a full week before driving on it. Proper curing is essential to achieve maximum durability and longevity, so resist the temptation to use your garage too soon. Keep the garage well-ventilated during the curing process to ensure proper airflow and drying.
/7184880388_7a10367e16_k-587ae00d5f9b584db399e346.jpg)
Finishing Touches and Maintenance Tips
Once the epoxy has fully cured, adding a clear topcoat can provide additional protection and enhance the shine of your new garage floor. A topcoat is particularly beneficial if you’ve used decorative flakes, as it seals them in and provides a smooth, glossy finish. Choose a topcoat that is compatible with your epoxy and apply it using the same techniques as the base coats. A clear topcoat also makes cleaning and maintenance easier, as it creates a non-porous, smooth surface.
Regular maintenance is key to preserving the appearance and durability of your epoxy garage floor. Sweep or vacuum the floor regularly to remove dirt and debris that can cause scratches. For deeper cleaning, use a mop with warm water and a mild detergent. Avoid using abrasive cleaners or harsh chemicals, as these can damage the epoxy finish. Spills should be cleaned up promptly to prevent staining and maintain the floor’s pristine appearance.
Inspect your epoxy floor periodically for signs of wear or damage. Minor scratches or scuffs can often be buffed out with a soft cloth and a bit of rubbing alcohol. For more significant damage, such as deep scratches or chips, you may need to apply a touch-up coat of epoxy. Keep a small amount of epoxy on hand for such repairs, and follow the same application process used for the initial coating.
Preventative measures can also help extend the life of your epoxy garage floor. Place mats or rugs at entry points to reduce the amount of dirt and debris tracked onto the floor. Use protective pads under heavy equipment and furniture to prevent scratches, and avoid dragging heavy items across the floor. By taking these simple precautions, you can keep your epoxy floor looking new for years to come.
Temperature and humidity can affect the performance of your epoxy floor, especially in extreme conditions. If you live in an area with high humidity or temperature fluctuations, consider using a dehumidifier or space heater in your garage to maintain a consistent environment. This can help prevent the epoxy from becoming brittle or cracking over time.
Finally, consider applying a fresh coat of clear topcoat every few years to refresh the finish and maintain the floor’s protective properties. A new topcoat can restore the shine and provide an additional layer of protection against wear and tear. This is especially important in high-traffic areas or garages used for heavy-duty activities.
Common Mistakes to Avoid
Skipping Proper Preparation
The most common mistake when applying epoxy to a garage floor is inadequate preparation. Failing to thoroughly clean and repair the floor can result in poor adhesion, causing the epoxy to peel or bubble. Ensure the floor is free of dirt, oil, and moisture, and repair any cracks before applying the epoxy.
Not Etching the Concrete
Etching the concrete is essential for creating a surface that the epoxy can bond to. Skipping this step can lead to a weak bond and premature failure of the epoxy coating. Always use an etching solution or grinder to prepare the concrete properly.
Mixing Epoxy Incorrectly
Epoxy must be mixed in precise proportions to ensure proper curing and adhesion. Improper mixing can lead to a sticky or uneven finish. Follow the manufacturer’s instructions carefully and mix the components thoroughly for the recommended amount of time.
Applying Epoxy in the Wrong Conditions
Temperature and humidity play a significant role in the epoxy application process. Applying epoxy in extreme temperatures or high humidity can prevent it from curing properly and result in a poor finish. Always check the weather conditions and follow the manufacturer’s guidelines for optimal application.
Rushing the Curing Process
One of the biggest mistakes is using the garage before the epoxy has fully cured. Walking or driving on the floor too soon can cause permanent damage to the coating. Be patient and allow the epoxy to cure fully for at least 72 hours before using the space.
Ignoring Safety Precautions
Epoxy contains chemicals that can be harmful if inhaled or if they come into contact with skin. Failing to use proper safety gear, like gloves, goggles, and masks, can lead to health issues. Always wear protective equipment and ensure adequate ventilation during application.

Can I apply epoxy over a painted garage floor?
Applying epoxy over a painted garage floor is not recommended. The epoxy needs to bond directly with the concrete to adhere properly. If the floor is already painted, the paint must be removed completely before applying the epoxy. Sanding or grinding the floor can help remove paint, but ensure the surface is smooth and clean before starting the epoxy application.
How long does epoxy garage flooring last?
Epoxy garage flooring can last anywhere from 5 to 20 years, depending on several factors such as the type of epoxy used, the level of traffic and usage, and how well the floor is maintained. High-quality epoxy and proper installation will result in a longer lifespan. Regular maintenance, including cleaning and applying a topcoat as needed, will help extend the life of your epoxy floor.
Is it necessary to use a primer before applying epoxy?
Using a primer is highly recommended when applying epoxy to a garage floor. A primer helps seal the concrete and provides a better surface for the epoxy to adhere to, ensuring a more durable and long-lasting finish. It also helps to prevent issues such as bubbling and peeling that can occur if the epoxy is applied directly to bare concrete.
Can I use epoxy flooring for an outdoor garage?
Epoxy flooring can be used in outdoor garages, but it’s important to choose an epoxy designed for exterior use. Outdoor conditions, such as UV exposure, temperature fluctuations, and moisture, can affect standard indoor epoxies. UV-resistant epoxy coatings are available for outdoor applications and offer better protection against the elements.
How do I remove epoxy if I want to replace it?
Removing epoxy from a garage floor can be challenging and typically requires heavy-duty equipment like a floor grinder or a chemical epoxy remover. The process involves grinding or sanding down the epoxy to the bare concrete. It’s a labor-intensive job that may require professional assistance, especially if the epoxy is thick or has been in place for several years.
What should I do if my epoxy floor has bubbles?
Bubbles in an epoxy floor are usually caused by improper application, such as applying the epoxy too thickly or in conditions that are too hot or humid. If bubbles appear, they can often be sanded down once the epoxy has cured and a new coat can be applied. In severe cases, you may need to strip the epoxy and start over. To avoid bubbles, ensure proper mixing, application, and environmental conditions during installation.

Related Posts: