Laying Down Vinyl Floor

7 Key Benefits of Luxury Vinyl Tile (No-Brainer) – Home Stratosphere

laying vinyl floor Laying vinyl floor, Vinyl flooring bathroom, Vinyl flooring kitchen

Vinyl vs. Laminate Flooring: Which Is Best?
:max_bytes(150000):strip_icc()/GettyImages-185270632-59494f413df78c537bf9a0c4.jpg)
Laying Vinyl Tile Vinyl Plank Flooring How to Lay Self-adhesive Vinyl Planks DIY Doctor
Installing Vinyl Floors – A Do It Yourself Guide Vinyl plank floor, Installing vinyl plank

How to Install Loose Lay Vinyl Plank Flooring Tile Wizards Total Flooring Solutions
How to Lay the Perfect Loose Lay Vinyl Plank Flooring Tile Wizards
How to Lay a Vinyl Tile Floor Vinyl tile flooring, Vinyl tile, Flooring

The 25+ best Laying vinyl flooring ideas on Pinterest Vinyl flooring installation, Sheet

Installing Your Peel-and-Stick Vinyl Tile Floor – YouTube

How to Install Vinyl Plank Flooring
:max_bytes(150000):strip_icc()/easy-install-plank-vinyl-flooring-1822808-07-9e82b716c3e94264b4a6084e174e9aeb.jpg)
Related Posts:
- Pine Vinyl Flooring
- Vinyl Floor Laying DIY
- Cortex Vinyl Flooring
- Grey Slate Effect Vinyl Floor Tiles
- Dark Oak Vinyl Flooring
- Limestone Effect Vinyl Flooring
- Vinyl Floor With Border
- Adhesive For Vinyl Flooring To Concrete
- Teak Wood Vinyl Flooring
- Cheap Vinyl Flooring
Vinyl flooring is an ideal choice for homeowners looking for a durable, affordable, and stylish flooring option. Its water-resistant qualities make it perfect for high-traffic areas like kitchens and bathrooms, as well as being attractive enough to use in any room in the house. Installing vinyl flooring is a relatively easy do-it-yourself project, but if done incorrectly, can result in costly damage or uneven floors. To achieve professional results with vinyl flooring installation, it is important to follow some simple steps.
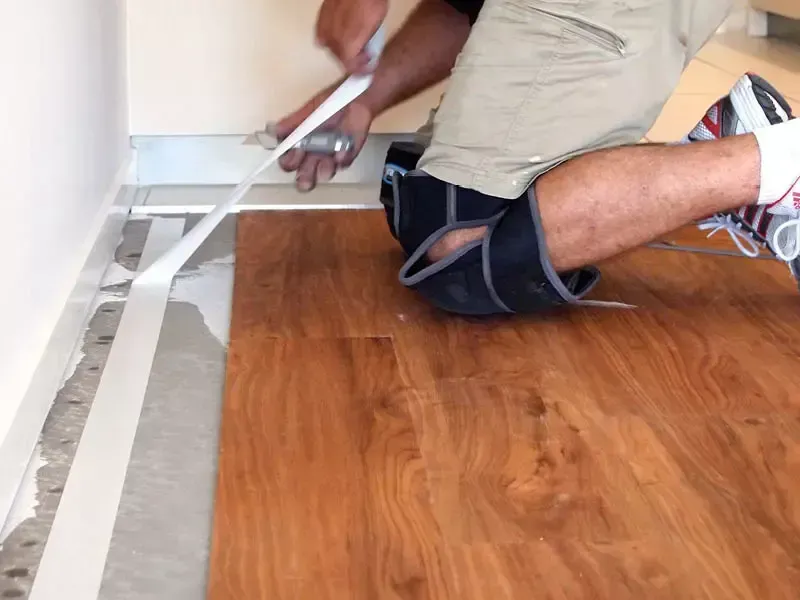
## Preparing the Subfloor
When installing vinyl flooring, the subfloor must be dry, level, and smooth before beginning. Any cracks or irregularities should be filled with a cementitious self-leveler. It’s important to wait 24 hours for the self-leveler to dry completely before laying down the new flooring. Depending on the condition of the subfloor, it may also be necessary to install a layer of underlayment to ensure a smooth surface and reduce sound transmission between rooms.
## Acclimatizing the Vinyl Planks and Tiles
Before installing vinyl planks or tiles, it is important to allow them to acclimate to the space. This means allowing them to adjust to the temperature and humidity levels of the space in which they will be installed. Unopened boxes of vinyl planks should remain in the room in which they will be installed for at least 48 hours before being laid down. This will allow them to reach the same temperature and humidity level as the space they will inhabit so that any additional expansion or contraction after installation should be minimal.
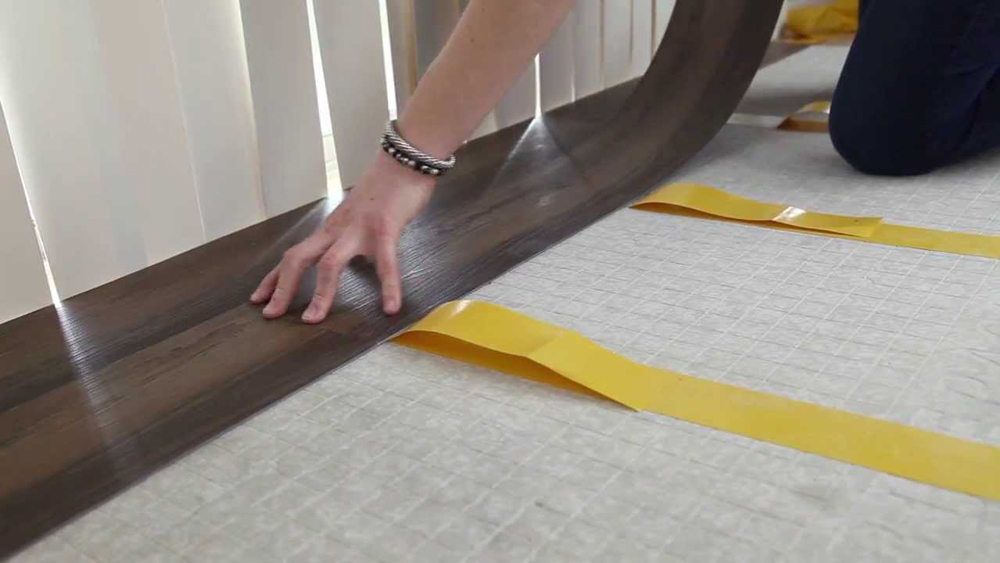
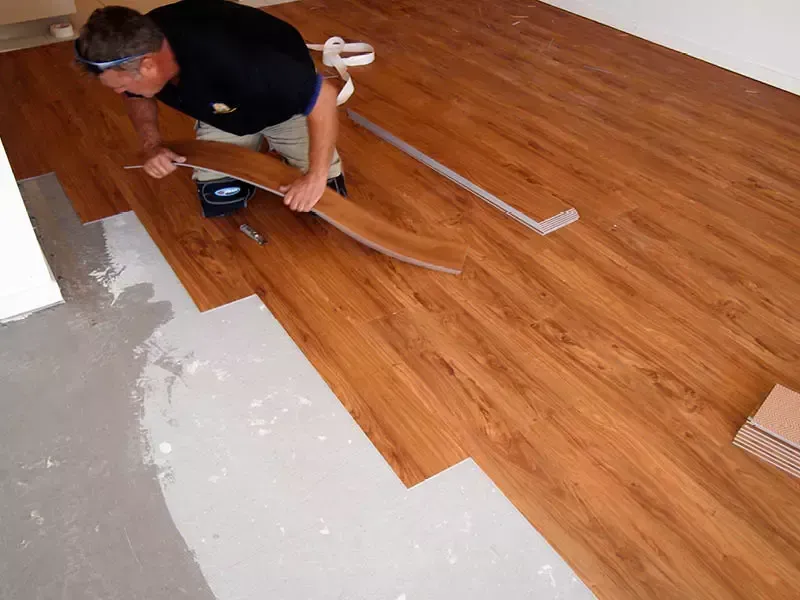
## Laying Down Vinyl Planks
Once the subfloor is prepared and the vinyl planks are acclimated, it’s time to begin laying them down. Start by laying a few pieces from corner-to-corner of the room, being sure to take up any slack in the planks that may cause buckling later on. If necessary, trim pieces with a utility knife so that they fit flush against each other. When laying down vinyl planks, use either a tapping block or rubber mallet to secure them in place. Do not use a hammer directly on top of the planks themselves as this can damage them or create uneven surfaces.
## Laying Down Vinyl Tiles
Installing sheet vinyl can be done in much the same way as laying down vinyl planks, however there are a few exceptions when dealing with tile-shaped pieces instead of rectangular planks. When laying down tiles you’ll want to protect them from marking up one another while they are still loose with spacers or cardboard strips between them. Once spread out on top of the subfloor, lightly tap each tile with a rubber mallet until all surfaces are even. When you come to an edge piece, you can cut it with scissors for precise fitting around objects such as toilet bases or kitchen islands.
## Finishing Up
Once all of your vinyl tiles or planks are laid down securely, it’s time to give it that finished look by adding trim pieces such as stair nosing or quarter rounds along edges where necessary. This will help create a polished look as well as protect against water damage along walls or in doorways where water may come into contact with your new flooring. Finally, inspect your work for any areas that may need additional trimming or edging and enjoy your brand new floor!
How long does it take to install vinyl flooring?
The installation of vinyl flooring depends on the size of the room and the type of vinyl being installed. For a standard room, installation typically takes 1-2 days.How much does it cost to install vinyl flooring?
The installation cost of vinyl flooring varies depending on a number of factors, such as the size of the area that needs to be covered, the type of vinyl you select, and who is doing the installation. Generally speaking, you can expect to pay between $2-$6 per square foot for basic vinyl installation.What is the average price for professional installation of vinyl flooring?
The average cost of professional installation of vinyl flooring is between $4-$7 per square foot. This cost may vary depending on the type of vinyl you choose, the complexity of the installation, and the labor involved.What tools are needed for professional installation of vinyl flooring?
1. Vinyl flooring2. Utility knife or carpet knife
3. Metal straight edge or straight board
4. Tape measure and chalk line
5. Tapping block or rubber mallet
6. Seam roller
7. Vinyl adhesive and vinyl patching compound
8. Adhesive spreader
9. Notched trowel
10. Seam sealer (optional)