Saltillo Tiles: Characteristics and Benefits
When I first discovered Saltillo tiles, I was struck by their warm, earthy tones and rustic charm. These tiles, traditionally handmade in Mexico, have a distinctive look that can add character and elegance to any space. Today I will take you through the unique characteristics and benefits of Saltillo tiles, which make them such a popular flooring choice.
- Handmade Craftsmanship: One of the things I love most about Saltillo tiles is that each tile is handcrafted. This means no two tiles are exactly alike, giving them a one-of-a-kind, artisanal feel. Made from natural clay, these tiles are shaped by hand, sun-dried, and then fired in a kiln, resulting in subtle variations in color, texture, and size. The handmade process gives the tiles a rustic, imperfect charm that I find captivating.
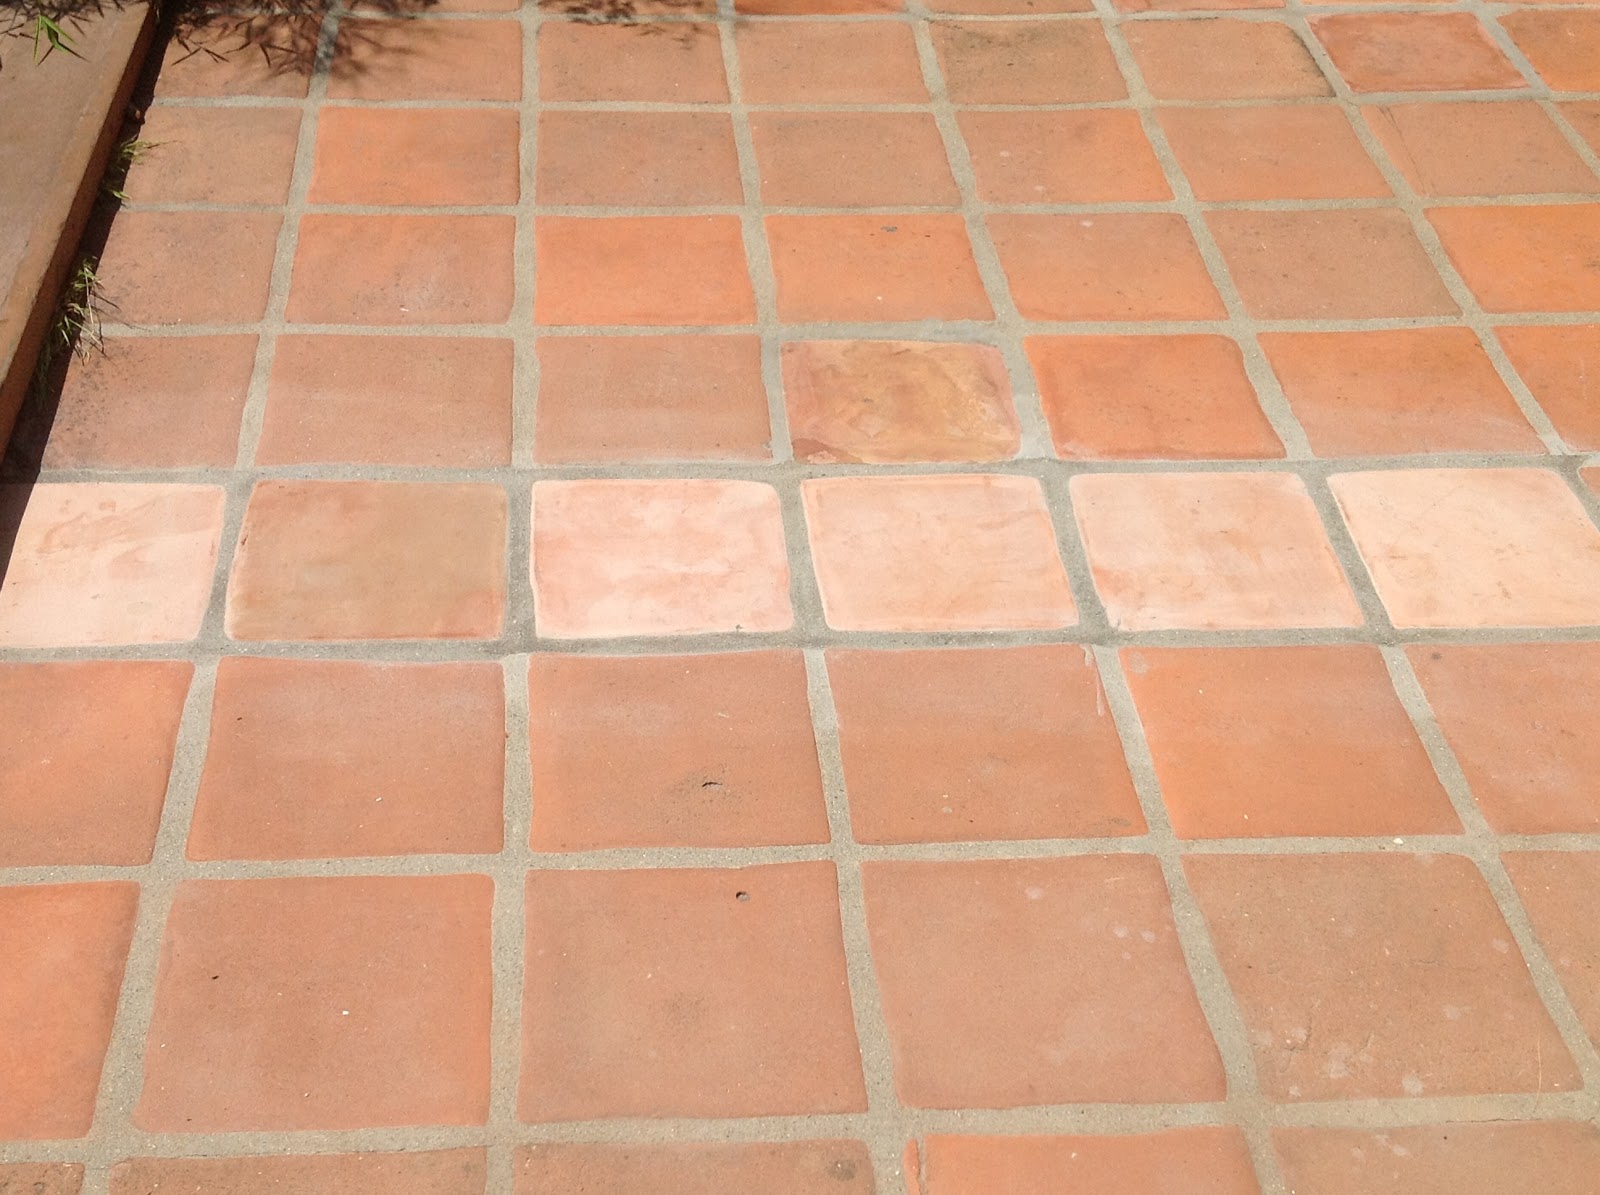
- Earthy, Warm Tones: Saltillo tiles are known for their warm, earthy hues that range from terracotta red to golden yellow. These colors bring a natural, organic feel to any room, which is one reason I always recommend Saltillo for homeowners who want to create a welcoming and cozy atmosphere. The natural variations in the tiles’ color can create a stunning, dynamic floor that looks alive with texture and warmth.
- Durable and Long-Lasting: Despite their handmade nature, Saltillo tiles are incredibly durable. Once sealed and maintained properly, they can withstand heavy foot traffic and daily wear and tear. I’ve found that Saltillo tiles, when treated correctly, can last for decades, making them an excellent long-term investment for your home. Their durability makes them especially great for outdoor patios and high-traffic areas.
- Cooling Properties: Living in a hot climate, I’ve come to appreciate how Saltillo tiles can naturally cool down a room. The clay used in these tiles has natural cooling properties, making them an excellent choice for homes in warmer regions. Walking barefoot on a Saltillo floor during a hot summer day is a delight, as the tiles feel cool underfoot, providing a refreshing escape from the heat.
- Versatility in Design: Saltillo tiles aren’t limited to traditional rustic or Southwestern decor. Over the years, I’ve seen them used in a variety of design styles, from Mediterranean to modern. Their versatility lies in their natural, earthy aesthetic, which can complement a range of interior designs. Whether you want to create a cozy, country-style kitchen or a sleek, modern living room, Saltillo tiles can adapt to fit your vision.
- Eco-Friendly Flooring Option: For those of us who are conscious about sustainability, Saltillo tiles are a fantastic choice. Made from natural clay and fired using traditional methods, they have a low environmental impact compared to other flooring materials. I love that they are produced with minimal waste and often use solar energy during the drying process. This makes Saltillo tiles an eco-friendly option for those looking to reduce their carbon footprint while still having beautiful, durable floors.

Why Stain Saltillo Tiles? Pros and Aesthetic Advantages
When it comes to enhancing the natural beauty of Saltillo tiles, staining is a game-changer. I’ve always loved the look of traditional Saltillo, but staining allows you to customize and elevate the appearance of your floors even further. Let’s see why staining Saltillo tiles is such a great idea and share some of the aesthetic benefits it offers.
Customizing the Color
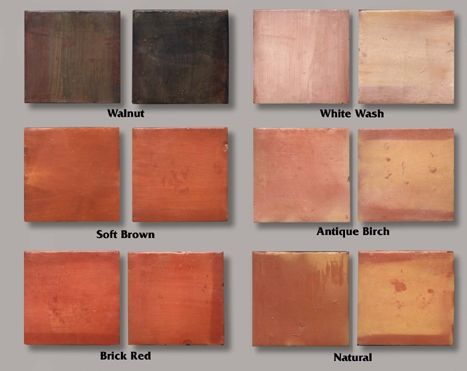
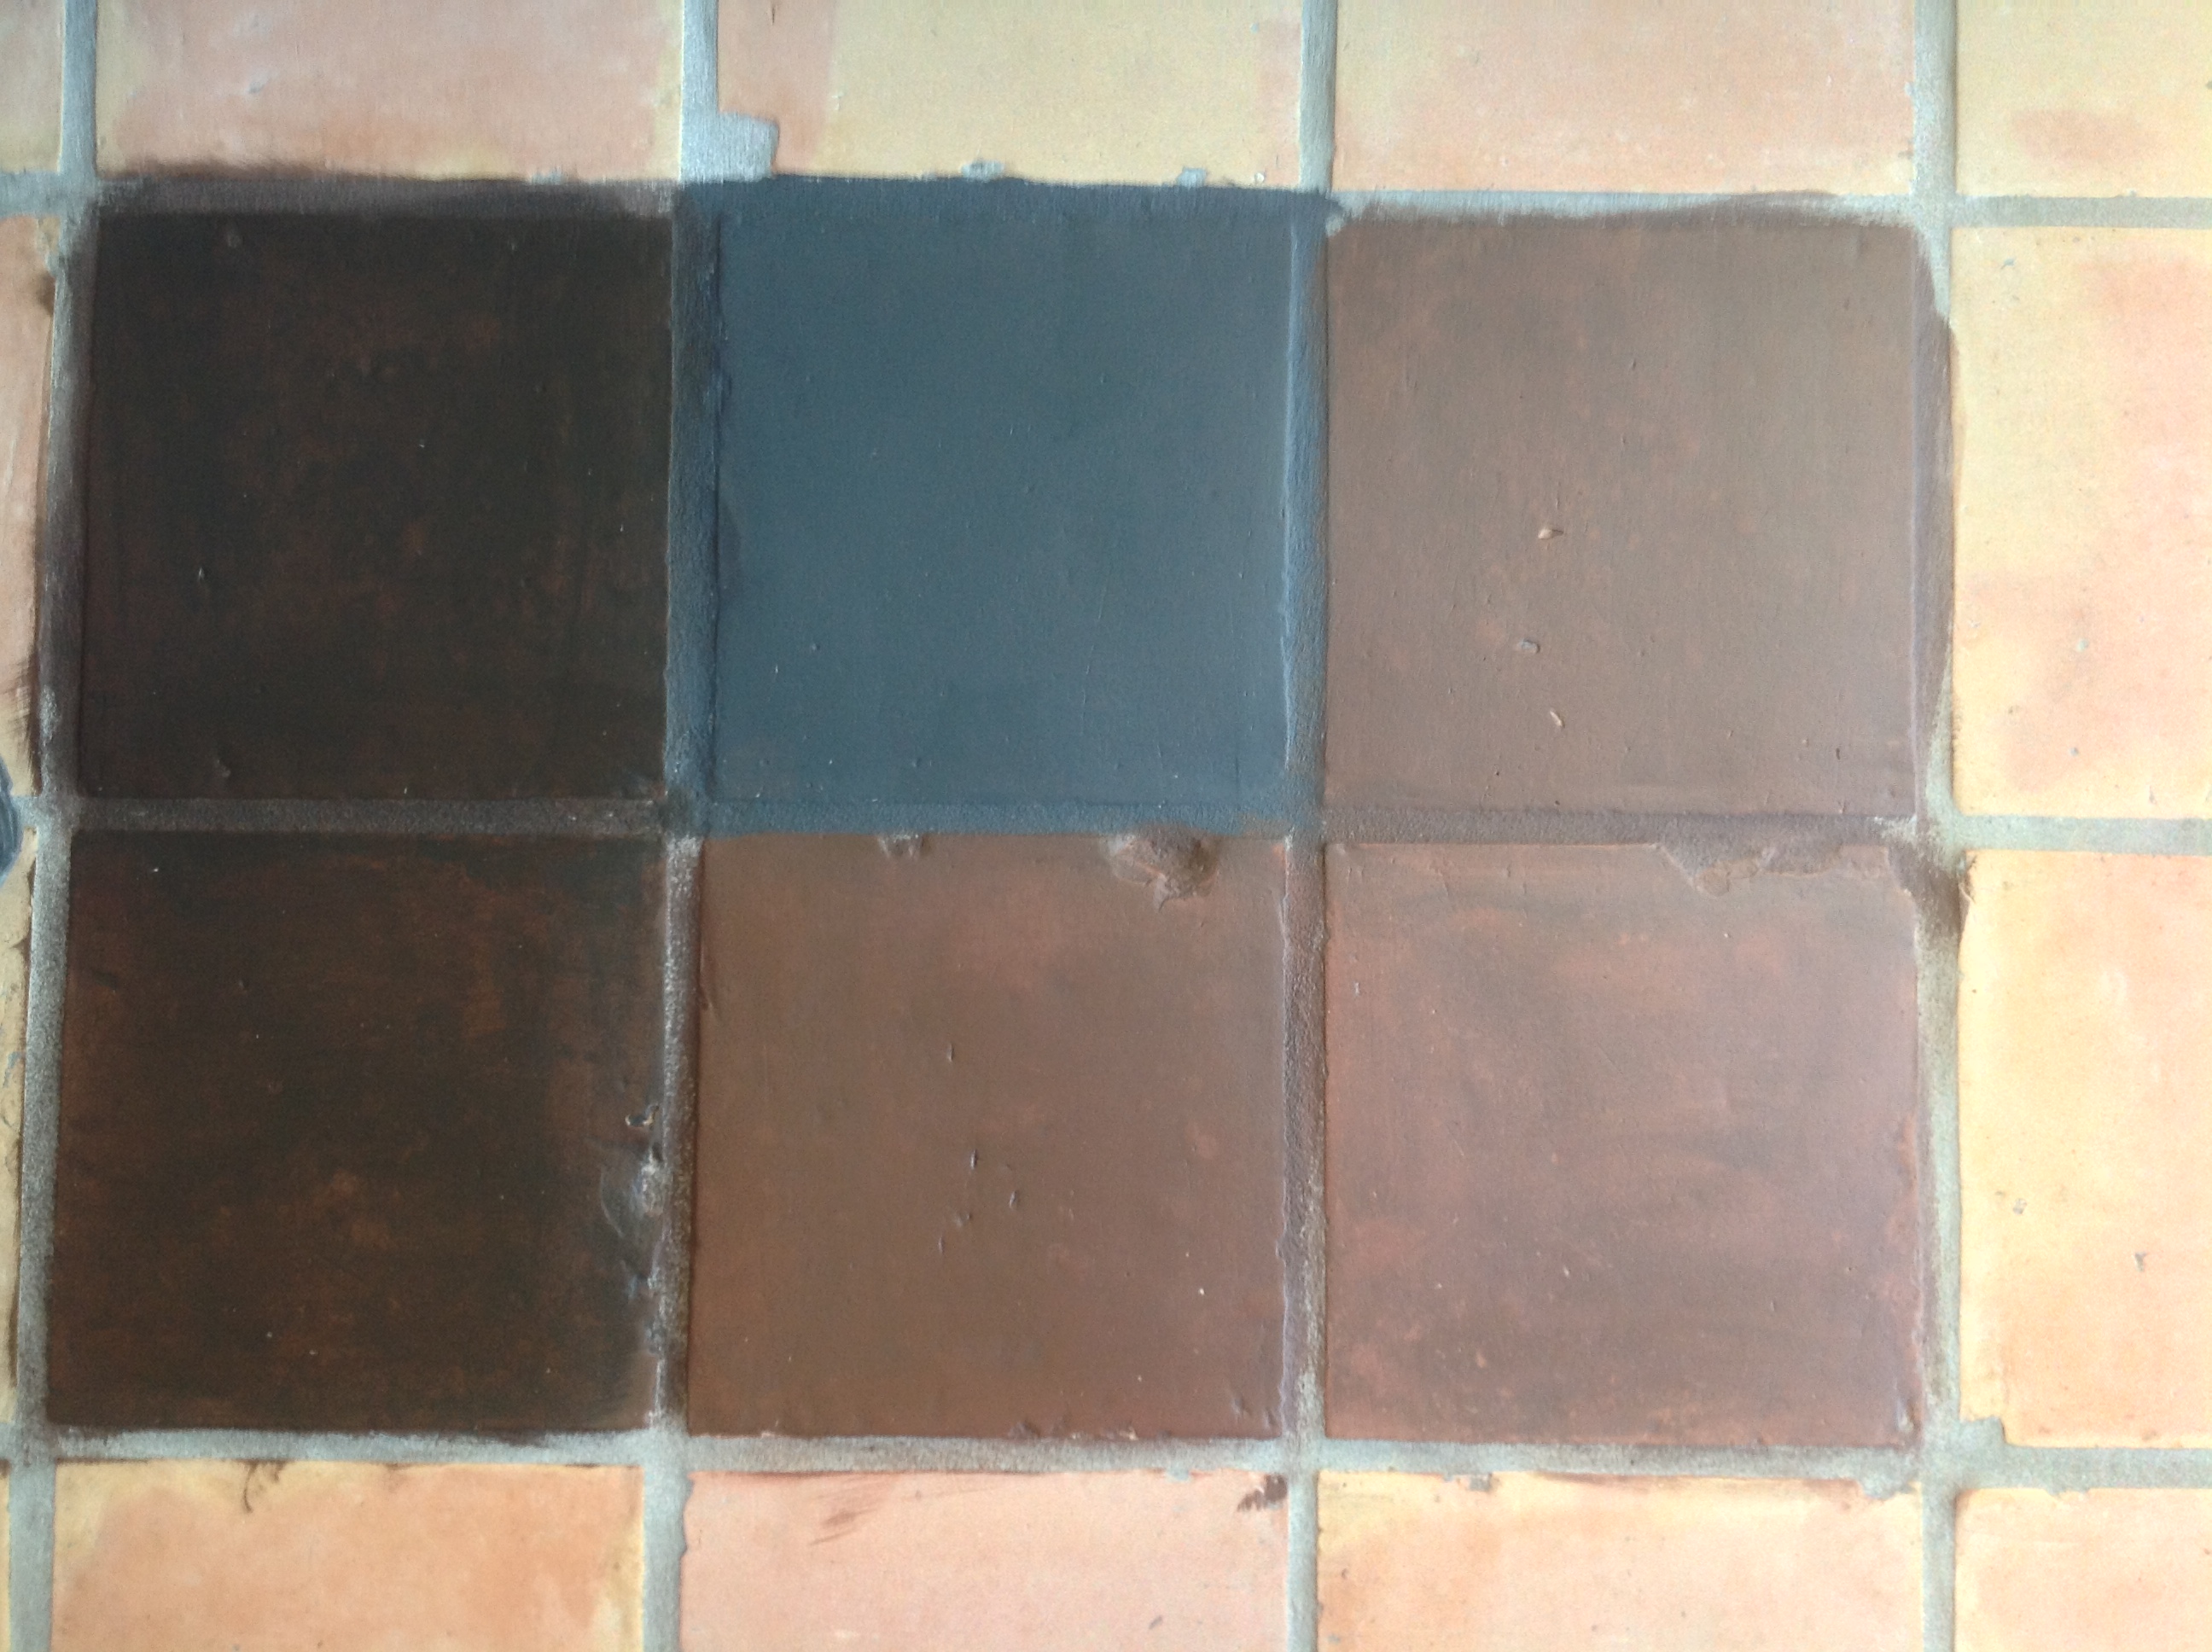
One of the primary reasons I choose to stain Saltillo tiles is the ability to customize the color. While the natural reddish tones of Saltillo are stunning on their own, staining offers the option to create a wider range of colors, from deep chocolate browns to lighter, sandy hues. This allows me to match the tiles to any design scheme or personal preference.
Enhancing the Natural Texture
Saltillo tiles have a unique texture, and staining can help to accentuate these natural details. The uneven surface, with its variations in height and texture, takes stain beautifully. I’ve found that staining deepens the natural color contrasts and highlights the imperfections that make each tile unique. The result is a rich, textured floor that looks more dimensional and full of life.
Creating a Modern Look
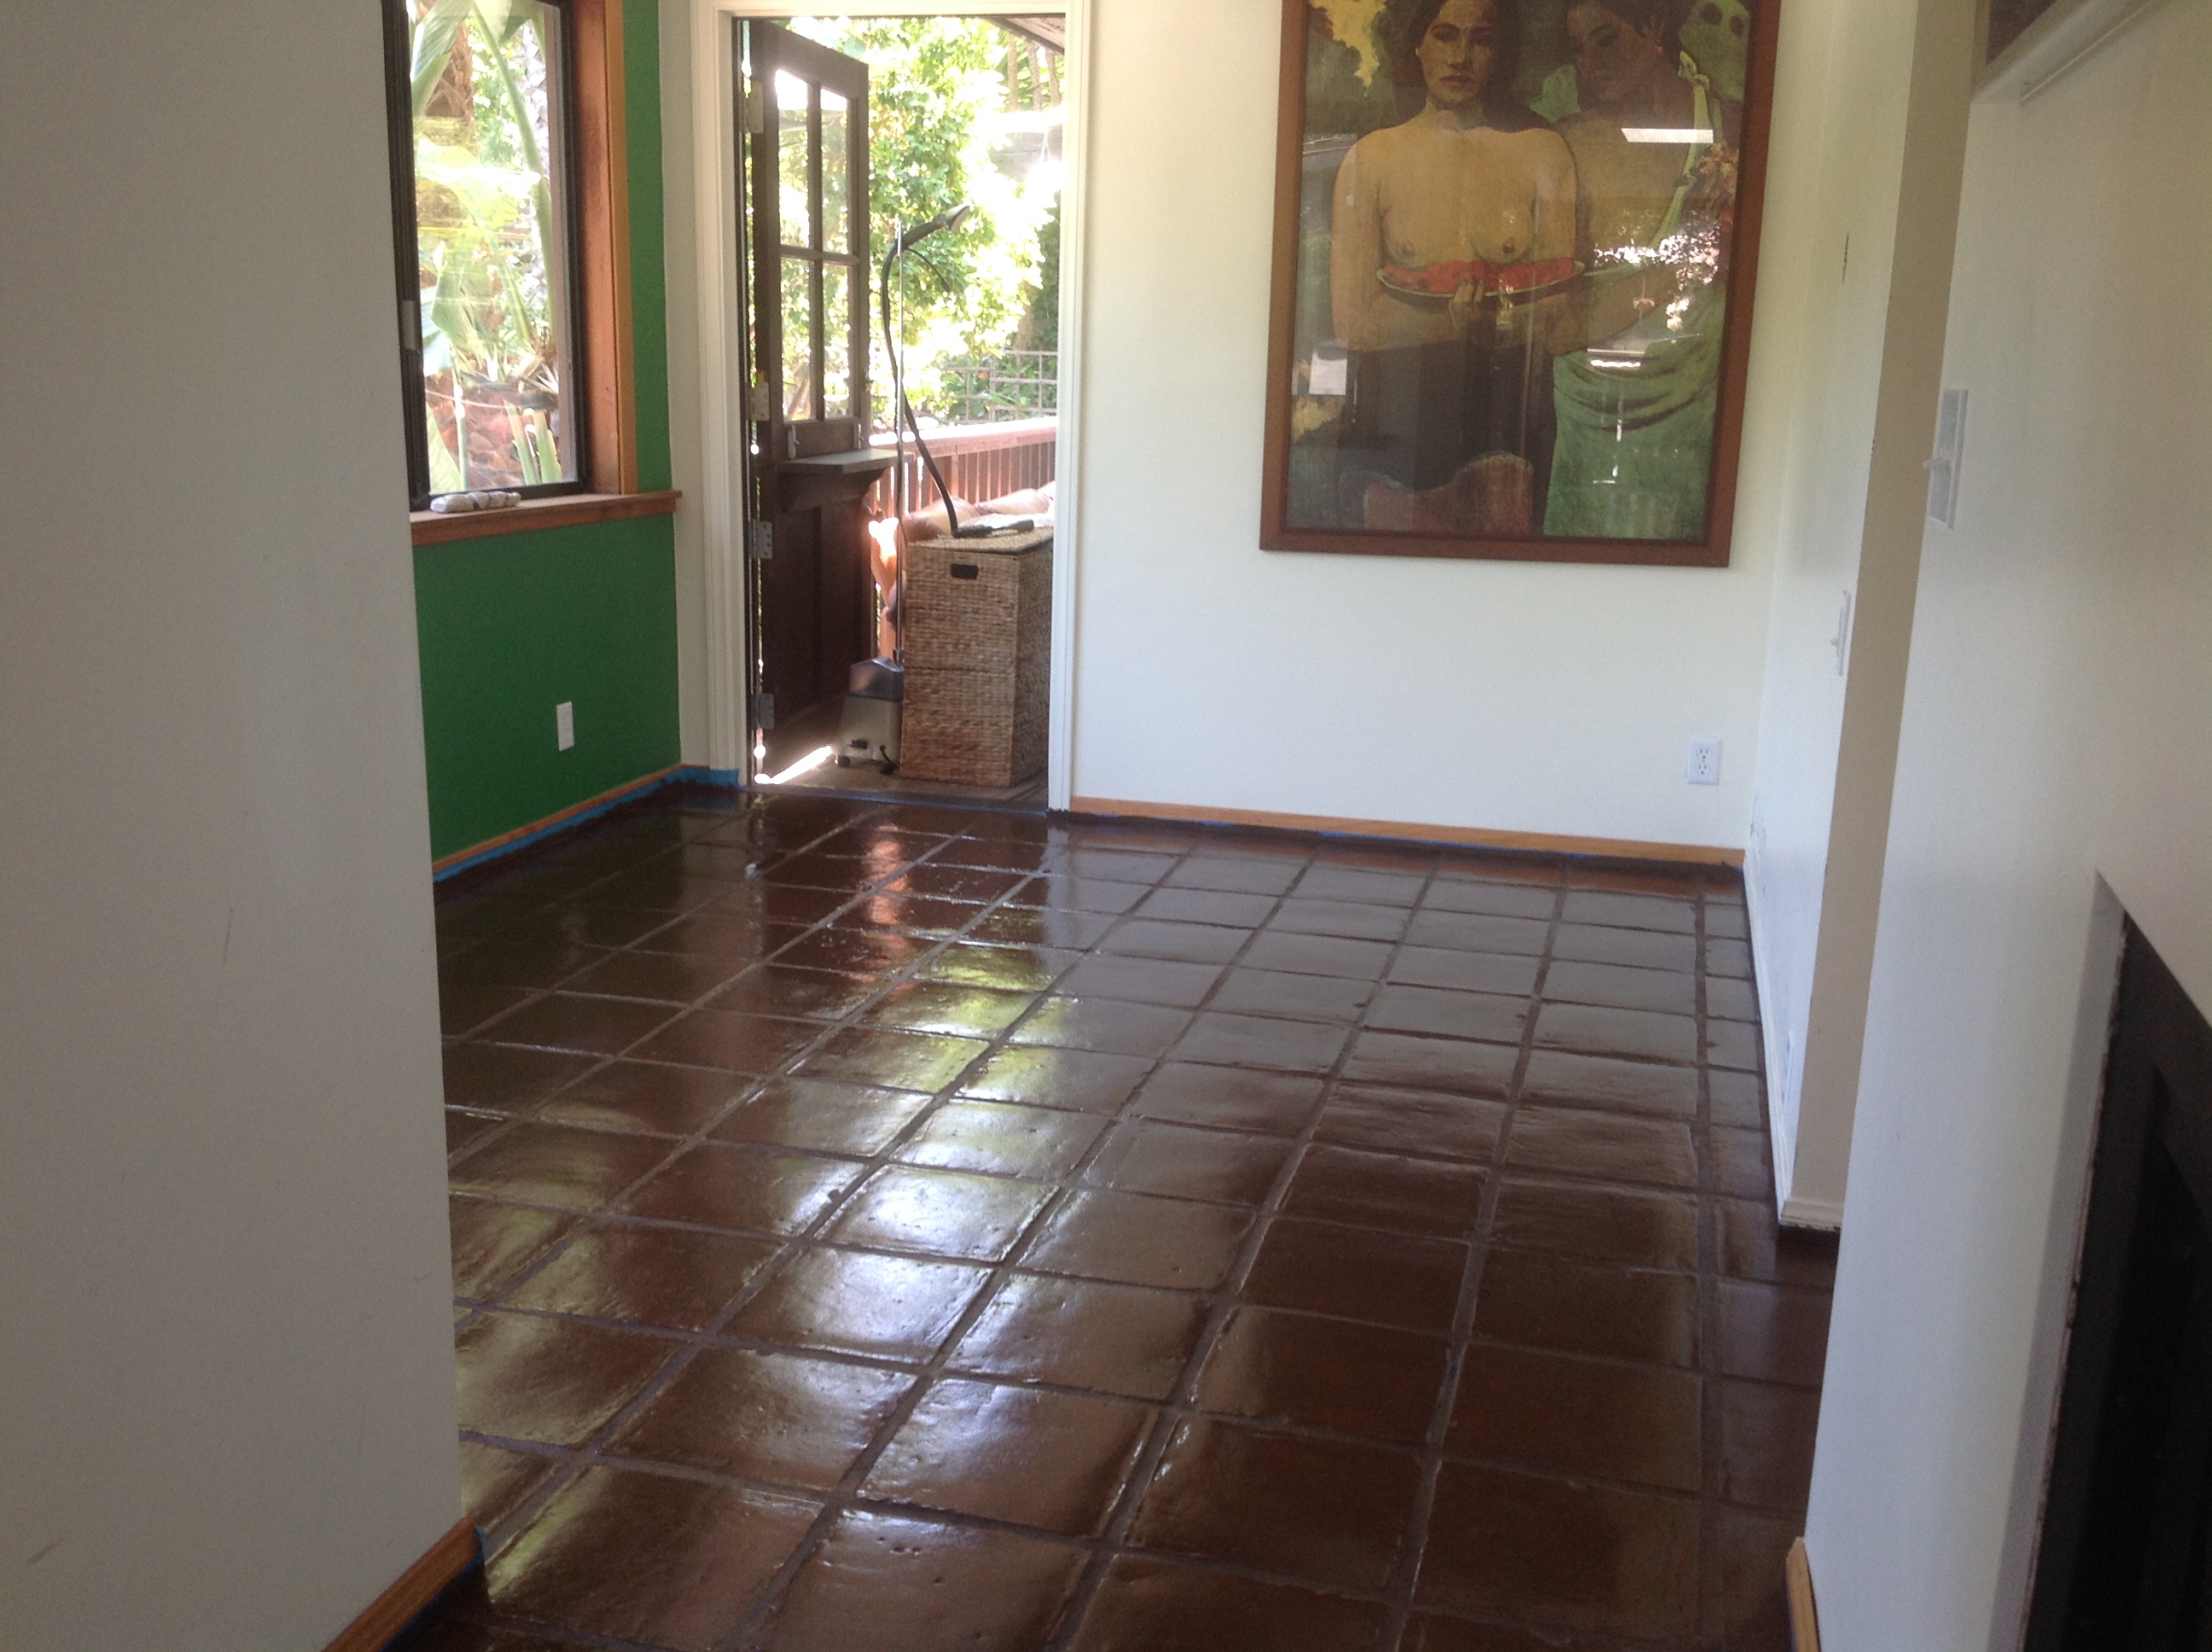
While Saltillo tiles are often associated with rustic or traditional decor, staining can give them a more modern appeal. By choosing a darker or more neutral stain, I’ve been able to transform the look of Saltillo tiles to fit contemporary spaces. Dark, rich stains can create a sleek, modern aesthetic that pairs well with minimalist furniture and clean lines.
Protecting the Tiles
Aside from aesthetic advantages, staining Saltillo tiles also offers some practical benefits. The stain acts as a protective layer, helping to prevent damage from spills, moisture, and daily wear and tear. I’ve noticed that staining can make the tiles less porous, which is crucial for preventing stains and maintaining the tiles’ appearance over time.
Complementing Outdoor Spaces
One of my favorite uses of stained Saltillo tiles is in outdoor spaces, such as patios and courtyards. The ability to stain the tiles in colors that complement the natural landscape is invaluable. I’ve found that earthy tones like deep browns and warm reds blend beautifully with outdoor elements like plants, stone, and wood, creating a seamless transition between indoor and outdoor areas.
Boosting Resale Value
I’ve seen firsthand how stained Saltillo tiles can enhance the overall value of a home. The custom look and added durability that staining provides can make a home more attractive to potential buyers. When prospective buyers see a floor that’s been beautifully stained and well-maintained, it leaves a lasting impression, making the home feel more luxurious and well cared for.
Preparing Saltillo Tiles for Staining: Cleaning and Surface Prep
Before you can begin staining Saltillo tiles, proper preparation is key. Trust me, skipping this step can lead to a less-than-perfect finish and even damage to your tiles. I’ve learned from experience that taking the time to clean and prep your Saltillo tiles before staining makes all the difference in the final result. Here’s how I recommend getting your tiles ready for staining.
Thorough Cleaning Is a Must
The first and most important step in preparing Saltillo tiles for staining is a deep cleaning. Any dirt, grease, or debris left on the tiles can interfere with the staining process. I always start by sweeping or vacuuming the entire area to remove loose dirt. Then, I use a gentle pH-neutral cleaner to scrub the tiles, ensuring that every inch is spotless. It’s essential to avoid harsh chemicals, as they can damage the surface of the tiles.
Removing Old Sealant or Wax
If your Saltillo tiles have been previously sealed or waxed, this layer will need to be removed before staining. I’ve found that using a tile stripper works well for removing old sealants, but it’s important to follow the product instructions carefully to avoid damaging the tiles. Once the old sealant is stripped away, I always make sure to rinse the tiles thoroughly to remove any residue.
Repairing Cracks or Chips
Before staining, it’s also crucial to inspect the tiles for any cracks or chips. These imperfections can become more noticeable after staining, so I always recommend repairing them beforehand. I’ve had success using a tile repair compound that matches the color of the tiles. Once repaired, I allow the compound to dry completely before moving on to the next step.
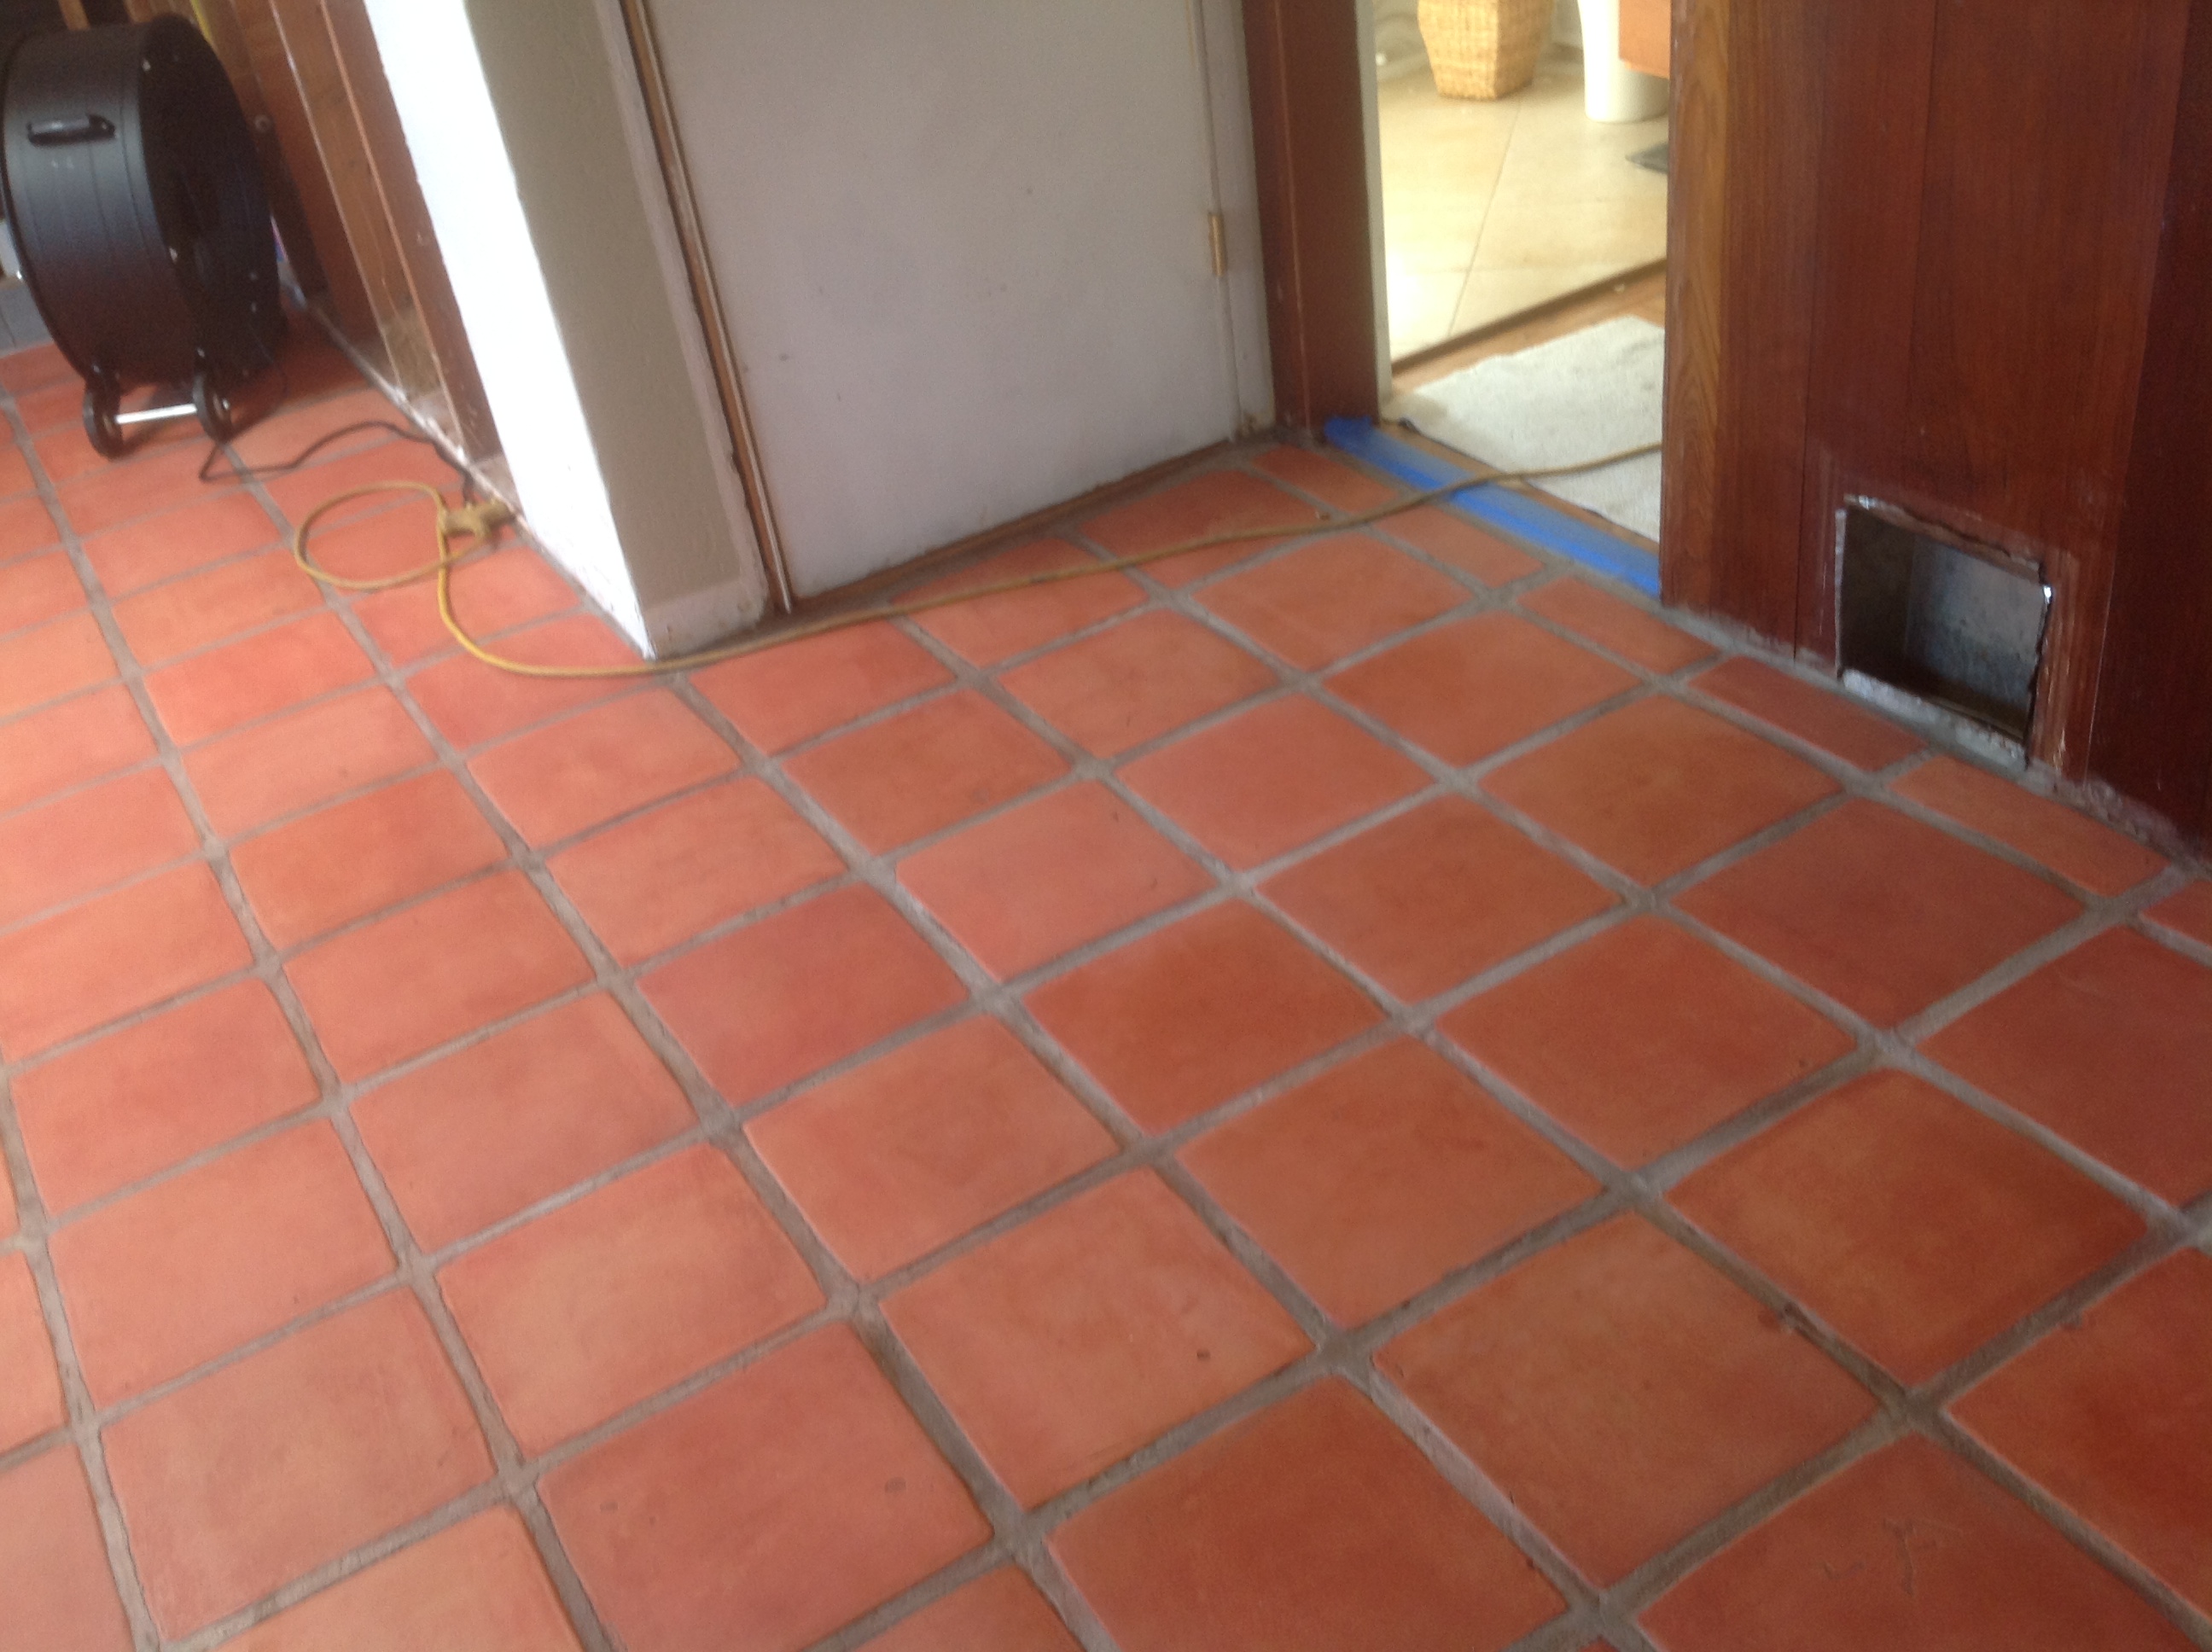
Allowing the Tiles to Dry Completely
Saltillo tiles are porous, so they absorb water easily. After cleaning or repairing the tiles, it’s essential to allow them to dry completely before applying any stain. I’ve made the mistake of rushing this step in the past, and it resulted in uneven staining. To avoid this, I usually wait at least 24 hours after cleaning before proceeding with the staining process.
Testing the Stain on a Small Area
Before committing to staining the entire floor, I always test the stain on a small, inconspicuous area of the tiles. This allows me to see how the stain will look and make any adjustments if needed. I’ve found that this step helps prevent surprises and ensures that the final result is exactly what I envisioned.
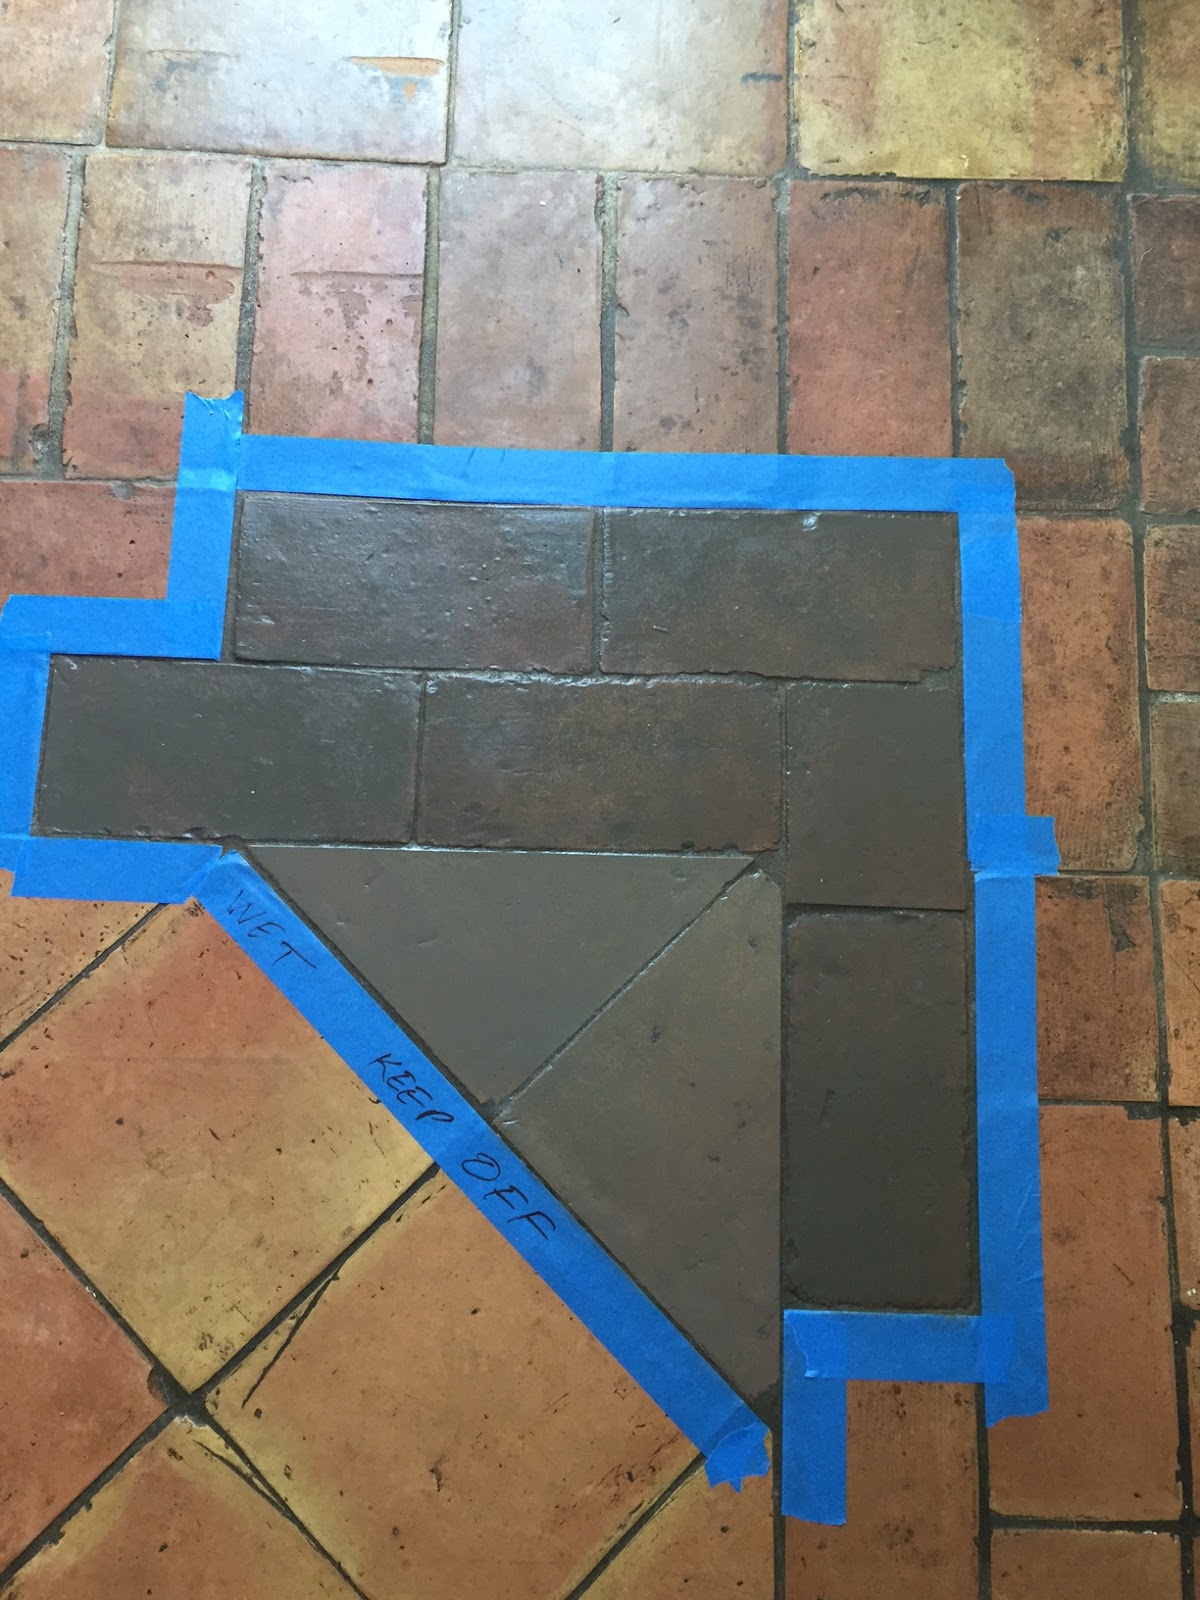
Protecting Surrounding Areas
Finally, I make sure to protect any surrounding areas before I begin staining. I use painter’s tape to mask off walls, baseboards, and any other surfaces that I don’t want to get stained. Laying down drop cloths can also help protect nearby floors or furniture from accidental splashes.
Choosing the Right Stain for Saltillo Tile Floors
Selecting the right stain for Saltillo tiles can be a bit overwhelming, especially with so many options available. Over the years, I’ve experimented with different stains and learned what works best for Saltillo tiles. Below are the key factors to consider when choosing a stain and share some of my top recommendations.
Water-Based vs. Oil-Based Stains
One of the first decisions you’ll need to make is whether to use a water-based or oil-based stain. I’ve found that water-based stains dry faster and have fewer fumes, making them easier to work with in indoor spaces. However, oil-based stains tend to penetrate deeper into the tiles and create a more durable finish. Both options have their advantages, so it depends on your specific needs.
Color Options and Customization
The color of the stain is another crucial consideration. I love that staining allows for a wide range of color options, from rich browns and reds to lighter, more neutral tones. When selecting a color, I always take into account the surrounding decor and the natural tones of the tiles. For a more customized look, you can even mix stains to create a unique color that perfectly suits your space.
Penetrating vs. Surface Stains
There are two main types of stains: penetrating stains and surface stains. I prefer using penetrating stains on Saltillo tiles because they soak into the porous clay and create a more natural, long-lasting color. Surface stains, on the other hand, sit on top of the tiles and can wear away over time, especially in high-traffic areas.
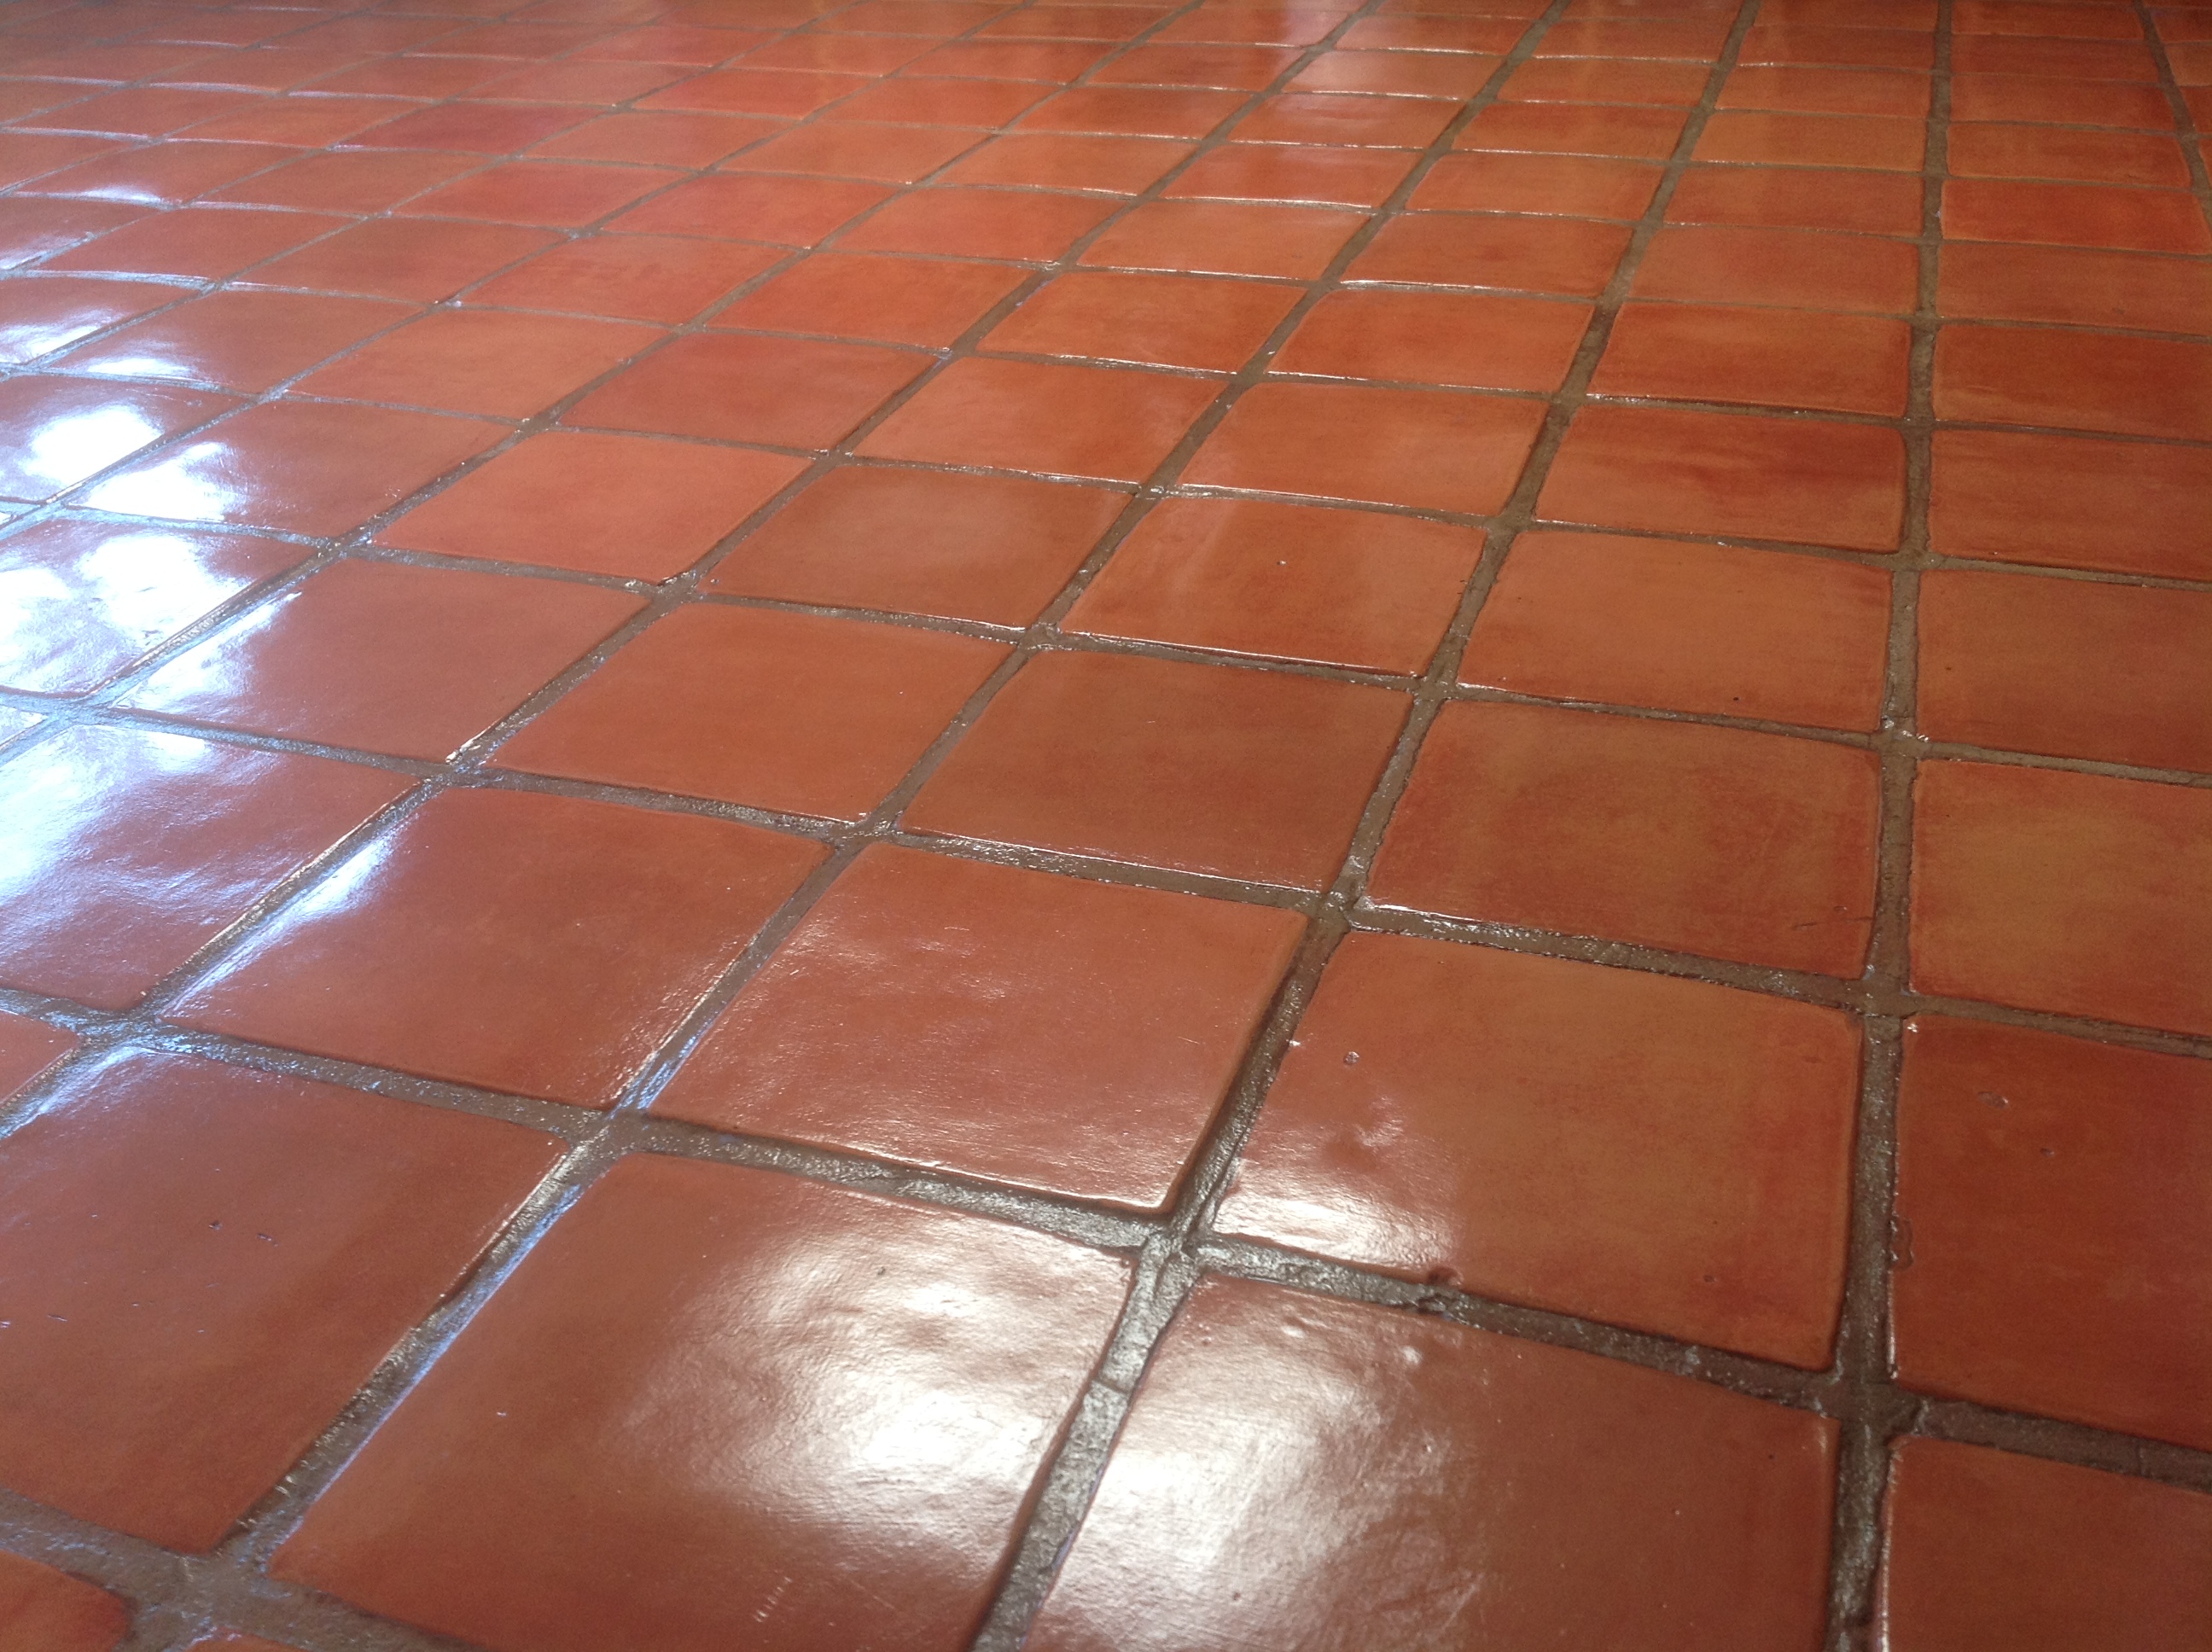
Choosing a Matte or Glossy Finish
Another decision you’ll need to make is whether to go with a matte or glossy finish. I tend to lean toward a matte finish for Saltillo tiles because it complements the natural, rustic look of the tiles. However, if you want a more polished and contemporary appearance, a glossy finish might be the way to go. It’s really a matter of personal preference.
Considering Stain Durability
When choosing a stain, durability is always a key factor for me. I’ve found that some stains are more resistant to fading, scratches, and wear than others. For areas with heavy foot traffic, I recommend choosing a stain that’s specifically designed for high durability. This will help ensure that your floors look beautiful for years to come.
Eco-Friendly Stain Options
If you’re environmentally conscious like I am, you’ll be happy to know that there are eco-friendly stain options available for Saltillo tiles. Look for stains that are low in volatile organic compounds (VOCs) and made from natural or water-based ingredients. These options not only reduce your environmental impact but also create a safer indoor environment by minimizing harmful fumes.

Step-by-Step Guide to Staining Saltillo Tiles
Staining Saltillo tiles is a rewarding DIY project that can completely transform the look of your floors. While the process may seem daunting at first, I’ve broken it down into manageable steps that anyone can follow. Here’s my tried-and-true guide to staining Saltillo tiles, based on my personal experience.
Step 1: Gather Your Materials
Before you start, it’s important to gather all the materials you’ll need for the job. This includes the stain of your choice, painter’s tape, drop cloths, a clean mop or cloth for cleaning, a paintbrush or roller for applying the stain, and a sealant for protecting the finish. Having everything ready beforehand will make the process go much smoother.
Step 2: Prepare the Tiles
As I mentioned earlier, proper preparation is key to achieving a flawless finish. Start by thoroughly cleaning the tiles and removing any old sealant or wax. Once the tiles are clean and dry, mask off any areas you want to protect with painter’s tape, and lay down drop cloths to catch any accidental drips or splashes.
Step 3: Apply the Stain
When it comes to applying the stain, I always recommend starting in a corner of the room and working your way out to avoid stepping on wet tiles. Using a paintbrush or roller, apply the stain evenly to each tile, making sure to follow the grain and texture of the tiles. Depending on the type of stain you’re using, you may need to apply multiple coats to achieve the desired color.
Step 4: Wipe Away Excess Stain
After applying the stain, I always take a clean, dry cloth and gently wipe away any excess stain from the surface of the tiles. This helps prevent streaks and ensures an even finish. Be sure to check the instructions on your stain for the recommended drying time between coats.
Step 5: Let the Stain Dry
Once the stain has been applied and the excess has been wiped away, it’s time to let the stain dry. I usually wait at least 24 hours before walking on the tiles or applying a second coat, but this can vary depending on the type of stain you’re using. It’s important to give the stain plenty of time to set and cure before moving on to the next step.
Step 6: Seal the Tiles
After the stain has dried completely, it’s time to apply a sealant to protect the finish and enhance the color. I always recommend using a high-quality sealer that’s specifically designed for Saltillo tiles. Apply the sealer with a clean brush or roller, following the manufacturer’s instructions, and allow it to dry completely before walking on the floors.
Sealing Saltillo Tiles After Staining: Protection and Longevity
Sealing stained Saltillo tiles is essential for preserving their beauty and protecting them from wear and tear. In my experience, a good sealant not only enhances the color of the stain but also ensures that your floors stay looking great for years to come. Here’s what I’ve learned about sealing Saltillo tiles after staining.
Why Sealing Is Important
Saltillo tiles are porous, meaning they can easily absorb moisture, dirt, and stains if left unsealed. I’ve found that sealing the tiles creates a protective barrier that prevents liquids and debris from penetrating the surface. This is especially important in high-traffic areas or spaces like kitchens and bathrooms where spills are more likely to occur.
Types of Sealers for Saltillo Tiles
There are several types of sealers to choose from, and selecting the right one depends on the look and level of protection you want. I’ve had success using both penetrating sealers, which soak into the tiles and protect from within, and surface sealers, which create a protective layer on top. Penetrating sealers tend to maintain a more natural, matte finish, while surface sealers can provide a glossy sheen.
Enhancing the Stain’s Color
One of the benefits of sealing Saltillo tiles is that it can enhance the color of the stain. I’ve noticed that sealers can deepen and intensify the color, giving the tiles a richer, more vibrant appearance. This is especially true for penetrating sealers, which bring out the natural beauty of the tiles while providing long-lasting protection.
How Often to Reseal
In my experience, how often you need to reseal your Saltillo tiles depends on the level of foot traffic and exposure to moisture. For high-traffic areas, I usually reseal the tiles every 1-2 years to ensure they stay protected. In less frequently used spaces, resealing every 3-5 years may be sufficient.
DIY vs. Professional Sealing
While sealing Saltillo tiles is a relatively straightforward DIY project, I’ve found that hiring a professional can be a good investment if you’re not confident in your ability to apply the sealer evenly. A professional will have the experience and tools needed to ensure a flawless finish, which can save you time and potential frustration.
Sealant Maintenance
Once your Saltillo tiles are sealed, maintenance is simple. I recommend using a pH-neutral cleaner to clean the floors regularly, as harsh chemicals can strip away the sealant over time. It’s also a good idea to avoid abrasive cleaning tools that can scratch the surface of the sealant.

Maintenance Tips for Stained Saltillo Tile Floors
Maintaining stained Saltillo tile floors is essential for keeping them looking beautiful and preserving their longevity. Over the years, I’ve developed a few go-to tips for ensuring that these floors stay in top condition with minimal effort. Here are my best maintenance tips for stained Saltillo tile floors.
Regular Sweeping and Mopping
One of the easiest ways to maintain stained Saltillo tiles is by sweeping or vacuuming them regularly to remove dirt and debris. I’ve found that a soft-bristle broom or a vacuum with a hard floor setting works best for preventing scratches. In addition to sweeping, I mop the floors with a pH-neutral cleaner once a week to keep them looking fresh and clean.
Avoiding Harsh Cleaners
Because Saltillo tiles are porous, harsh cleaners can damage the stain and sealer. I always stick to a pH-neutral cleaner that’s safe for natural stone or tile. In my experience, using vinegar or acidic cleaners can strip away the protective sealant and cause the stain to fade, so it’s important to avoid those products.
Addressing Spills Immediately
Spills are bound to happen, especially in high-traffic areas like kitchens and entryways. When I notice a spill, I make sure to clean it up right away to prevent staining. Even though the tiles are sealed, leaving liquids on the surface for too long can cause discoloration or water damage.
Using Area Rugs for Protection
One of my favorite ways to protect stained Saltillo tiles is by placing area rugs or mats in high-traffic areas. Not only do rugs add an extra layer of protection, but they also enhance the overall look of the room. I like to place rugs in front of entryways, sinks, and other areas where the tiles are more likely to see heavy use.
Resealing as Needed
As I mentioned earlier, resealing your Saltillo tiles is key to maintaining their protection and appearance. I check the condition of the sealer every year by sprinkling a few drops of water on the tiles. If the water doesn’t bead up, it’s time to reseal. Keeping up with resealing ensures that your floors stay protected from moisture and wear.
Polishing for Extra Shine
For those who prefer a glossier finish, I recommend using a tile polish specifically designed for Saltillo tiles. I’ve found that applying a coat of polish every few months can enhance the shine of the tiles and make them look freshly stained. Just be sure to follow the manufacturer’s instructions for application and drying times.
BEFORE AND AFTER STAINING SALTILLO TILE – design indulgence
Paver Staining California Tile Restoration
Saltillo tile, Painting tile, Painting tile floors

Turn your remodeling dreams into reality with our custom tile staining
Related Posts: