Trafficmaster Laminate Flooring Installation Instructions
Trafficmaster Glueless Laminate Flooring Instructions – Flooring Ideas
Trafficmaster Laminate Flooring Instructions – Flooring Ideas

Traffic Master Allure Installation / Trafficmaster Allure Ultra Resilient Flooring Installation
Trafficmaster Laminate Flooring Instructions – Flooring Ideas

How to install Trafficmaster allure [VIDEO] All About Flooring

7 Pics Trafficmaster Allure Vinyl Tile Flooring Installation And Description – Alqu Blog
Trafficmaster Flooring Installation Instructions
Trafficmaster Flooring Installation Instructions – The Floors

Trafficmaster Laminate Flooring Instructions – Flooring Ideas
Trafficmaster Laminate Flooring Instructions – Flooring Ideas
Trafficmaster Laminate Flooring Installation Instructions Floor Roma

Related Posts:
- Oak Grey Laminate Flooring
- Laminate Flooring Living Room Ideas
- How To Remove Laminate Flooring
- Gray Laminate Flooring Ideas
- How To Remove Laminate Floor Glue
- Laminate Floor Edge Filler
- Farmhouse Laminate Flooring
- Dark Laminate Flooring Ideas
- Laminate Floor Uneven Transition
- Laminate Floor Colors Ideas
Are you thinking of installing Trafficmaster laminate flooring in your home? This is a great choice – laminate flooring is a popular option for homeowners because it looks like real wood, is easy to maintain, and is relatively affordable.
However, before you install Trafficmaster laminate flooring, it’s important to understand the installation process. This article will provide comprehensive instructions on how to install Trafficmaster laminate flooring, so that you can get the job done right.
### Now Let’s Get Started With The Installation
Before you start installing Trafficmaster laminate flooring, it’s important to gather all the materials and tools you’ll need. These include the following:
* Laminate flooring planks
* Underlayment
* Spacers
* Measuring tape
* Chalk line
* Utility knife
* Hammer
* Nails or screws
* Adhesive
* Putty knife
* Sandpaper
* Vacuum cleaner
Once you have all the materials and tools you need, you can begin the installation process. Here are the steps you should follow:
### Step 1: Prepare The Subfloor
The first step in installing Trafficmaster laminate flooring is to prepare the subfloor. This means removing any existing floor coverings (such as carpet or vinyl), along with any debris or dirt. You should also make sure that the subfloor is clean and level. If necessary, use a putty knife or sandpaper to remove any imperfections. Once you’ve cleaned the subfloor, vacuum it to get rid of any remaining dirt or dust.
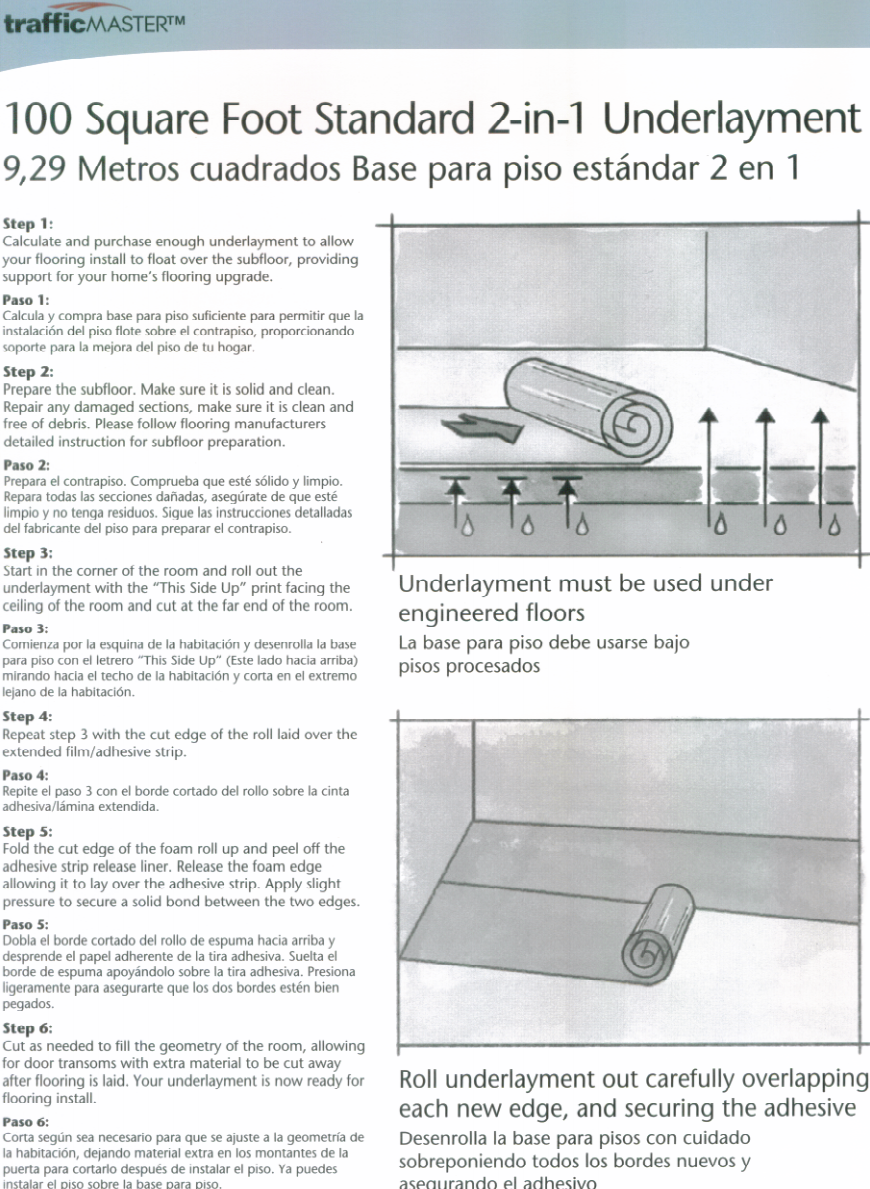
### Step 2: Install The Underlayment
The next step in installing Trafficmaster laminate flooring is to install the underlayment. This is an important step because it provides added insulation and soundproofing. When installing the underlayment, make sure that all seams are tightly sealed and overlapped by at least 6 inches. If necessary, use adhesive to secure the underlayment in place.
### Step 3: Place The Spacers Around The Room
Once the underlayment has been installed, place spacers around the room at regular intervals (usually 8-12 inches). This will help you maintain an even spacing between the boards when laying them down. Make sure to use spacers that are made specifically for laminate flooring – this will ensure that they fit correctly and provide adequate space.
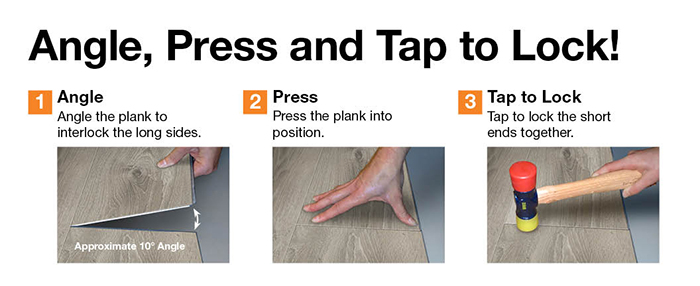
### Step 4: Start Laying The Planks Down
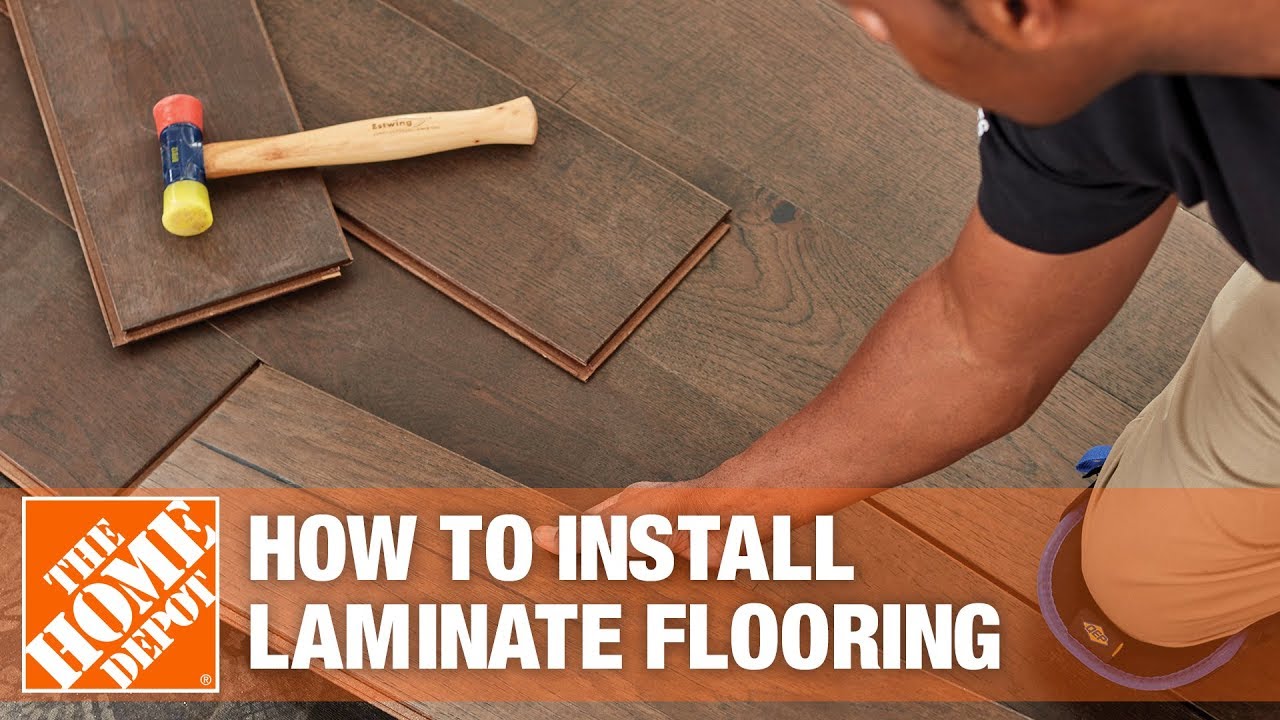
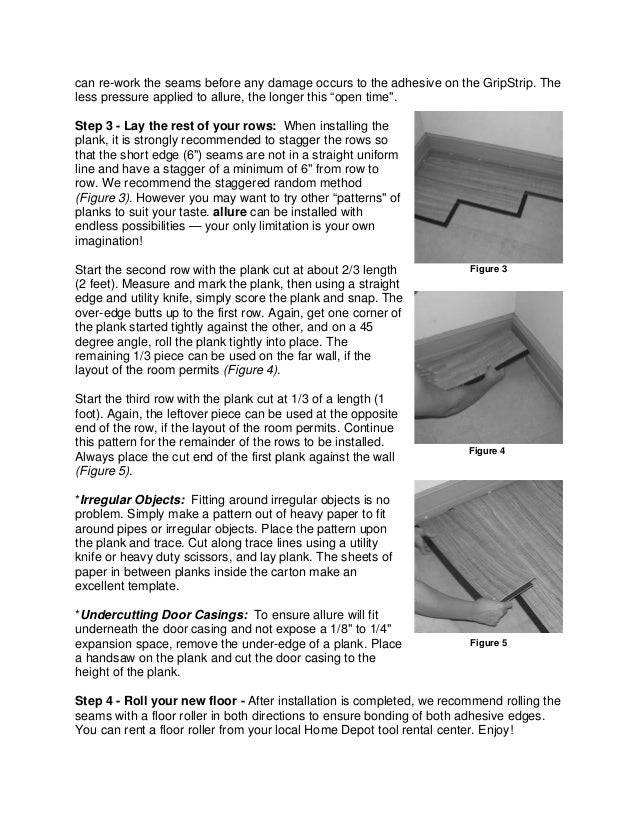
Now that your subfloor is prepared and your spacers are in place, you can start laying down your laminate planks. Begin in one corner of the room and lay down your first plank, making sure that it’s lined up with the chalk line you drew earlier. Use your hammer and nails or screws to secure the plank in place. Continue laying down planks until you reach the end of one row, then start on the next row until all of your planks are in place.
### Step 5: Secure The Planks Together
Once all of your planks are in place, it’s time to secure them together. Depending on the type of plank you have, this can be done with either adhesive or nails or screws. If using adhesive, make sure you apply it evenly across each plank and allow for adequate drying time before moving on to the next step. If using nails or screws, make sure they are tightly secured into place without damaging any of the planks.
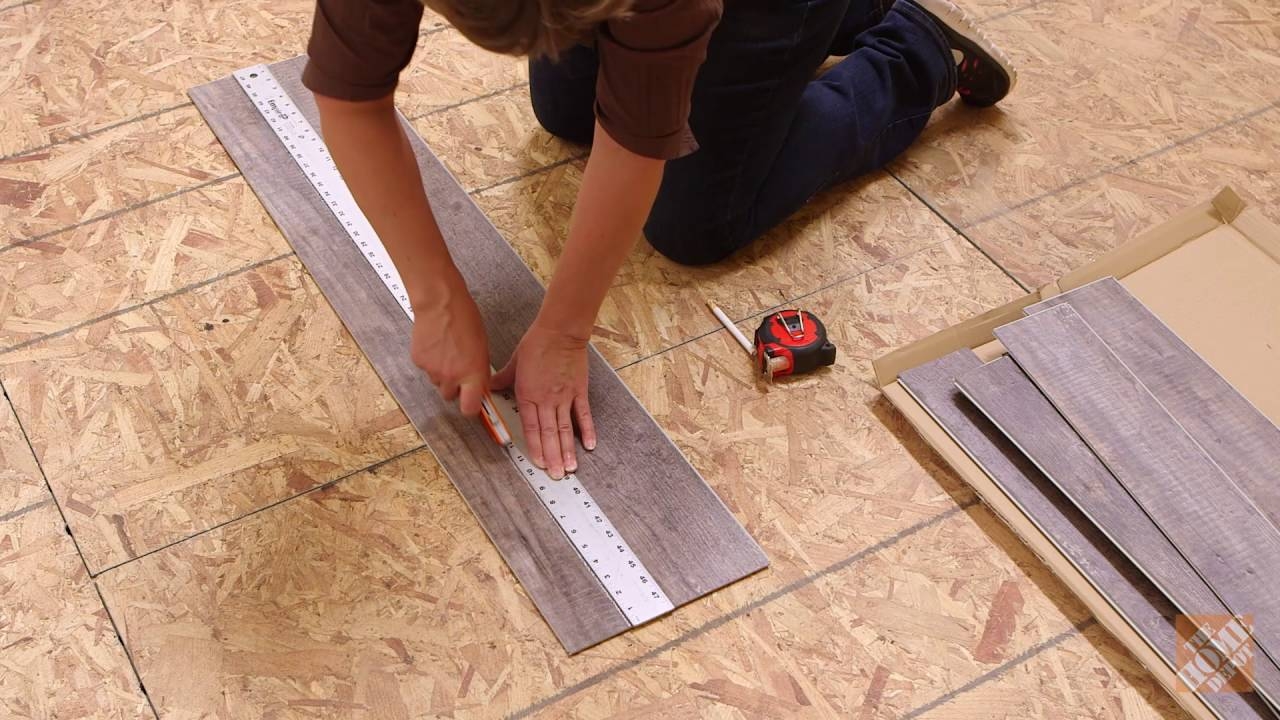
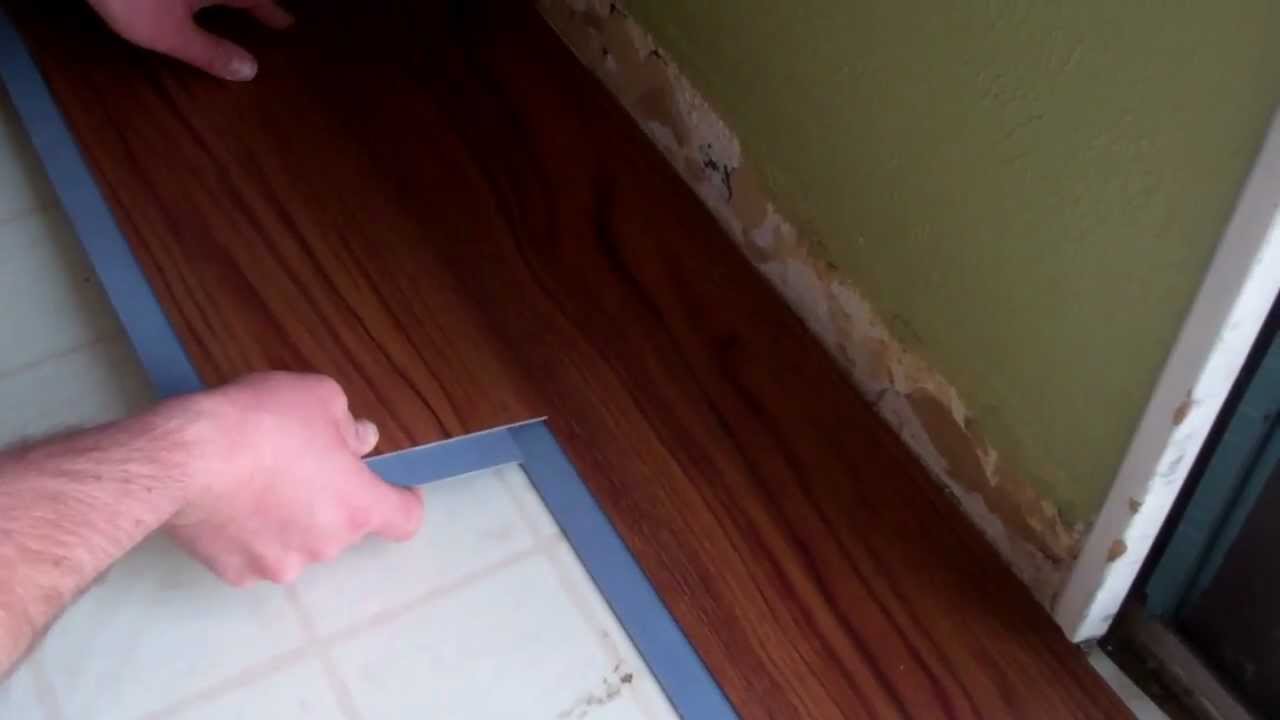
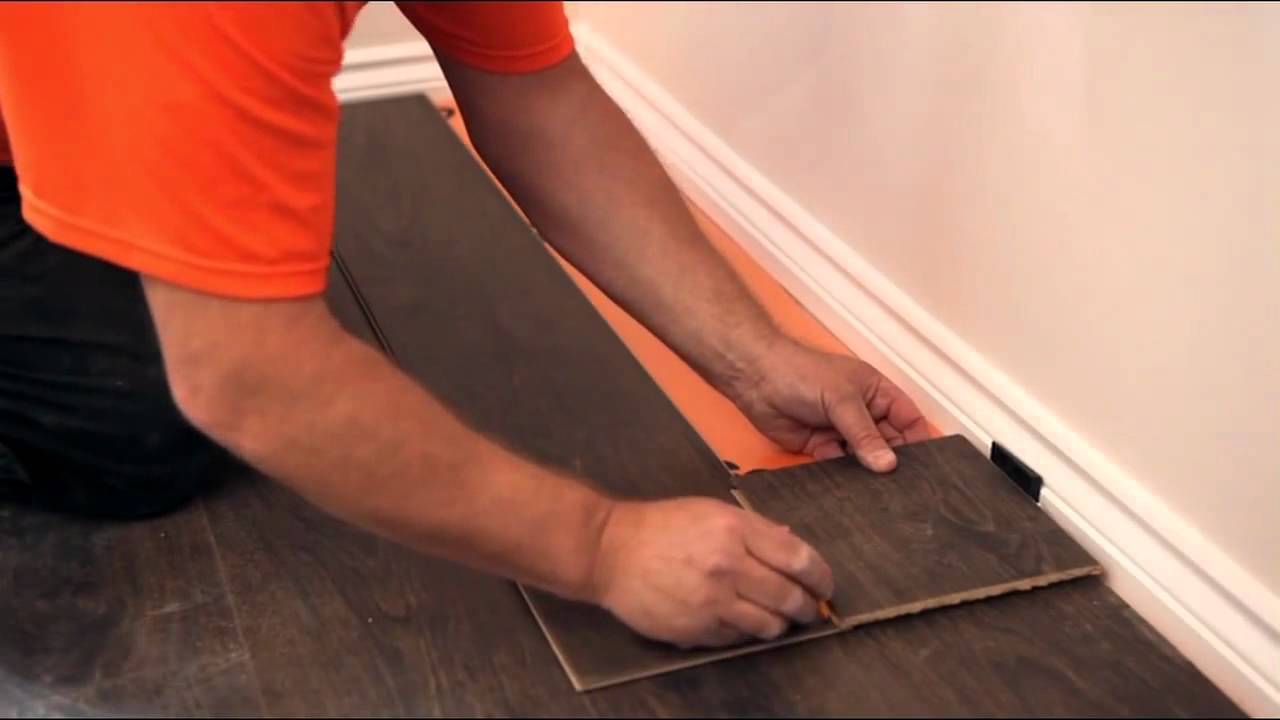
### Step 6: Trim Any Excess Planks Or Edges
Once all of your planks are securely in place, it’s time to trim any excess planks or edges that may be sticking out. Use your utility knife and measure twice before cutting – this will help ensure that there are no gaps or uneven edges when finished.
### Step 7: Finish Up And Enjoy Your New Floor!
Once all of your planks are trimmed and secured in place, your Trafficmaster laminate flooring installation is complete! Now all that’s left to do is stand back and admire your work – with proper care and maintenance, your