Best DIY Bathroom Flooring

Cheap Bathroom Flooring Ideas – This Old House

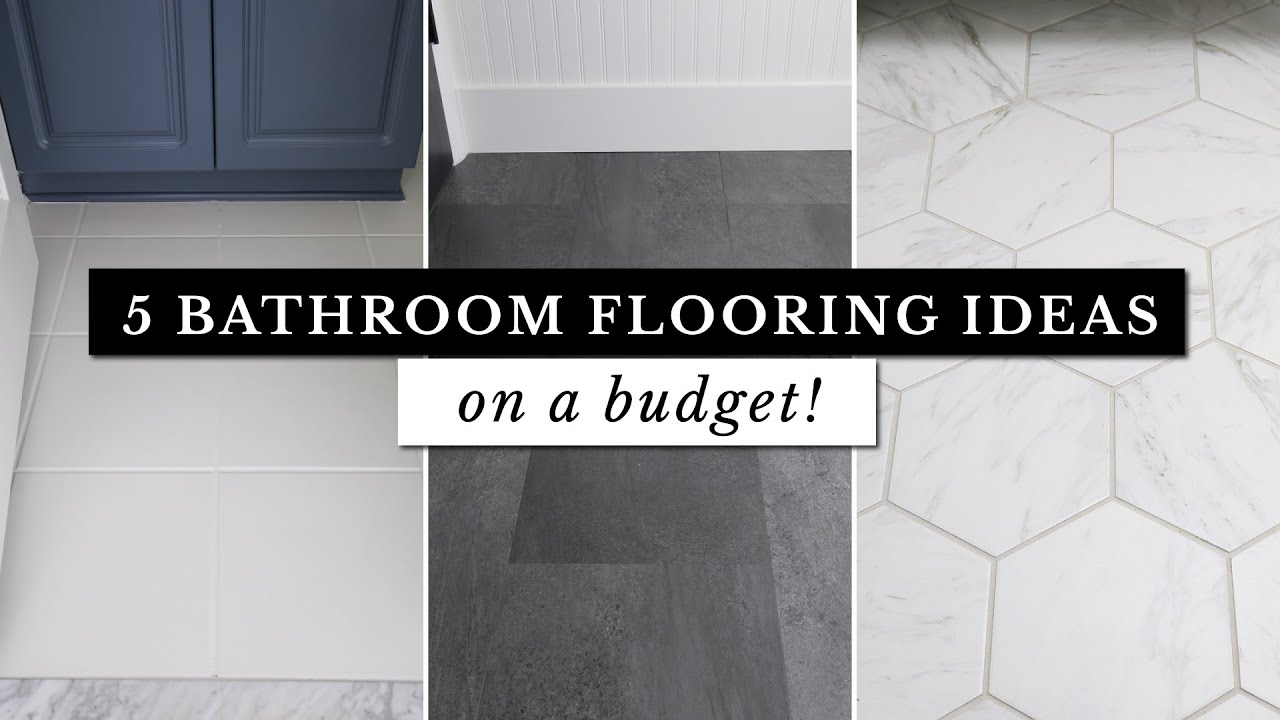
5 Bathroom Flooring Ideas on a Budget!
The Best Bathroom Flooring to Consider for Your Remodel
:strip_icc()/bathroom-sliding-glass-shower-7922259e-4fd4ec7febc9489b8156e04c3a8e5aec.jpg)
5 Great Budget-Friendly Bathroom Flooring Options
:max_bytes(150000):strip_icc()/budget-bathroom-flooring-ideas-1314768_vinyl-15890baf134846e88534b881d30a3b91.jpg)
The Best Flooring Options for Bathrooms – This Old House
/cdn.vox-cdn.com/uploads/chorus_asset/file/20070663/20_master_bath.jpg)
Best Bathroom Flooring Options u2013 Forbes Home

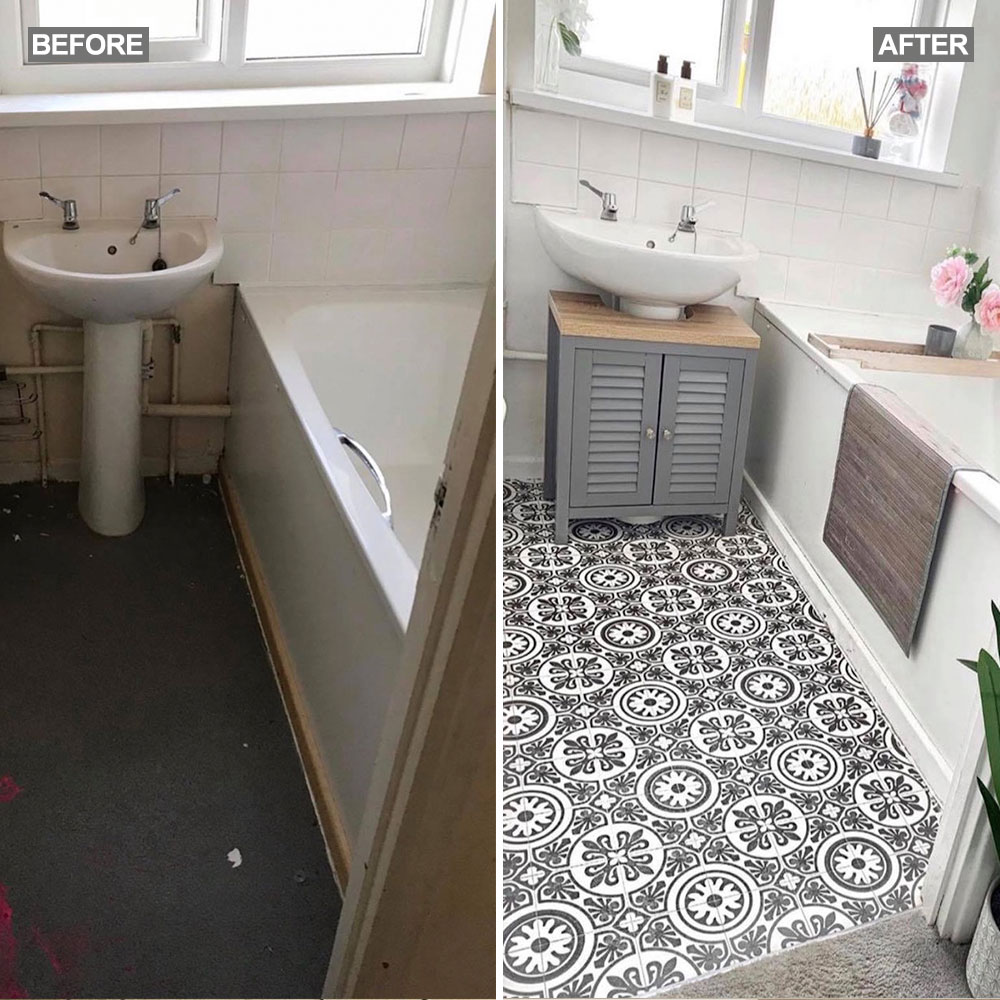
Mumu0027s DIY vinyl bathroom flooring transforms this lacklustre
Small Bathroom Flooring Ideas – Best Options for a Remodel
The Best Bathroom Flooring to Consider for Your Remodel
:strip_icc()/ship-lap-walls-glassed-shower-bathroom-afb08d50-f70752fb86d547218890f30e827febcf.jpg)
Bathroom Flooring Ideas – The Home Depot
Related Posts:
- French Country Bathroom Flooring
- Mid Century Modern Bathroom Flooring
- Rustic Bathroom Floor Tiles
- Purple Bathroom Flooring
- How To Clean Bathroom Floor Stains
- Tile Design Bathroom Floor
- Terracotta Bathroom Floor
- Cool Bathroom Floor Ideas
- Light Bathroom Floor Tiles
- Classic Bathroom Floor Tile Ideas
Best DIY Bathroom Flooring: A Guide to the Perfect Flooring Choice
When it comes to choosing the right flooring for your bathroom, there are several options to choose from. From hardwood floors to tiled floors, there is something to suit every budget and style. However, if you’re looking for something a little different, why not consider DIY bathroom flooring? With a few simple steps and the right materials, you can create a truly unique and stylish floor that will last for years.
In this guide, we’ll look at some of the best DIY bathroom flooring options available and the advantages of each. We’ll also discuss the necessary tools and materials you’ll need, as well as how to install the floor yourself. So, let’s get started!
Types of DIY Bathroom Flooring
When it comes to DIY bathroom flooring, there are a few popular choices that you can choose from. Let’s take a look at them in more detail.
Vinyl Tile Flooring
Vinyl tile flooring is one of the most popular types of DIY bathroom flooring. It is easy to install and requires minimal maintenance. Vinyl tiles come in a variety of colors and designs, so you can easily match your existing decor. Plus, vinyl tiles are water-resistant and durable, so they will last for many years with minimal maintenance.
Cork Flooring
Cork flooring is another popular choice for DIY bathroom flooring. Cork is naturally water-resistant and has anti-microbial properties, making it an ideal choice for bathrooms. It also provides excellent insulation and cushioning, which helps reduce noise levels in the bathroom. Plus, cork is easy to install and requires minimal maintenance over time.
Wood Flooring
Wood flooring is another great option for DIY bathroom flooring. Wood is known for its natural beauty and durability, making it an excellent choice for bathrooms. However, wood can be prone to warping in high humidity environments, so it’s important to seal it properly before installing it in your bathroom.
Concrete Flooring
Concrete flooring is an ideal choice for DIY bathroom flooring if you’re looking for an industrial look. Concrete is incredibly durable and easy to maintain; however, it can be expensive and labor-intensive to install correctly.
Benefits of DIY Bathroom Flooring
There are many benefits to installing your own bathroom flooring. For starters, it can save you money compared to hiring a professional installer. Additionally, you can customize the design of your floor to match your existing decor or create something completely unique. Lastly, installing your own bathroom floor gives you greater control over the quality of the job and allows you to make sure that it meets your exact needs.
Tools & Materials Needed for DIY Bathroom Floor Installation
Installing your own bathroom floor requires some basic tools and materials. You’ll need a measuring tape, level, saw (if needed), drill or screwdriver (depending on what type of floor you choose), adhesive (if needed), grout (if needed), caulk (if needed), as well as the materials for your chosen type of floor.
Step-by-Step Guide to Installing DIY Bathroom Floor
Now that we’ve looked at the various types of DIY bathroom flooring available and their benefits, let’s look at how to install your chosen type of floor step-by-step:
Step 1: Measure & Mark – The first step is to measure your bathroom space accurately and mark where you want each tile or plank of wood or cork to go. Make sure that all measurements are accurate before moving on to the next step!
Step 2: Cut & Install – Depending on what type of material you chose for your bathroom floor, you will either cut and install individual tiles/planks or lay down sheets of material in one go. If cutting individual pieces, use a saw or other cutting tool specified by the manufacturer’s instructions. Once cut, secure them into place with adhesive or nails/screws depending on the material used.