DIY Epoxy Bathroom Floor

A complete guide to 3D epoxy flooring and 3D floor designs

20+ Epoxy Bathroom Floor Ideas

15 Best Epoxy Flooring Ideas – Decoration Channel

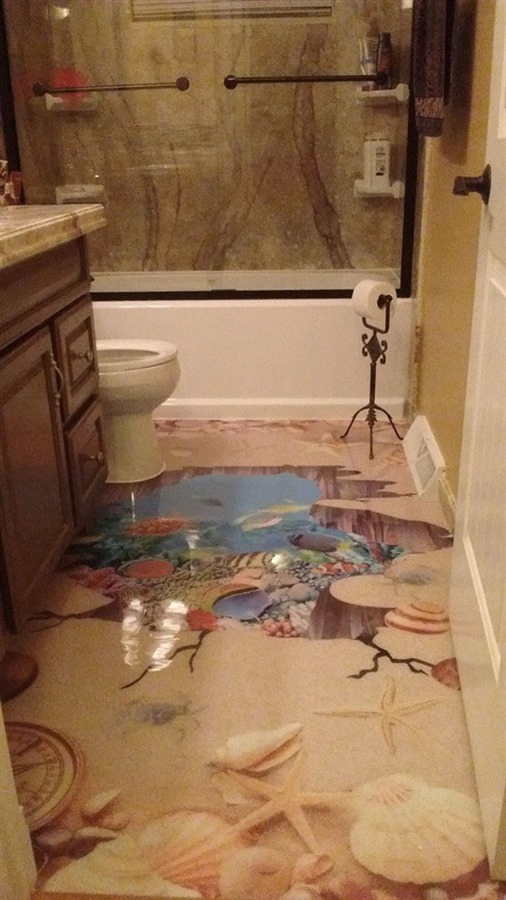
3d epoxy flooring for bathroom beach sand and shell theme Epoxy floor, Epoxy floor 3d, 3d epoxy

Diy Epoxy Bathroom Floor Another Home Image Ideas
Epoxy Bathroom Floor

20+ Epoxy Bathroom Floor – HOMYHOMEE
3-D bathroom floor Epoxy floor 3d, Unusual bathrooms, Flooring

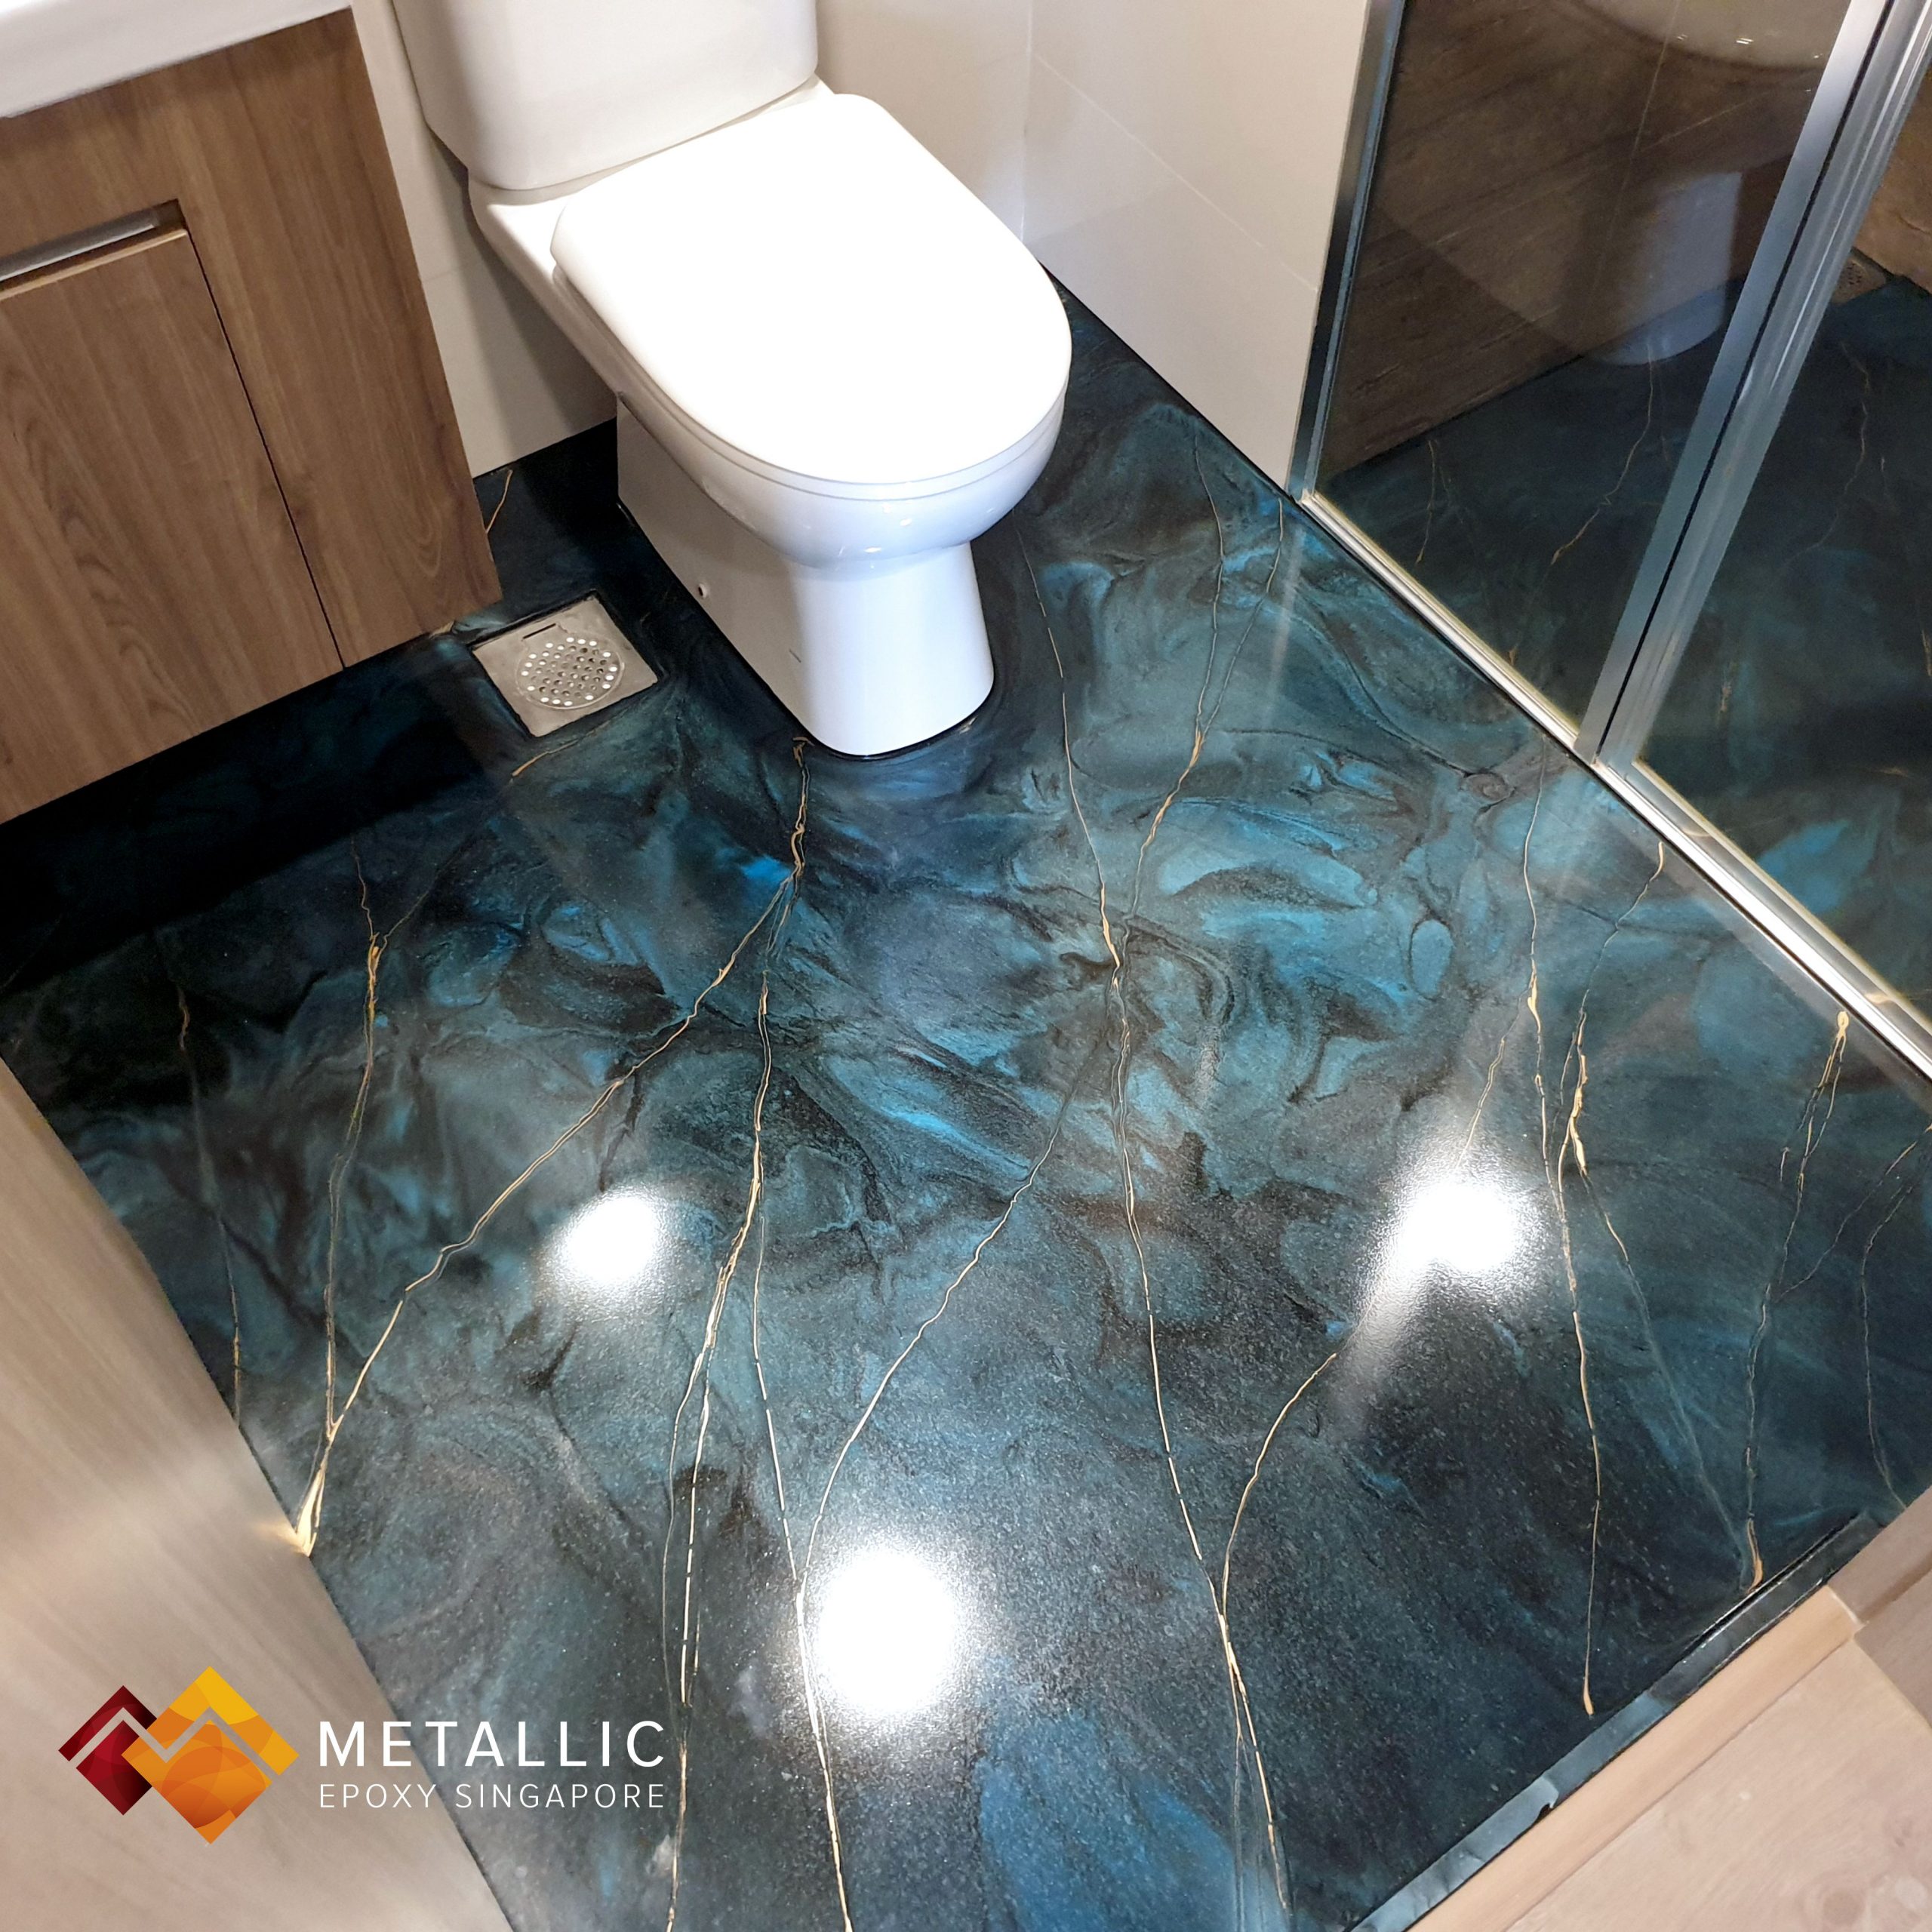
40 best images about Epoxy flooring & Art on Pinterest Beautiful, Sharks and Awesome

Pin by Britzen7 on 6420 Bathroom Remodel Diy flooring, Laundry room flooring, Amazing bathrooms

White Marble Bathroom Epoxy Resin Flooring Water Resistant Modern Interior Design Home

Related Posts:
- French Country Bathroom Flooring
- Mid Century Modern Bathroom Flooring
- Rustic Bathroom Floor Tiles
- Purple Bathroom Flooring
- How To Clean Bathroom Floor Stains
- Tile Design Bathroom Floor
- Terracotta Bathroom Floor
- Cool Bathroom Floor Ideas
- Light Bathroom Floor Tiles
- Classic Bathroom Floor Tile Ideas
When it comes to giving your bathroom a new look, one of the biggest decisions you will make is how to update the floor. While there are many options available, epoxy floors have become increasingly popular in recent years. This guide will walk you through all the steps involved in installing your own DIY epoxy bathroom floor.
What is Epoxy Flooring?
Epoxy flooring is a versatile and durable coating that is applied to a variety of surfaces, including concrete, wood, and tile. It creates a waterproof, easy-to-clean, and stain-resistant surface that will last for years to come. Epoxy flooring comes in a variety of colors and styles, making it an excellent choice for any bathroom design.
Benefits of Installing an Epoxy Bathroom Floor
Installing an epoxy floor in your bathroom offers several advantages, including:
1. Increased Durability: Epoxy floors are extremely durable and resistant to abrasion, making them ideal for high-traffic areas like bathrooms. With proper maintenance, epoxy floors can last up to ten years or more.
2. Easy Maintenance: Unlike other types of flooring, epoxy floors require very little maintenance. They are easy to clean and can withstand heavy cleaning chemicals, making them ideal for bathrooms with frequent visitors or young children.
3. Stain Resistance: Epoxy floors are highly resistant to staining, dirt, and grime. This makes them a perfect choice for bathrooms that tend to get messy quickly or are subject to spills and splashes.
4. Slip Resistant: One of the most important features of any bathroom floor is its slip resistance. Epoxy floors are naturally slip resistant due to their textured surface, making them a safe option for those with small children or elderly family members.
5. Cost Effective: Installing an epoxy bathroom floor can be relatively inexpensive when compared to other types of flooring such as tiles or wood boards. In addition, it’s easy to install by yourself if you’ve got some DIY experience.
Instructions on How to Install an Epoxy Bathroom Floor
If you’d like to install your own epoxy floor in your bathroom, here is a step-by-step guide on how to do it:
Step 1: Prepare the Surface
Before applying the epoxy floor coating, you must first ensure that the surface is completely clean and free of dirt or debris. If you’re applying it on top of tiles or concrete, use a pressure washer and detergent to thoroughly clean the area before proceeding with the installation.
Step 2: Prime the Surface
Once you’ve cleaned the surface completely, you should apply an epoxy primer specifically designed for the surface you’ll be applying the epoxy coating onto. Make sure to let this dry completely before continuing with the installation process.
Step 3: Measure and Mix
Once the primer has dried, measure out the amount of epoxy resin needed for your project according to the manufacturer’s instructions and mix it accordingly before adding any colorants or additives.
Step 4: Apply Colorants and Additives
Depending on the look you want for your epoxy floor coating, you can now add any colorants or additives that you wish to achieve your desired result. Make sure these are mixed thoroughly before proceeding with the application procedure.
Step 5: Install Your Epoxy Coating
Now you’re ready to start spreading your epoxy coating across your bathroom floor according to the manufacturer’s instructions. Make sure that you use a roller brush or spatula for even coverage as you apply it over the entire surface area. Let your epoxy floor cure for at least 24 hours before walking on it or exposing it to water or heavy traffic.
Conclusion
Installing an epoxy bathroom floor may seem intimidating at first but with careful preparation and attention to detail it can be done easily by anyone with some basic DIY skills. This guide has outlined all the steps required in order to get started on this project yourself so that you can create a beautiful and durable bathroom floor that will last for many years to come .
What surfaces are best for DIY epoxy bathroom floor?
The best surfaces for DIY epoxy bathroom floors are clean, smooth, and prepped concrete, tile, and vinyl. Each surface requires slightly different prep work, so make sure to research what is necessary for each one before beginning the project.What types of preparation are needed for DIY epoxy bathroom flooring?
1. Thoroughly clean and dry the bathroom floor.2. Repair any existing damage to the floor.
3. Mask off and protect any areas you don’t want to get epoxy on.
4. Apply two coats of concrete primer/etching and let dry according to manufacturer’s instructions.
5. Mix the epoxy according to manufacturer’s directions and apply with a roller or brush.
6. Allow the first coat of epoxy to dry before applying a second coat.
7. If desired, add decorative chips or paint to add color to the epoxy floor.
8. Allow the epoxy to cure fully before using the room.
What tools are needed for DIY epoxy bathroom flooring?
1. Floor grinder or sander2. Vacuum cleaner
3. Tape measure
4. Metal screed
5. Epoxy kit
6. Protective clothing and gloves
7. Polishing pad
8. Respirator
9. Paint roller and pan or trowel
10. Drop cloths or tarps
11. Tape or glue gun
12. Paintbrush and sponge
What kind of epoxy should I use for DIY bathroom flooring?
We recommend using a two part, 100% solids, epoxy floor coating for your DIY bathroom flooring. This type of epoxy is designed to be both durable and waterproof, making it the perfect choice for a bathroom floor. Before you purchase the epoxy, be sure to read the instructions and follow the guidelines to ensure that you use the correct product for the job.What types of adhesive should be used when laying bathroom floor tiles?
The best type of adhesive to use when laying bathroom floor tiles is a thin-set mortar adhesive, which is a waterproof cement-based adhesive. This type of adhesive should be mixed with water according to the manufacturer’s instructions and applied to the back of the tile before laying on the substrate. For additional adhesion, it is also recommended to spread a small amount of thin-set adhesive onto the substrate as well.What are the advantages and disadvantages of using an adhesive to lay bathroom floor tiles?
Advantages:1. Adhesives for tiles are usually easy to use and highly effective, so laying floor tiles becomes much easier and faster.
2. Adhesive helps to securely hold the tiles in place, and there is no need to use grout.
3. Adhesives are affordable and quite easy to obtain.
Disadvantages:
1. Applying too much adhesive can cause tiles to become uneven or create air bubbles which can cause tiles to chip or crack.
2. If the adhesive is applied incorrectly it can lead to water seeping in behind the tiles and affecting the substrate surface, which could lead to mould and rot.
3. The adhesive needs to set overnight so it can be difficult to complete the job quickly and it is best to work in small sections at a time.