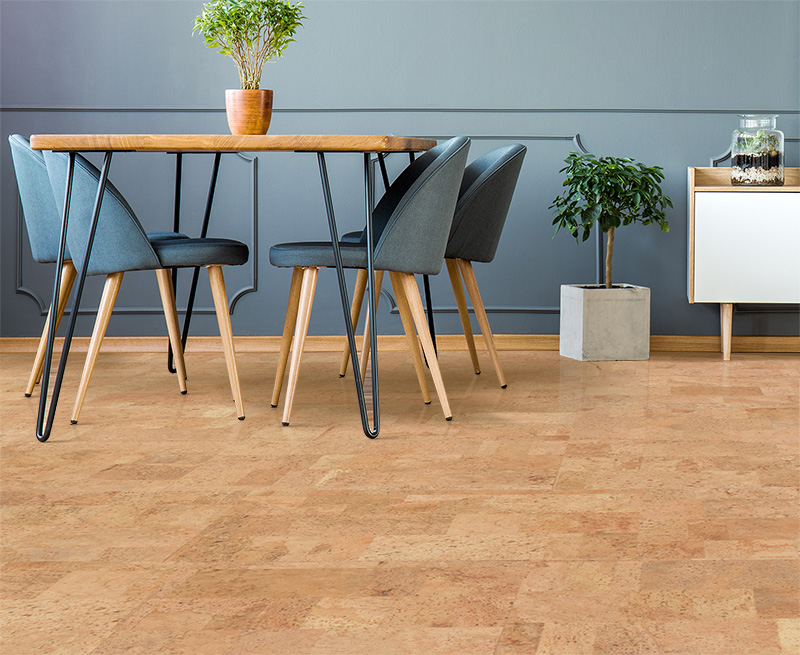
Cork flooring is an eco-friendly and stylish option for homeowners looking to add a unique touch to their living spaces. This guide will walk you through everything you need to know about DIY cork flooring, from selecting the right materials to installation and maintenance. We’ll also cover common mistakes to avoid and answer frequently asked questions to ensure your DIY project is a success.
Understanding Cork Flooring
What is Cork Flooring?
Cork flooring is made from the bark of cork oak trees, primarily harvested in Mediterranean countries like Portugal and Spain. This sustainable material is known for its unique properties, including elasticity, sound absorption, and thermal insulation. Cork flooring is available in various forms, including tiles and planks, and comes in a range of colors and finishes.
Benefits of Cork Flooring
One of the main advantages of cork flooring is its sustainability. The harvesting process does not harm the trees, allowing them to regenerate bark every nine years. Cork is also hypoallergenic and resistant to mold and mildew, making it an excellent choice for people with allergies. Additionally, cork flooring provides a cushioned surface that is comfortable to walk on and reduces noise, which is ideal for homes with children or pets.
Types of Cork Flooring
Cork flooring is available in two primary types: floating floors and glue-down tiles. Floating floors consist of interlocking planks that “float” above the subfloor, while glue-down tiles are adhered directly to the subfloor. Each type has its advantages and is suitable for different installation scenarios. Floating floors are easier to install and remove, while glue-down tiles offer a more permanent solution.
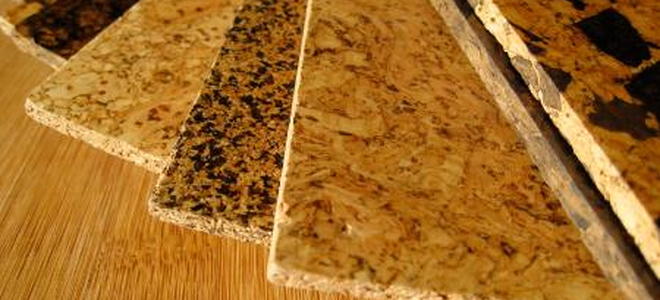
Choosing the Right Cork Flooring
When selecting cork flooring, consider factors such as thickness, finish, and color. Thicker cork provides better insulation and cushioning but may be more expensive. Finishes can range from natural to stained, with options like matte, satin, or high-gloss. The color of the cork can vary from light natural tones to darker, richer shades, allowing you to match your decor preferences.
Environmental Impact
Cork flooring is an environmentally friendly choice because it is made from a renewable resource. The production process generates minimal waste, and the cork itself is biodegradable. Choosing cork flooring can help reduce your carbon footprint and contribute to sustainable living. Moreover, many cork flooring manufacturers follow strict environmental standards and certifications, ensuring the product’s eco-friendliness.
Cost Considerations
Cork flooring can be more expensive than some other flooring options, but it offers long-term value due to its durability and low maintenance requirements. The cost varies based on factors such as quality, thickness, and finish. While the initial investment may be higher, cork flooring’s benefits and longevity make it a cost-effective choice in the long run.

Preparing for Installation
Assessing the Subfloor
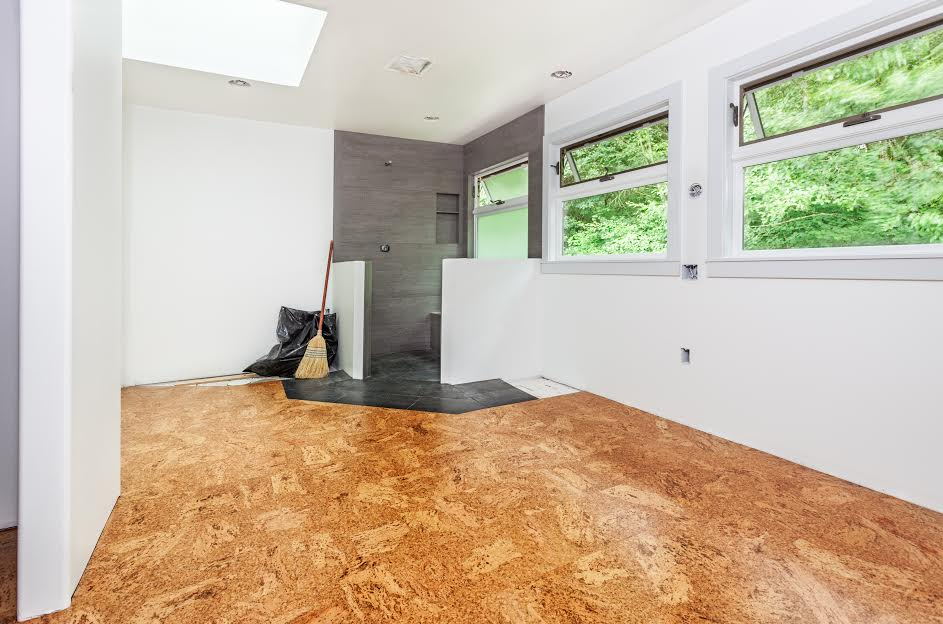
Before installing cork flooring, it’s crucial to assess the condition of the subfloor. The subfloor should be clean, dry, and level to ensure a successful installation. Remove any existing flooring materials and repair any cracks or uneven areas. A well-prepared subfloor provides a solid foundation for your cork flooring and prevents issues such as warping or gaps.
Gathering Necessary Tools and Materials
Having the right tools and materials on hand is essential for a smooth installation process. Key tools include a utility knife, measuring tape, straightedge, tapping block, and rubber mallet. You’ll also need materials such as underlayment, adhesive (if using glue-down tiles), and cork flooring planks or tiles. Preparing all necessary items in advance can help avoid delays during the installation.
Acclimating the Cork Flooring
Cork flooring needs to acclimate to the room’s temperature and humidity levels before installation. Place the cork planks or tiles in the installation area for at least 48 hours to adjust. This step helps prevent expansion or contraction after installation, ensuring a stable and long-lasting floor. Keep the room’s temperature and humidity consistent during this period.
Planning the Layout
Planning the layout of your cork flooring is a critical step that ensures a balanced and aesthetically pleasing result. Measure the space and create a detailed plan that includes the placement of full planks or tiles and cuts. Start from the center of the room and work outward to avoid awkward cuts at the edges. Dry-lay the flooring to visualize the final layout and make any necessary adjustments.
Cutting the Cork Flooring
Cutting cork flooring to fit around edges, corners, and obstacles is often required. Use a utility knife or saw to make precise cuts, ensuring that the edges are smooth and even. Measure carefully before cutting to avoid wasting materials. Properly cut pieces contribute to a professional and polished appearance.
Installing Underlayment
Underlayment is an important component that provides additional cushioning and sound insulation. Roll out the underlayment and trim it to fit the room’s dimensions, leaving a small gap around the edges to allow for expansion. Secure the underlayment in place with tape or adhesive, following the manufacturer’s instructions. Proper underlayment installation enhances the performance and comfort of your cork flooring.
Installing Floating Cork Flooring
Starting the Installation
Begin the installation by placing the first row of cork planks along the longest wall, leaving a small expansion gap between the planks and the wall. Use spacers to maintain this gap, which allows the flooring to expand and contract with changes in temperature and humidity. Ensure the planks are properly aligned and interlocked.
Interlocking the Planks
Floating cork flooring features a click-lock system that allows the planks to interlock without the need for adhesive. Align the tongue of one plank with the groove of the adjacent plank and press down firmly until they click into place. Use a tapping block and rubber mallet to secure the connection and avoid damaging the planks.
Staggering the Seams
To create a visually appealing and structurally sound floor, stagger the seams of the planks by at least 6 inches. This pattern reduces the risk of gaps and adds to the overall strength of the floor. Use cut pieces from the end of one row to start the next row, ensuring that seams do not align in adjacent rows.

Continuing the Installation
Continue installing the cork planks row by row, maintaining the expansion gap and staggered seams. Check periodically to ensure the rows are straight and the planks are securely interlocked. Adjust as necessary to keep the installation even and aligned. Floating cork flooring is relatively easy to adjust if mistakes are made, making it a user-friendly option for DIYers.
Fitting Around Obstacles
When fitting cork flooring around obstacles such as door frames or vents, measure and cut the planks carefully to ensure a snug fit. Use a jigsaw or coping saw for intricate cuts. For door frames, remove the molding and undercut the frame to allow the flooring to slide underneath, creating a seamless look.
Finishing the Installation
Once all the planks are installed, remove the spacers and install baseboards or quarter-round molding to cover the expansion gap around the room’s perimeter. This step not only enhances the appearance of the floor but also secures the edges and allows for natural expansion and contraction. Clean the floor thoroughly to remove any debris or dust from the installation process.

Installing Glue-Down Cork Tiles
Preparing the Subfloor
For glue-down cork tiles, proper subfloor preparation is even more critical. Ensure the subfloor is clean, dry, level, and free of any debris. Any imperfections in the subfloor can affect the adhesion and appearance of the tiles. Use a leveling compound to address any uneven areas and sand down high spots if necessary.
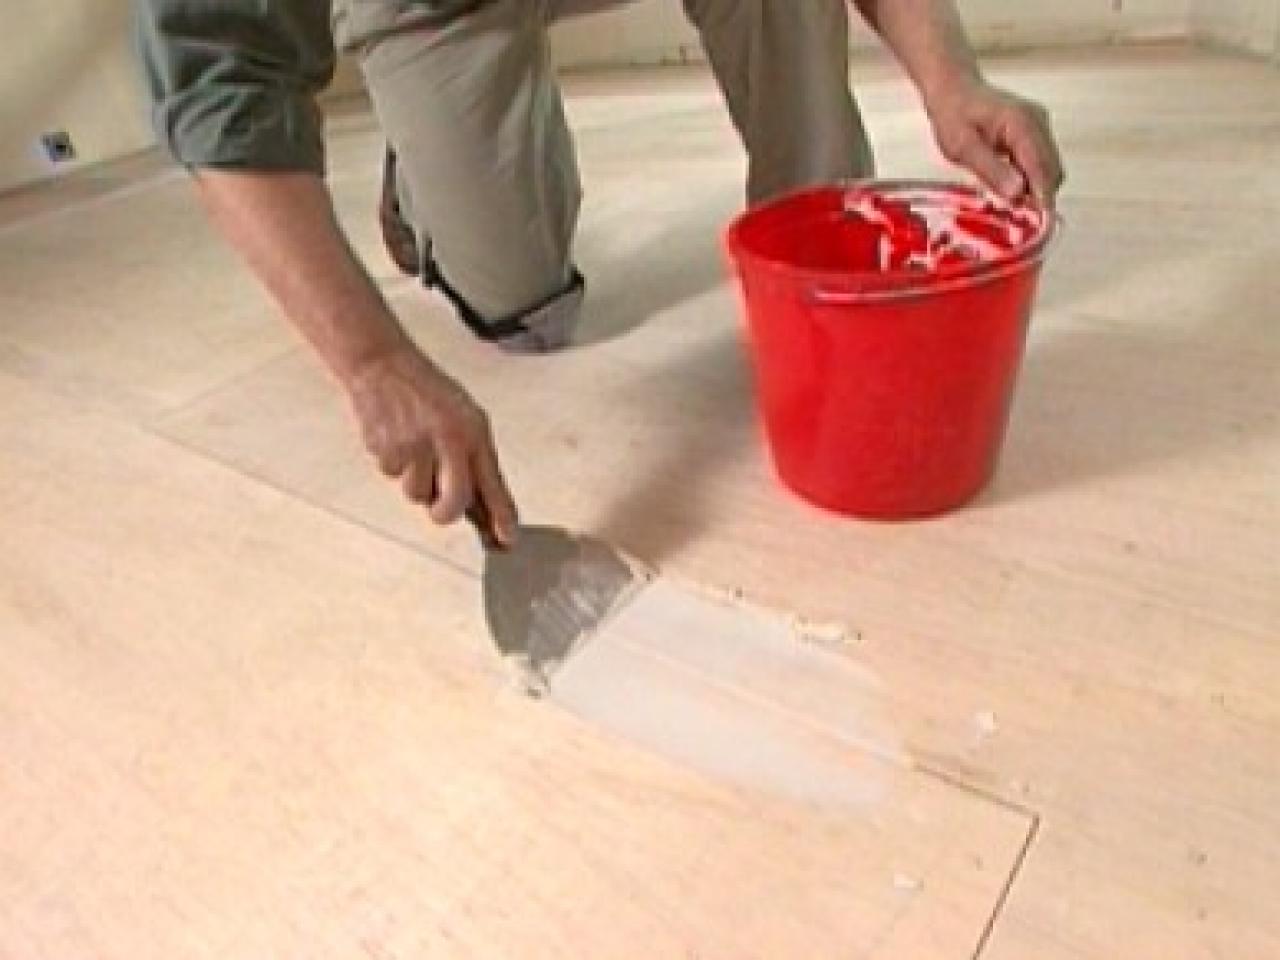
Applying Adhesive
Choose a high-quality adhesive specifically designed for cork flooring. Apply the adhesive to a small section of the subfloor using a notched trowel, following the manufacturer’s instructions for coverage and drying time. Spread the adhesive evenly to ensure a strong bond and prevent bubbles or gaps.
Setting the Tiles
Begin setting the tiles by placing the first tile in a corner or along the longest wall, pressing it firmly into the adhesive. Use a rolling pin or floor roller to ensure full contact and eliminate air pockets. Continue placing the tiles row by row, leaving a small expansion gap around the edges.

Cutting Tiles to Fit
When you reach the edges of the room or encounter obstacles, measure and cut the tiles to fit precisely. Use a utility knife or saw to make clean cuts, ensuring that the edges are smooth and even. Dry-fit the tiles before applying adhesive to confirm the fit and adjust as necessary.
Rolling the Floor
After all the tiles are set, use a floor roller to press them firmly into the adhesive. Rolling the floor helps to ensure a strong bond and prevents tiles from shifting or lifting. Follow the manufacturer’s recommendations for rolling the floor, typically within 24 hours of installation.
Allowing the Adhesive to Cure
Allow the adhesive to cure for the recommended time before walking on the floor or replacing furniture. This period is crucial for achieving a strong bond and preventing tiles from moving. Follow the manufacturer’s guidelines for curing times to ensure the best results.

Maintenance and Care
Regular Cleaning
Regular cleaning is essential to maintain the appearance and longevity of your cork flooring. Sweep or vacuum the floor regularly to remove dirt and debris that can scratch the surface. Use a damp mop with a pH-neutral cleaner to clean the floor, avoiding harsh chemicals that can damage the finish.
Preventing Damage
Protect your cork flooring from scratches and dents by using furniture pads under heavy objects and placing rugs or mats in high-traffic areas. Avoid dragging heavy items across the floor, and be mindful of sharp objects that can cause damage. Regularly inspect the floor for signs of wear and address any issues promptly.
Handling Spills
Cork flooring is naturally resistant to moisture, but it’s important to clean up spills promptly to prevent staining or damage. Blot the spill with a clean cloth and use a damp mop to clean the area. Avoid using excessive water, as it can seep into the seams and cause swelling or warping.
Reapplying Finish
Over time, the finish on your cork flooring may wear down, especially in high-traffic areas. Reapply a protective finish periodically to maintain the floor’s appearance and durability. Follow the manufacturer’s recommendations for reapplying finish and choose a product compatible with your cork flooring.
Repairing Damage
If your cork flooring becomes damaged, you can repair it by replacing individual tiles or planks. Carefully remove the damaged piece and clean the area thoroughly. Apply adhesive and set the new tile or plank, ensuring it is level with the surrounding floor. Use a rolling pin or floor roller to secure the repair.
Long-Term Care
Caring for your cork flooring over the long term involves regular maintenance and occasional touch-ups. Keep the floor clean and free of debris, reapply finish as needed, and address any damage promptly. With proper care, your cork flooring can last for many years and continue to provide a beautiful and durable surface.

Common Mistakes to Avoid
Skipping Subfloor Preparation
One of the most common mistakes is skipping the subfloor preparation. Failing to clean, level, and repair the subfloor can result in uneven tiles and poor adhesion. Take the time to properly prepare the subfloor to ensure a smooth and successful installation.
Incorrect Adhesive Application
Using the wrong adhesive or applying it incorrectly can lead to tiles not adhering properly. Choose a high-quality adhesive suitable for cork flooring and follow the manufacturer’s instructions for application. Ensure even coverage and avoid using too much or too little adhesive.
Inadequate Acclimation
Not allowing the cork flooring to acclimate to the room’s temperature and humidity can cause the planks or tiles to expand or contract after installation. This can lead to gaps, warping, or buckling. Ensure the flooring acclimates for at least 48 hours before installation.
Poor Planning and Layout
Inaccurate measurements and poor planning can result in an unbalanced and uneven tile layout. Take the time to measure your space carefully and plan the layout, starting from the center and working outward. Dry-lay the flooring to visualize the final arrangement and make any necessary adjustments.
Not Sealing Tiles and Grout
Failing to seal the tiles and grout can lead to stains, moisture damage, and discoloration. Always apply a high-quality sealer designed for cork tiles and grout. Follow the manufacturer’s instructions for application and reapply periodically to maintain protection.
Neglecting Maintenance
Regular maintenance is essential for keeping your cork floor tiles in good condition. Neglecting cleaning, sealing, and repairs can lead to a worn and damaged floor. Incorporate regular maintenance tasks into your routine to ensure the longevity and appearance of your tiles.

How do I choose the right cork flooring for my space?
Choosing the right cork flooring involves considering factors such as thickness, finish, and color. Assess the function of your space and select flooring that is durable, water-resistant, and easy to maintain. Evaluate the quality of the flooring and ensure it complements your overall design theme.
Can I install cork flooring over an existing floor?
Yes, you can install cork flooring over an existing floor if the subfloor is in good condition. Ensure the existing floor is clean, dry, and level before installation. Use a high-quality adhesive suitable for the subfloor material and follow the manufacturer’s instructions for proper adhesion.
How do I maintain cork flooring?
Maintaining cork flooring involves regular cleaning, prompt spill cleanup, and periodic sealing. Sweep or vacuum regularly to remove dirt and debris, use a pH-neutral cleaner for cleaning, and avoid harsh chemicals. Reapply sealant periodically to protect against stains and moisture, and address any repairs promptly.

Are cork floors suitable for high-traffic areas?
Yes, cork floors are suitable for high-traffic areas due to their durability and resilience. However, regular maintenance, such as sweeping, vacuuming, and periodic reapplication of sealant, is essential to keep the floor in good condition. Consider placing rugs or mats in particularly high-traffic areas for added protection.
How long does it take to install cork flooring?
The installation time for cork flooring depends on the size of the area, the complexity of the layout, and the drying times for adhesive and sealant. On average, the process can take several days to a week. Allow proper curing time for adhesive, sealant, and underlayment before heavy traffic or use.
What should I do if a cork tile gets damaged?
If a cork tile gets damaged, you can replace it by carefully removing the damaged tile and cleaning the area. Apply new adhesive and set the replacement tile, ensuring it is level with the surrounding tiles. Grout and seal the new tile to match the existing installation. For significant damage, consult a professional for proper repair.
Related Posts: