Cedar Bathroom Floor

Rustic Red Cedar Bathroom in Jerseyville Barn with slate floor and hand crafted walnut vanity

Cedar Paneling Bathroom Remodel Bathroom Cedar Panels

Cedar plank flooring. Cedar plank, Plank flooring, Flooring

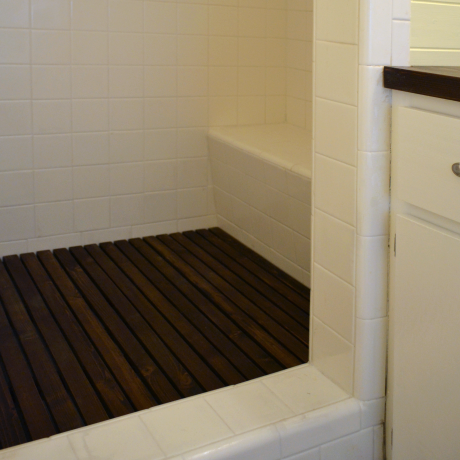
DIY Removable Cedar Shower Floor Mat
Add a Classic Touch to Cabins with Cedar Wood Paneling

Related image Bathrooms remodel, Remodel, Cedar homes

75 Rustic Primary Bathroom Ideas (Photos) Knotty pine paneling, Knotty pine decor, Cabin bathrooms

Cedar Plank Bathroom Wall – Domestically Speaking

DIY Cedar Bath Mat – The Merrythought

Cedar Log Vanity Cabin bathroom decor, Rustic bathrooms, Rustic bathroom vanities

Related Posts:
- French Country Bathroom Flooring
- Mid Century Modern Bathroom Flooring
- Rustic Bathroom Floor Tiles
- Purple Bathroom Flooring
- How To Clean Bathroom Floor Stains
- Tile Design Bathroom Floor
- Terracotta Bathroom Floor
- Cool Bathroom Floor Ideas
- Light Bathroom Floor Tiles
- Classic Bathroom Floor Tile Ideas
SEO Title: How to Install a Cedar Bathroom Floor for a Refreshing New Look
Cedar bathroom floors are becoming increasingly popular in the home design world. Not only do they offer a beautiful aesthetic and feel that is impossible to replicate with other materials, but they are also incredibly easy to install. Whether you’re looking to renovate an existing bathroom or create a brand new one, installing a cedar floor will give your home a refreshing new look.
Benefits of Installing a Cedar Bathroom Floor
Cedar floors offer many benefits that make them the perfect choice for any bathroom. The natural wood grain and texture of cedar provide an organic feel that is unparalleled. Cedar is also highly durable, making it an ideal choice for high-traffic areas in the home, including bathrooms. Additionally, it is resistant to mold and mildew, and its antiseptic properties help keep your bathroom smelling fresh and clean.
Preparation Before Installing Your Cedar Floor
Before installing your cedar floor, there are several steps you need to take to ensure the process goes smoothly. First, you should inspect your subfloor for any damage or potential weak spots that could cause problems during installation. If needed, repair any damage or weak spots before beginning the installation process. You should also make sure the subfloor is clean and free of debris before starting.
Next, you will need to measure the area where your cedar floor will be installed. Measure the length and width of the room in order to determine how much cedar flooring you need to purchase. It’s important to remember that you should always buy more than you need in order to account for mistakes or unexpected changes during installation.
Installing Your Cedar Bathroom Floor
Once you have all your materials ready, it’s time to begin installing your cedar bathroom floor. Start by laying out a row of planks along one wall of the room, making sure they are aligned correctly and spaced evenly apart. Then use a level to make sure each plank is straight before securing them with glue or nails. As you continue laying out each row of planks, make sure they are staggered so there are no seams aligning between adjacent rows.
Once all the planks are laid out, it’s time to secure them with nails or glue. For added stability, you can use construction adhesive along the perimeter of each plank as well as in between them. Once all the planks are secured, let them dry before continuing with the next step.
Finishing Your Cedar Bathroom Floor
Once all the planks are laid out and secured, it’s time to give them a finish. If you want your cedar floor to have an extra layer of protection against moisture and dirt, consider applying a sealant or wax finish. This will help protect your floor from water damage as well as everyday wear and tear. Once your sealant or wax finish has been applied, let it dry completely before walking on it or using it in any way.
Enjoy Your New Cedar Bathroom Floor!
Installing a cedar bathroom floor can be a daunting task but if done properly, it can provide many years of enjoyment. With its natural beauty and durability, cedar is the perfect choice for any bathroom renovation project or new build. So go ahead and enjoy your new cedar bathroom floor – it’s sure to bring a refreshing new look to your home!