How To Reglaze Tile Floor

Image result for reglaze tile floor Tile reglazing, Flooring, House design

Reglaze Tile Floor Diy – Flooring Images

Go to http://specializedrefinishing.com/services/tile-reglazing/ for more info on our tile

Reglazing Old Bathroom Tiles – Bathroom Information
Tile Floor Resurfacing – Flooring Site

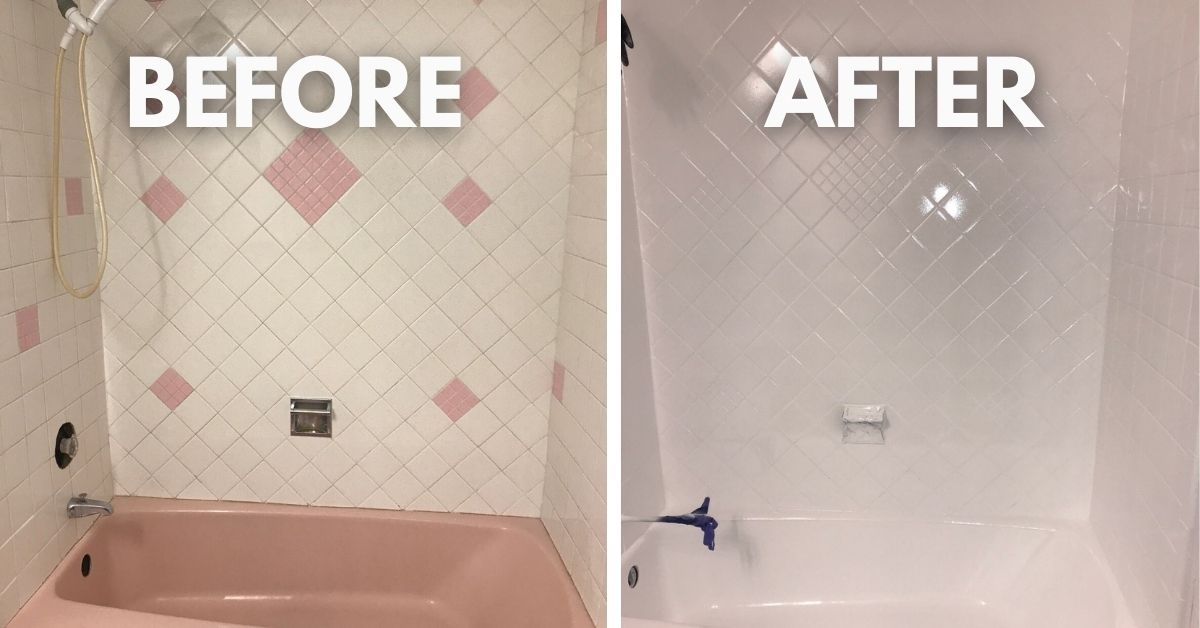
24 Stunning Reglazing Bathroom Tile – Home, Family, Style and Art Ideas
Reglaze Tile Floor Cost – Flooring House

Bathtub Reglazing and Floor Tile Resurfacing, Multi-Stone Fleck line, by Dennie’s Resurfacing

Tile Floor Resurfacing – Flooring Site

24 Stunning Reglazing Bathroom Tile – Home, Family, Style and Art Ideas

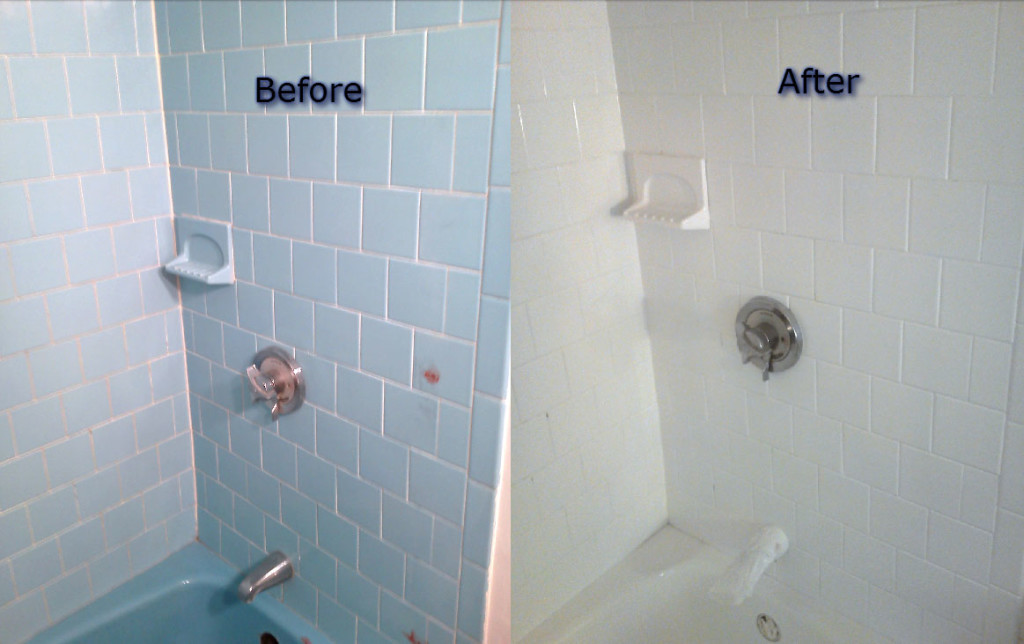
24 Cute Refinishing Bathroom Tiles – Home Decoration and Inspiration Ideas

Related Posts:
- Cuban Tile Floors
- Easy Way To Grout Tile Floor
- Types Of Marble Tile Flooring
- Slate Tile Floor
- Classic Bathroom Tile Floors
- Tile Floor Color Ideas
- Wet Mops For Tile Floors
- Staining Saltillo Tile Floors
- Terrazzo Tile Floor Outdoor
- Tile Flooring For Screened Porch
Tile floors are a great way to add a touch of style and sophistication to any room of your home, but keeping them in good shape is no easy task. Maintaining tile floors can be a time-consuming and difficult process, and if left unchecked, the grout between your tiles can become discolored or cracked over time. Reglazing tile floors is an effective way to restore their original look while also adding protection from further damage. In this article, we’ll discuss what reglazing is, how to go about it, and the types of materials you need to get the job done.
## What is Reglazing Tile Floors?
Reglazing tile floors is the process of applying a protective coating to the surface of your tiles in order to preserve their appearance and protect them from future damage. This coating will also help fill in any gaps or cracks that have developed in the grout between your tiles. Reglazing tile floors can help make your tiles look brand new again and restore their original luster and shine.
## How to Reglaze Tile Floors
Before you start the process of reglazing your tile floors, it’s important to make sure they are clean and free from dirt and debris. Start by vacuuming up any loose dirt or dust that has built up on your tile floors, then mopping them with a mild detergent to remove any stubborn grime. Once you’ve thoroughly cleaned your floor, allow it to dry completely before starting the reglazing process.
To begin reglazing your tile floors, you’ll need some specific materials, including a penetrating sealant, a soft cloth, a roller applicator brush, an edging tool, some masking tape, and some rags for wiping up any spills or excess material during the process. Start by applying the penetrating sealant to the surface of your tiles using the roller applicator brush and edging tool, making sure to evenly coat each area without leaving any puddles or drips behind. Once you’ve finished applying the sealant, allow it to dry for at least 12 hours before applying the topcoat.
When you’re ready to apply the topcoat for your reglazing job, use masking tape around any areas that you don’t want covered by the topcoat (such as windows or doorways). Use a roller or brush to evenly spread the topcoat over the entire surface of your tile floors, making sure to carefully fill in all cracks and crevices along the way. Allow this coat to dry overnight before walking on it.
## Types of Materials You Need To Reglaze Tile Floors
When it comes time for reglazing tile floors, there are a few specific materials you’ll need in order to get the job done right. The most important material is a penetrating sealant which can be used both before and after applying the topcoat. This sealant will help create a waterproof layer over your tiles which will prevent water from seeping into cracks or crevices and damaging them over time.
In addition to this sealant, you’ll also need a roller applicator brush and an edging tool which can be used for applying the sealant as well as spreading out the topcoat once it has been applied. Masking tape is also necessary for keeping areas that shouldn’t be covered by the topcoat protected from spills or excess material that could cause permanent damage. Lastly, rags are essential for cleaning up any messes that occur during the process of reglazing your tile floors.
## Final Thoughts
Reglazing tile floors is an effective way to restore their original beauty while protecting them from future damage. The process involves applying a protective coating over your tiles which will fill in any gaps or cracks that have developed as well as add some much needed waterproofing protection. By following these tips and using the proper materials, you can reglaze your tile floors with ease and keep them looking beautiful for years to come.
What tools do I need to reglaze a tile floor?
– Putty knife– Sponge
– Grout float
– Bucket
– Grout sealer
– Latex gloves
– Protective eyewear
– Soft bristle brush
– Tile and grout cleaner
– Tile spacers
– Respirator mask
– Chalk line
– Timer or clock
– Notched trowel
– Removeable tile adhesive
– Tile cutters or wet saw
– Tile roller or wheeled spreader
– Penetrating sealant
– Stencils (optional)
– Edge trimmer (optional)
– Painter’s tape (optional)
– Paint roller (optional)
– Rags for cleaning up (optional)