When I inherited my 1980s split-level home four years ago, the basement was nothing more than a cold, damp storage area with bare concrete floors that made my feet ache just walking across them. I knew I wanted to turn this space into a functional family room, but the flooring challenge seemed overwhelming at first. After extensive research, several failed attempts, and learning from my mistakes, I finally found the perfect solution that has transformed my basement into one of our favorite gathering spaces. The journey taught me that basement flooring isn’t just about covering concrete; it’s about understanding moisture, insulation, and creating a comfortable environment that can withstand the unique challenges of below-grade living.
Luxury Vinyl Plank: The Game-Changer for Moisture Control
After my first flooring disaster with laminate that warped from moisture, I discovered luxury vinyl plank (LVP), and it completely changed my basement renovation game. The waterproof core technology meant I could finally have beautiful floors that looked like hardwood without worrying about humidity or the occasional minor flood. I chose a rustic oak pattern that added warmth to the space while the textured surface provided grip, which was important for safety on basement stairs.
The installation process was surprisingly manageable as a weekend DIY project. The click-lock system allowed me to install the planks as a floating floor over my existing concrete, using a moisture barrier and foam underlayment for extra insulation. I appreciated that I could work in sections, completing one area at a time without disrupting the entire basement. The flexibility of LVP also meant it could handle minor settling or temperature changes without cracking.
Living with LVP in my basement for three years now, I can honestly say it’s been maintenance-free and incredibly durable. When our water heater leaked last winter, the water beaded up on the surface and cleaned up easily with no damage. The comfort underfoot is remarkable compared to bare concrete, and guests consistently compliment the floors, often assuming they’re real hardwood. The investment has paid off in both functionality and the value it’s added to my home.
Polished Concrete: Industrial Chic That Works
Before settling on LVP for most of my basement, I experimented with polished concrete in my workshop area, and the results were stunning. The process involved grinding the existing concrete smooth and applying multiple coats of sealer to create a glossy, durable surface. What initially seemed like a budget-friendly option turned out to be both practical and stylish, giving my basement a modern, industrial aesthetic that I love.
The transformation was dramatic. My dull, stained concrete became a sleek surface that reflects light beautifully, making the basement feel larger and brighter. I added decorative scoring patterns to create the appearance of large tiles, which helped break up the expanse and added visual interest. The radiant heating mat I installed underneath made the concrete surprisingly comfortable to walk on, even during cold winter months.
Maintenance has been incredibly simple. I just sweep regularly and mop occasionally with a neutral cleaner. Spills clean up effortlessly, and the surface has proven resistant to stains from paint, oil, and other workshop materials. The durability is outstanding, with no signs of wear even in high-traffic areas. The only consideration is that dropped items can break more easily on the hard surface, but for a workshop environment, this trade-off has been worthwhile.

Carpet Tiles: Comfort and Flexibility Combined
For areas where I wanted maximum comfort, like the TV watching zone and kids’ play area, I chose commercial-grade carpet tiles that could handle basement conditions. Unlike traditional broadloom carpet that can trap moisture and develop mold, these modular tiles allow air circulation and can be individually replaced if damaged. I selected a neutral gray pattern that hides dirt well and provides the soft, warm feeling my family wanted for relaxation.
The installation was incredibly forgiving for a novice. Each tile simply stuck to the concrete with adhesive backing, and I could easily cut tiles to fit around obstacles like support posts. The beauty of the modular system became apparent when my son spilled paint during an art project. I simply removed the affected tiles, cleaned them, and put them back down. No need to replace entire sections or hire professionals for repairs.
The comfort factor has been amazing for our family lifestyle. The tiles provide cushioning for kids playing on the floor and insulation that makes the space feel warmer. Sound dampening is another unexpected benefit, as the carpet tiles significantly reduce noise transmission to the upper floors. After two years, they still look great despite heavy use, pet traffic, and the occasional basement party with friends.

Engineered Hardwood: Premium Look with Basement-Friendly Features
Initially, I thought hardwood was impossible in a basement environment, but I discovered engineered hardwood specifically designed for below-grade installation. The layered construction with a moisture-resistant core allowed me to achieve the premium hardwood look I wanted in my main entertaining area. I chose a wide-plank hickory that added character and warmth while being stable enough for basement conditions.
The installation required careful attention to moisture management. I used a vapor barrier system and allowed the flooring to acclimate in the basement for several days before installation. The tongue-and-groove system went together smoothly, though I hired professionals for this installation, given the investment and technical requirements. The result was worth every penny, creating a sophisticated space that rivals any main-floor room.
Living with engineered hardwood in my basement has exceeded my expectations. The surface is easy to clean and maintain, requiring only regular sweeping and occasional damp mopping. The stability has been excellent, with no warping or gapping even through seasonal humidity changes. When friends visit, they’re always surprised to learn they’re in a basement because the flooring gives it such an upscale, finished appearance.

Rubber Flooring: Safety and Durability for Active Spaces
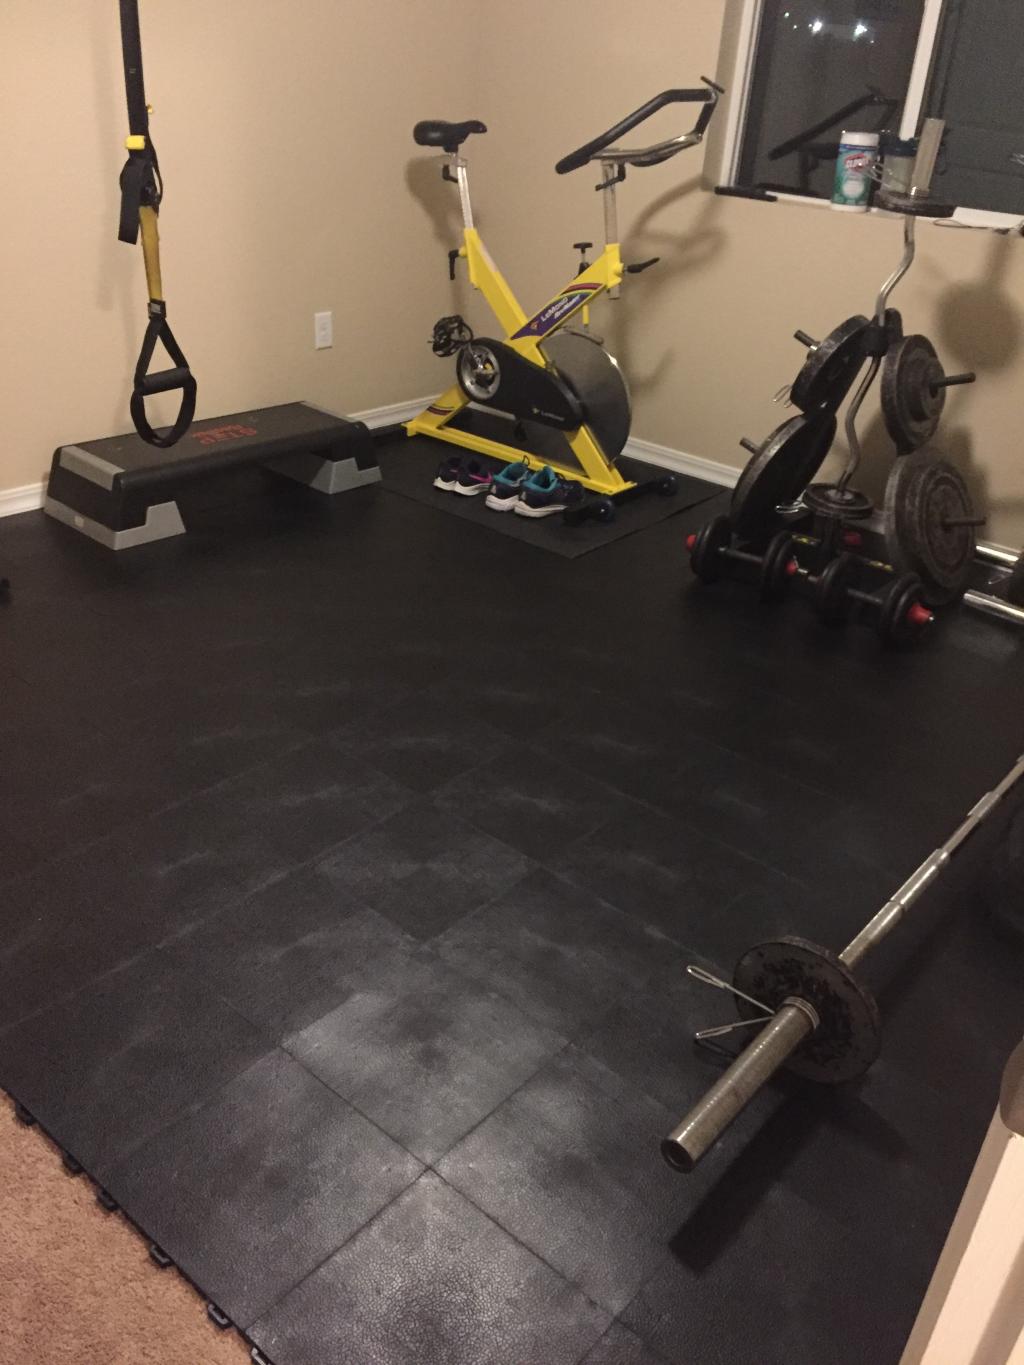
For my home gym area, I needed flooring that could handle dropped weights, provide cushioning for exercises, and resist moisture from workouts. Rubber flooring tiles turned out to be the perfect solution, offering safety, comfort, and durability in a basement environment. The interlocking system made installation straightforward, and the variety of colors allowed me to create an attractive pattern that defined the exercise space.
The performance benefits have been outstanding. The cushioned surface reduces impact on joints during workouts while providing excellent grip for safety. When I drop weights or exercise equipment, the rubber absorbs the impact without damage to either the floor or the equipment. The non-porous surface resists bacteria and odors naturally, which is crucial in a workout environment where moisture and sweat are constant factors.
Maintenance is minimal and practical. I simply sweep regularly and mop with a mild disinfectant when needed. The textured surface hides scuff marks and minor wear, while spills wipe up easily. The modular design means I can reconfigure the layout if needed or replace individual tiles if they become damaged. For an active family, rubber flooring has proven to be both functional and cost-effective for specialized basement spaces.
Ceramic Tile: Classic Reliability for Wet Areas
In my basement bathroom and utility room, ceramic tile was the obvious choice for its water resistance and durability. I learned that proper installation in below-grade applications requires waterproof membranes and careful attention to drainage, but the long-term performance makes the extra effort worthwhile. I chose large-format tiles to minimize grout lines and selected a stone-look pattern that complements the overall basement design.
The installation was more complex than other flooring options, requiring professional expertise to ensure proper waterproofing and drainage. The process included installing a waterproof membrane system, heating cables for comfort, and using specialized grouts and sealers designed for basement applications. While more expensive initially, the peace of mind and long-term durability have justified the investment.
The performance has been flawless for over three years. The surface is completely impervious to water and easy to keep clean and sanitary. The heated cables make the tile comfortable underfoot even in winter, and the durability means I don’t worry about damage from dropped items or heavy use. For wet areas in basements, ceramic tile remains the gold standard for reliability and longevity.

What’s the most important consideration when choosing basement flooring?
Moisture management is crucial. I learned this after my first failed attempt with standard laminate. Always test your concrete for moisture levels, use appropriate vapor barriers, and choose flooring specifically rated for below-grade installation. Address any existing moisture issues before installing any flooring system.
Can I install heated floors in my basement?
Yes! I installed radiant heating under both my polished concrete and ceramic tile areas. Electric heating mats work well with most basement flooring types and dramatically improve comfort. The installation adds cost but makes the basement feel like any other living space. Plan for proper insulation and moisture barriers.

How do I handle basement flooding concerns with my flooring choice?
Choose truly waterproof options like LVP, polished concrete, or ceramic tile for flood-prone areas. I keep a wet vacuum handy and ensure proper drainage around my basement perimeter. Floating floors like LVP can be easier to dry out than glued-down options if water does get underneath.
What’s the most budget-friendly basement flooring option?
Polished concrete offers the best value if your existing slab is in good condition. My workshop area costs about $3 per square foo,t including sealer and decorative scoring. Carpet tiles are another affordable option for comfort areas, typically running $2-4 per square foot installed.

How do I deal with uneven concrete floors?
I used self-leveling compound in areas with significant dips or slopes. For minor irregularities, quality underlayment can help with floating floor systems. Don’t skip this step; uneven floors will show through most flooring types and can cause premature failure or safety issues.
Should I hire professionals or attempt DIY basement flooring installation?
It depends on the flooring type and your skill level. I successfully installed LVP and carpet tiles myself, but hired professionals for engineered hardwood and ceramic tile. Consider the complexity, your experience level, and the consequences of mistakes when making this decision. Some installations require special tools.

Choosing the best flooring for your basement
Related Posts: