Garage Floor Epoxy Pictures

Epoxy Garage Floors Philadelphia New Jersey Jersey Shore
Epoxy Garage Flooring & Polyaspartic Coatings Vancouver

Epoxy Floor Coating A Garage In Eagle Idaho

3 Best Garage Floor Epoxy Options for a Durable, Long-Lasting Finish – Garage Sanctum
Epoxy Garage Floors that are beautiful and commercial grade -Garage Revolution
Epoxy Vinyl Chip Garage Floor- Springfield, MA – Diamond Kote Decorative Concrete Resurfacing

Garage Floor Epoxy Kits Epoxy flooring coating and paint ArmorGarage

Epoxy Coated my garage floor – Imgur Garage epoxy, Garage floor, Garage floor paint

5 Benefits of a Garage Epoxy Floor Professional Surface Restoration
Metallic Epoxy Garage Floor Pictures – flooring Designs

Related Posts:
- Marble Garage Floor
- Cheap Garage Floor Covering
- Garage Floor Coating
- Heavy Duty Garage Flooring
- Checkerboard Garage Floor Tiles
- Garage Floor Sealer Paint
- Epoxyshield Garage Floor Paint
- Benefits Of Epoxy Flooring In Garage
- Garage Floor Preparation For Epoxy
- Garage Workshop Flooring
Are you looking for ways to make your garage more visually appealing? One great solution is to install epoxy coatings on your garage floor. Not only will this create a more polished look, it can also protect your garage floor from scratches, stains, and other damage. This article will explore all the key aspects of laying epoxy onto your garage floor, from pictures to what to consider before you start the process.
What Is Garage Floor Epoxy?
Epoxy is a type of floor coating that uses a combination of resins and hardeners to form a durable, glossy finish. It’s often referred to as a ‘polymer concrete’ and comes in a wide range of colors. A great benefit of epoxy is it offers excellent protection against scratches, dents, and other damage. Additionally, it’s available in easy DIY kits that allow you to lay the coating yourself. This makes it an ideal choice for those looking for a cost-effective way to makeover their garage floors.
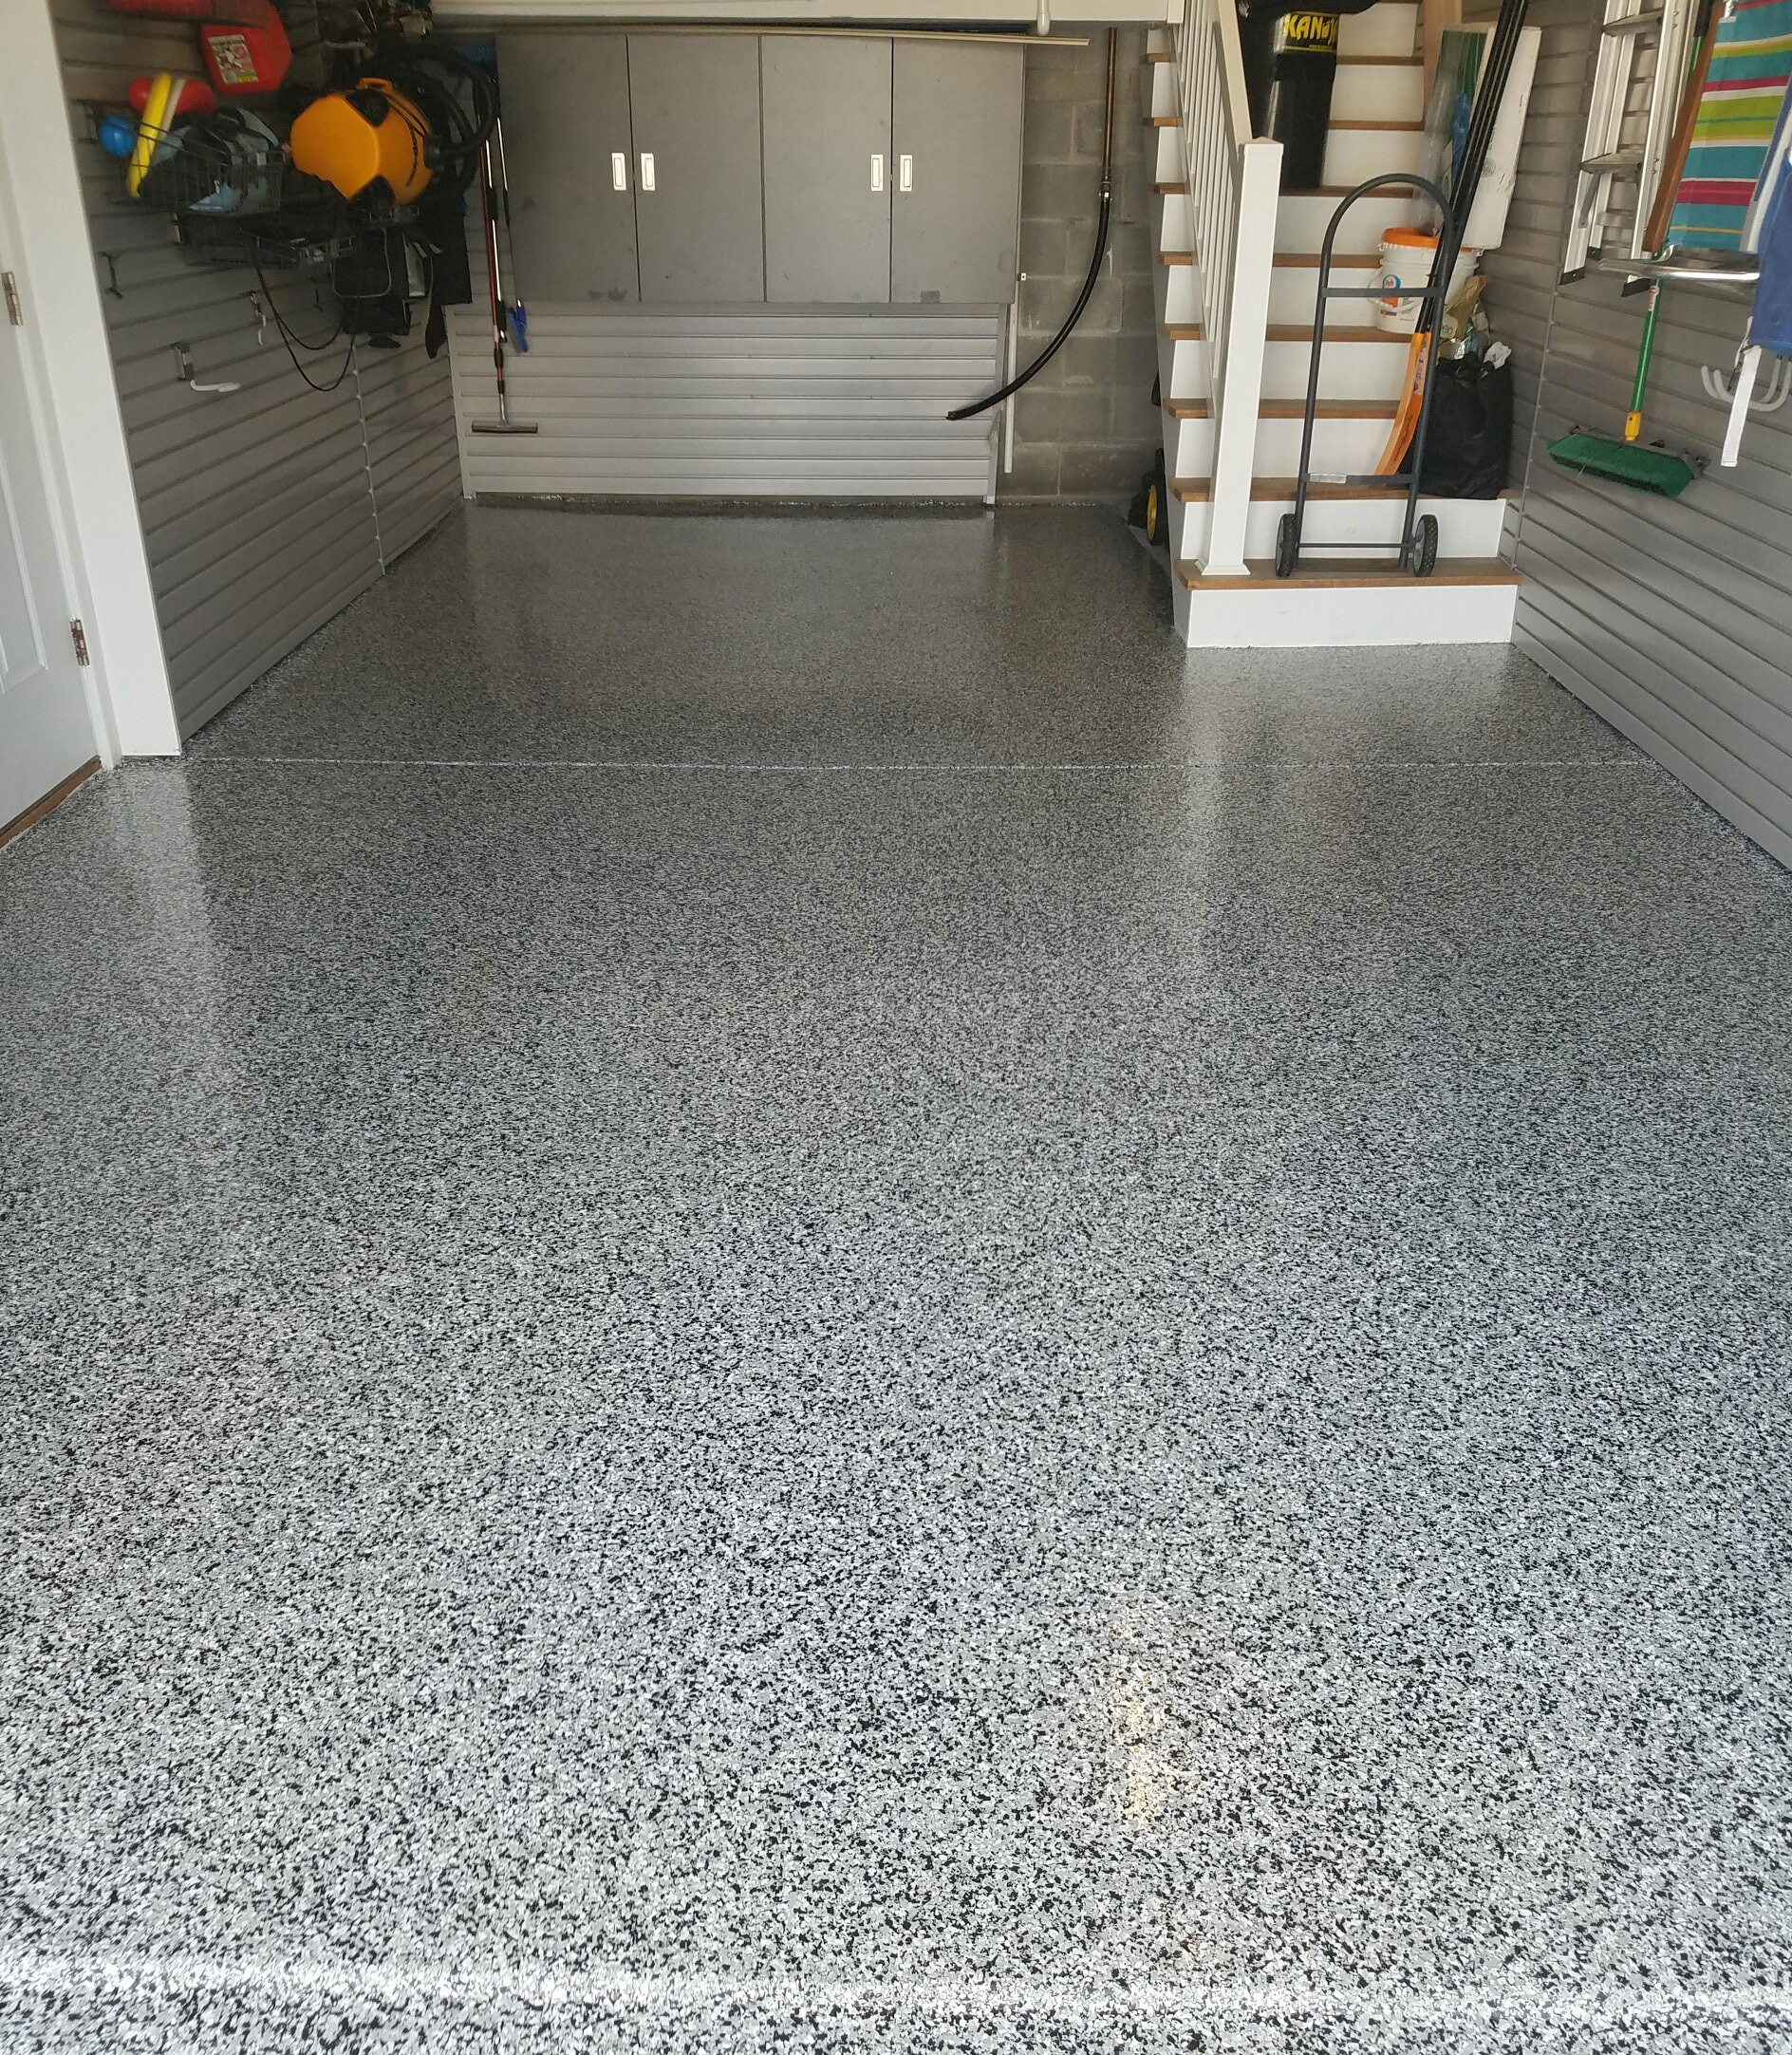
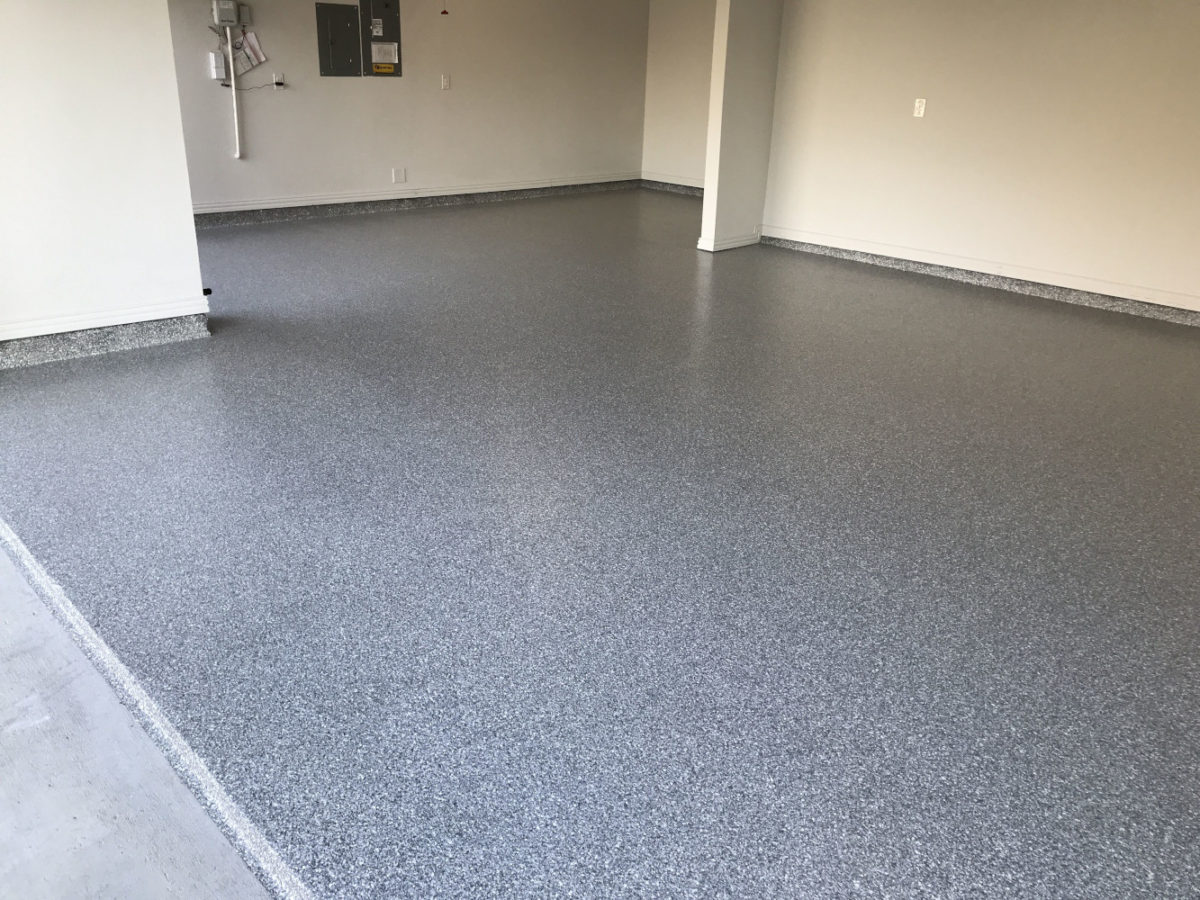
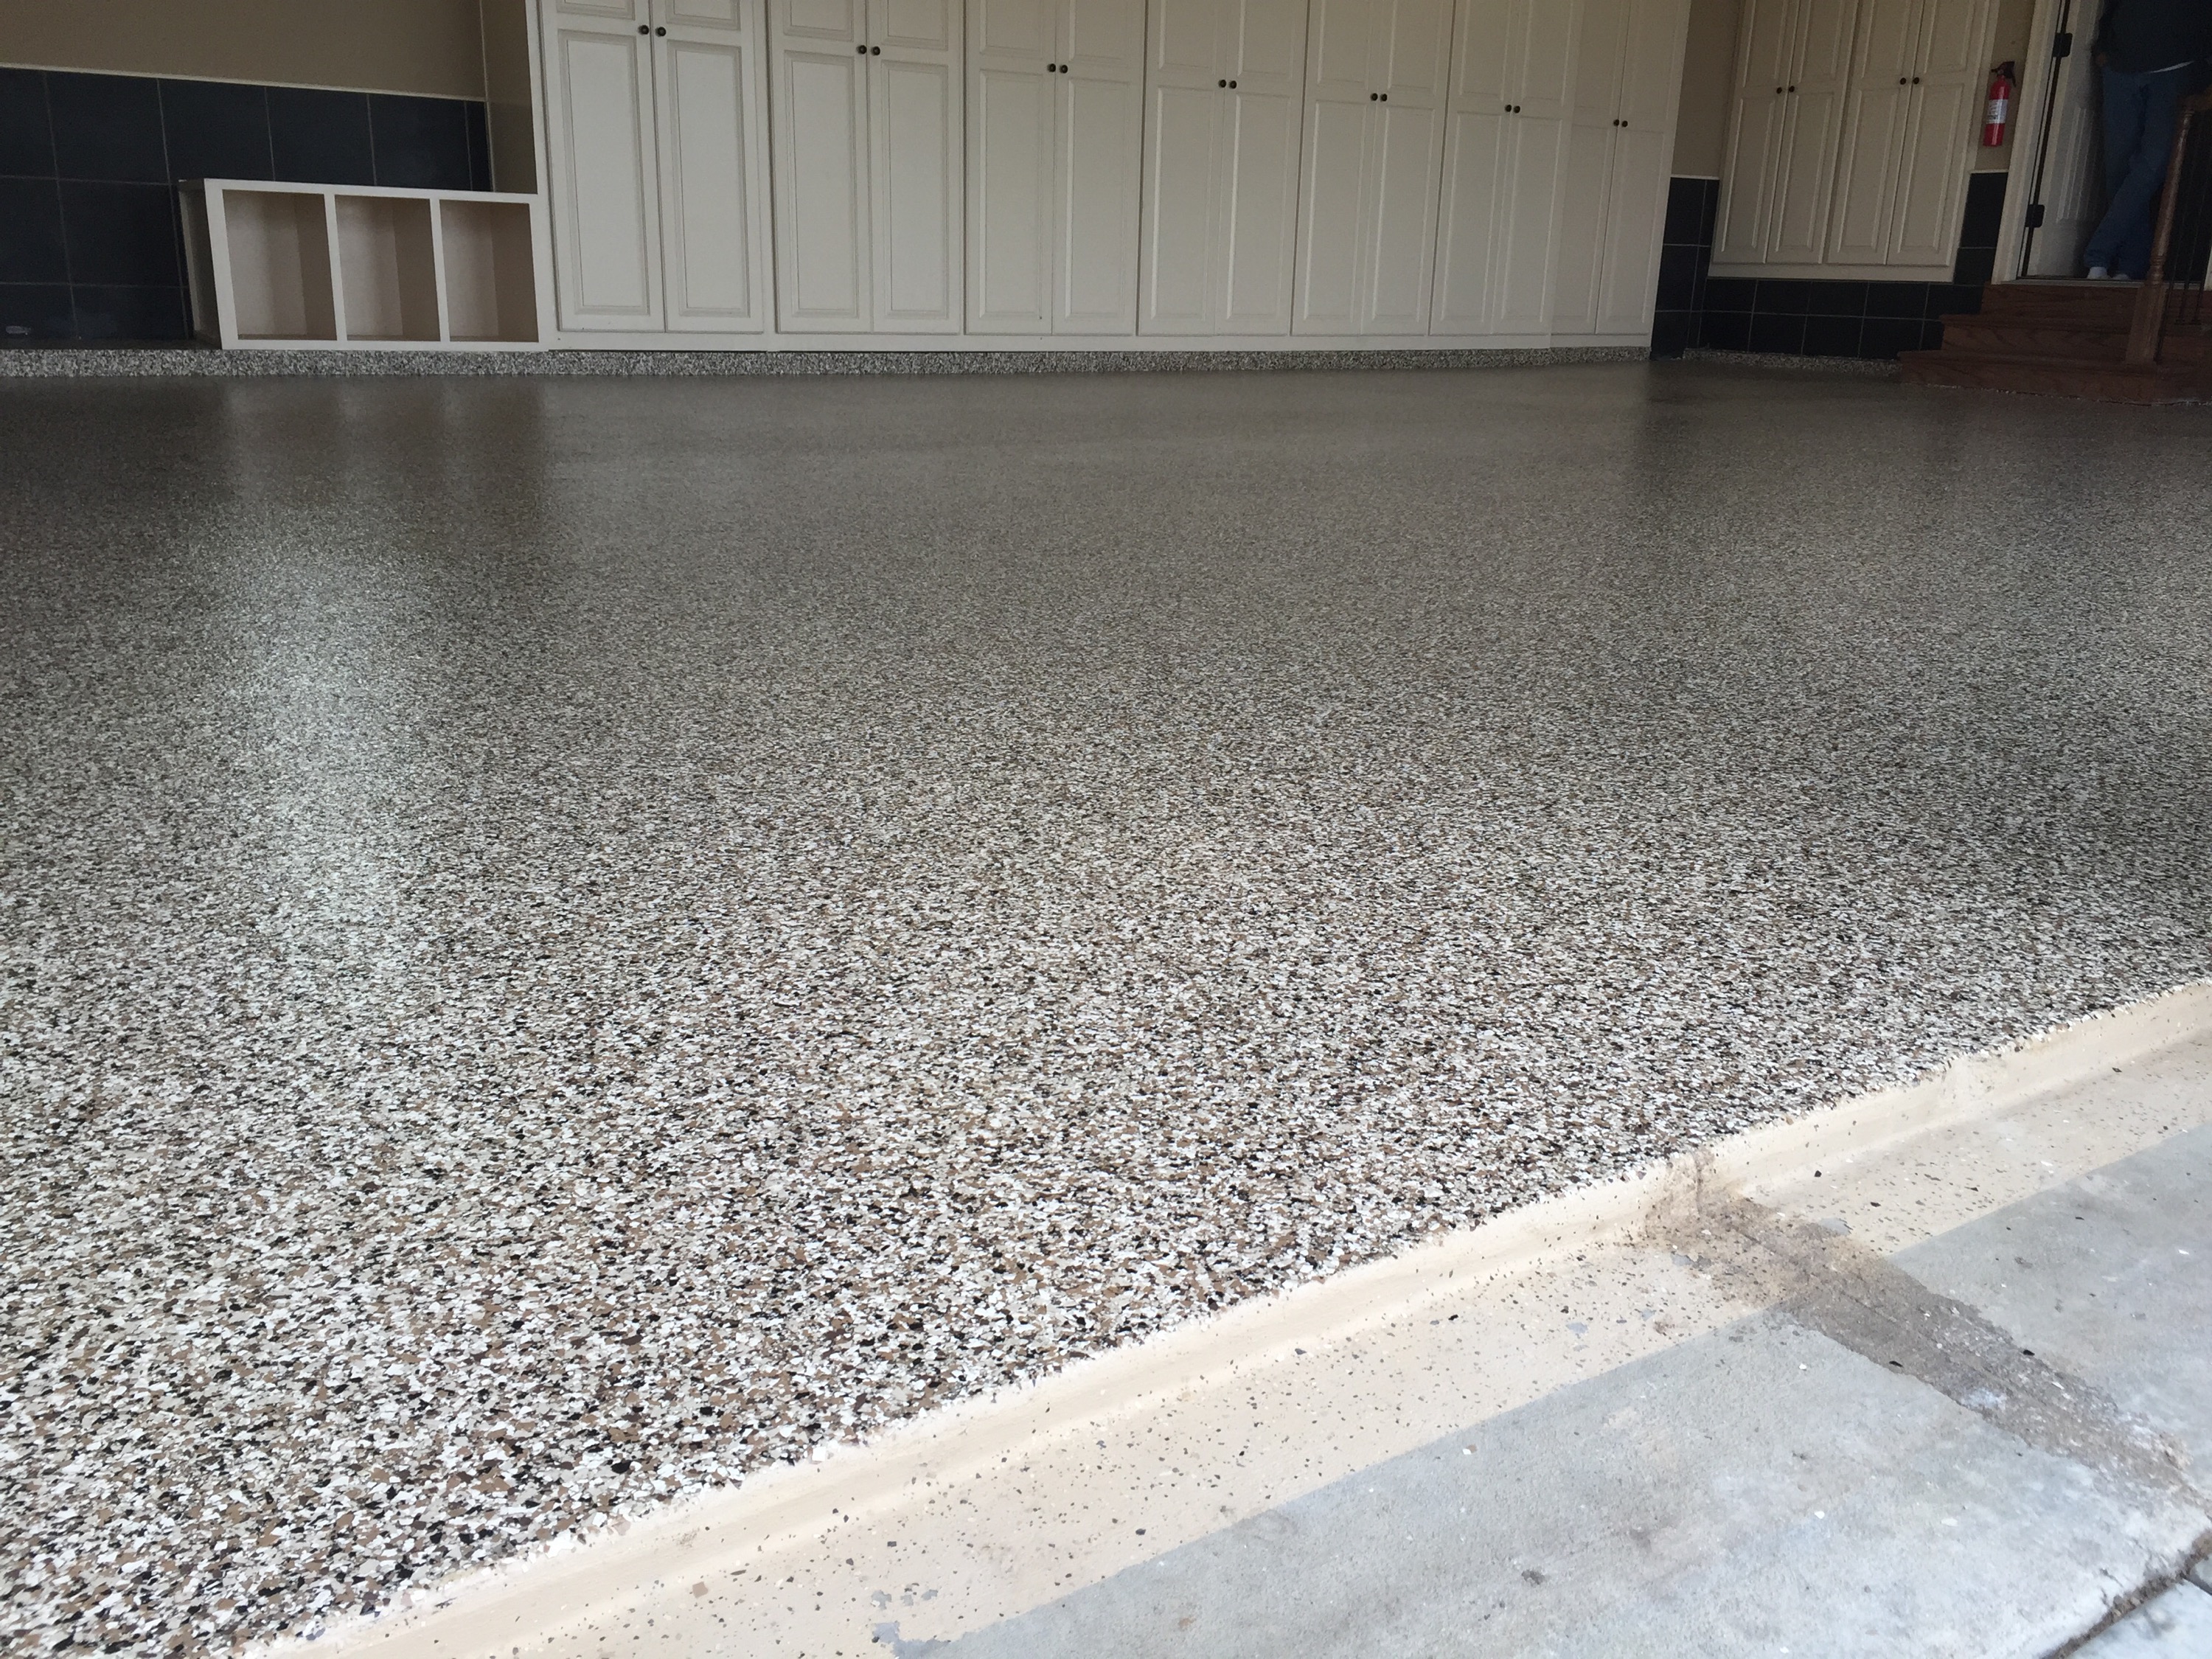
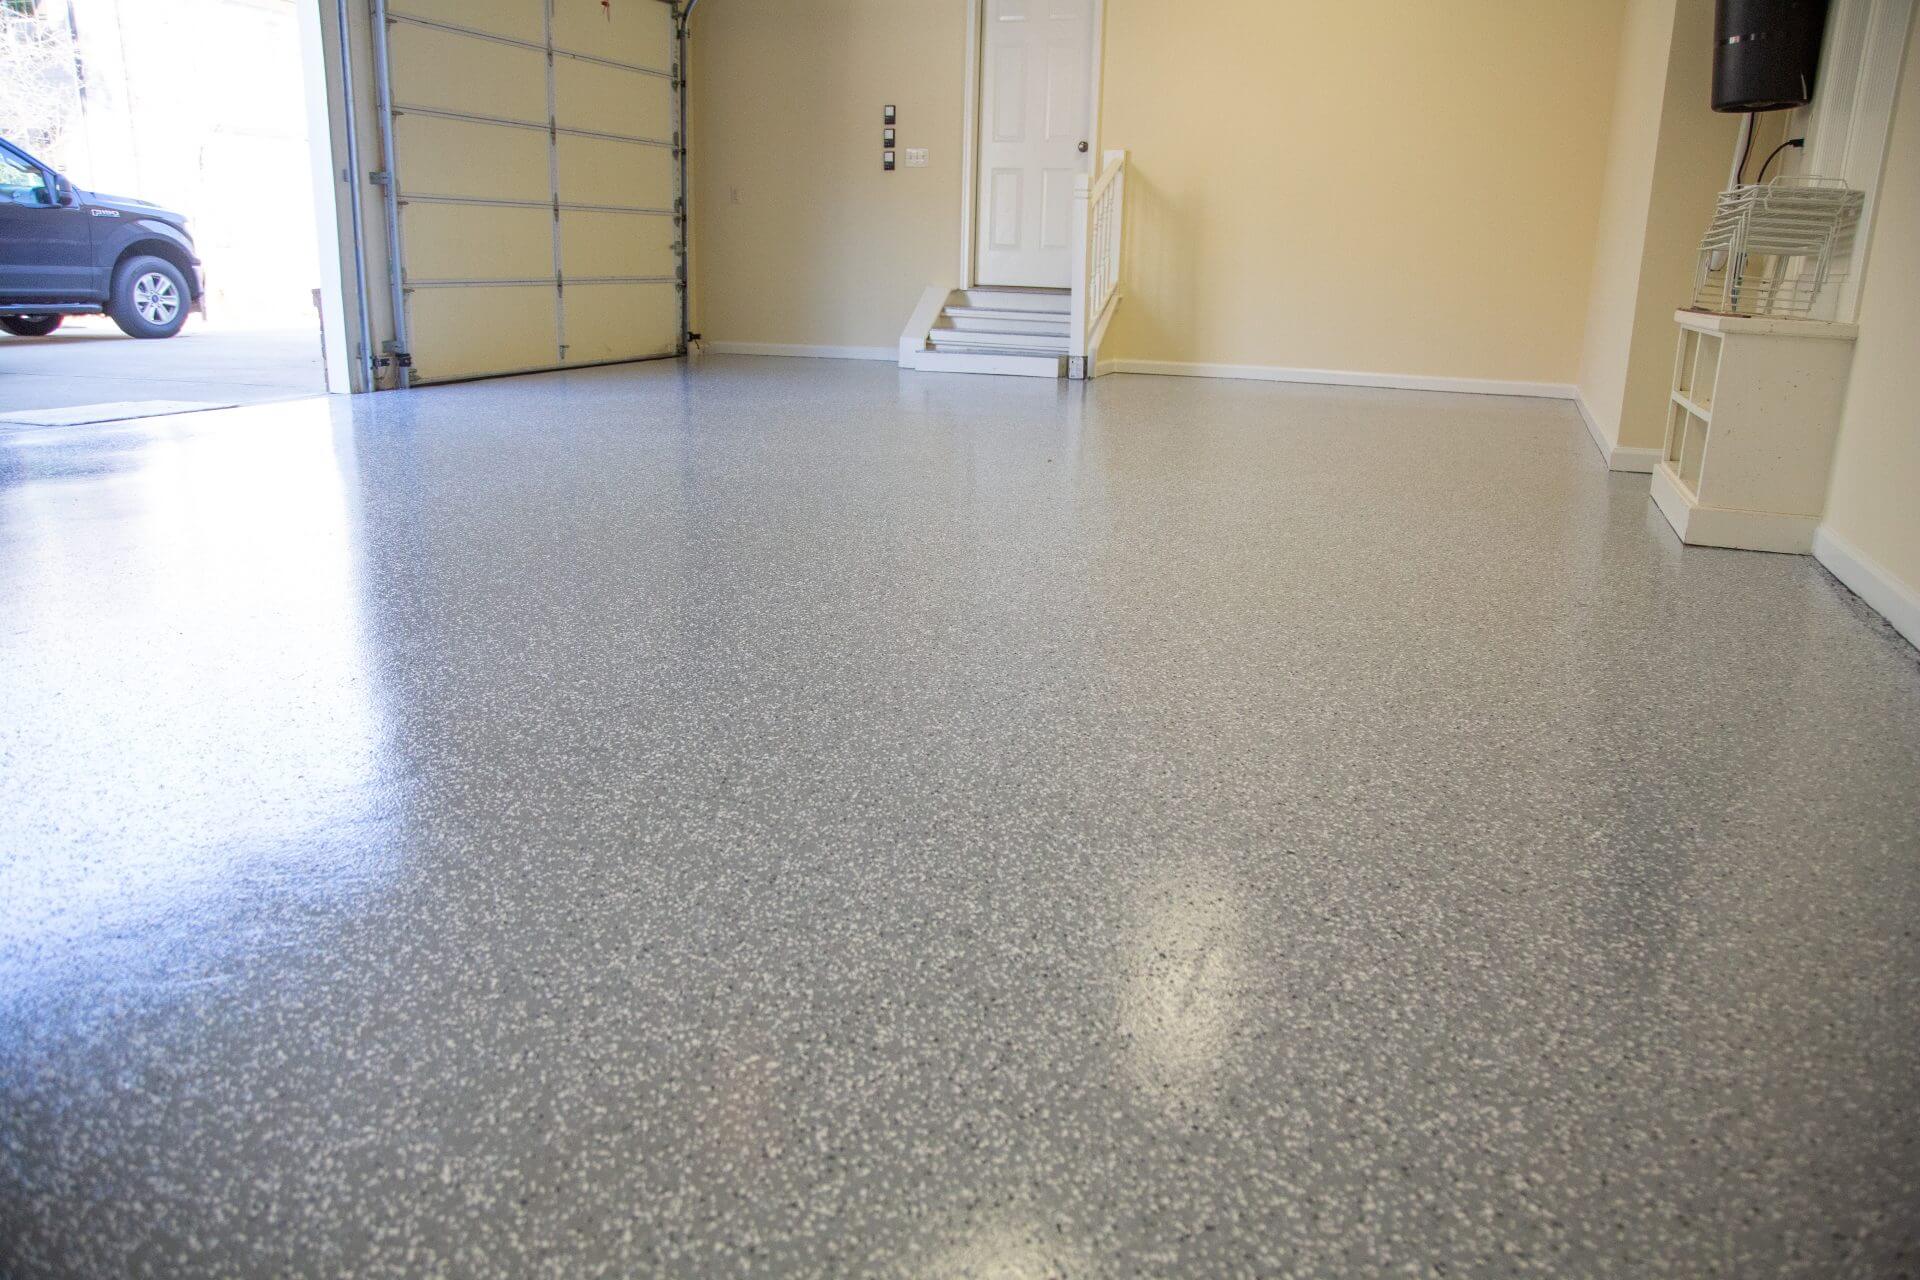
Garage Floor Epoxy Pictures: Examples of Transformations
Epoxy flooring is one of the most dramatic transformations you can make to your garage. Laying down epoxy can completely revamp the look, feel, and function of your space. Here are just some of the results you can achieve by installing an epoxy floor:
• Sleek gray tones – These create an industrial look which can really help with protecting your floors from oil and dirt damage. Plus, they’re subtle enough to complement any style of décor.
• Bold colored accents – If you’re looking for a more eye-catching option then try creating intricate designs using bold colors like yellow or red. You’ll be able to create unique patterns which are perfect for standing out from the crowd.
• Specialty flakes – For a one-of-a-kind design, choose specialty flakes which give you the opportunity to add texture to your epoxy coating in the form of flecks of color that reflect the light at different angles.
Garage Floor Epoxy Pictures: Things to Consider Before You Start
Installing epoxy on your own can be a great way to save money and take total control over the transformation of your garage floor. Before you start, here are some things to consider:
• Preparing your floor – One of the most important parts of laying down epoxy is ensuring that your floor is thoroughly prepared first. This will involve removing any existing coatings or paint, and then thoroughly cleaning the floor prior to applying epoxy.
• Choosing your colors – One thing that helps make epoxy such an appealing option is that it comes in so many different colors and shades. Do some research beforehand so you can select the colors that best match or enhance your existing décor.
• Understanding installation – Installing epoxy isn’t difficult but there are several steps involved in making sure you get a smooth finish with no bubbles or gaps in it. Doing research beforehand will ensure you know exactly how to lay down the epoxy so that it’s perfect when finished.
Garage Floor Epoxy Pictures: Final Thoughts
Installing epoxy on your garage floor can be one of the most impactful transformations you can make to any space in your home. Not only does it look amazing but it will also provide lasting protection from scratches and other possible damage. Before starting the installation process, make sure you know what colors work best with your décor and have taken all the necessary steps beforehand. With these tips in mind, you’ll have a beautiful epoxy coating that will last for years!
What kind of preparation is required before applying epoxy to a garage floor?
Before applying epoxy to a garage floor, the surface should be thoroughly cleaned and degreased, then lightly sanded with 80-grit sandpaper. Any cracks or holes should be filled in, and then the surface should be vacuumed and wiped down to remove any dust or dirt particles. Finally, a primer coat should be applied before the epoxy is applied. This helps ensure that the epoxy bonds properly and offers a longer-lasting, durable finish.What is the best way to clean a garage floor before applying epoxy?
The best way to clean a garage floor before applying epoxy is to sweep and vacuum it thoroughly to remove any dirt and debris. After that, scrub the entire floor with a degreaser or detergent solution to get rid of any oil or grease. Rinse the solution off with clean water and allow the floor to dry completely before applying the epoxy.What type of cleaning solution should be used to clean a garage floor before applying epoxy?
A degreasing cleaning solution such as TSP (trisodium phosphate) should be used to clean a garage floor before applying epoxy. It can be mixed with hot water and used for scrubbing the floor with a stiff brush to remove dirt, oil, and grease. Once the floor is clean, it should be rinsed with clear water and allowed to dry before applying epoxy.What type of cleaning chemical should be used to prepare a garage floor for epoxy?
A concrete degreaser or detergent should be used to clean the garage floor before applying epoxy. It is important to thoroughly wash the floor and remove any dirt, dust, grease, and oil that might interfere with the adhesion of the epoxy. Once the cleaning is complete, it is important to allow the floor to dry completely before applying the epoxy.What is the best way to apply epoxy to a garage floor?
The best way to apply epoxy to a garage floor is to first clean and prepare the floor. A concrete floor should be swept and then stripped of any existing coatings. It should then be thoroughly washed and degreased. Once it is dry, etch the floor with muriatic acid to create a profile for the epoxy to better adhere. Allow the floor to dry completely before applying the primer and then let the primer dry for at least an hour before applying two coats of epoxy. Roll it on with a 3/8-inch nylon roller and allow it to dry 24 hours before walking on it.What tools are needed to apply epoxy to a garage floor?
1. Floor Grinder: Used to remove any imperfections or existing coatings from the garage floor.2. Vacuum Cleaner: Used to clean the floor before applying the epoxy.
3. Paint Roller and Suitable Roller Frame: Used to apply the epoxy mixture to the garage floor.
4. Glove and Mask: Used for safety when working with the epoxy.
5. Mixing Bucket and Drill with Mixing Attachment: Used to mix the epoxy according to the directions on the package.
6. Paint Stripper: To remove any oil from the floor if necessary.
7. Paint Brush: Can be used to apply a sealer or protective coat after the epoxy has been applied.
What types of safety equipment is needed to apply epoxy to a garage floor?
1. Protective eyewear and gloves2. Chemical-resistant apron and boots
3. Dust mask or respirator
4. Ventilation
5. Masking tape
6. Drop cloth
7. Paint roller and tray
8. Paint brush
9. Drill with mixing paddle and shaft
10. Rubber squeegee or trowel