How To Install Tile Floor On Wood Subfloor

How To Lay Floor Tiles – DIY Floor Tile Installation
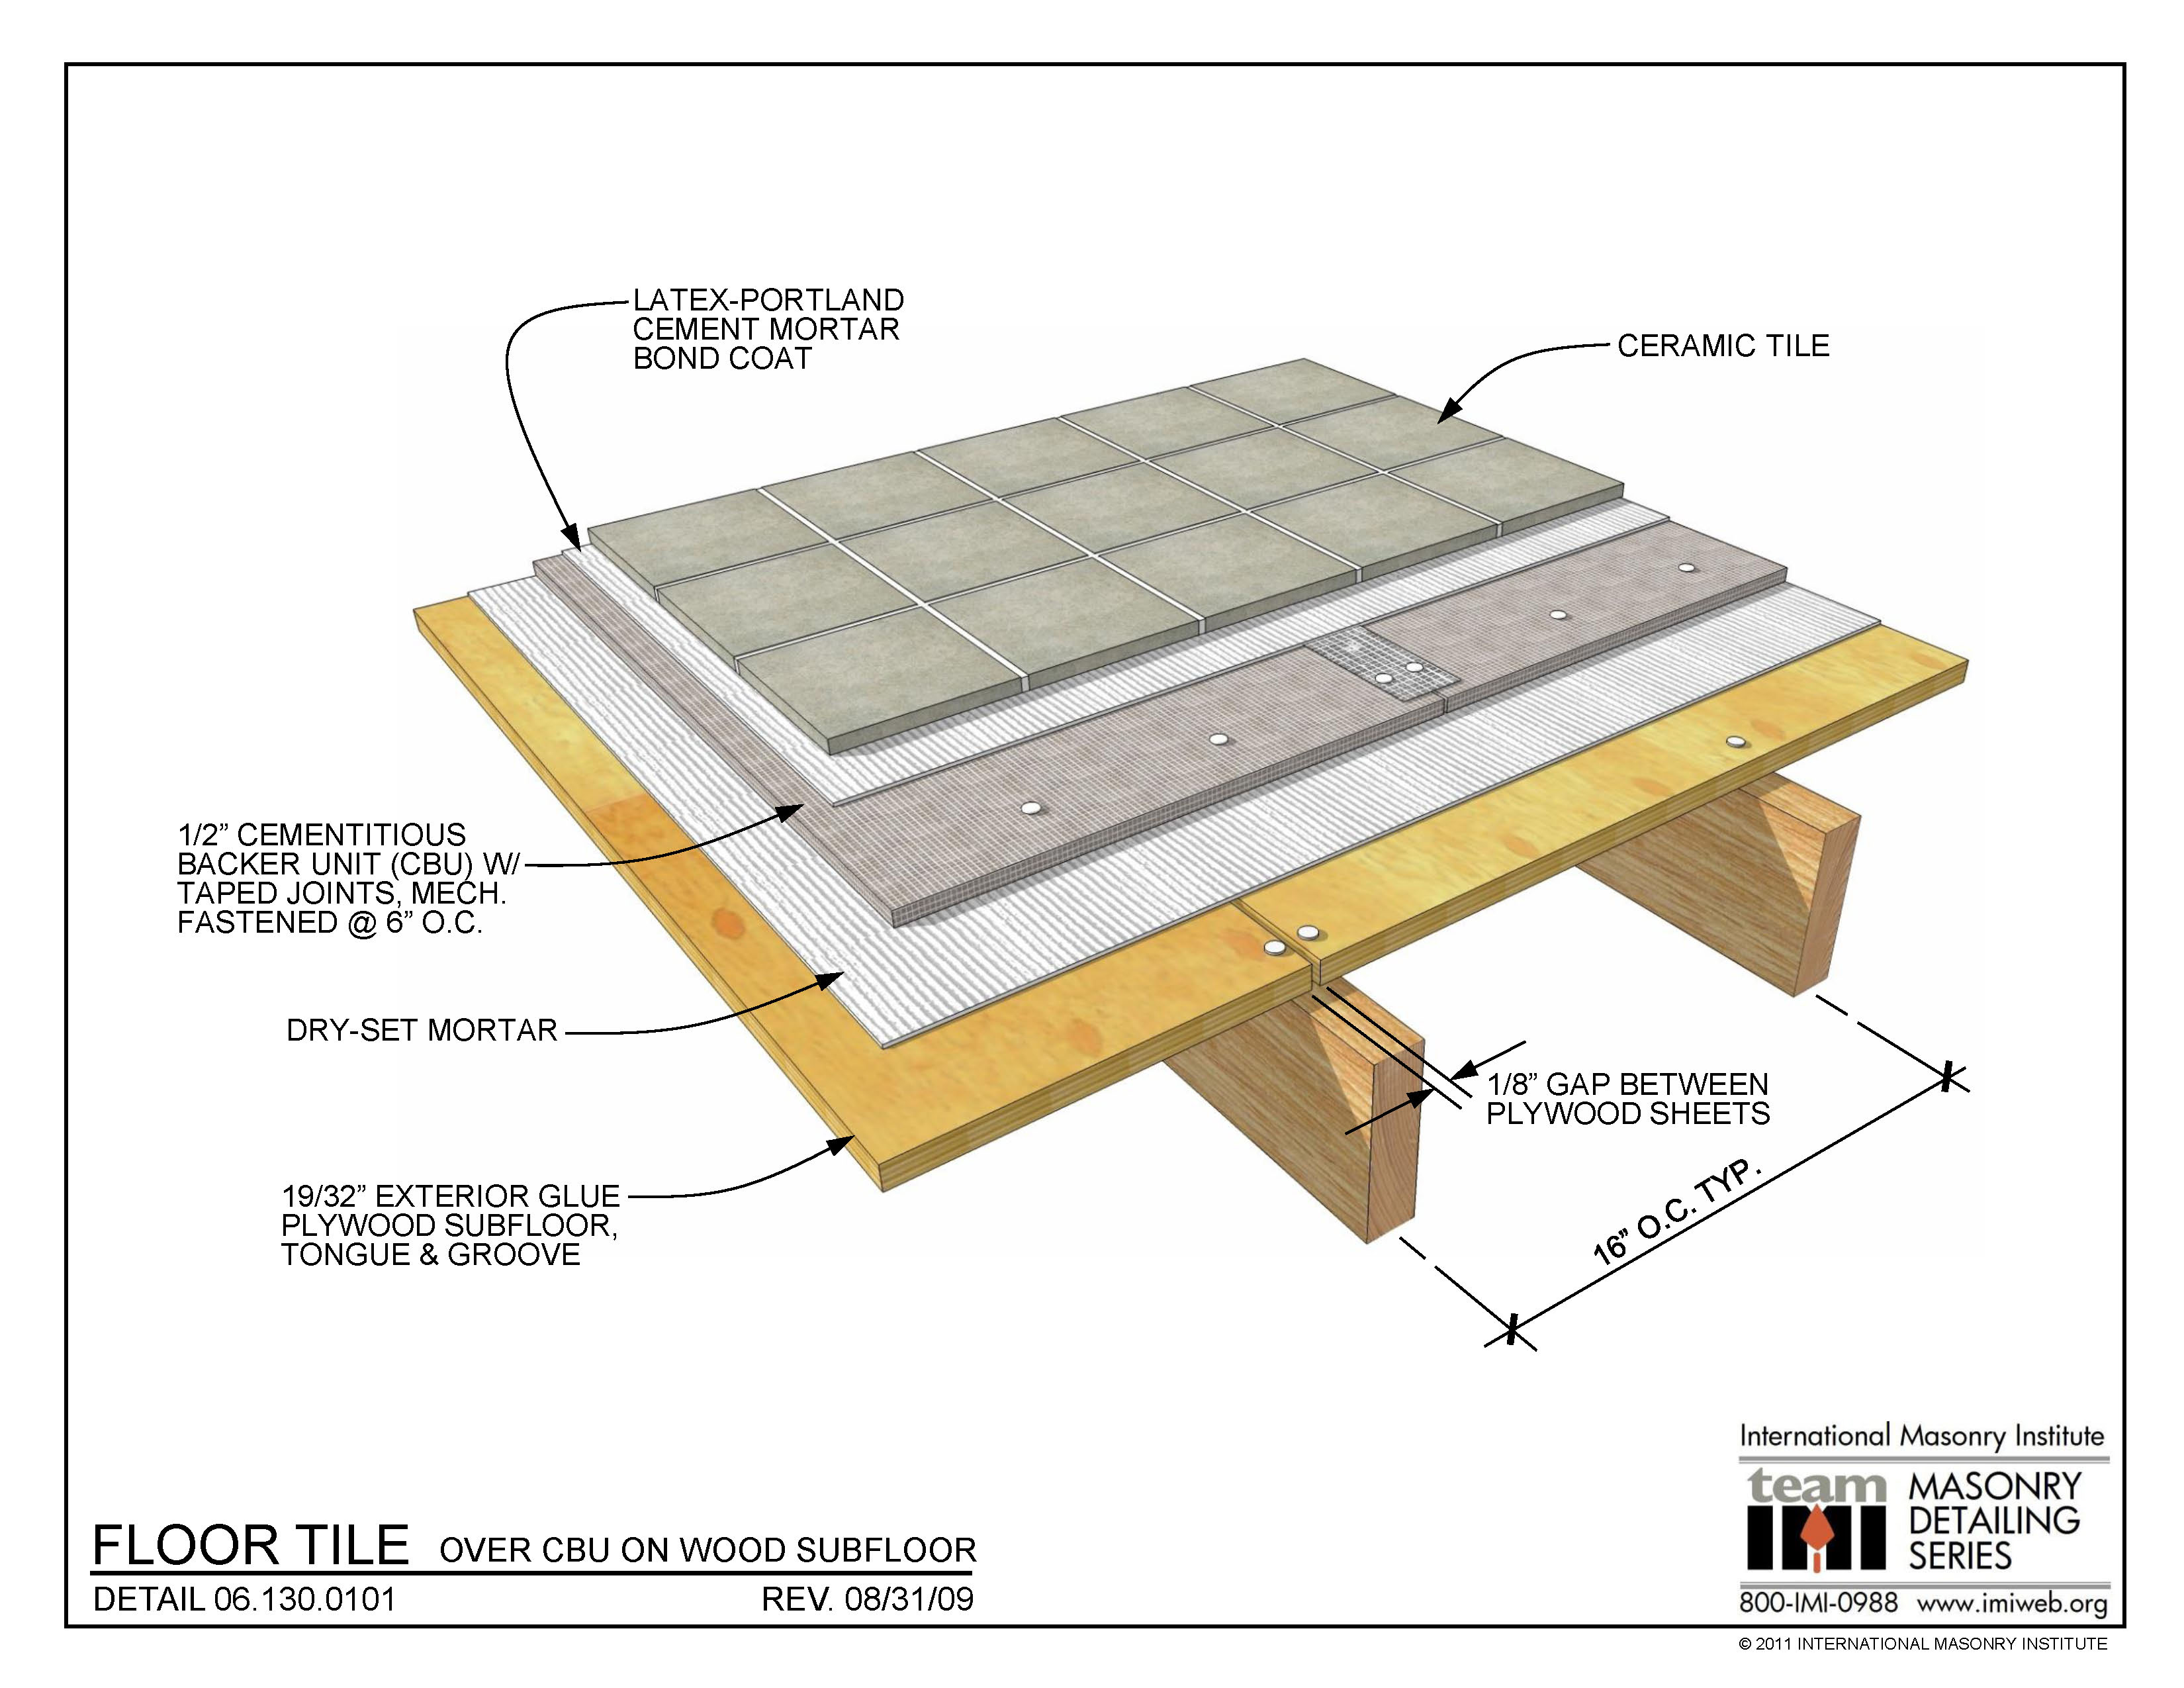
06.130.0101: Floor Tile – Over CBU on Wood Subfloor International Masonry Institute
Floor leveling over wood subfloor Diy home repair, Home repairs, Diy home improvement

How to Install Tile Over a Wood Subfloor – Cooper Sale House

How to Install Tile Backer Board on a Wood Subfloor (DIY)

HOW TO LEVEL A SUBFLOOR FOR A HARDWOOD FLOOR INSTALLATION Deluxe Art Floor

Subfloor & Underlayment Cabinet & Floor DIRECT

How to Install Tile Over a Wood Subfloor Today’s Homeowner Tile installation, Wood tile

Subfloor Options for Basements HGTV
Subflooring for Wood, Tile, and Other Floor Coverings
/installing-hardwood-floor-170040982-582b748c5f9b58d5b17d0c58.jpg)
Can Vinyl Flooring Be Installed Over Original Plywood Floor – clean vinyl flooring with steamer
Related Posts:
- Cuban Tile Floors
- Easy Way To Grout Tile Floor
- Types Of Marble Tile Flooring
- Slate Tile Floor
- Classic Bathroom Tile Floors
- Tile Floor Color Ideas
- Wet Mops For Tile Floors
- Staining Saltillo Tile Floors
- Terrazzo Tile Floor Outdoor
- Tile Flooring For Screened Porch
Installing tile flooring on a wood subfloor can be an exciting and rewarding DIY project. It requires proper planning, preparation, and the right tools and materials to ensure a beautiful and long-lasting installation. In this article, we’ll cover all the steps you need to take to successfully install tile flooring on a wood subfloor.
## Understanding the Subfloor
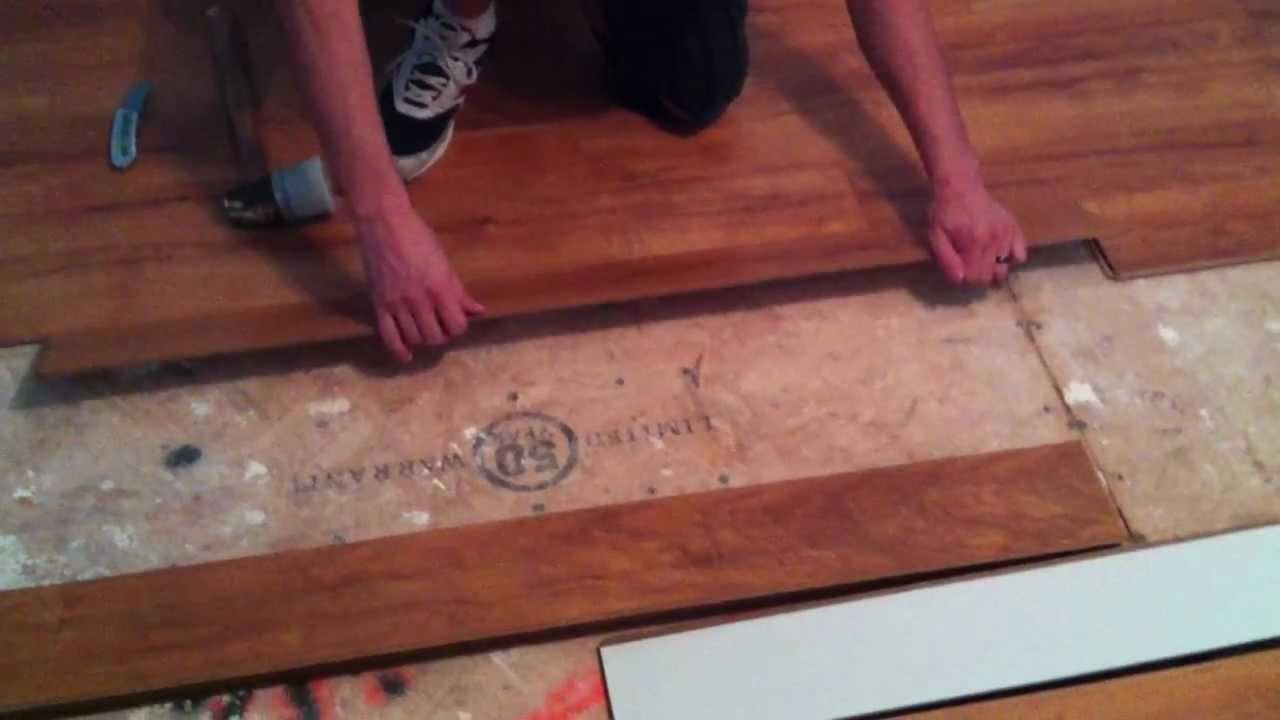
Before you begin your tile floor installation project, it’s important to understand what type of subfloor you have and what its limitations are. If you’re working with an engineered wood subfloor, it should be capable of supporting the weight of tile, provided it’s installed correctly. If you’re installing tile over an existing wood subfloor, make sure it’s structurally sound and free from soft spots, which can cause tiles to crack or become loose over time.
## Prepping the Subfloor
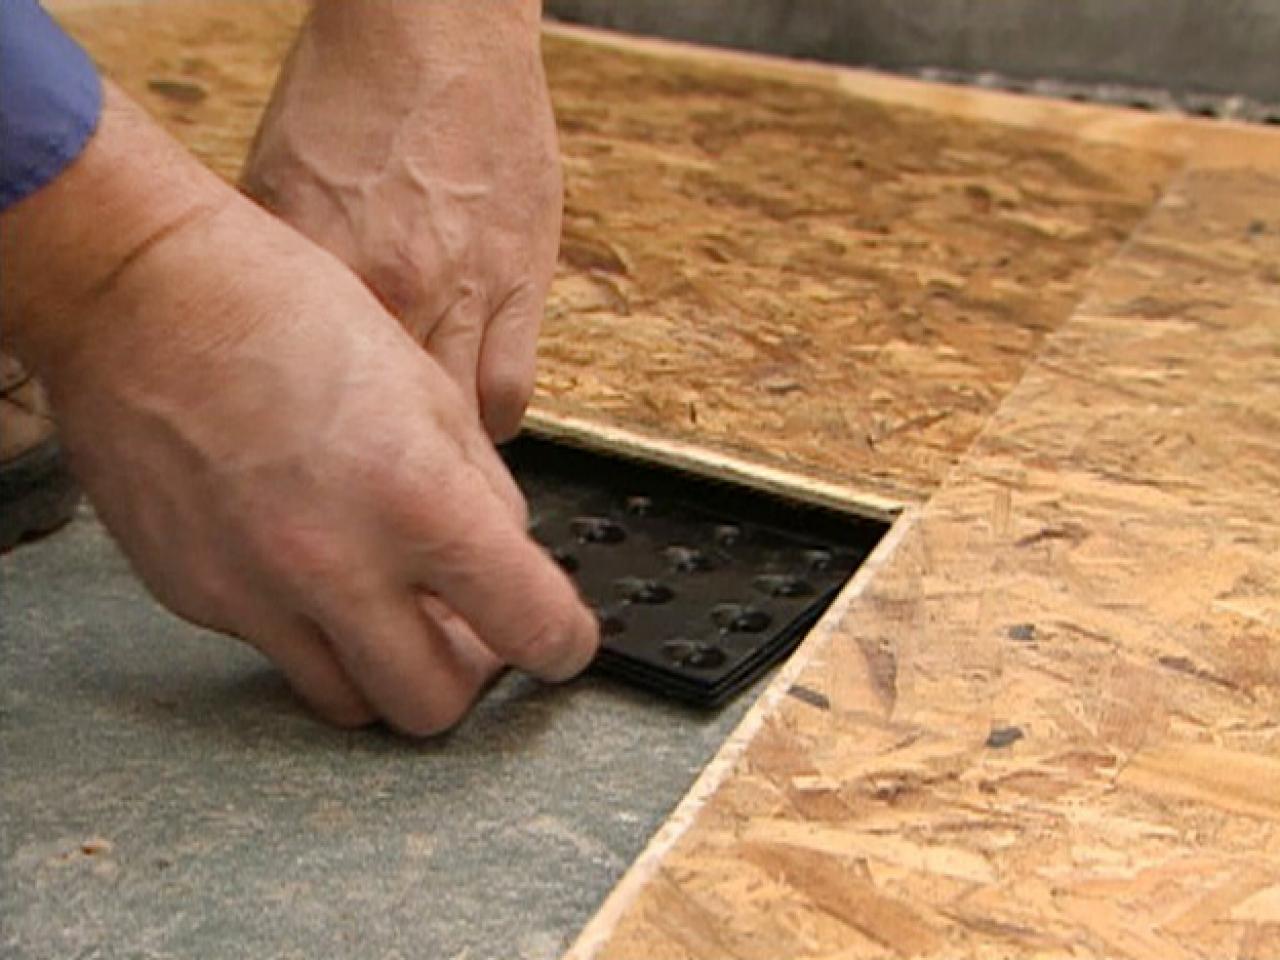
Once you’ve determined that your wood subfloor is suitable for tile installation, it’s time to prepare the surface. Remove any existing flooring material such as carpeting or vinyl. Make sure to clean the surface thoroughly and fill any gaps or holes with an appropriate filler. Once your surface is clean and level, apply a layer of underlayment such as plywood or cement board. This will provide a solid foundation for your tile floor.
## Installing Tile Flooring
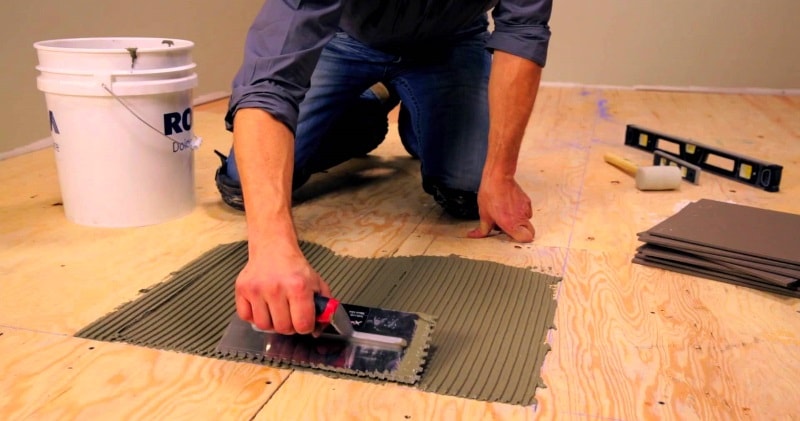
Once your subfloor is prepped, you can begin laying down your tile. Start by laying out the tiles in a dry run, making sure they fit properly. Once you’re happy with the layout, you can start applying adhesive. Use a notched trowel to spread a thin layer of adhesive onto the underlayment and place your tiles into position. Use spacers between tiles to maintain consistent grout lines. When all of the tiles are in place, allow them to dry for at least 24 hours before grouting.
## Grouting Your Tile Floor
Grouting is an important step for ensuring your tile floor is properly sealed and protected from water damage. Mix your grout according to the manufacturer’s instructions and apply it using a rubber float held at an angle of 45 degrees. Work the grout into all corners and edges and use a damp sponge to wipe off any excess grout from the tiles. Allow the grout to dry for 24 hours before sealing.
## Sealing Your Tile Floor
Sealing your tile floor is an important step for protecting it from dirt, stains, and water damage. Choose a sealer that is specifically designed for ceramic or porcelain tile floors and apply it according to the manufacturer’s instructions. Allow the sealer to dry completely before walking on the tiles or adding furniture back into the room.
Installing tile flooring on a wood subfloor is a rewarding DIY project that adds value to your home while providing a beautiful finished look. With proper planning and preparation, you can create a long-lasting tile floor that will last for years to come. By following the steps outlined above, you can ensure that your new tile floor will look beautiful and perform well for many years to come!