How To Put Down Tile Floor In Bathroom

How to Install Ceramic Tile Floor in the Bathroom Ceramic tile bathrooms, Ceramic floor tiles

How to Lay Tile: Install a Ceramic Tile Floor In the Bathroom Family Handyman
Installing Ceramic Tile Floor In Bathroom – How to Lay Tile: Install a Ceramic Tile Floor In the

How to Install Bathroom Floor Tile how-tos DIY
How to Lay Tile: Install a Ceramic Tile Floor In the Bathroom
How to Lay Tile: Install a Ceramic Tile Floor In the Bathroom The Family Handyman in 2020

How to Put Down Tile in Your Bathroom or Kitchen

How to Install Bathroom Floor Tile how-tos DIY
Installing Peel And Stick Vinyl Tile – sclubutorrent

How to Lay a Vinyl Tile Floor Vinyl tile flooring, Vinyl tile, Laying vinyl flooring

Tile can be installed over various types of subfloor. The most suitable materials for the

Related Posts:
- Cuban Tile Floors
- Easy Way To Grout Tile Floor
- Types Of Marble Tile Flooring
- Slate Tile Floor
- Classic Bathroom Tile Floors
- Tile Floor Color Ideas
- Wet Mops For Tile Floors
- Staining Saltillo Tile Floors
- Terrazzo Tile Floor Outdoor
- Tile Flooring For Screened Porch
Having tile flooring in your bathroom adds a touch of class and sophistication, making it the perfect choice for any bathroom renovation project. Not only is it aesthetically pleasing, but it’s also durable and can withstand heavy foot traffic. Installing tile flooring in your bathroom doesn’t have to be a difficult process if you know what you’re doing. Here is a step-by-step guide on how to put down tile floor in a bathroom.
### Step 1: Prepare the Floor
The first step to putting down tile flooring in your bathroom is to prepare the floor. Start by clearing the room of any furniture and other items that may be in the way. Next, it’s important to inspect the subfloor for any signs of damage or unevenness. Repair any damaged areas or use a leveling compound to level out any uneven spots. Once the subfloor is prepped and ready to go, it’s time to start laying down the tiles.
### Step 2: Install the Vapor Barrier
Before you begin laying down the tile flooring, it’s important to install a vapor barrier between the subfloor and the tiles. This will help protect your floor from moisture and keep mold and mildew away. Start by rolling out a layer of polyethylene sheeting across the entire surface of the subfloor. Cut and tape it into place, making sure that there are no gaps or holes in the material. This will ensure that moisture doesn’t seep through and cause damage to your tile flooring.
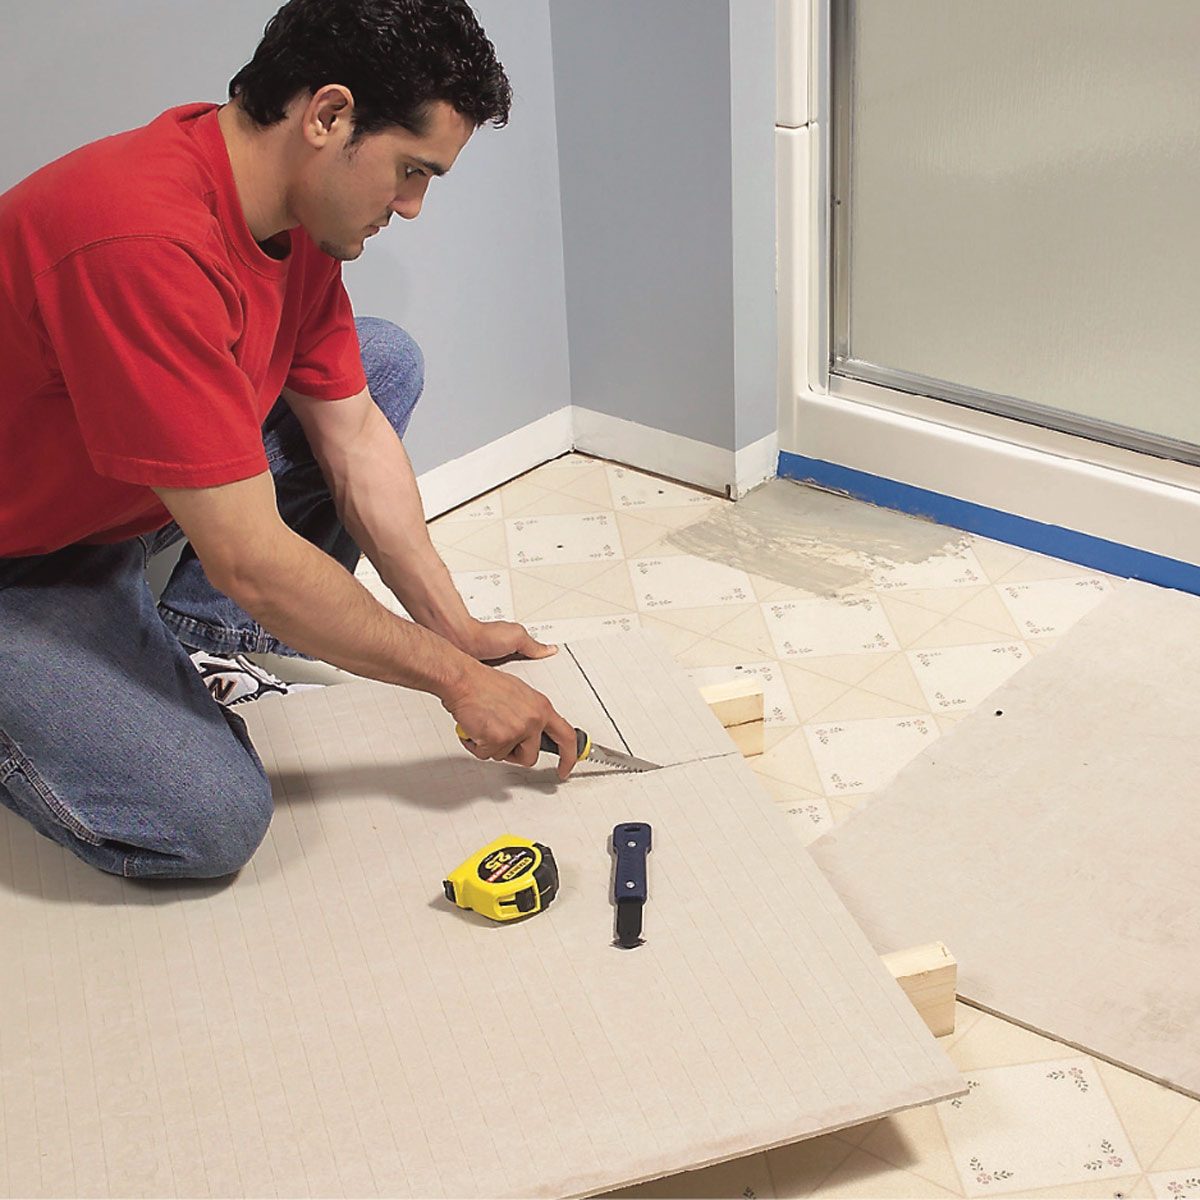
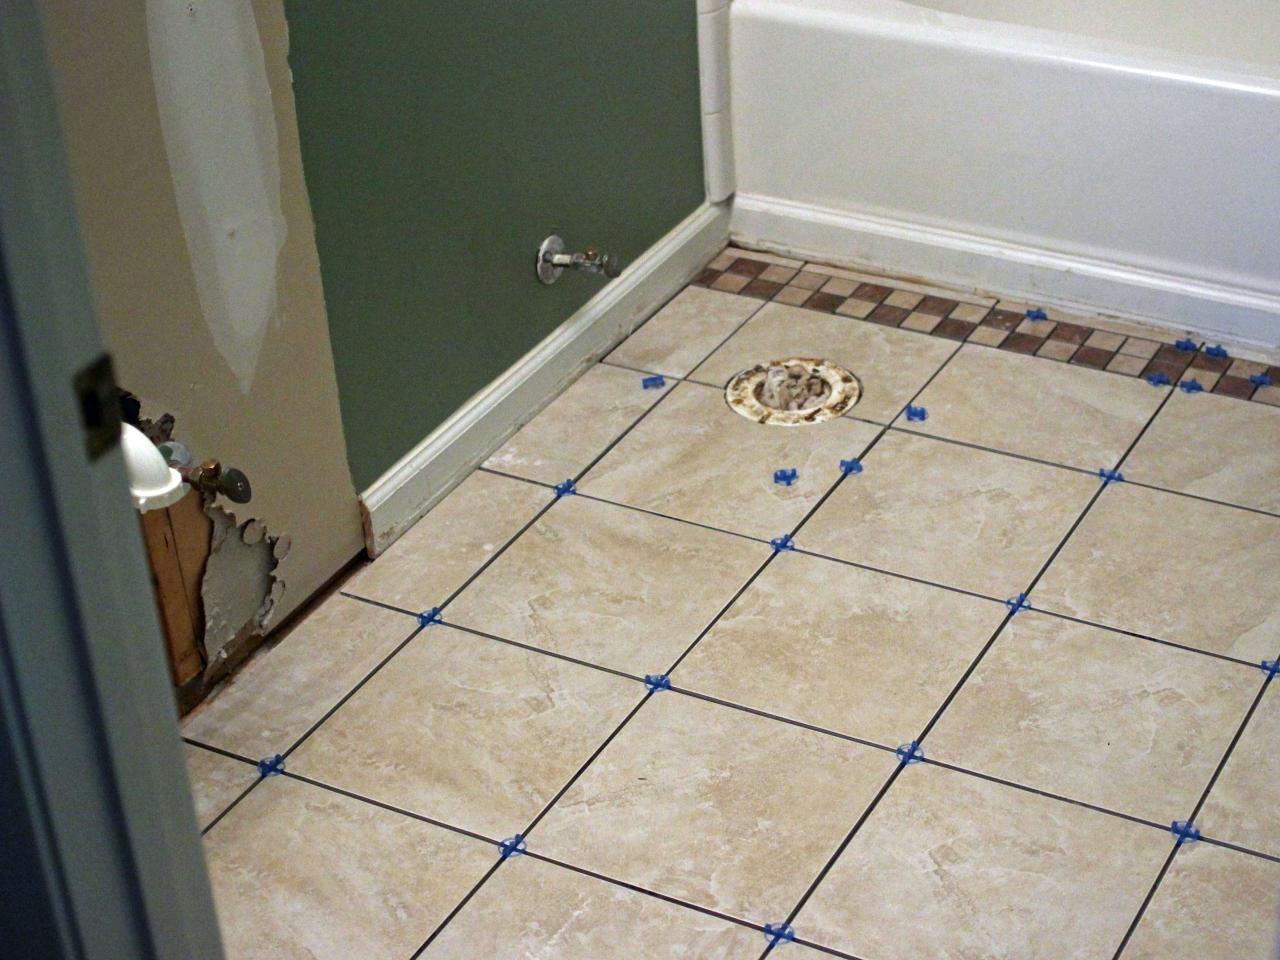
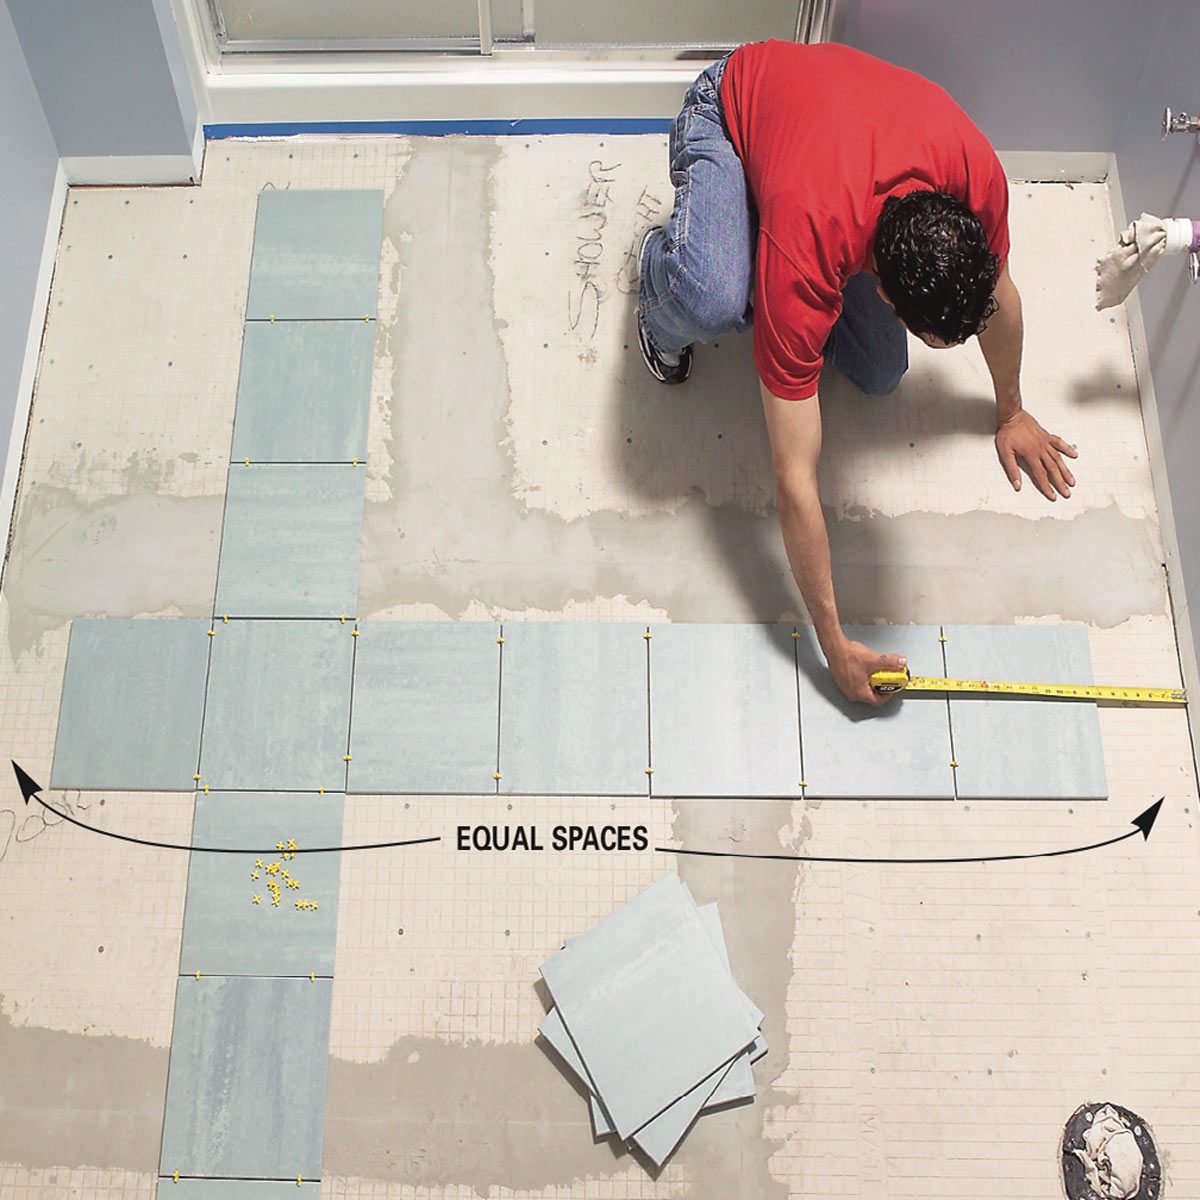
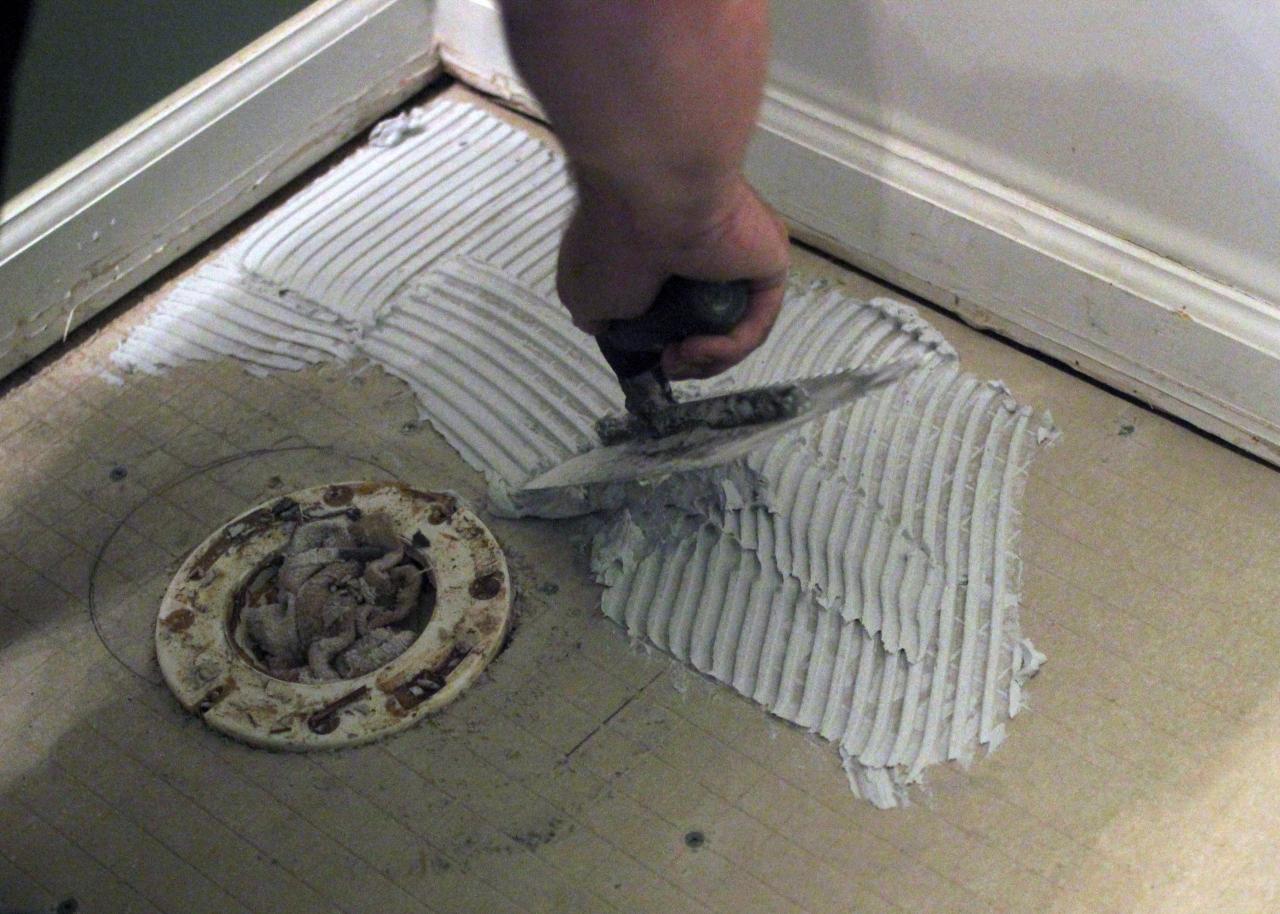
### Step 3: Lay Down the Tile
Once the vapor barrier is in place, you can start to lay down the tile flooring. Begin by laying out your tiles on the surface of the subfloor so that you can determine the best way to arrange them. Make sure that you leave enough space between each tile for grout lines. Once you have determined where each tile should go, you can start applying adhesive to the back of each one and placing them in their designated spot. Make sure to press each tile firmly into place before moving on to the next one.
### Step 4: Grout The Tiles
Once all of your tiles are in place, it’s time to grout them together using an appropriate grout type for your specific tile flooring. Start by mixing up a batch of grout according to package instructions. Spread it carefully over all of the tiles using a rubber float grout spreader, making sure that it gets into all of those tiny crevices between each tile. Allow it to set for about an hour before wiping away any excess grout with a damp sponge.
### Step 5: Seal The Tiles
Finally, seal your newly installed tiled floor with a sealant product designed specifically for your type of tile material. This will help protect your tiles from staining and prevent dirt from penetrating through any cracks or crevices. Make sure that you follow all instructions on the sealant product carefully and allow adequate time for drying before walking on the newly installed tiles.
Putting down tile flooring in your bathroom can completely transform its appearance and increase its overall value as well. By following these five steps, you’ll be able to successfully install new tiled flooring in no time at all!