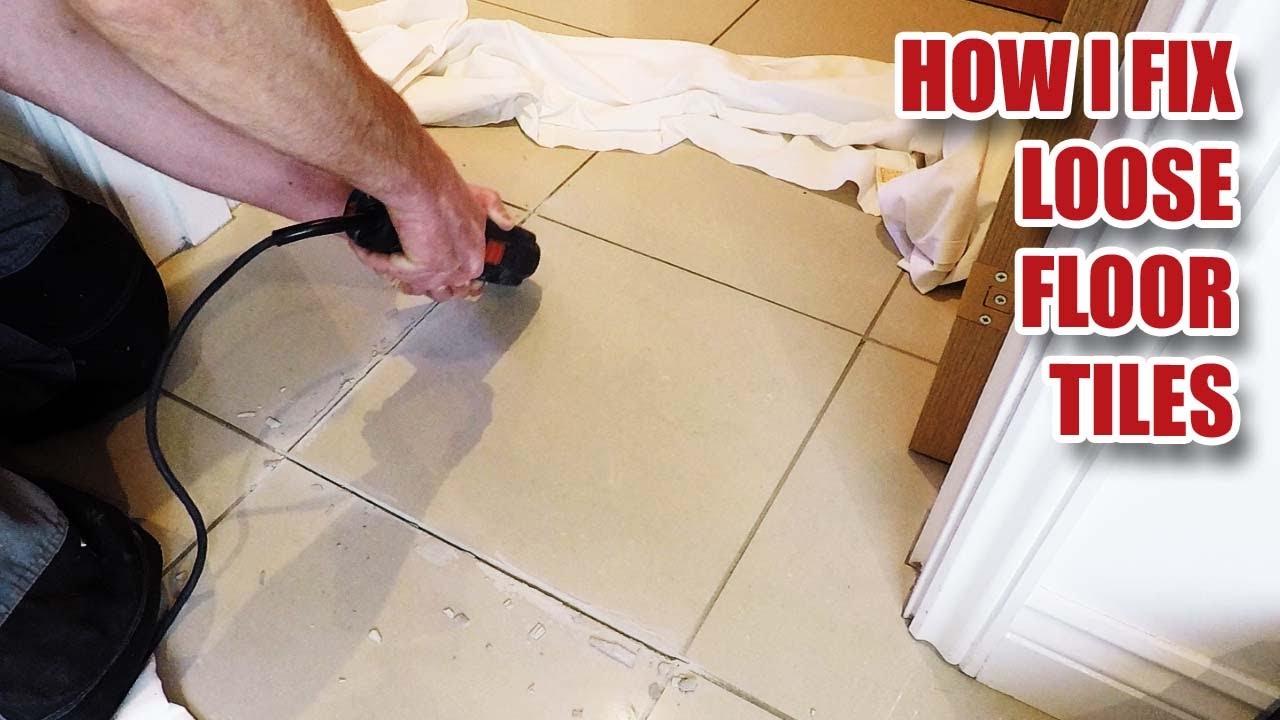
How To Repair Bathroom Floor

Tips in Removing Bathroom Floor Bathroom floor tiles, Removing bathroom tile, Bathroom flooring

How To Fix Bathroom Floor Tiles – Flooring Site
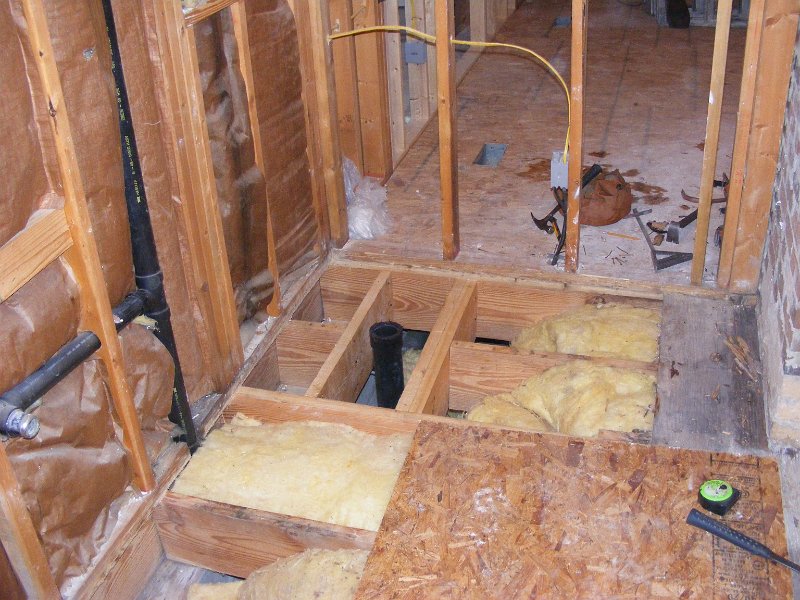
Bathroom – Toilet Subfloor Repair & New Glueless Flooring – Payne, Ohio JeremyKrill.com

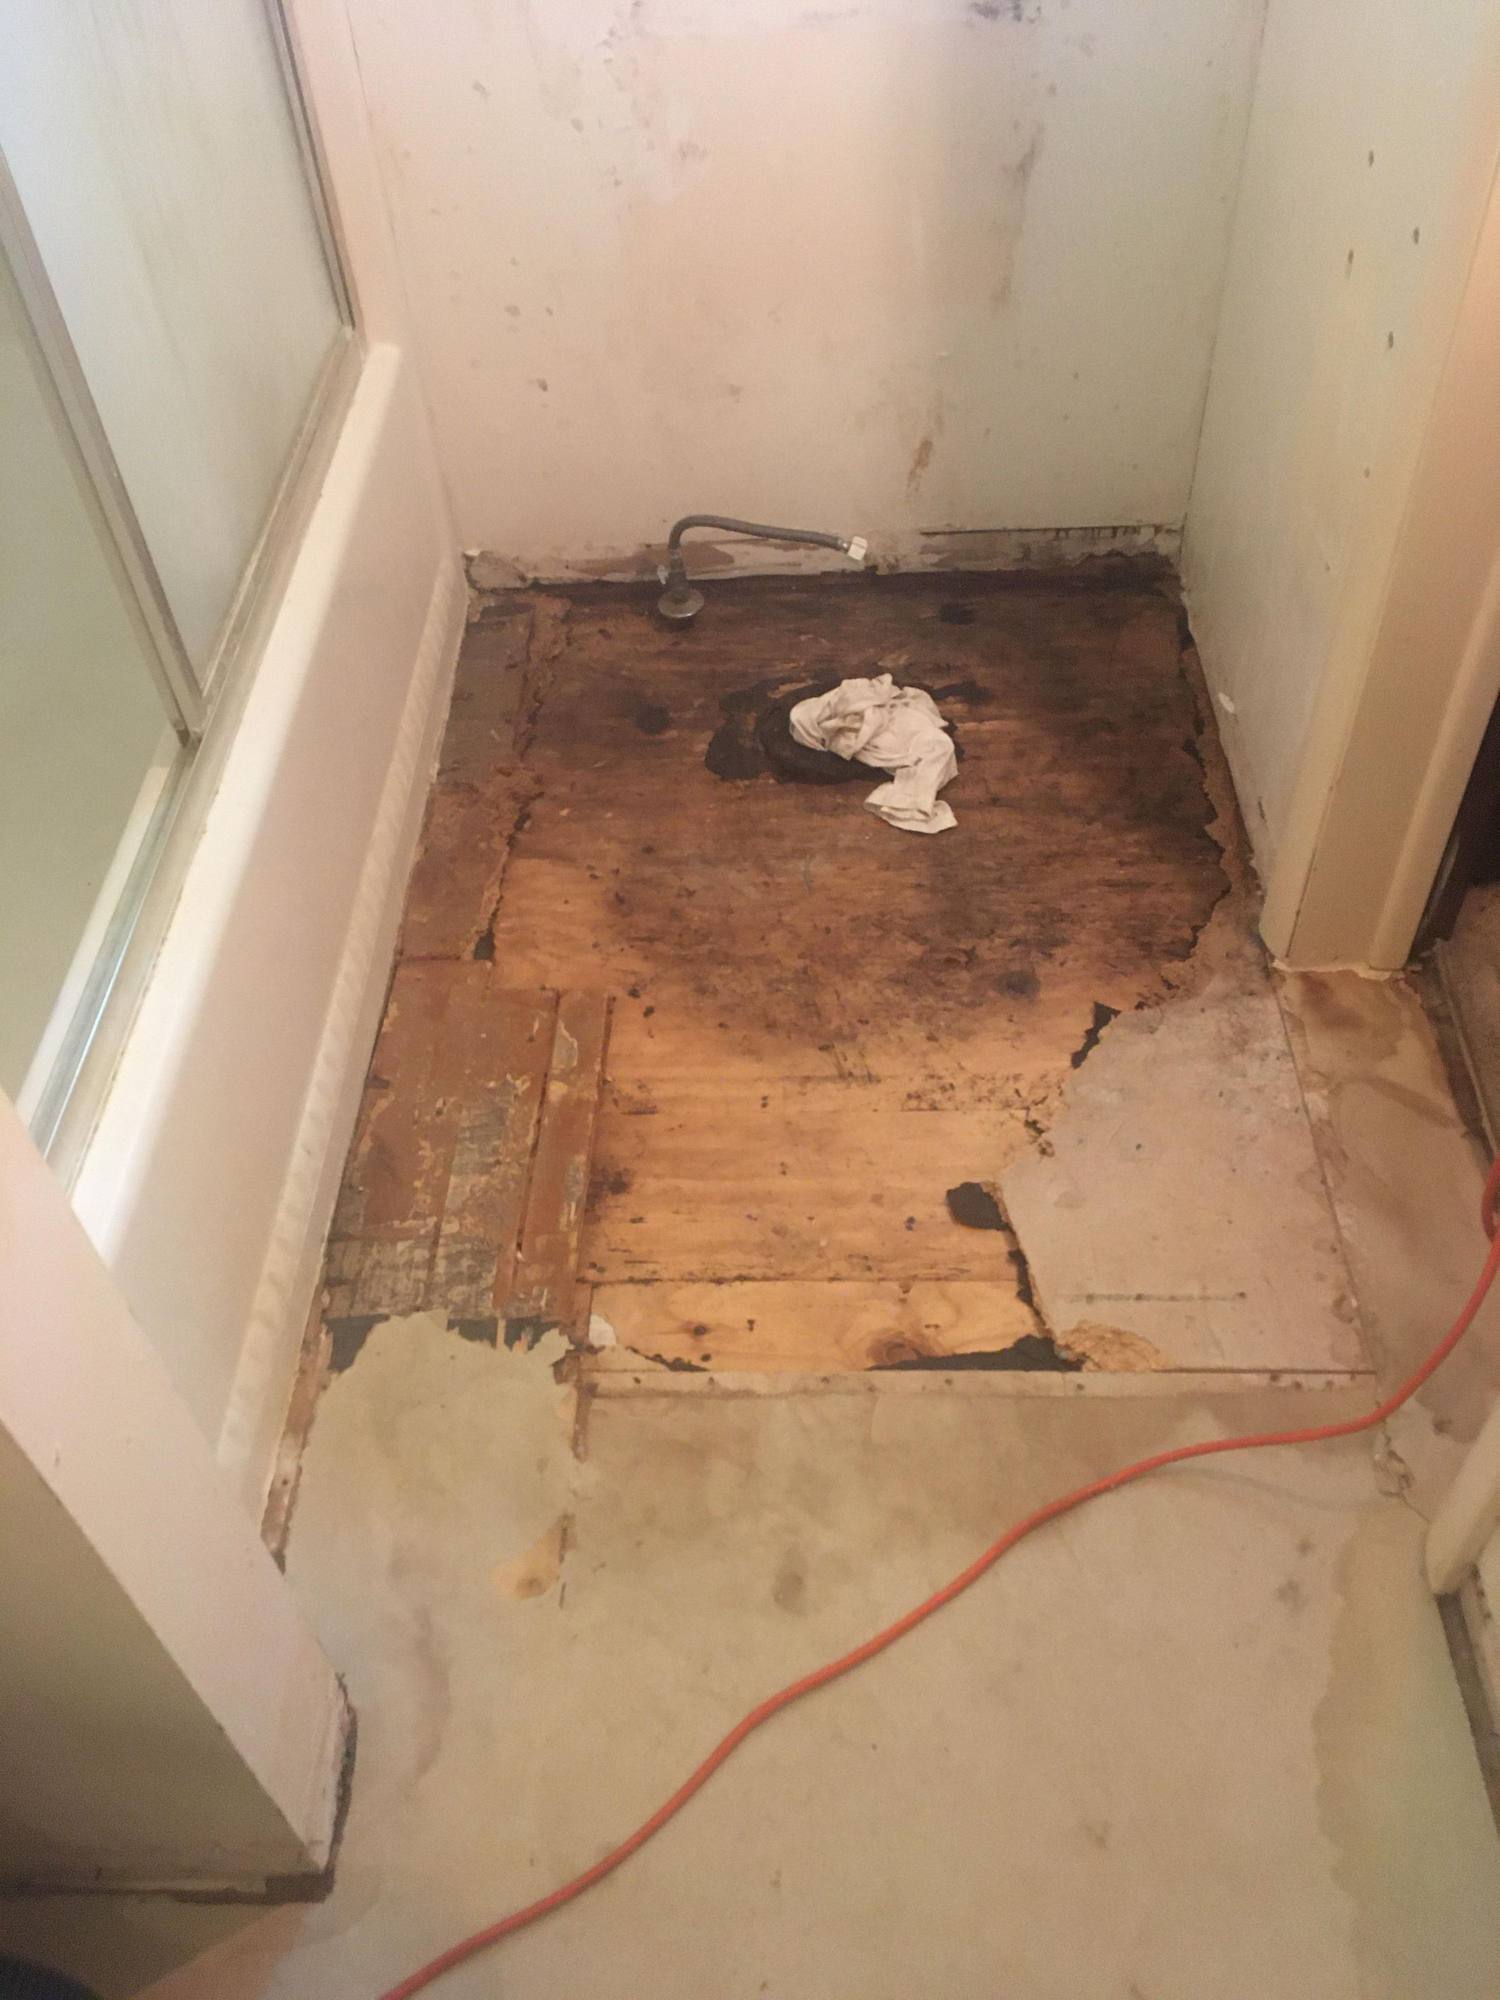
rotten bathroom floor – Google Search Bathroom flooring, Home repair, Reroofing

How To Fix Subfloor In Bathroom Viewfloor.co

municipalidadosorno.cl – How to remove tile in bathroom floor

Repairing rotting bathroom subfloor around toilet questions – DoItYourself.com Community Forums
Diy home repair, Bathroom repair, Subfloor repair

Repairing a Bathroom Subfloor
Bathroom floor tile repair was finished – YouTube

Consider this necessary illustration as well as visit the provided details on Small Bathroom

Related Posts:
- French Country Bathroom Flooring
- Mid Century Modern Bathroom Flooring
- Rustic Bathroom Floor Tiles
- Purple Bathroom Flooring
- How To Clean Bathroom Floor Stains
- Tile Design Bathroom Floor
- Terracotta Bathroom Floor
- Cool Bathroom Floor Ideas
- Light Bathroom Floor Tiles
- Classic Bathroom Floor Tile Ideas
Repairing a Bathroom Floor: A Step-by-Step Guide
When it comes to maintaining your home, there are few tasks more essential than regularly inspecting and repairing your bathroom floor. In order to ensure that your bathroom floor remains in good shape for years to come, it is important to take the time to inspect it periodically and to repair any damage you find. Doing so can save you from costly repairs down the line, and help you keep your home looking great.
This article will provide you with a step-by-step guide on how to repair your bathroom floor. We’ll cover all the essential steps, from locating and fixing common problems to ensuring that the job is done properly. Let’s get started!
Step 1: Inspect Your Floor
The first step in repairing your bathroom floor is to give it a thorough inspection. Look for any cracks, chips, or other signs of damage. If you find any of these, mark them with a pencil or marker so you can easily locate them later. You should also check for any loose tiles or other sections of the floor that may need attention.
### Step 2: Prepare the Area
Once you’ve located the areas that need repair, it’s time to prepare the area for repair. Begin by sweeping up any dirt or debris in the area. Next, use a vacuum cleaner to remove any remaining dirt and debris from the area. Finally, use a damp cloth to wipe away any remaining dirt or dust.
### Step 3: Repair Cracks and Chips
If you find any cracks or chips in your bathroom floor, you’ll need to repair them before continuing with the project. To do this, use an epoxy adhesive to fill in any cracks or chips in the floor. Once filled in, allow the adhesive to dry completely before moving on to the next step.
### Step 4: Replace Loose Tiles
If you find any loose tiles on your bathroom floor, they will need to be replaced before continuing with the project. Begin by carefully removing the old tile, being careful not to damage the surrounding area. Once removed, clean up any remaining dust or debris before laying down a new tile in its place. Be sure to use an appropriate adhesive for this task as well as grout for added stability and protection against water damage.
### Step 5: Apply Grout
Once all of the tiles have been replaced and secured in place, it’s time to apply grout. Begin by mixing up some grout according to the instructions provided by the manufacturer. Once mixed, apply a thin layer of grout over the entire surface of your bathroom floor using a rubber trowel. Allow the grout to dry completely before moving on to the next step.
### Step 6: Seal and Protect
Finally, once all of the repairs have been completed and the grout has dried completely, it’s time to seal and protect your bathroom floor. To do this, apply a sealer designed specifically for bathroom floors according to its instructions. Once applied, allow it plenty of time to dry before walking on it or using your bathroom again.
By following these steps and taking proper care of your bathroom floor, you can ensure that it remains in good condition for years to come. With regular inspections and prompt repairs when necessary, you can ensure that your bathroom floor looks great and lasts for years without needing major repairs or replacements.