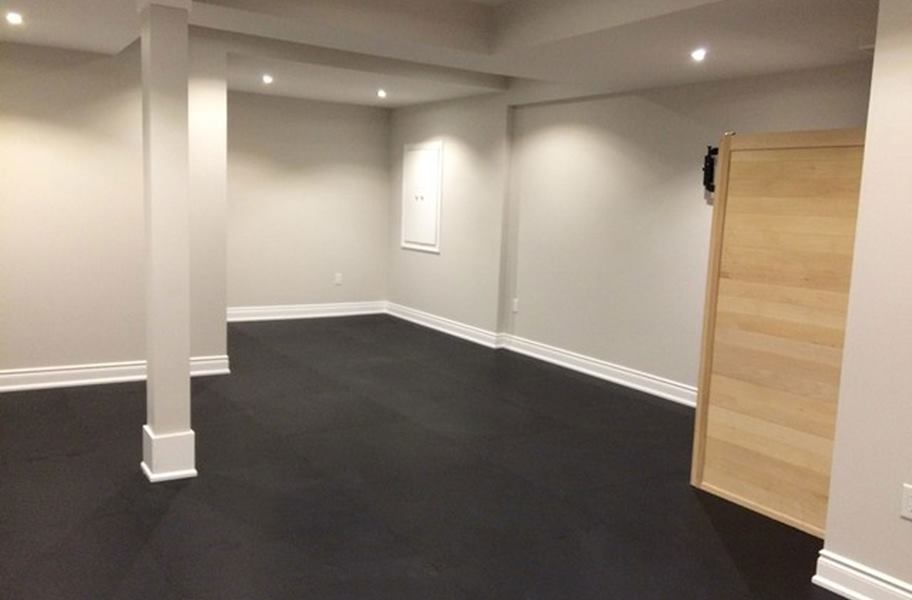
Interlocking Rubber Floor Tiles For Basement

Basement Upgrades #BasementDesign Interlocking flooring, Rubber flooring, Interlocking rubber

The Best Basement Flooring Options – Flooring Inc
Rubber Tile Flooring For Basement – Roppe rubber tile with raised circular design. Want for
Revolution 36” L x 36” W x 0.63” Home gym flooring, Basement flooring, Rubber floor tiles

Tuff-Lock Interlocking Rubber Tiles 24" x 24" at Menards Interlocking rubber tile, Rubber

Rubber Tile Flooring For Basement – Roppe rubber tile with raised circular design. Want for
EZ-Flex Interlocking Recycled Rubber Floor Tiles Rubber flooring basement, Rubber floor tiles

Basement Flooring Rubber – Buy Best Rubber Flooring Dubai Abu Dhabi Al Ain UAE / Rubber is

Heavy Duty 100% Natural Rubber Interlocking Floor Tile 1m x 1m x 17mm thick for Gyms, Garages

Interlocking Rubber Floor Tiles Basement – Tiles : Home Design Ideas #w3YAaQ5Yel

Pin on Ravishing RED

Related Posts:
- Basement Flooring Ideas
- Basement Floor Heaving Repair
- Basement Flooring Options DIY
- Fixing Basement Floor
- Repainting Basement Floor
- Walkout Basement Flooring
- Brick Basement Flooring
- Budget Basement Flooring
- Waterproofing Your Basement Floor
- Laminate Basement Flooring
Interlocking Rubber Floor Tiles For Basement: Transforming Your Space
Introduction:
Are you searching for the perfect flooring solution for your basement? Look no further than interlocking rubber floor tiles! This innovative and versatile flooring option is gaining popularity for its durability, ease of installation, and aesthetic appeal. In this article, we will delve deep into the world of interlocking rubber floor tiles for basements, exploring their benefits, installation process, maintenance tips, and frequently asked questions. Let’s dive in!
Benefits of Interlocking Rubber Floor Tiles:
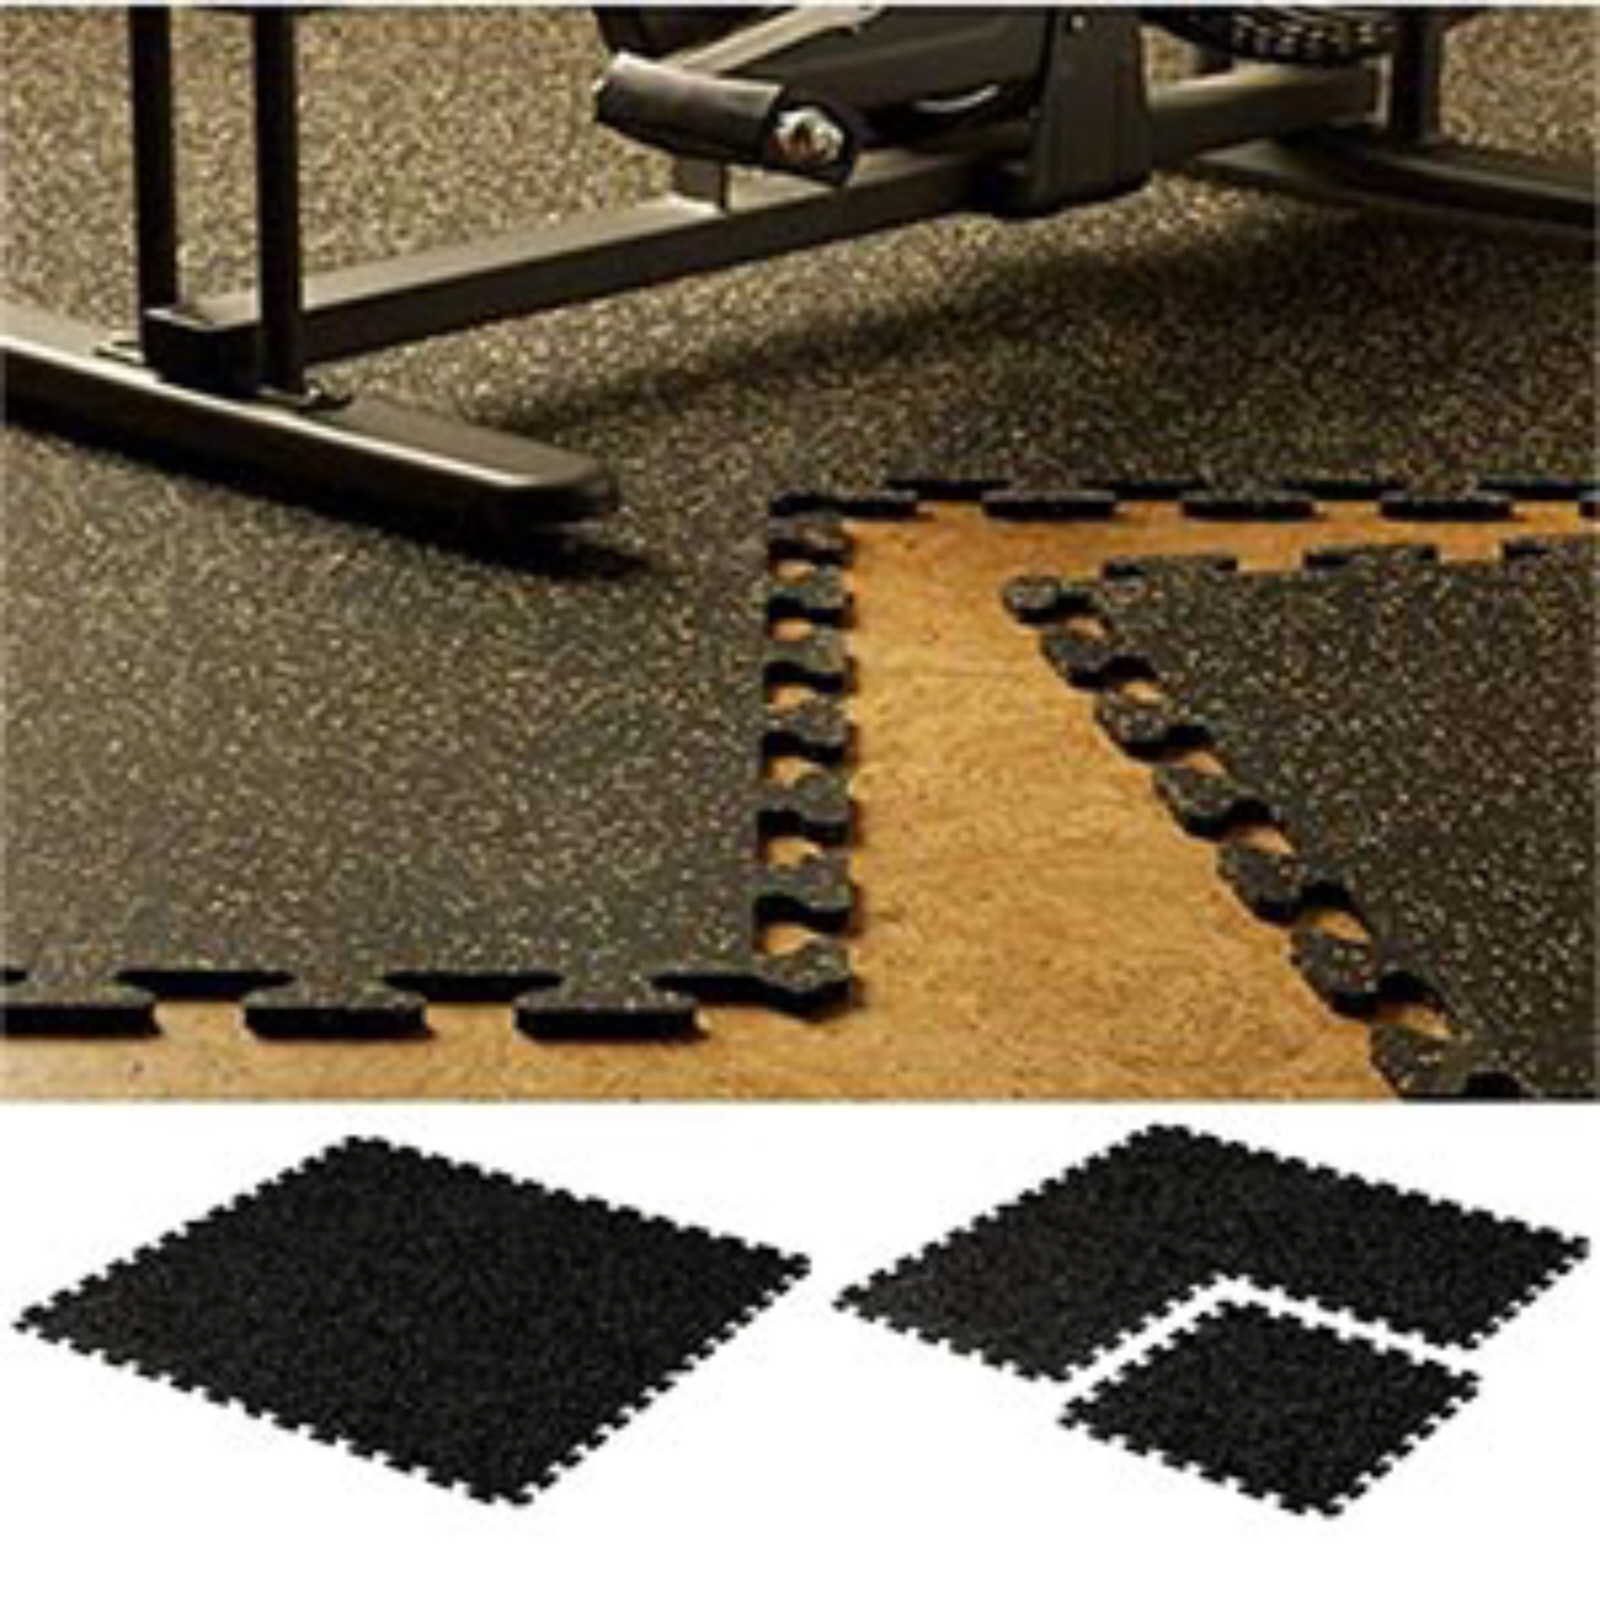
1. Durability: Interlocking rubber floor tiles are known for their exceptional durability. Made from resilient rubber material, these tiles can withstand heavy foot traffic, furniture weight, and even moisture. They are highly resistant to scratches, stains, and dents, making them ideal for basements where wear and tear are common.
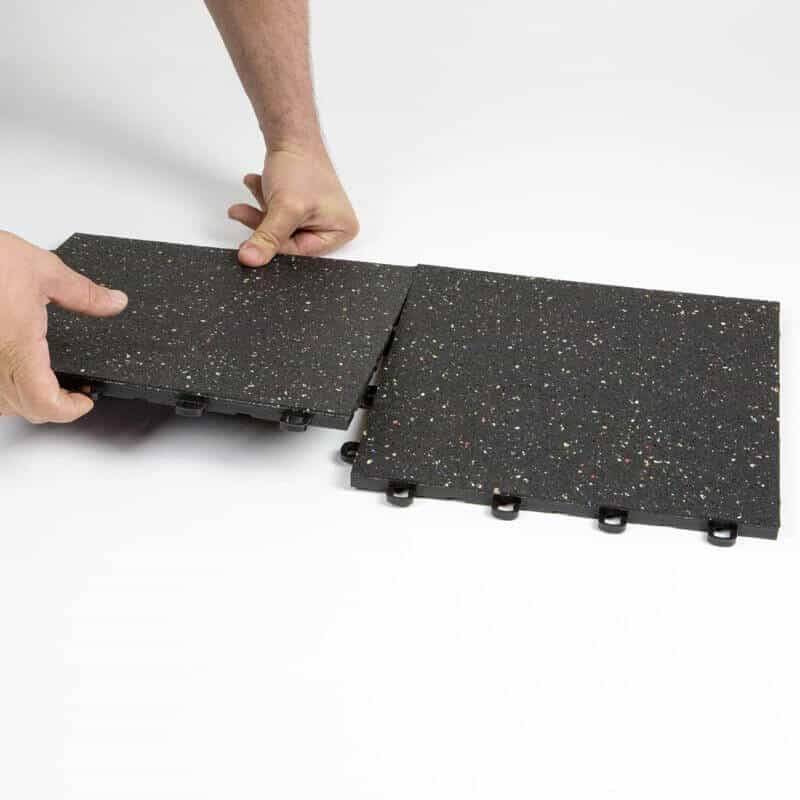
2. Easy Installation: One of the significant advantages of interlocking rubber floor tiles is their hassle-free installation process. With their unique interlocking design, these tiles can be easily placed together without the need for adhesives or specialized tools. This allows for a DIY-friendly installation that can be accomplished in minimal time.
3. Versatility: Interlocking rubber floor tiles come in a wide range of colors, patterns, and textures, allowing you to choose the perfect style that suits your basement aesthetic. Whether you prefer a sleek and modern look or a more traditional feel, there is a tile option available to meet your preferences.
4. Comfort and Safety: Rubber flooring provides exceptional underfoot comfort due to its shock-absorbent properties. It offers a cushioned surface that reduces fatigue and minimizes the risk of injuries from slips and falls. Furthermore, these tiles provide excellent thermal insulation, keeping your basement warm and cozy.
5. Sound Absorption: Basements often suffer from poor sound insulation due to their concrete structure. Interlocking rubber floor tiles effectively absorb sound vibrations, reducing noise transmission to other parts of the house. This makes them an excellent choice for homeowners looking to create a quiet and peaceful basement environment.
Installation Process:
Installing interlocking rubber floor tiles in your basement is a straightforward process. Here are the step-by-step guidelines:
1. Prepare the Surface: Ensure that the basement floor is clean, dry, and free from any debris. Remove any existing flooring materials and repair any cracks or uneven spots.
2. Measure and Plan: Measure the dimensions of your basement to determine the number of tiles required. Plan the layout by starting from a corner or wall and working your way across the room.
3. Lay the Tiles: Begin the installation by placing the first tile in the corner, interlocking it with the adjacent tile. Continue adding tiles in a row, ensuring they fit tightly together. Use a rubber mallet or hammer with a rubber tip to secure the tiles in place, ensuring they lie flat and level.
4. Cut Tiles if Necessary: If you encounter obstructions such as poles or corners that require smaller tile pieces, measure and cut the tiles accordingly using a utility knife or a rubber floor tile cutter.
5. Finish the Edges: Once you have installed all full-size tiles, it’s time to finish the edges. Use edge pieces specifically designed for interlocking rubber floor tiles to provide a clean and seamless look.
Maintenance Tips:
Proper maintenance ensures the longevity and cleanliness of your interlocking rubber floor tiles. Here are some essential tips to keep in mind:
1. Regular Cleaning: Vacuum or sweep your rubber floor regularly to remove dirt, dust, and debris that can accumulate over time. Use a mild detergent mixed with water for deeper cleaning when necessary.
2. Spill Cleanup: Wipe up any spills immediately to prevent staining or potential slip hazards. Rubber flooring is highly resistant to liquid penetration, but prompt action is still important.
3. Avoid Harsh Chemicals: Avoid using harsh chemicals, abrasive cleaners, or wire brushes that can potentially damage the rubber surface. Stick to gentle cleaning solutions recommended by the manufacturer.
4. Protect from Sharp Objects: Although rubber floor tiles are highly durable, they can still be punctured or damaged by sharp objects. Avoid dragging heavy furniture across the floor and use protective pads or coasters to prevent scratches.
Frequently Asked Questions:
Q1. Can interlocking rubber floor tiles be installed over concrete in a basement?
A1. Absolutely! Interlocking rubber floor tiles are an excellent choice for basement floors, especially over concrete. The rubber material provides insulation against cold and dampness , making it a comfortable and safe flooring option for basements.
Q2. Are interlocking rubber floor tiles easy to install?
A2. Yes, interlocking rubber floor tiles are relatively easy to install. The interlocking design allows for a seamless and secure fit without the need for adhesives or special tools. However, proper preparation of the surface and accurate measurements are important for a successful installation.
Q3. Can interlocking rubber floor tiles be used in high-traffic areas?
A3. Yes, interlocking rubber floor tiles are highly durable and able to withstand heavy foot traffic. They are commonly used in commercial gyms and fitness centers, where they endure constant use and still maintain their functionality and appearance.
Q4. How do I clean interlocking rubber floor tiles?
A4. Regular cleaning of interlocking rubber floor tiles involves vacuuming or sweeping to remove loose dirt and debris. For deeper cleaning, a mild detergent mixed with water can be used. Avoid using harsh chemicals or abrasive cleaners that can damage the rubber surface.
Q5. Can interlocking rubber floor tiles be used in wet areas?
A5. Yes, interlocking rubber floor tiles are moisture-resistant and can be used in wet areas such as basements and bathrooms. However, it is important to ensure proper installation and adequate ventilation to prevent moisture buildup underneath the tiles.
Q6. Are interlocking rubber floor tiles eco-friendly?
A6. Many interlocking rubber floor tiles are made from recycled materials, making them an eco-friendly flooring option. Additionally, rubber is a sustainable material that can be recycled at the end of its lifespan, reducing waste and environmental impact.
Overall, interlocking rubber floor tiles offer numerous benefits for basement flooring. They provide comfort, safety, sound absorption, and easy installation. With proper maintenance, these durable tiles can withstand the test of time and keep your basement looking and feeling great.