Repouring Garage Floor
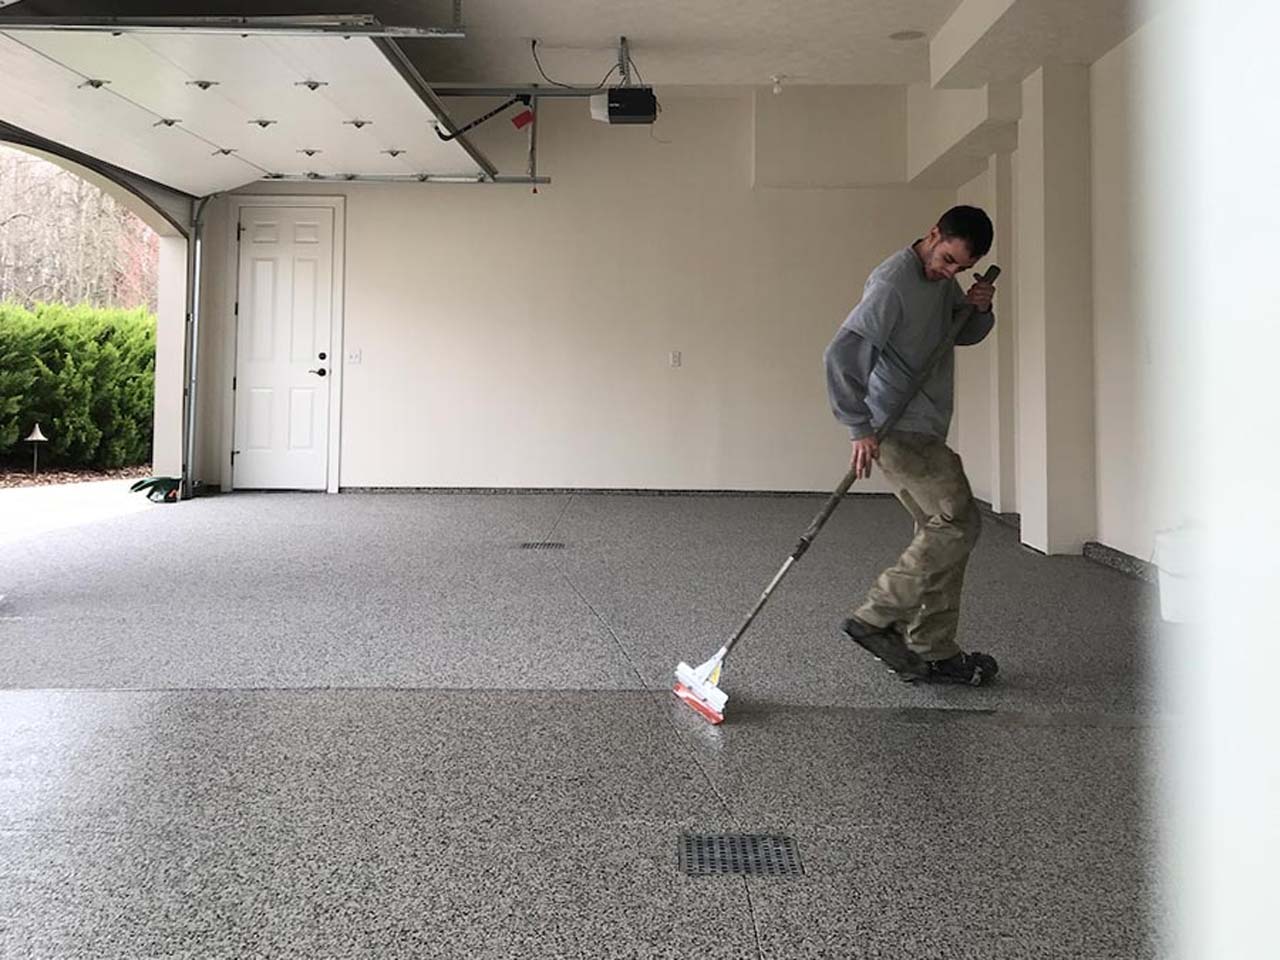
Garage Floor Resurfacing: Fix a Pitted Garage Floor Family Handyman

Best Way To Repair Pitted Garage Floor – Knight Ricky

Garage Floor Resurfacing: Fix a Pitted Garage Floor Family Handyman
Concrete Garage Floor Repair and Replacement – Canadian Masonry Services

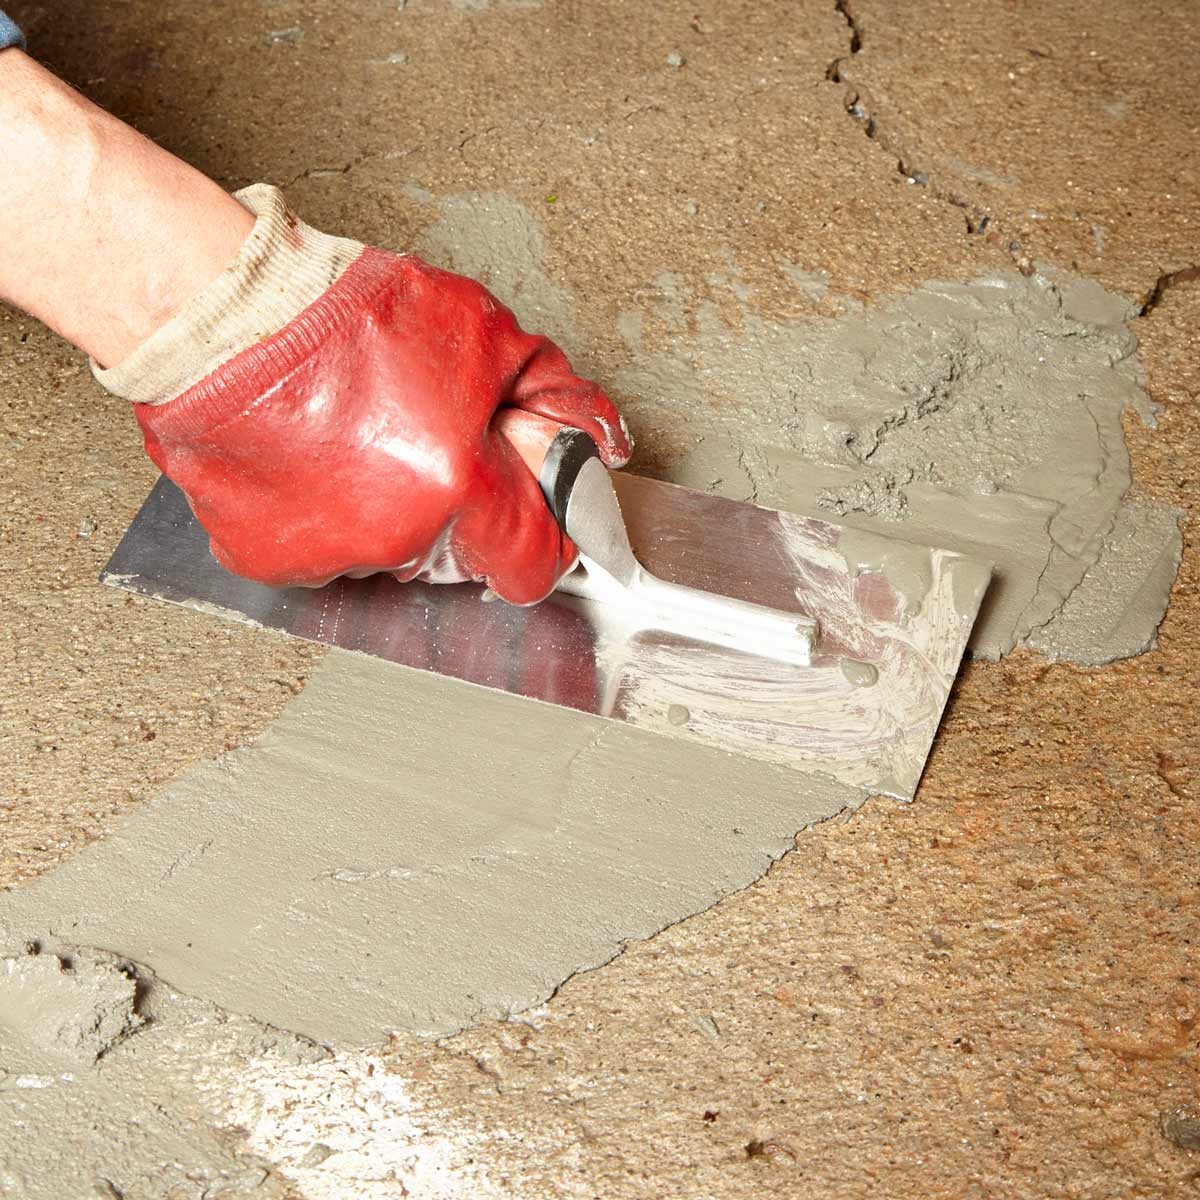
DIY Concrete Crack Repair Family Handyman

Garage Floor Resurfacing: Fix a Pitted Garage Floor Family Handyman

Pouring A Concrete Floor In A Garage – Clsa Flooring Guide

Repair A Garage Floor – Flooring Ideas
How To Apply Epoxy Paint On Floor – Flooring Tips

Concrete Leveling – Garage Concrete Repair in Oklahoma City, Ok – Cracked Garage Floor in

Raising & Repairing Hoffman Estates Garage Floor – Concrete Hero

Related Posts:
- Marble Garage Floor
- Cheap Garage Floor Covering
- Garage Floor Coating
- Heavy Duty Garage Flooring
- Checkerboard Garage Floor Tiles
- Garage Floor Sealer Paint
- Epoxyshield Garage Floor Paint
- Benefits Of Epoxy Flooring In Garage
- Garage Floor Preparation For Epoxy
- Garage Workshop Flooring
Having a garage is a great convenience for many homeowners, but it can come with its own challenges. One of the main problems is that the floor may have to be repoured or repaired after some time. The garage floor is subjected to a lot of wear and tear due to heavy vehicles, tools, and other items that are stored in there. If you want your garage floor to last long-term and stay strong and durable, you need to know how to pour and repair it correctly.
Steps for Pouring a Garage Floor
Pouring a garage floor is not as complicated as it may seem. It’s actually quite simple if you follow the right steps. Here’s what you need to do.
Step 1: Prepare the Site
The first step is to prepare the site for pouring the concrete. You need to clean up the area and make sure there are no obstacles that could prevent the concrete from being poured evenly. Clear away any debris, level the ground, and make sure it’s free from water or other liquids that could interfere with the pouring process.
Step 2: Install Forms
Once the site is prepared, it’s time to install forms that will help keep your concrete in place. These forms should be constructed from wood or metal and positioned around the perimeter of your garage floor. Make sure they are level and secure so they don’t move during the pouring process.
Step 3: Mix the Concrete
Now it’s time to mix the concrete. Depending on how large your garage floor is, you can either purchase pre-mixed concrete or mix it yourself. If you choose to mix it yourself, make sure you use the right materials in order to get an even mix with no lumps or clumps.
Step 4: Pour the Concrete
Once everything is mixed together, it’s time to pour the concrete onto your garage floor. Make sure you pour it evenly across the whole surface so that it spreads out evenly without any gaps or depressions. This will ensure that your floor is strong and durable when it dries.
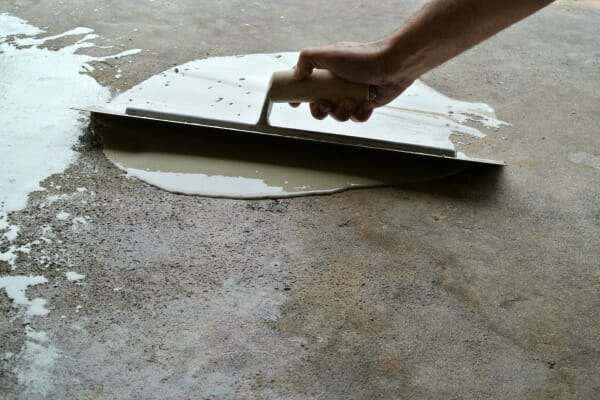
Step 5: Finish It Off
Finally, after your concrete has been poured, you should smooth out any bumps or imperfections with a trowel or other tool. Once this is done, let your concrete dry for at least 24 hours before walking on it or driving over it with cars.
Tips for Repairing a Garage Floor
If your garage floor is already installed but needs repairs due to cracks or other damage, then you can use these tips to help you fix it up quickly and easily.
Tip 1: Repair Small Cracks
For small cracks in your concrete, use an epoxy filler or caulk to fill in any gaps. Make sure you thoroughly clean out the crack before applying the filler so that it gets a good grip on the surface area and won’t come loose over time.
Tip 2: Use a Patching Compound
For larger cracks or holes in your garage floor, use a patching compound such as concrete patching material or asphalt patching material. This will help fill in any large gaps and make your floor look like new again. Just make sure to clean out any debris before applying the patching material so that it gets a good grip on the surface area.
Tip 3: Apply an Epoxy Coating
If you want to give your garage floor an extra layer of protection from wear and tear, then consider applying an epoxy coating to the surface area. This will help prevent future damage and make your floor look much more attractive than before. It’s also relatively easy to apply and doesn’t require too much maintenance once applied properly.
Conclusion
Pouring and repairing a garage floor isn’t as difficult as many people think, as long as you follow these simple steps outlined above. With just a few hours of preparation and repair work, you can have a strong and durable garage floor that will last for years to come!