Tiling A Bathroom Floor Around A Toilet
4 Ways to Cut Tile Around a Toilet – wikiHow

SHOULD YOU TILE AROUND OR UNDER A TOILET?
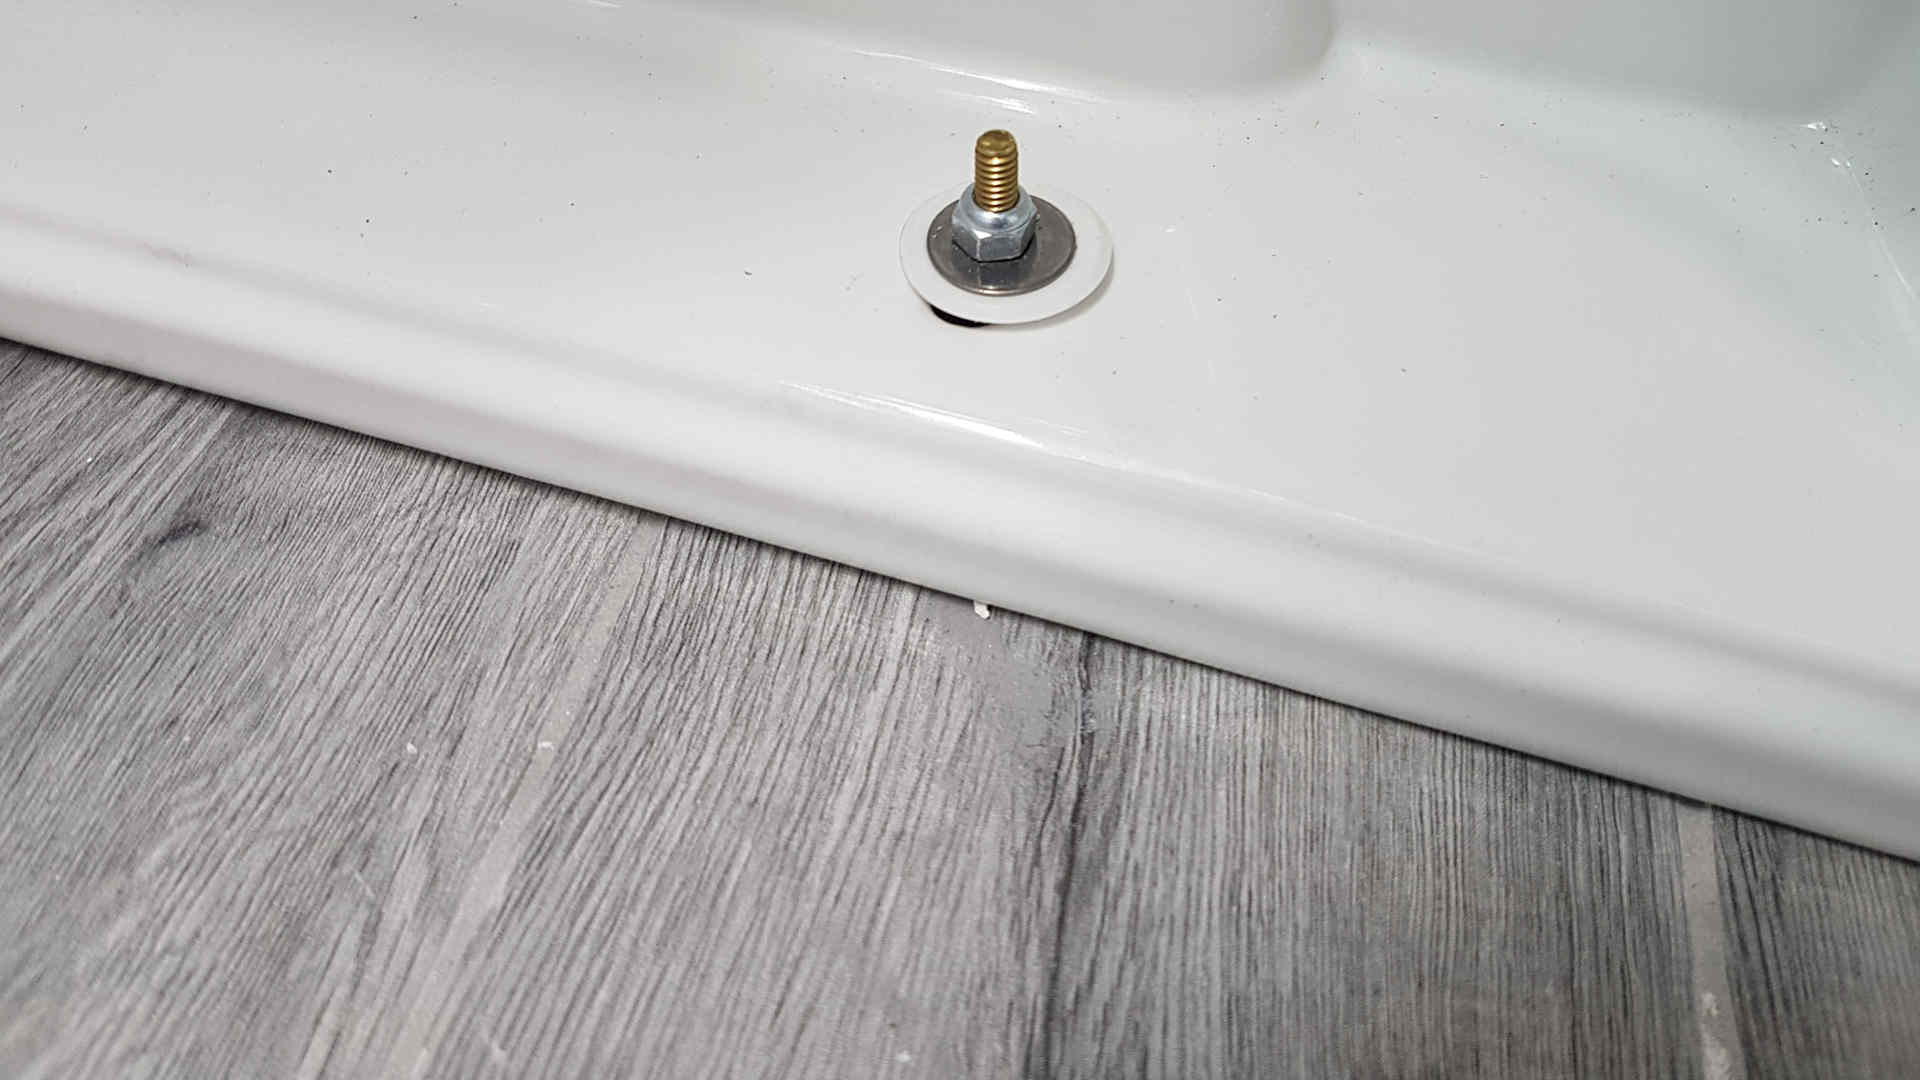
Tiling Around the Toilet Flange
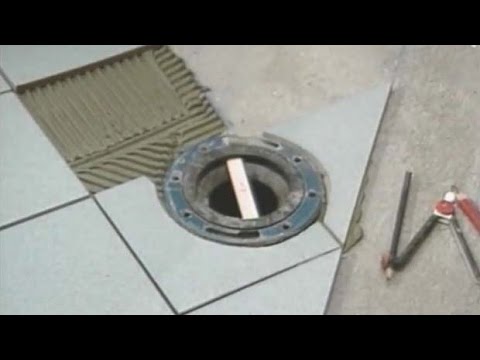
How do I install tile under a toilet? (the faster and easier way)
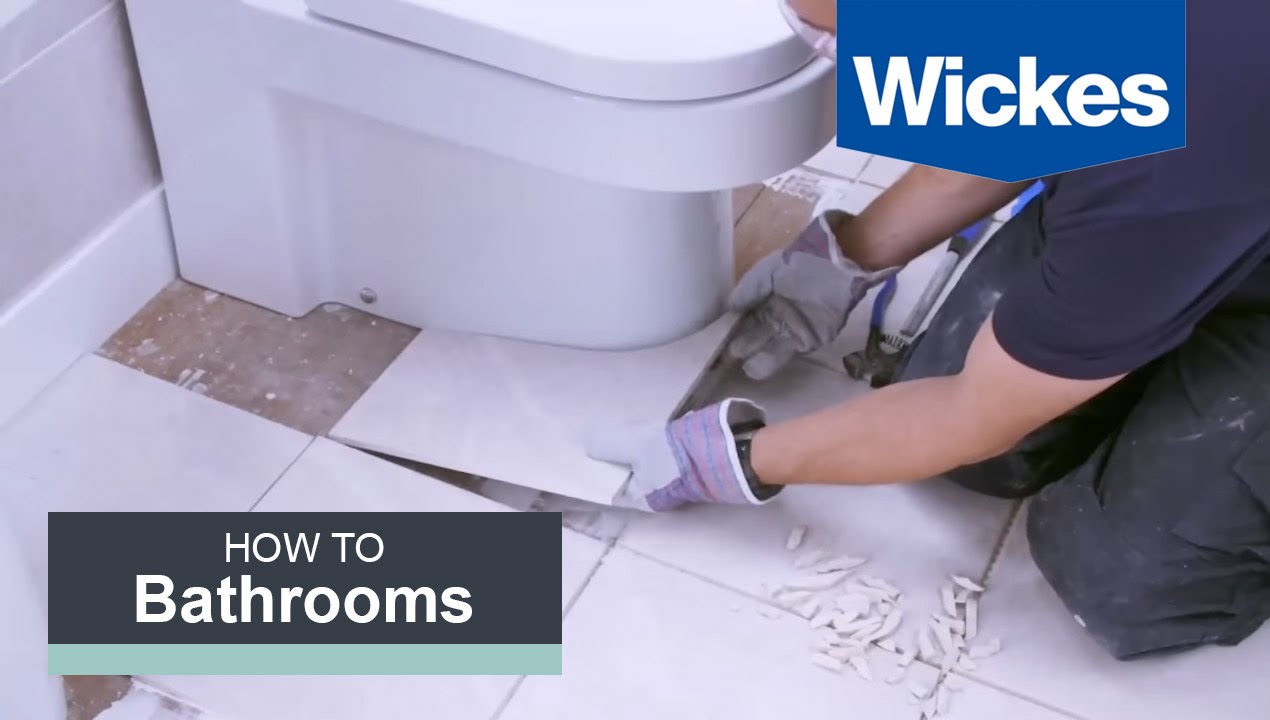
How to Tile a Bathroom Floor with Wickes

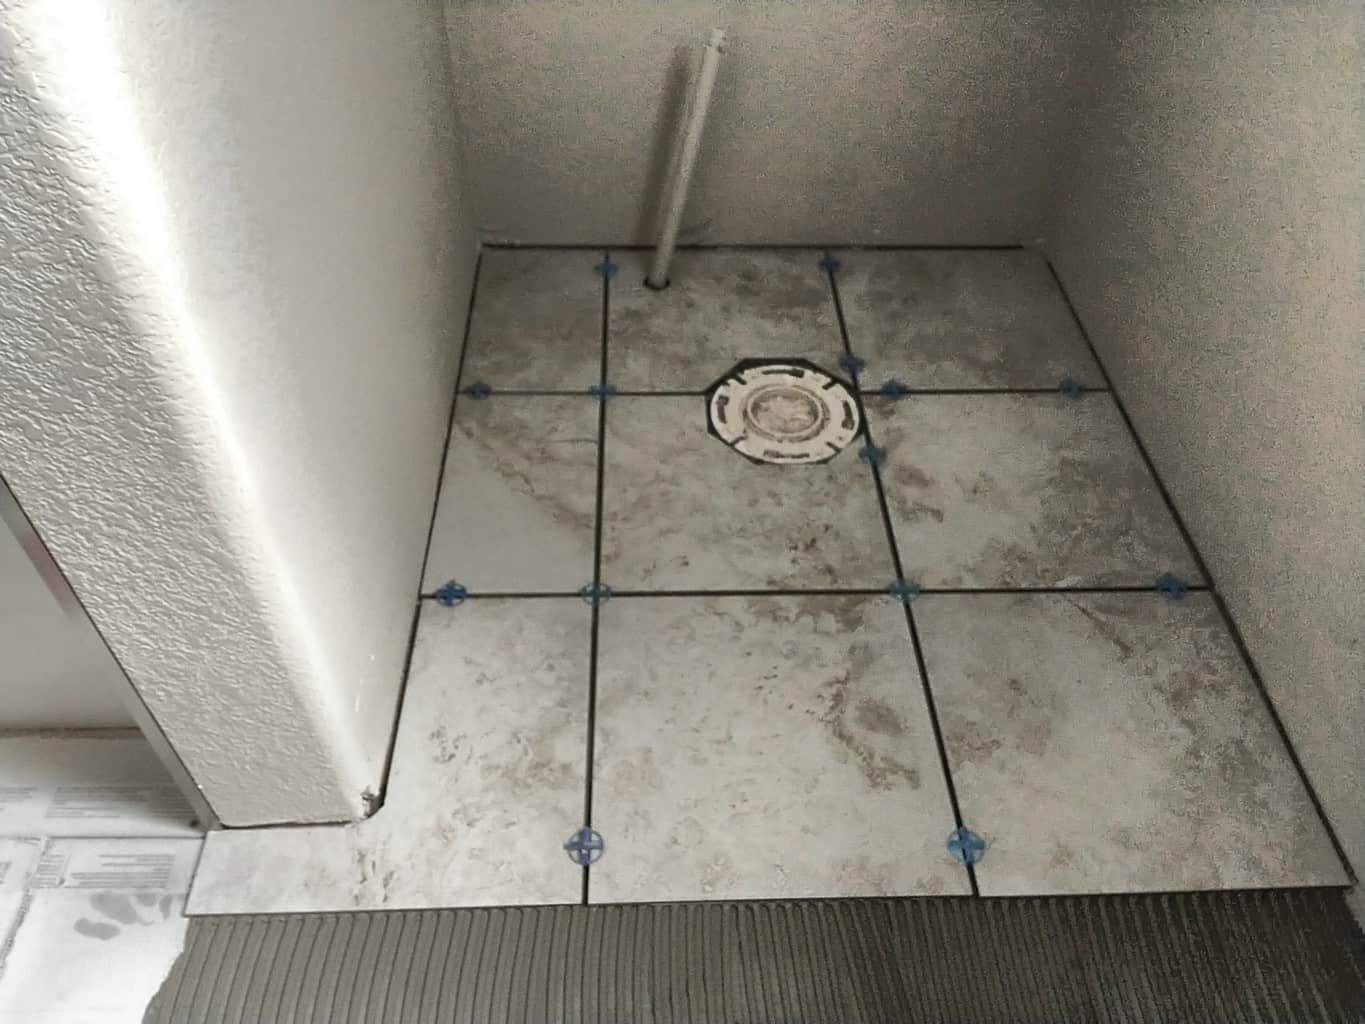
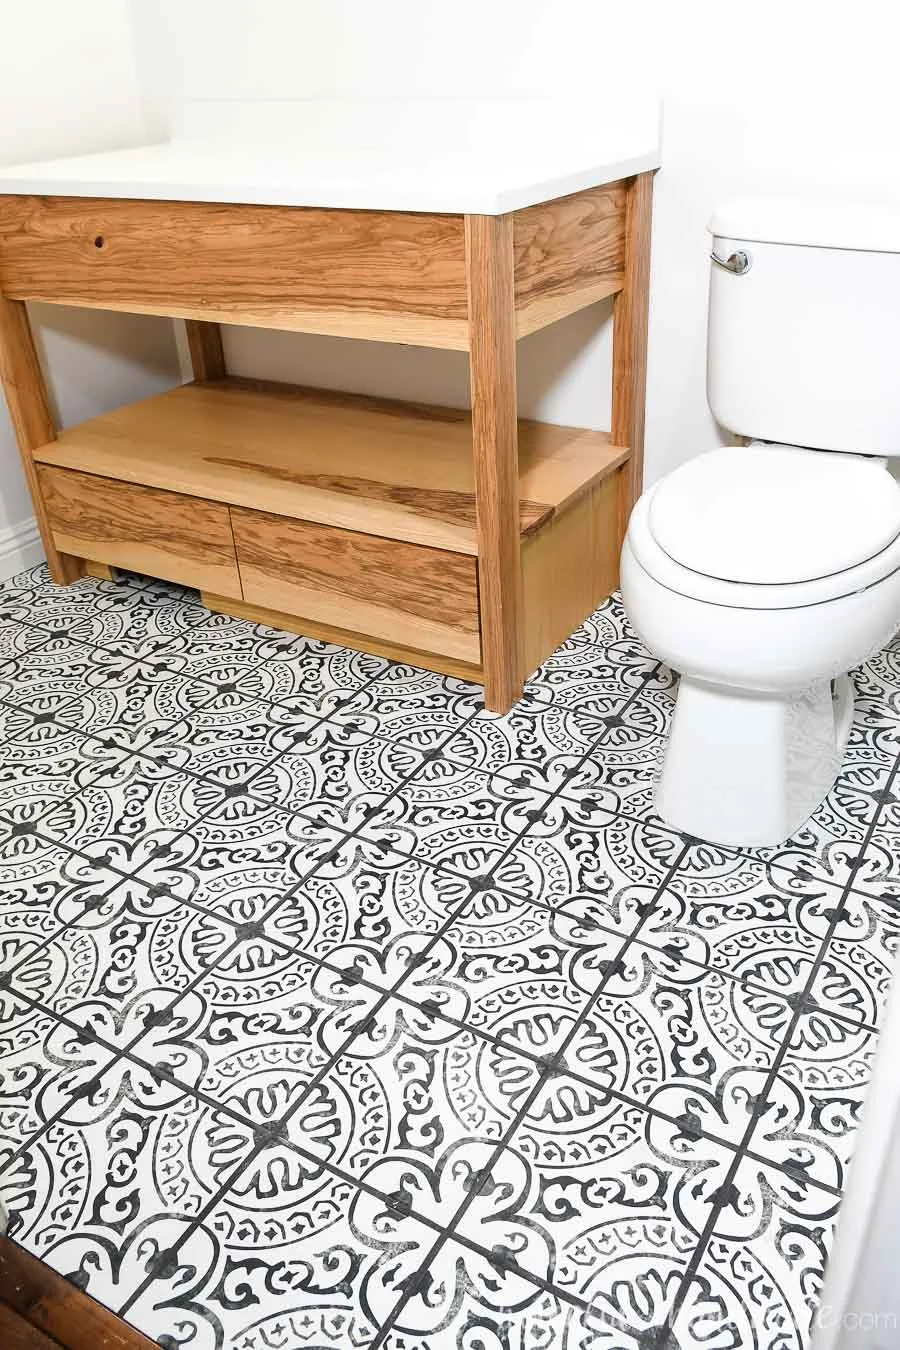
Laying Floor Tiles in a Small Bathroom – Houseful of Handmade
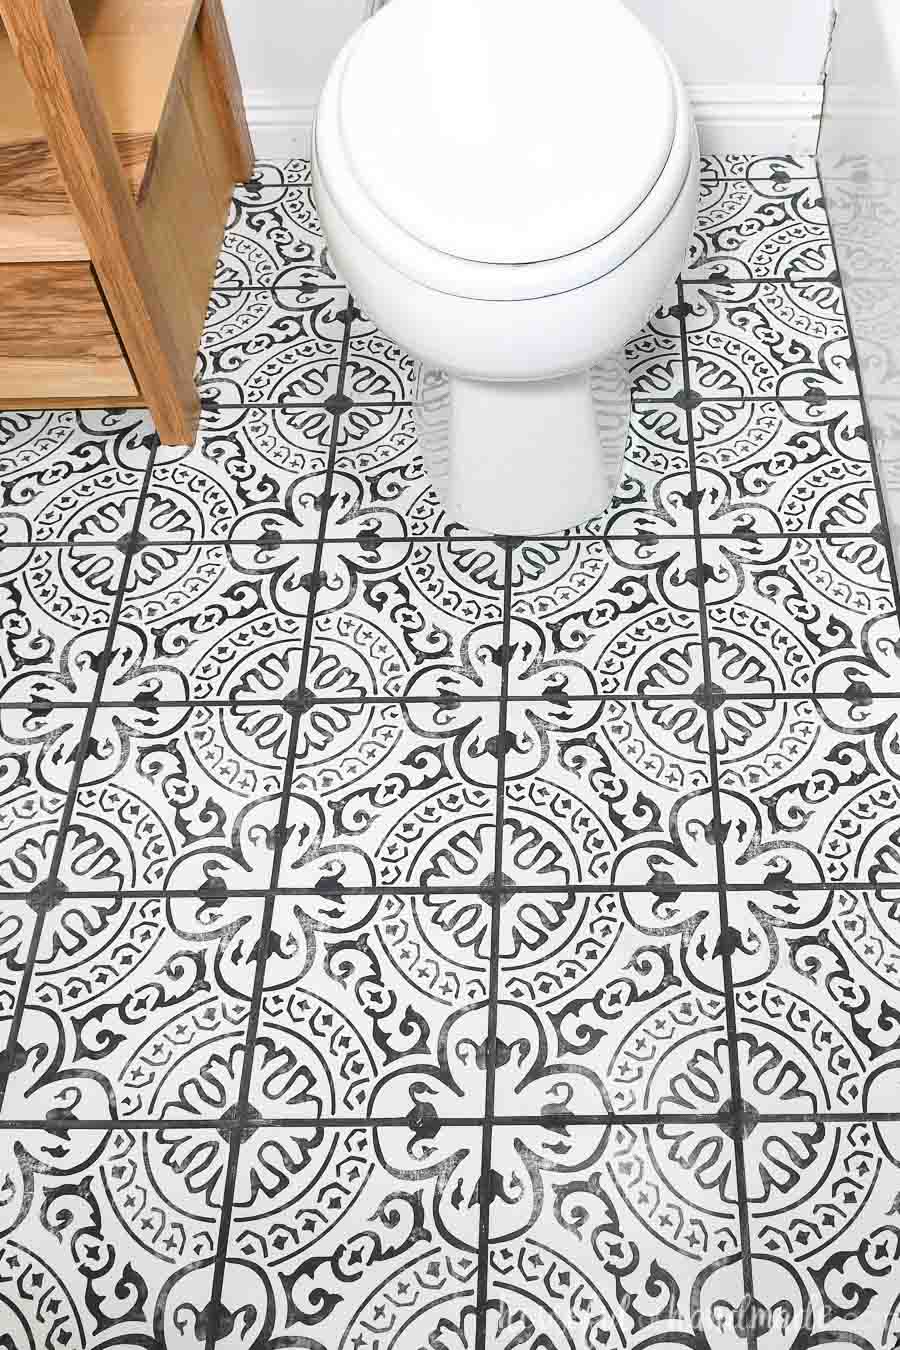
DIY Done Right: How to Tile Sticker Around the Toilet u2013 Quadrostyle

Laying Floor Tiles in a Small Bathroom – Houseful of Handmade
Luxury Vinyl Tile – Plank Flooring For Rental Bathrooms

SHOULD YOU TILE AROUND OR UNDER A TOILET?
Related Posts:
- French Country Bathroom Flooring
- Mid Century Modern Bathroom Flooring
- Rustic Bathroom Floor Tiles
- Purple Bathroom Flooring
- How To Clean Bathroom Floor Stains
- Tile Design Bathroom Floor
- Terracotta Bathroom Floor
- Cool Bathroom Floor Ideas
- Light Bathroom Floor Tiles
- Classic Bathroom Floor Tile Ideas
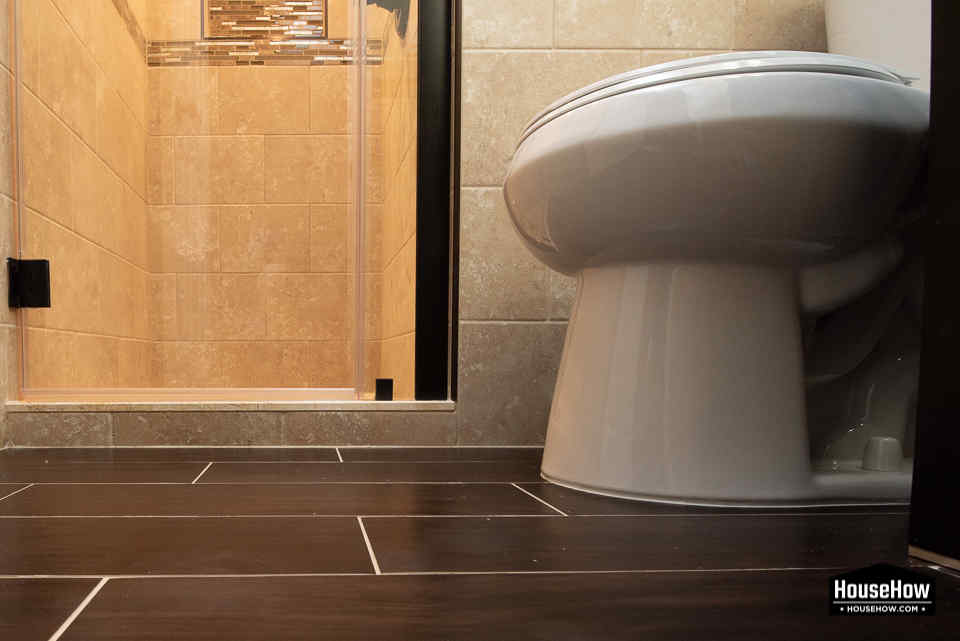
Are you looking to create a stunning bathroom design by tiling around a toilet? Then you’re in the right place. This guide will provide step-by-step instructions on how to successfully tile a bathroom floor around the toilet and achieve the perfect look.
## What You’ll Need
Before you start tiling your bathroom, you’ll need to gather some supplies. Firstly, you’ll need to purchase the appropriate number of tiles for your project. Make sure they’re compatible with your bathroom flooring and have the desired look you’re aiming for. Additionally, you’ll need to pick up a few other items such as grout, grout sealer, spacers, tile adhesive, and a trowel.
## Prepping The Area
Before you begin laying tiles around the toilet, it’s important to properly prep the area. Start by removing any existing flooring including any remaining adhesive or grout. Make sure to use a putty knife and scraper to get rid of stubborn bits of adhesive or grout. You should also check for any uneven areas on the subfloor and use a leveler if necessary. Once your subfloor is completely prepped and clean, it’s time to begin tiling.
## Laying Your Tiles
Now it’s time to start laying tiles around your toilet. Start by laying out your tiles in a dry run without applying any adhesive or grout. This will allow you to get an idea of how your floor will look once finished. Once you’re happy with the layout, it’s time to begin applying adhesive and grout. Begin in one corner and spread the adhesive evenly over the subfloor using the trowel. Once you’ve applied adhesive, begin laying your tiles in rows from the corner, ensuring that you use spacers between each tile for even spacing. Continue this process until all your tiles are laid out around the toilet.
## Applying Grout
Once all your tiles are laid out, it’s time to apply grout between each tile. Begin by mixing your grout according to instructions on the package. You can then use a trowel or rubber float to spread the grout into the joints between each tile. Make sure to fill all gaps and wipe away any excess grout with a damp sponge or cloth before it dries. Once all your tiles are filled with grout, allow them to dry overnight before applying a sealer.
## Sealing The Tiles
Once your tiles have completely dried, it’s time to seal them with a grout sealer. Begin by applying sealer to each joint between each tile using a paintbrush or foam brush. Allow the sealer to dry overnight before wiping away any excess with a damp cloth or sponge. Once all your tiles are sealed, you can enjoy your newly tiled bathroom floor!
Tiling a bathroom floor around a toilet isn’t always an easy task but with these step-by-step instructions it can be done quickly and easily! With patience and attention to detail you can create an eye-catching bathroom design that will last for years to come.