Marble Flooring Installation Guide
Marble Flooring: What to Know About Buying, Installing, and Maintaining It

How to Marble Flooring Installation Process – YouTube

Marble Flooring Installation – UnitedFKB
Marvellous Marble: A Guide To Your Marble Floor KleanSTONE

The Benefits of Marble Flooring Restoration

How to install marble floor: the detailed instructions
The Case for Marble Flooring elevation decoration countertop landscaping monument Bhandari
Home Improvement with Marble Flooring: Analyzing Pros and Cons

How to Clean Marble Floors of Dust, Dirt, and Stains – Bob Vila
HOUSE CONSTRUCTION IN INDIA: FLOORS MARBLE

The Advantages And Disadvantages of Marble Flooring
Related Posts:
- Marble Floor Polishing
- Italian Marble Flooring Designs
- Clean Marble Floor Tiles
- DIY Marble Floor Polish
- Beige Marble Floor Tiles
- Red Marble Floor Tile
- Sealing Honed Marble Floors
- Marble Floor Maintenance
- Marble Floor In Bedroom
- Modern Marble Floor Pattern Design
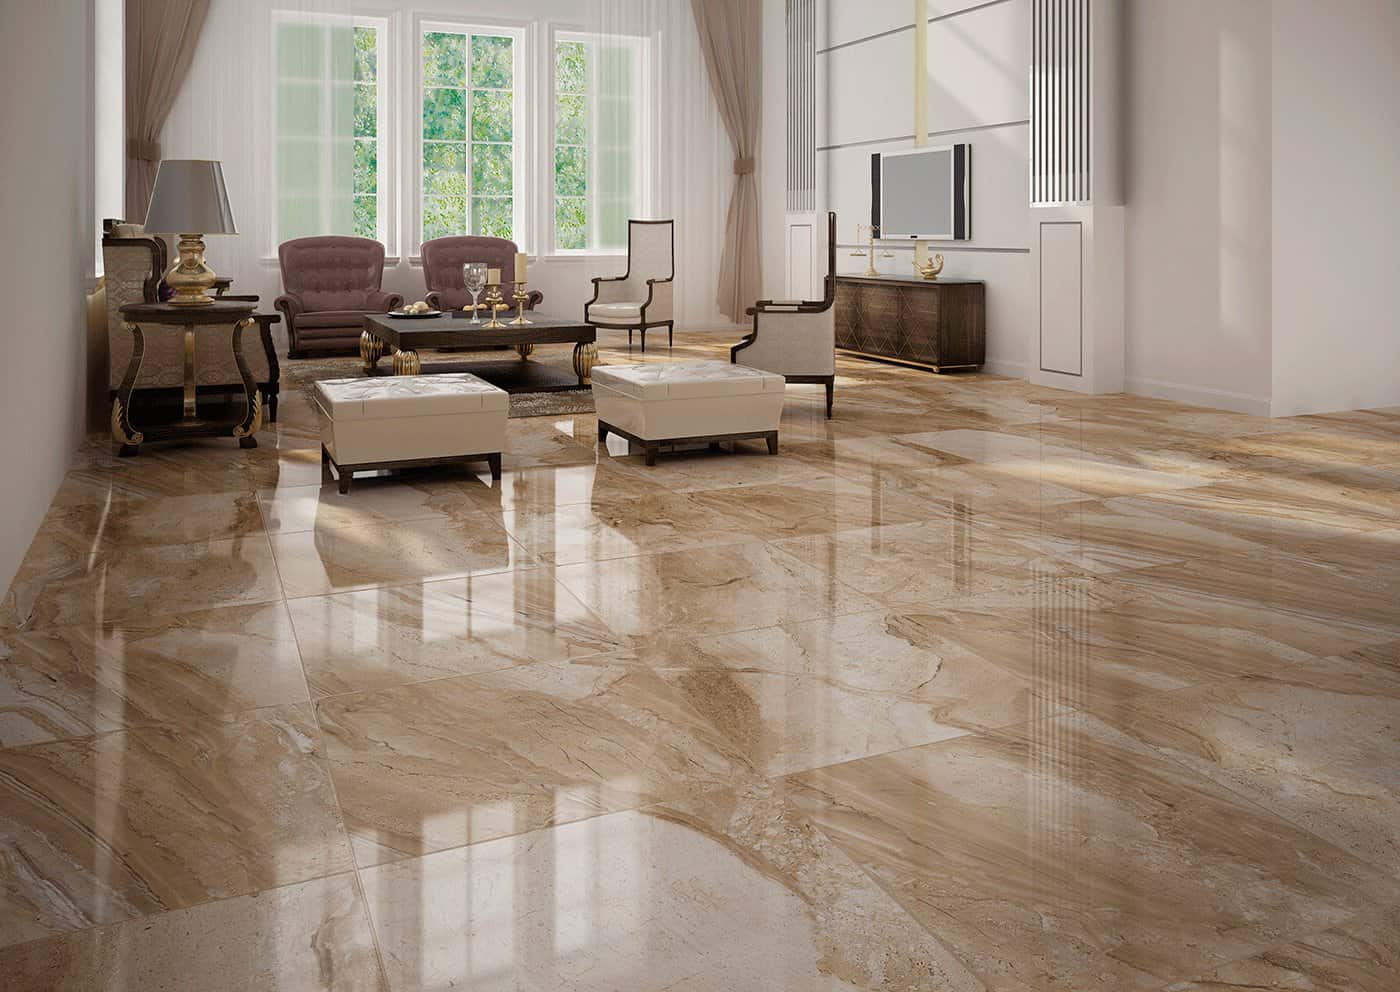
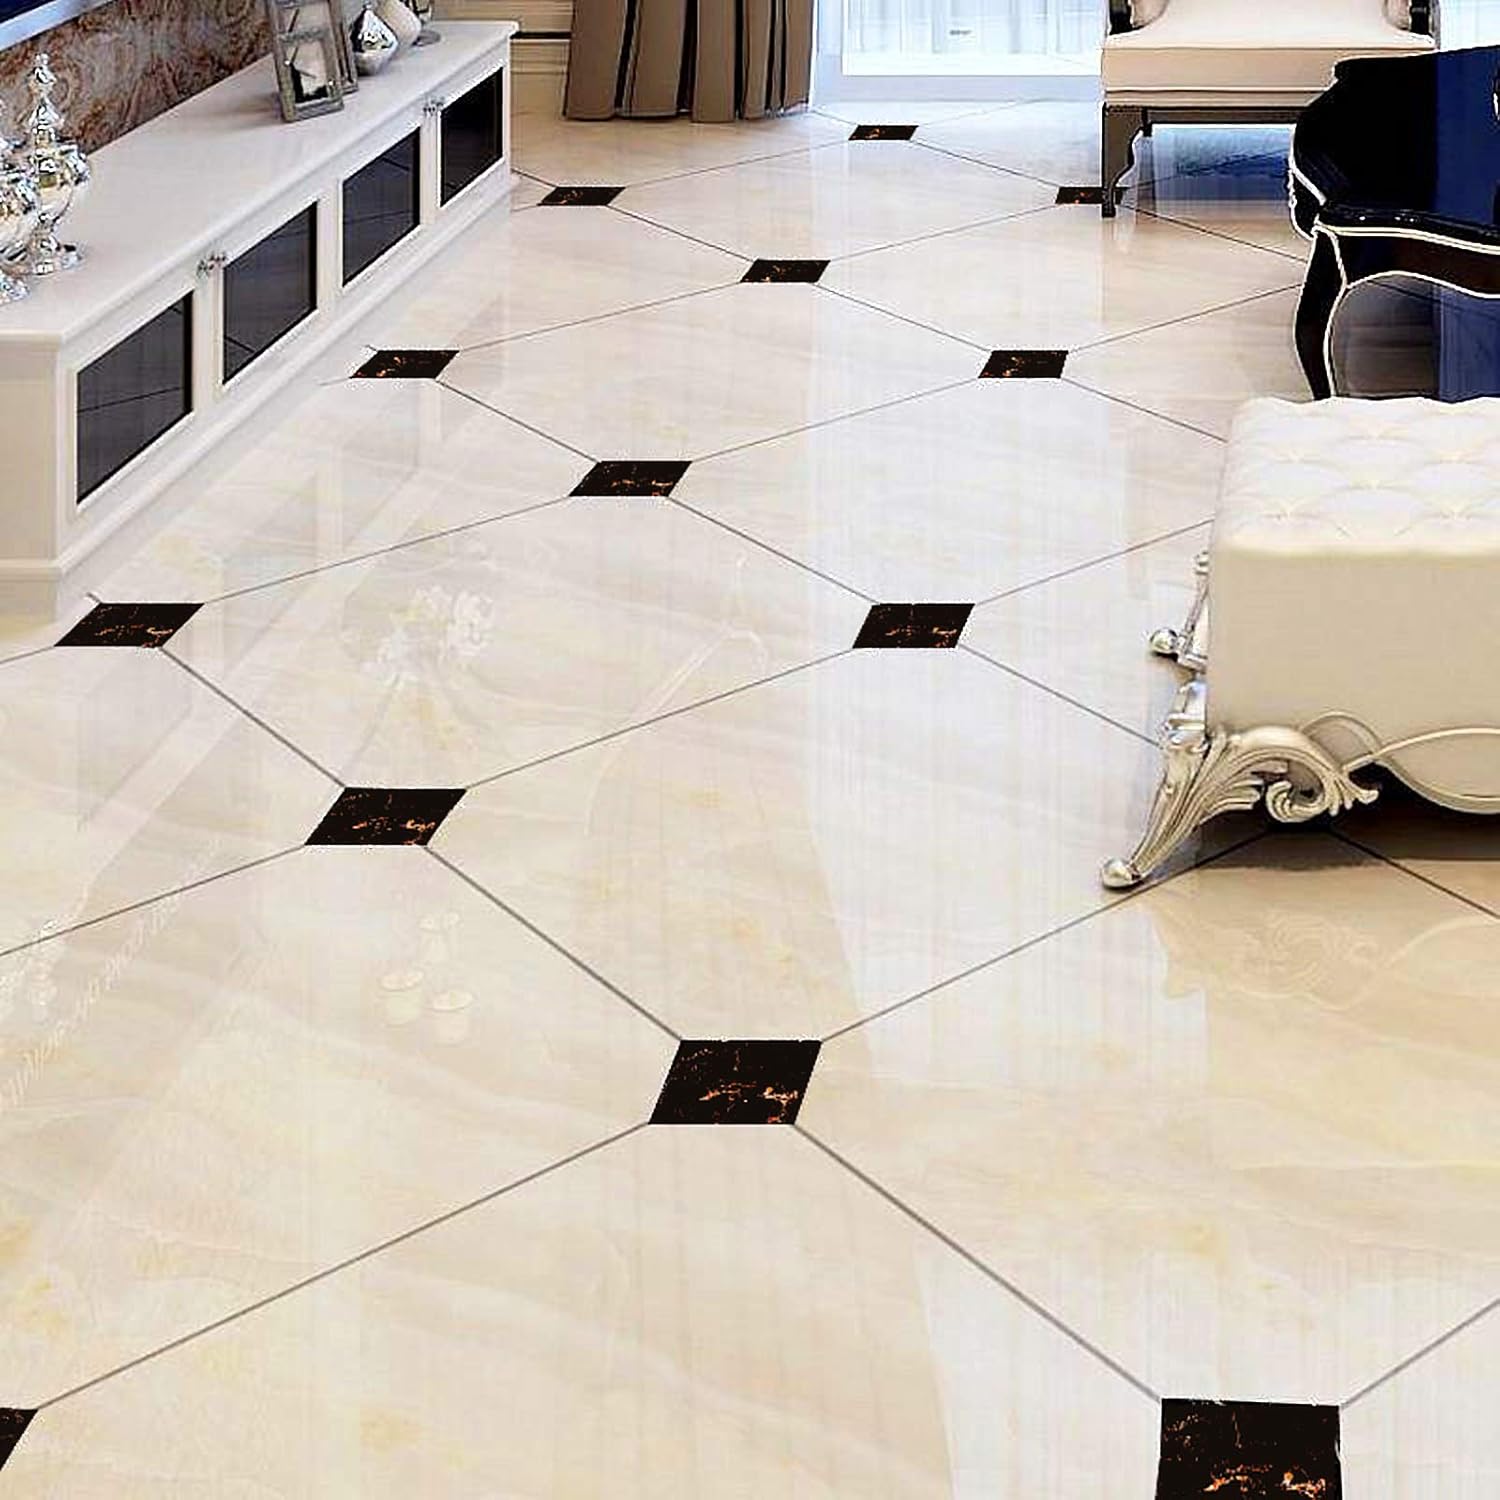
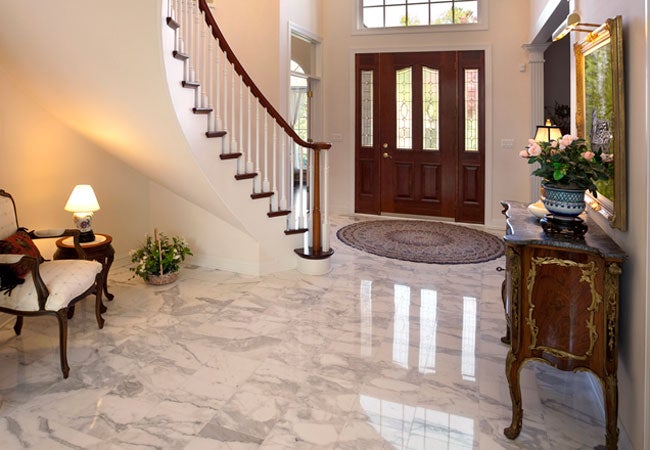
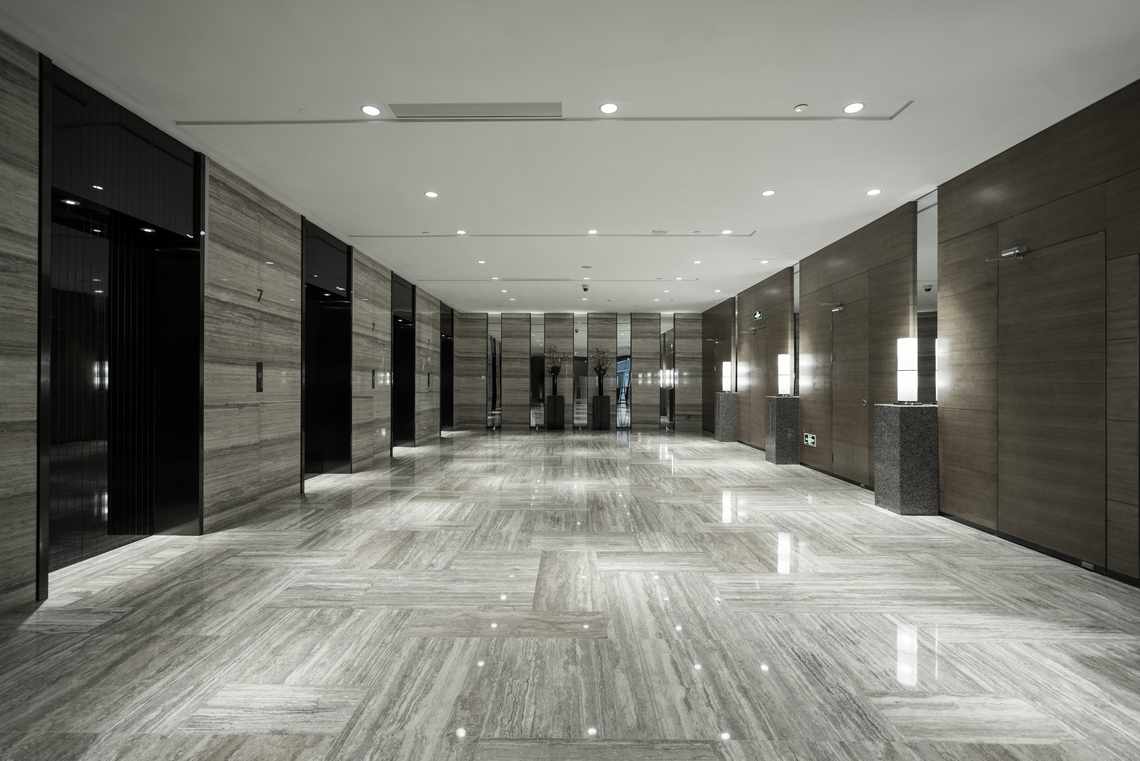
When it comes to making a statement in a home or commercial space, marble flooring is a timeless choice. Elegant and luxurious, marble floors provide a modern yet classic look to any interior. Installing a marble floor requires some forethought and consideration to ensure that the results are beautiful and long-lasting. Here is the ultimate guide to ensure that your marble floor is installed correctly.
## Choosing a Marble Flooring Installation Professional
Your chosen installer or contractor will be paramount to the success of your new marble floor. The installation of marble floors should only be handled by professionals who have experience with the specific nature of this material and its challenges. Inquire into the credentials, qualifications, and experience of your installer before attempting to achieve this task yourself. Taking care to select a reputable and experienced professional will result in a beautiful finish that has been correctly installed.
## Make Sure You Buy The Right Materials
The right tools are essential for your marble flooring installation project. Make sure you purchase the correct grade of mortar and grout for your specific type of marble, as well as sealants, adhesive, and other necessary items. It could be beneficial to consult with your chosen professional before buying any materials to ensure you have the right supplies on hand when needed.
## Prepare The Subfloor
Before any installation can take place, make sure that you prepare the subfloor correctly. If there are any existing cracks or warps then these must be addressed before proceeding with the installation process. A flat and level surface will make your finished floor look good, so it’s important to take the time to get this right before going any further.
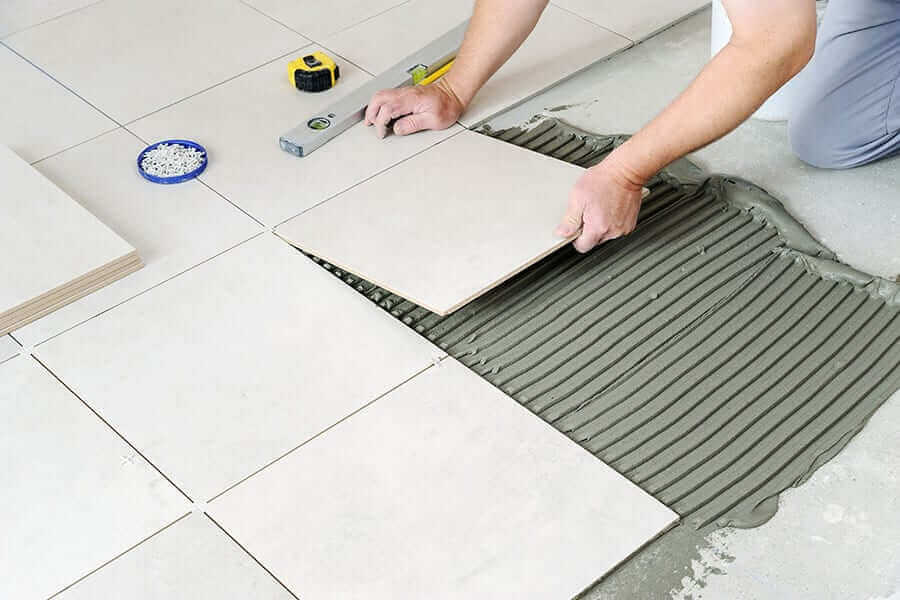
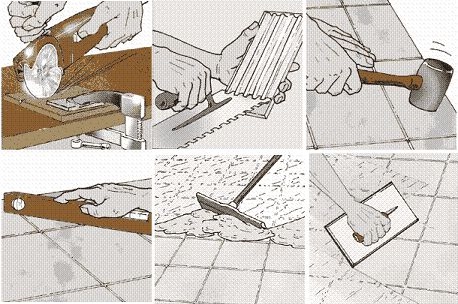
## Cut Your Tiles
Once your subfloor is ready, it’s time to begin cutting your marble tiles. Cutting marble tiles can be tricky, especially if you don’t have the correct equipment or experience. Consider hiring an experienced installer who will be able to make precise cuts swiftly and effectively.
## Mix Your Adhesives
It’s important not to skimp on adhesives when installing your marble flooring. Ensure that adhesives are mixed in accordance with manufacturer specifications for best performance. Mix only as much adhesive as you require at any one time as unused adhesive may not be reused due to setting time constraints.
## Spread Adhesive And Lay Tiles
Once adhesive is prepared correctly, spread it over a small section of the subfloor with a notched trowel at an even depth. Carefully lay out each tile onto its pre-cut section of adhesive and press it down firmly until it is level with neighboring tiles. Take care not to move adhered tiles after they have been laid out or this could affect their bond to the subfloor.
## Grouting The Tiles
Once all tiles are laid correctly, mix grout in accordance with manufacturer instructions using clean water and leave it aside for five minutes as per its instructions. Using either a grout float or trowel spread the grout across all tile joints ensuring that full coverage has been achieved across all sections of the floor. Wipe away any excess grout from tile faces using either a wet sponge or damp cloth before leaving grout lines undisturbed for 24 hours in order for them to set properly.
## Sealing Your Marble Floor
Sealing your completed marble floor is an imperative step in its care and maintenance. Use a quality sealer on the floor surface ensuring thorough coverage everywhere for optimal protection against corrosion from everyday wear and tear, dirt, and spills that could cause irreparable damage to your marble flooring investment if left unsealed.
## Marble Floor Maintenance Tips
Once your new marble floor has been installed correctly, taking some simple measures can help maintain its beautiful appearance for years to come:
* Vacuum or sweep regularly in order to remove dust particles gently which can scratch surfaces over time if left unchecked
* Mop once or twice per week using mild detergents mixed with warm water
* Wipe up spills immediately as they occur in order to avoid staining
* Remove shoes wearing protective shoe covers when entering areas where stone floors are present
* Use protective mats or rugs in areas where heavy foot traffic is expected
* Avoid using harsh chemical cleaners on stone Floors, and when in doubt, perform spot testing on a small area before applying to the entire floor
By following these steps you can reap the rewards of a beautiful marble floor for years to come.
What tools are needed for marble flooring installation?
1. Wet saw2. Marbling trowel
3. Grouting float
4. Sponge
5. Chalk snap line and carpenter’s level
6. Hammer and chisel
7. Notched trowel
8. Marble adhesive
9. Electric drill and mixing paddle
10. Grout sealer
11. Cotton rags
12. Masking tape
13. Protective eye wear and gloves
What is the difference between a wet and dry marble floor installation?
A wet marble floor installation involves pouring liquid adhesive onto the subfloor prior to laying the tiles. The liquid adhesive allows the tiles to be laid into the adhesive and dried in place. This method is often used when installing large, heavy slabs of marble.A dry marble floor installation involves using a thin-set mortar that is applied directly onto the subfloor prior to laying the tiles. This method is very popular since it does not require as much time and labor as wet installations. However, dry installations have less flexibility when it comes to design and are not recommended for installing large slabs of marble due to potential movement in the mortar.
What are the advantages and disadvantages of a wet marble floor installation?
Advantages:• A wet marble floor installation is highly durable and can last for decades.
• It is easy to clean and maintain since its finish is shiny and resistant to stains.
• Wet marble floor installation is very aesthetically pleasing and can add a luxurious touch to any home or commercial space.
• Marble floors are impervious to water, so they are ideal for bathrooms or other areas where there is a lot of moisture.
Disadvantages:
• It is more expensive than other flooring options.
• Marble is a natural stone and therefore subject to variations in color, texture, and veining.
• Wet marble floors must be sealed regularly to prevent staining and damage from moisture.
• Marble can be slippery when wet, so it’s important to use rugs or mats in areas where there may be a lot of moisture.