Remove Tile Floor And Backer Board

A fast way to remove ceramic floor tile from backer board – YouTube

Removing Ceramic Tile Flooring and Screwed Down Backerboard – HomeAdditionPlus.com
How to Remove Tile and Cement Backer Board The Easy Way, Fast and Cheap! – YouTube Tile

how To Remove Tile And Backer Board from The Floor Or Wall – YouTube Tile removal, Flooring

Tile and cement board removal – YouTube Tile removal, Removing floor tiles, Floor remodel

How to Remove Tile Adhesive From Drywall Hunker Adhesive tiles, Tile removal, Tub surround

Removing Ceramic Tile Flooring Backerboard Base
Removing Ceramic Tile Flooring and Screwed Down Backerboard – HomeAdditionPlus.com
DIY – Tips for removing tile floor, backer board, and lauan from plywood subfloor – YouTube

Remove Tile Floor And Backer Board – Flooring Blog

Remove Tile Floor And Backer Board – Flooring Blog

Related Posts:
- Cuban Tile Floors
- Easy Way To Grout Tile Floor
- Types Of Marble Tile Flooring
- Slate Tile Floor
- Classic Bathroom Tile Floors
- Tile Floor Color Ideas
- Wet Mops For Tile Floors
- Staining Saltillo Tile Floors
- Terrazzo Tile Floor Outdoor
- Tile Flooring For Screened Porch
Removing tile flooring from your home can be a daunting task, but it doesn’t have to be. By following the steps outlined in this guide, you can successfully remove and replace your tile flooring with ease. With the right tools, preparation, and knowledge, you can have your old tile out and a beautiful new one in in no time.
## Preparing for the Job
The first step in removing tile flooring is to properly prepare for the job. This includes gathering all of the necessary tools and materials, such as a hammer, chisel, drill, grout saw, backer board screws, and protective eyewear. Additionally, you should make sure to clear the room of any furniture or objects that could be damaged during the removal process.
## Removing the Tile
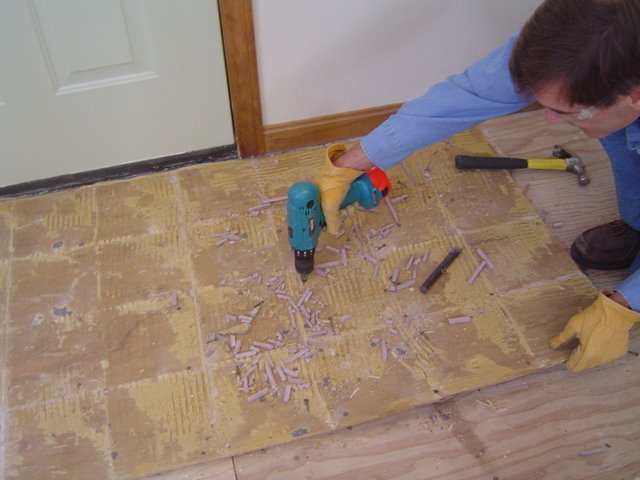
Now that you are properly prepared, you can begin to remove the tile flooring. Start by using a hammer and chisel to gently tap out each individual tile. Work slowly and carefully so as not to damage the subfloor beneath. Once all of the tiles have been removed, use a grout saw to cut away any remaining adhesive or grout.
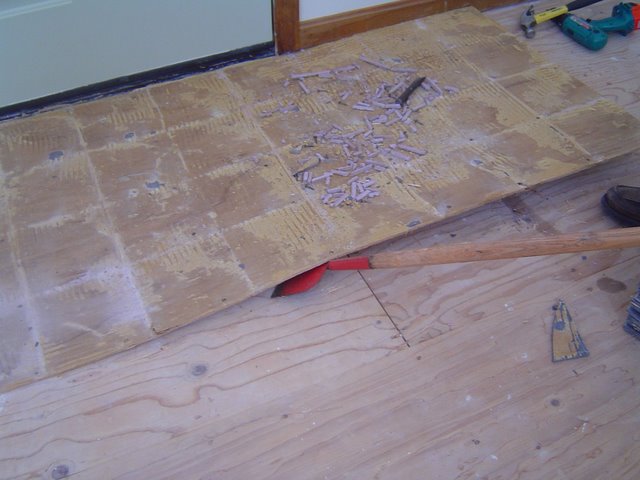
## Removing the Backer Board
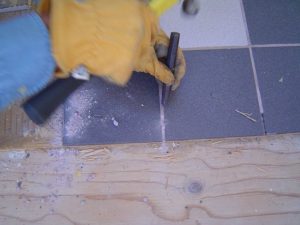
The next step is to remove the existing backer board. Begin by using a drill to remove any screws that are holding it in place. Once it is loose, use a hammer and pry bar to carefully lift it away from the subfloor. Be sure to dispose of the backer board properly as it will contain asbestos fibers if it was installed before 1989.
## Installing New Flooring
Once the old tile flooring and backer board have been removed, you are ready to install your new flooring. Begin by laying down new backer board over the subfloor and securing it with screws every 8-10 inches. Once it is secure, apply an adhesive according to manufacturer’s instructions and then lay down your new tiles. Allow them to dry before grouting in between each tile and completing any remaining sealing or finishing touches.
Removing old tile flooring and backer board can seem like a daunting task but with proper preparation and knowledge, it doesn’t have to be. By following the steps outlined in this guide, you can successfully remove and replace your existing tile flooring with ease. With a little bit of effort, you’ll soon have a beautiful new floor in no time!
What tools are needed to remove tile floor and backer board?
– Hammer– Chisel
– Pry Bar
– Reciprocating Saw
– Utility Knife
– Safety Glasses
– Dust Mask/Respirator
– Knee Pads
– Drill
– Grout Saw
– Backer Board Screws
– Adhesive (as needed)